
What you will make
A closed Flat band, the panel’s Size reads UK M, 16.70 mm inside (sizing charts differ by about half a size, so check against your own ring sizer), opened at the top so that a Round 4.00 floats between its two ends. A Round 4.00 is a round stone 4.00 mm across. The band is 4.00 wide and 3.00 deep, heavier than a bench would make, so that the ends are easy to see. The add-on cuts the band open, cuts a relief round the stone so that no metal touches it, and cuts a slot in each end face for the stone’s girdle, its widest edge: three cutters it keeps hidden. In the model the stone floats 0.05 clear all round. At the bench the tension comes from the spring of the metal, when the ends are sprung open to take the stone: the model does not carry that spring. The add-on’s alloy check reads the alloy’s name off a short list (platinum, 18ct and 14ct pass) and cannot read a spring, so a pass is not a promise that the band will hold.
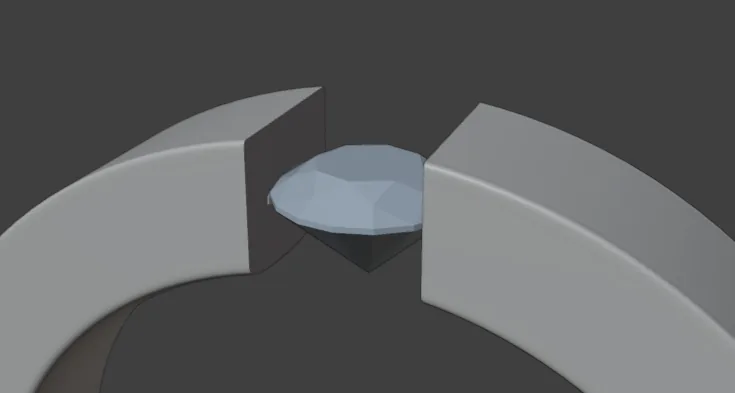
About 15 minutes.
Files
- p5-10-start.blend (2.01 MB): open this one to begin.
- p5-10-finished.blend (2.23 MB): the result, to compare with yours.
Both were made in Blender 5.2.0.
Before you start
- CAD/CAM Jeweller 2.22.0 or later (Preferences > Add-ons shows the version). You have done Part 0, Blender from nothing, and Build a band to a ring size (P1-01). The start file is in millimetres.
- The start file holds a closed Flat band, 4.00 wide and 3.00 deep, with a Round 4.00 inside its top. Tension is made once and is not live: a changed number needs a new, unopened band. To get one, open the start file again from your Downloads folder (Open an exercise file and keep the start file safe, P0-07, shows how): when Blender asks whether to save the changes, choose Don’t Save, the button that drops what you did since the last save. Pink handles may show on a piece before its exercise: they change numbers by dragging, so leave them alone for now.
Build it
Step 1. Open the start file and save your copy
WhereThe top bar: the row of words that begins File, Edit.
DoDownload p5-10-start.blend from Files above and open it. Then choose File > Save As and save it under the name below, in a folder of yours. Open an exercise file and keep the start file safe (P0-07) shows how.
Typemy-tension-ring.blend
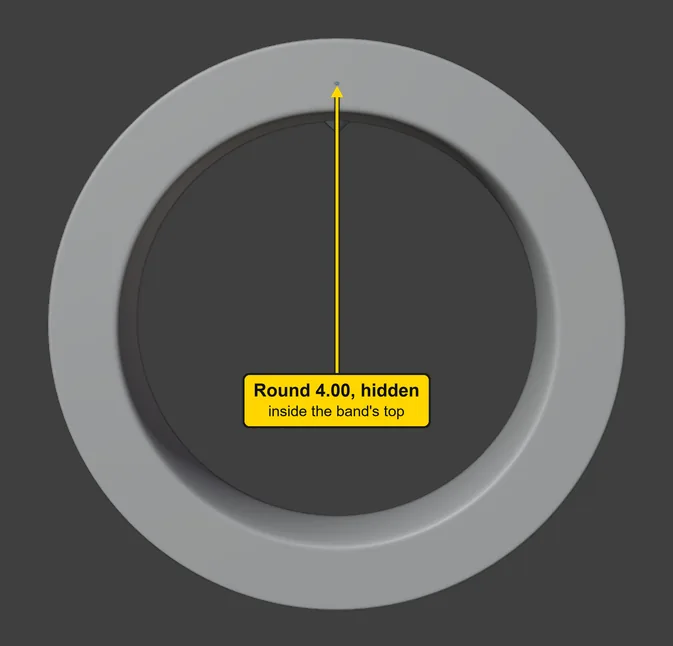
You should seeThe 3D view shows a plain band seen from the front. A round stone stands inside the band’s top, where it cannot be seen. The title bar, the strip above File and Edit, begins my-tension-ring.
It worked whenThe title bar, the strip above File and Edit, begins my-tension-ring.
Step 2. Select the band and the stone
WhereThe 3D view: move the pointer off the sidebar and into the dark area.
DoPress A, which selects everything in the file.
You should seeThe band outlined in orange and the words at the top left of the 3D view naming the stone. The file holds only the band and the stone, so A selects exactly the two things Tension needs: one round stone and the band. The stone sits inside the band’s top, so it cannot be clicked in the 3D view.
It worked whenThe band is outlined in orange.
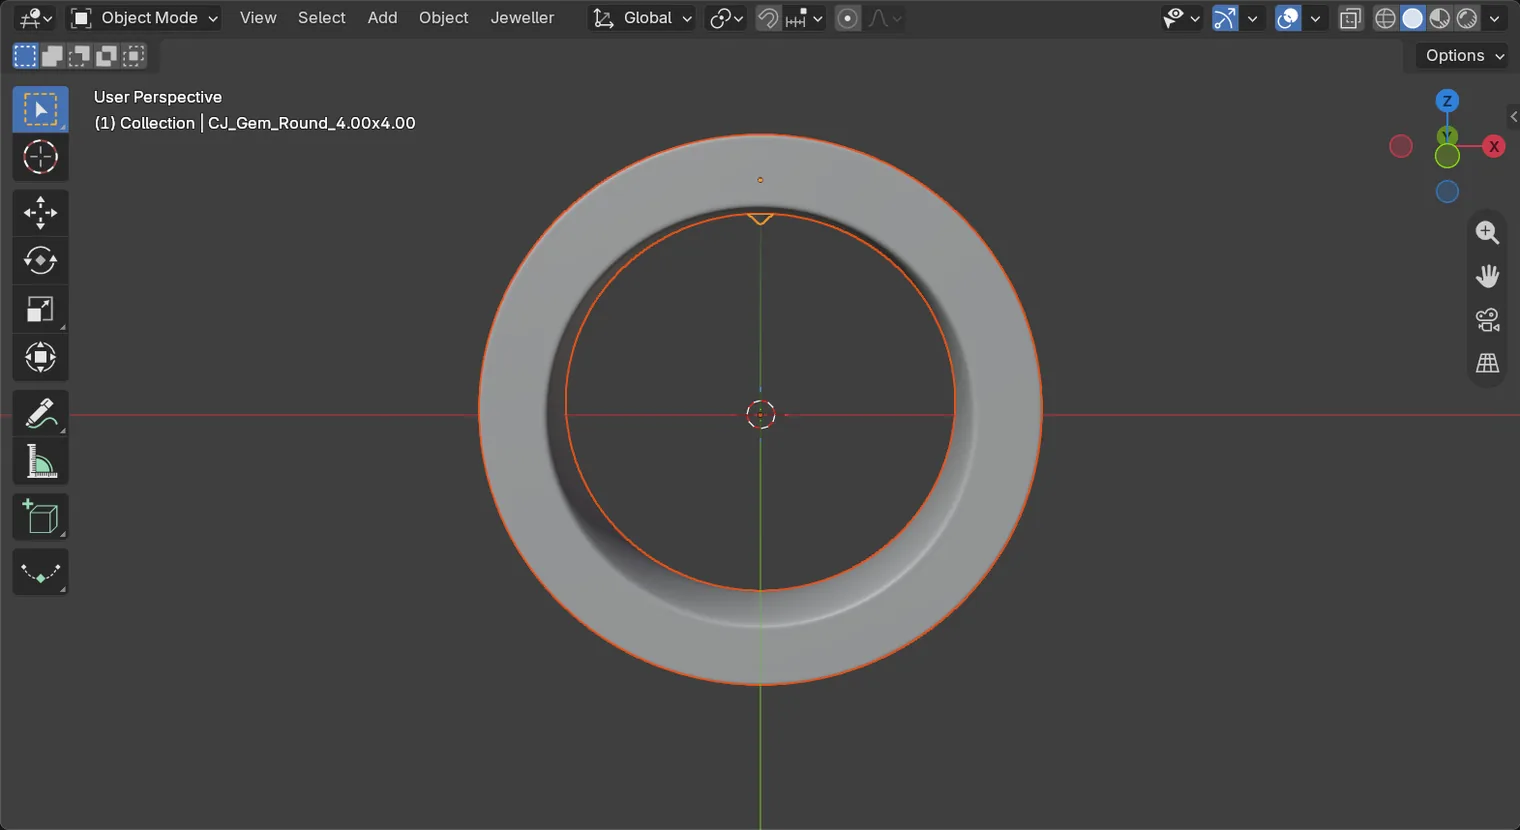
If it goes wrongNothing moves and the key types nowhere: the pointer is still over the sidebar. Move it over the 3D view and press A again.
Step 3. Open the Tension box and read its numbers
WhereThe sidebar: the CAD/CAM tab, the section bar, Setting, then the More Settings panel and its Tension box. If the sidebar is shut, press N with the pointer over the 3D view.
DoClick Setting in the section bar, open More Settings by its title, then open Tension by its title.
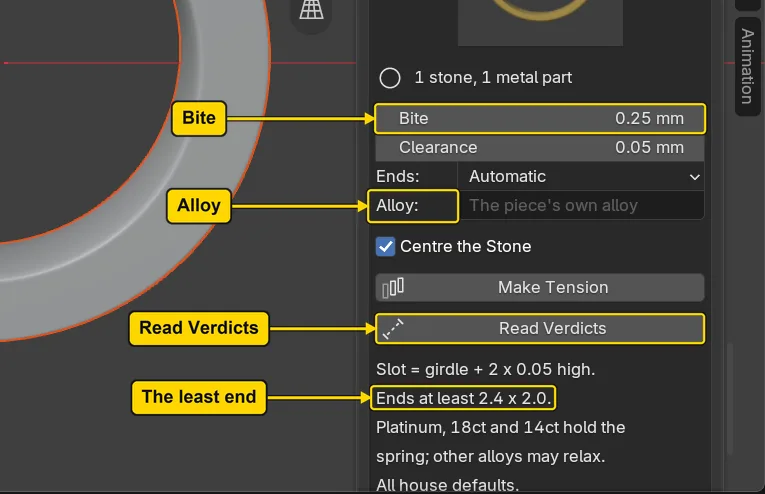
You should seeThe top line of the box reads “1 stone, 1 metal part”, then Bite 0.25, Clearance 0.05, Ends, Alloy and the tick Centre the Stone, then the buttons Make Tension and Read Verdicts. Bite is how far the stone’s girdle, its widest edge, enters each end face. Clearance is the gap the add-on leaves between the stone and the metal. The grey note under the buttons says every number is “a house default”, which means the add-on’s own starting number, and that platinum, 18ct and 14ct hold the spring. Its line “Ends at least 2.4 x 2.0” is the least size of each end face, 2.4 wide and 2.0 deep in millimetres: a tension end carries the load of the stone, and this band’s ends, 4.00 by 3.00, are well over it. The marks on the picture are named in words: Bite, Alloy, Read Verdicts and the line about the ends.
It worked whenThe top line of the box reads “1 stone, 1 metal part”.
Step 4. Read the verdicts first
WhereThe Tension box.
DoPress Read Verdicts.
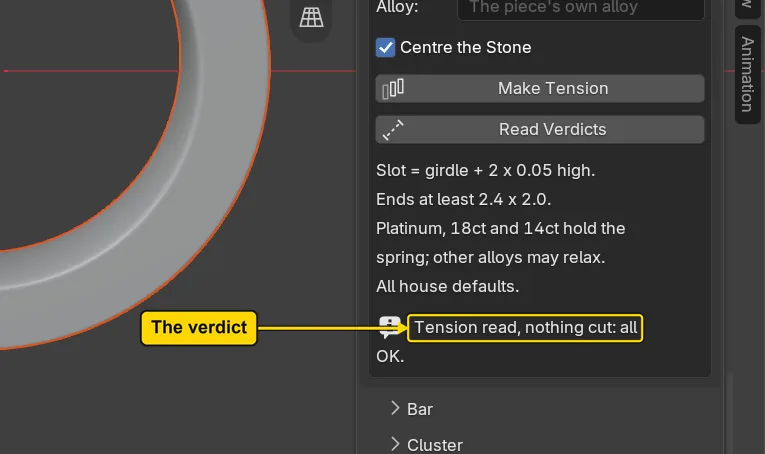
You should seeA line under the buttons that reads “Tension read, nothing cut: all OK.”. Nothing in the 3D view has changed: the band is whole and the stone has not moved. The field Alloy is empty, so the add-on reads the band’s own alloy, 18ct yellow, one of the three the box trusts.
It worked whenThe box reads “Tension read, nothing cut: all OK.”.
Step 5. Meet the warning: a soft alloy
WhereThe Tension box.
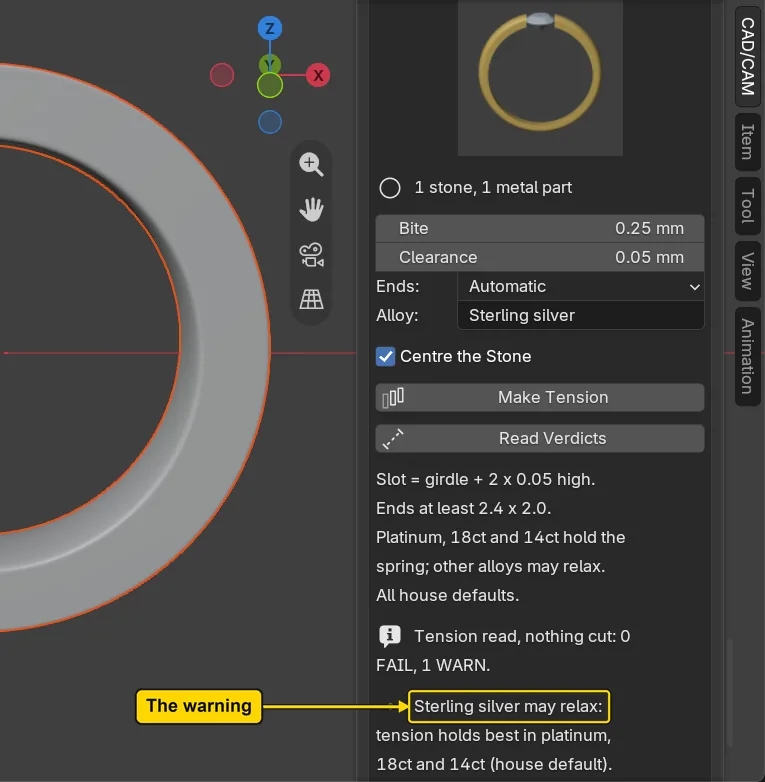
DoClick the field Alloy, type Sterling silver, press Enter, then press Read Verdicts again.
You should seeA warning line that begins “Sterling silver may relax”. A tension setting is held only by the spring of the metal, and silver does not hold it as the three alloys on the grey note do. The check only reads the name you typed against its list: it cannot test a spring. The warning does not stop the button: it tells you what you would be making. Nothing was cut.
It worked whenThe box reads a line beginning “Sterling silver may relax”.
Step 6. Name the band’s alloy and press Make Tension
WhereThe Tension box.
DoClick the field Alloy, type 18ct yellow, press Enter, then press Make Tension. Wait a moment.
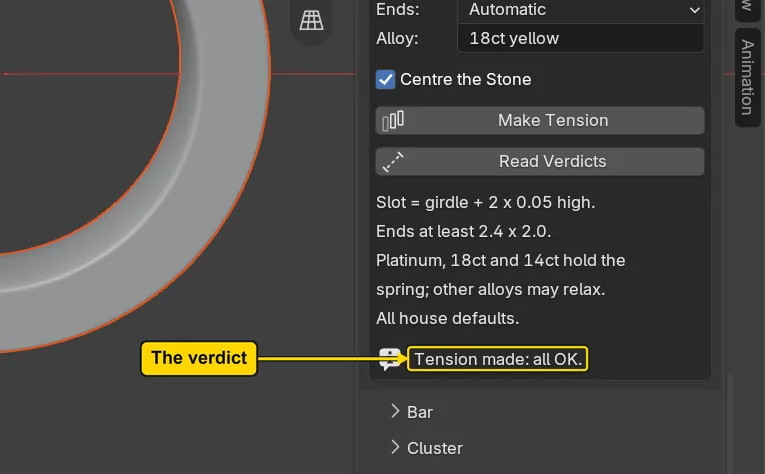
You should seeThe line “Tension made: all OK.”. The field names the alloy the check reads off its list, and 18ct yellow is one of the three that pass. The 3D view now shows the band cut open at the top, with the stone floating in the gap.
It worked whenThe box reads “Tension made: all OK.”.
Step 7. Look at the opened band
WhereThe 3D view, then the header: the row of words along the top of the 3D view.
DoClick the band’s flat front face at its side, choose View > Frame Selected, then click the hollow green ball on the gizmo, the one opposite the lettered green Y, to look from the front.
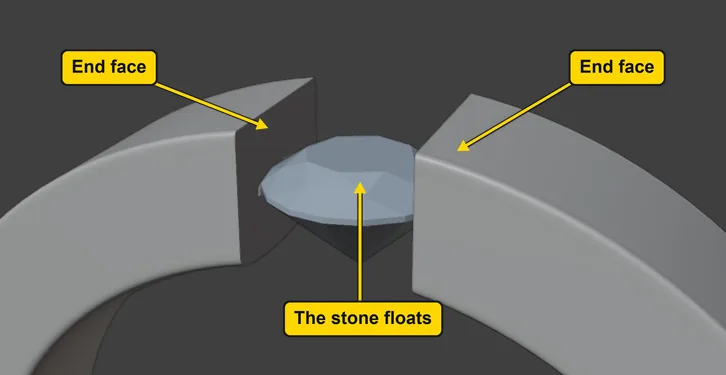
You should seeThe view from the front. If the view turns to the back instead, click the same ball again. To come close to the top, roll the wheel over it (two fingers up on a touchpad); the picture is framed on the top for this picture only, and View > Frame All brings everything back. You see the band cut open at the top: two flat end faces facing each other, and the stone between them with a hair of air all round. A slot cut into each end face holds the stone’s girdle, and that is all that holds it. The three cutters that made this are hidden, so you see only the result.
It worked whenYou can see two band ends with the stone floating between them.
Step 8. Save your work
WhereThe 3D view: move the pointer over it.
DoPress Ctrl+S.
You should seeBlender writes your copy at once, with no question, because the file already has a name. An asterisk, *, in the title bar marks changes that are not saved, and it goes now. Save your work and get it back (P0-12) says more about saving.
It worked whenThe title bar begins my-tension-ring and carries no asterisk.
No picture: the only change is a message on the status bar, and it fades.
Check your result
| What to read | Where | What it should say |
|---|---|---|
| The verdict | The CAD/CAM tab, Setting section, More Settings panel, Tension box, under the buttons | It reads “Tension made: all OK.” |
| The alloy | The same box, the field Alloy | It reads 18ct yellow |
| The band | The 3D view, from the front (step 7 shows how to get there), close on the top of the band | The band has two ends with the stone between them. A band that is whole at the top means Make Tension was not pressed |
Try it yourself
Open the start file again from your Downloads folder (Blender asks whether to save the changes: choose Don’t Save) and do steps 2 to 4. Change the alloy to one that is not on the panel’s list, for example Sterling silver, and press Read Verdicts again. The panel reads a warning that the alloy “may relax” and nothing is cut.
What you learned
- Read Verdicts measures and changes nothing. Make Tension opens the band at the stone, centres the stone, cuts the relief and the slots and keeps three cutters hidden.
- A spring needs a hard alloy: the panel reads the alloy’s name against its own short list (platinum, 18ct and 14ct) and warns “may relax” for any other. It cannot read a spring: that comes at the bench. A stone must be a stocked size, or the add-on refuses and names the two nearest.
- A bar between stones holds a row differently. Hold a row with bars (P5-11) is next.
Next: Hold a row with bars