
What you will do
You will switch the 3D view to Hamed’s Bench, a way of working where Alt and the left mouse button move the view, so that no middle button is needed. Then you will turn, slide and zoom with it, and learn the way back.
Alt and the left button doAbout 8 minutes.
Files
No file to download. You begin from Blender’s own File > New.
Before you start
- You have a mouse with no middle button, or a laptop’s touchpad. If you do have a middle button, Turn, slide and zoom the view with a middle button (P0-04) is all you need, and this page is only for interest.
- You know the 3D view, the header and the sidebar: Name every part of Blender’s screen (P0-02).
- On a touchpad, a left drag means pressing the touchpad down and sliding your finger.
Build it
Step 1. Start a new file
WhereThe top bar: the row of words that begins File, Edit.
DoStart a new file: File > New > General, as in Name every part of Blender’s screen (P0-02).
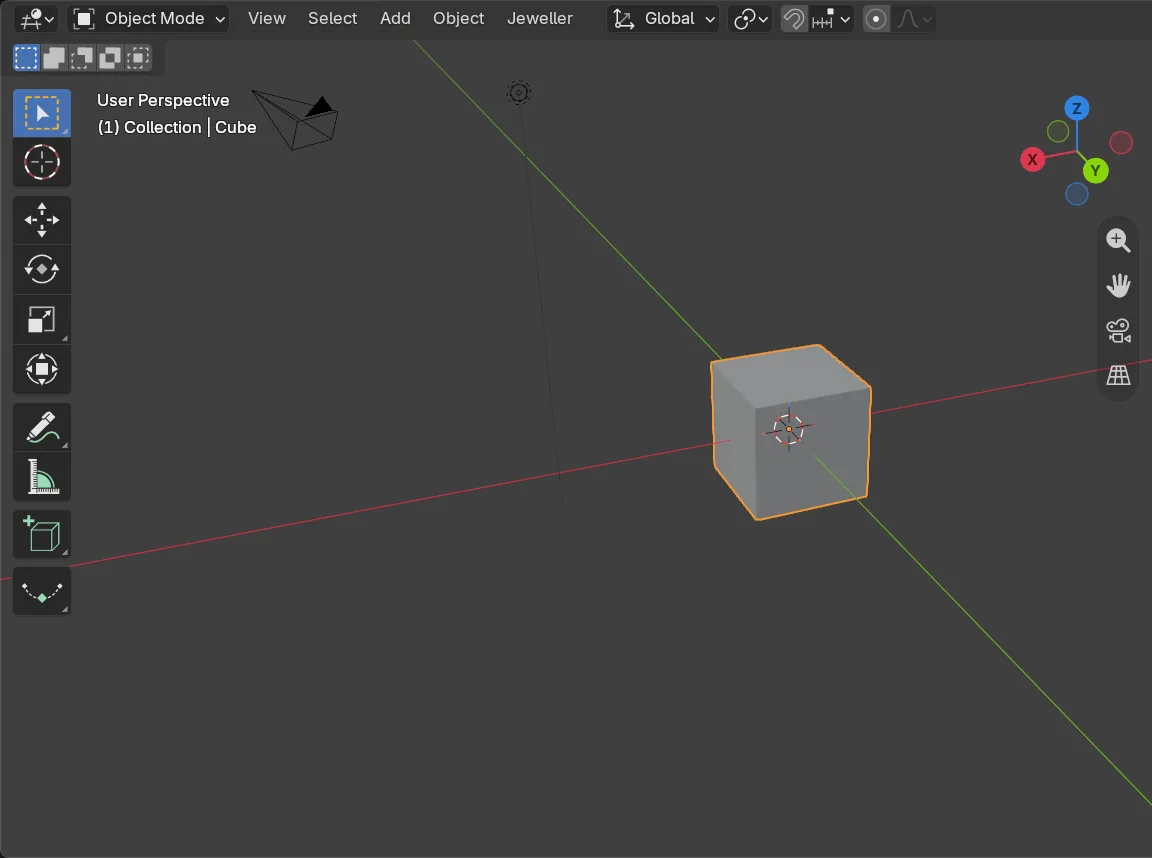
You should seeA new file: a grey cube in the middle of the 3D view, with a camera and a light round it.
It worked whenIn the Outliner, at the top right of the window, you can read Camera and Cube.
No picture: the menu is pictured in Name every part of Blender’s screen (P0-02).
If it goes wrongA box asks whether to save your changes: press Don’t Save. You only have Blender’s own cube to lose.
Step 2. Read the navigation line
WhereAnywhere over the 3D view.
DoPress N to open the sidebar.
You should seeThe sidebar opens on the CAD/CAM tab. Under the small word buttons at its top, the section bar, stands the Start Here panel. Its second line says how the view moves now.
It worked whenThe line in Start Here reads Navigation: Blender Default, or the choice you made when you installed the add-on.
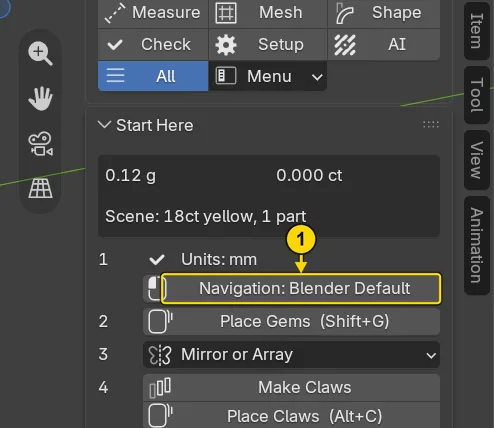
If it goes wrongThe sidebar shows other words: click the word CAD/CAM on the sidebar’s right edge.
Step 3. Open the Set Up window
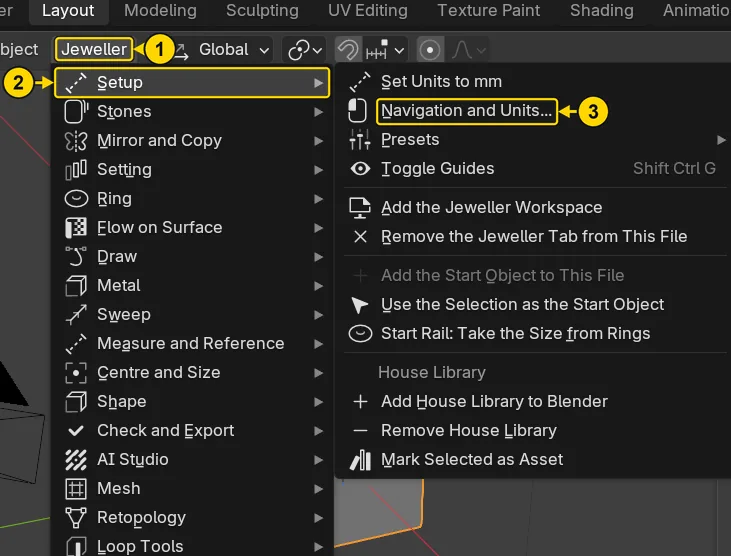
WhereThe header, along the top of the 3D view. Jeweller is the add-on’s menu, after Object.
DoClick Jeweller (marked 1), rest the pointer on Setup (marked 2), then click Navigation and Units… (marked 3).
You should seeThe window headed CAD/CAM Jeweller: Set Up, in the middle of the 3D view. It is the one you met when you installed the add-on.
It worked whenThe window stands open, with Hamed’s Bench and Blender Default side by side.
Step 4. Choose Hamed’s Bench
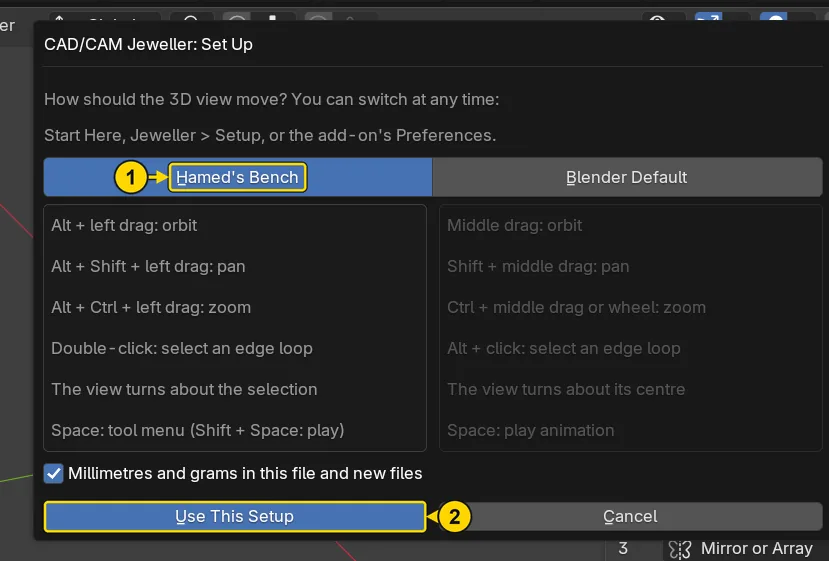
WhereThe Set Up window.
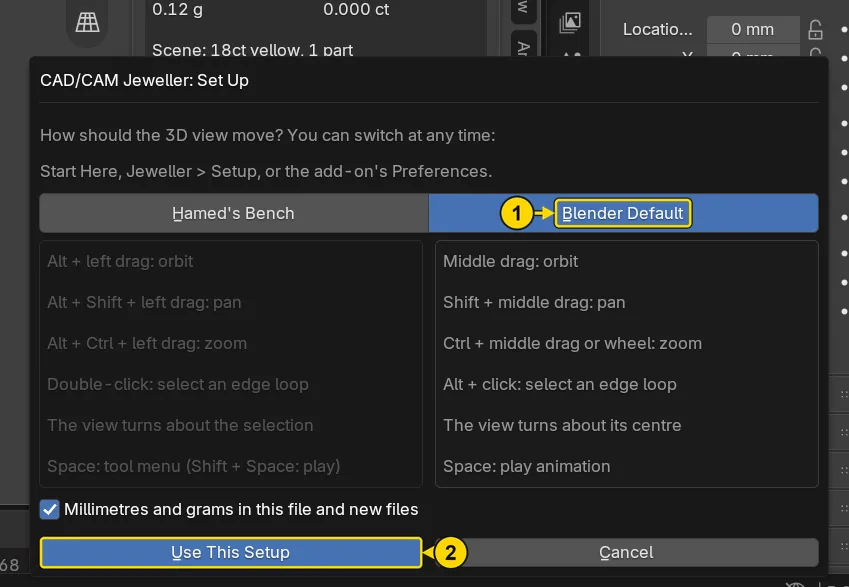
DoPress Hamed’s Bench (marked 1), then Use This Setup (marked 2).
You should seeThe left column of lines lights up when you press Hamed’s Bench: those are the moves you are about to use. The window then shuts, and the status bar begins Navigation: Hamed’s Bench. Leave the tick on Millimetres and grams in this file and new files.
It worked whenThe line in Start Here now reads Navigation: Hamed’s Bench.
Step 5. Turn the view
WhereThe 3D view: put the pointer over its middle.
DoHold Alt, press the left button and drag left. Let go of both.
You should seeThe view swings round the cube, and the small ball of coloured letters at the top right turns with you. This is orbit: you walk round the piece, and the piece stays still.
It worked whenThe cube is seen from another side, and the camera has moved across the 3D view.
Alt and a left drag turns the viewIf it goes wrongNothing moves: read the line in Start Here. If it says Blender Default, Alt and left drag does nothing to the view: do the step before this one again.
Step 6. Slide the view
WhereThe 3D view.
DoHold Alt and Shift, press the left button and drag. Let go of all three.
You should seeThe whole view slides with the pointer, and the cube stays the same size. This is pan: you step sideways.
It worked whenThe cube stands off to one side, at the same size as before.
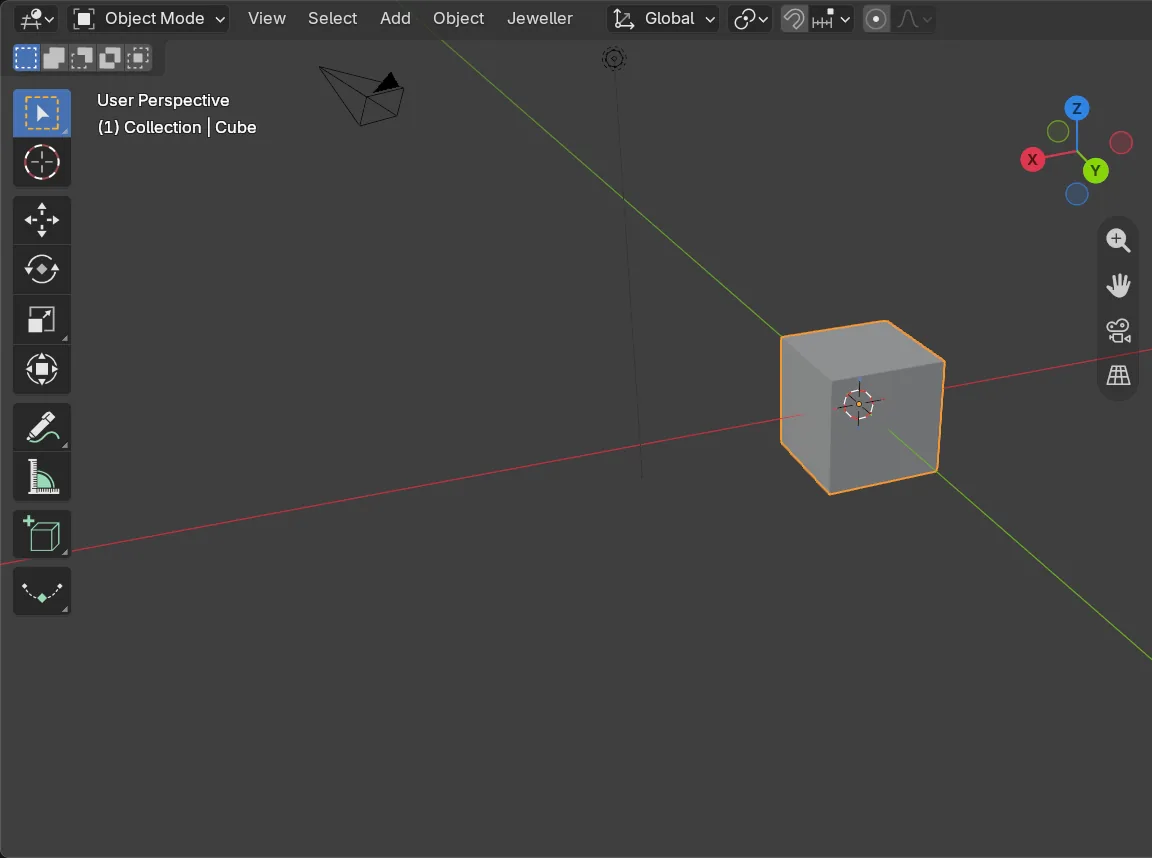
Alt, Shift and a left drag slides the viewStep 7. Zoom the view
WhereThe 3D view.
DoHold Alt and Ctrl, press the left button and drag upwards. Let go of all three.
You should seeThe view moves closer as you drag up, and back as you drag down.
It worked whenThe cube stands larger than it did.
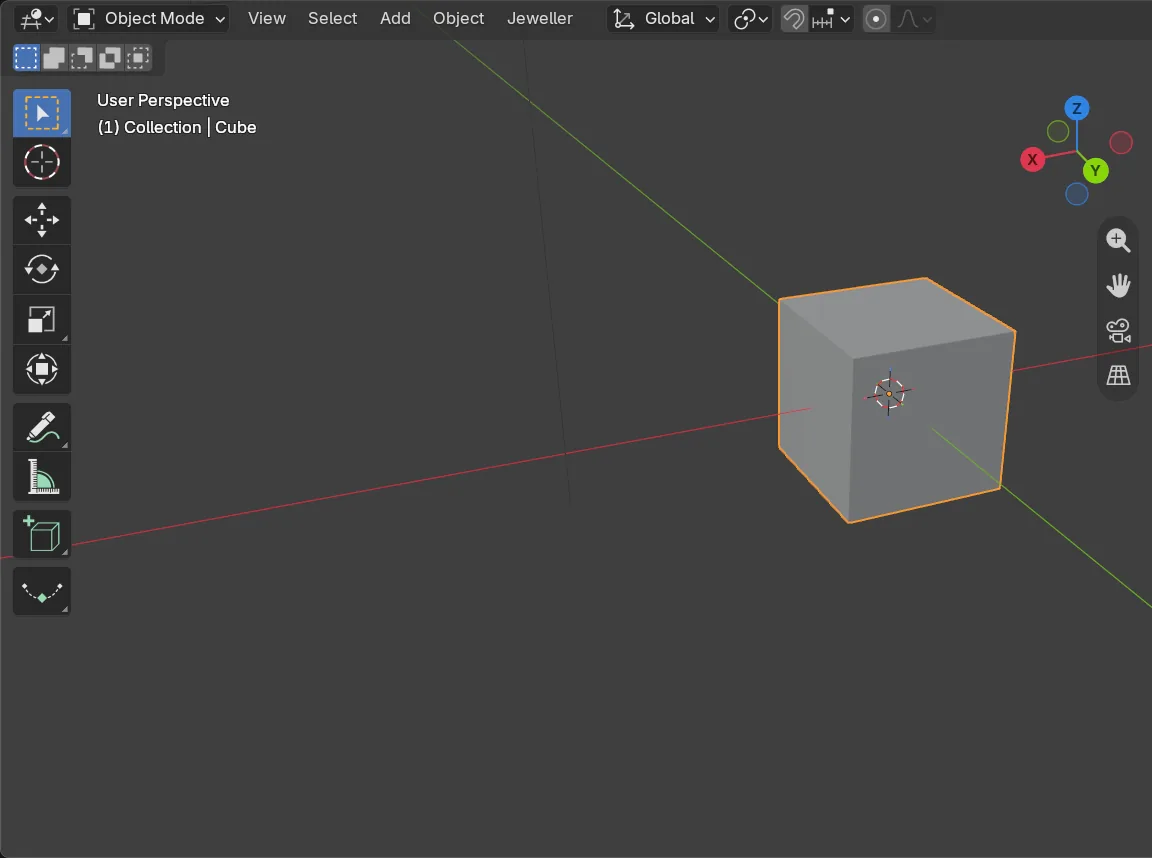
Alt, Ctrl and a left drag zooms the viewIf it goes wrongThe cube has gone from the window: it is not lost. Press Home with the pointer over the 3D view, or choose View > Frame All, and it comes back.
Step 8. Go back to Blender Default
WhereThe Start Here panel in the sidebar, then the Set Up window it opens.
DoPress the line Navigation: Hamed’s Bench. In the window, press Blender Default (marked 1), then Use This Setup (marked 2).
You should seeThe right column of lines lights up, the window shuts, and the mouse is back on Blender’s own moves. Leave the tick on Millimetres and grams in this file and new files. You can change as often as you like.
It worked whenThe line in Start Here reads Navigation: Blender Default.
Check your result
| What to read | Where | What it should say |
|---|---|---|
| The navigation | The sidebar, the CAD/CAM tab, the Start Here panel | Navigation: Blender Default after the last step, or Navigation: Hamed’s Bench if you stopped before it |
| The cube’s place | The Properties editor, the Object tab (P0-02 marks it), Location | X, Y and Z all read 0 mm: only your view has moved |
Try it yourself
Begin from File > New > General on Hamed’s Bench. Click Camera in the Outliner, then hold Alt and left drag: the view now swings round the camera and not round the cube, because on Hamed’s Bench the view turns about what is selected.
What you learned
- Hamed’s Bench:
Altand left drag turns the view,Alt,Shiftand left drag slides it,Alt,Ctrland left drag zooms. - The line in Start Here says which navigation you are on, and pressing it opens the Set Up window.
- You can change at any time, in the same window: nothing in your files depends on it.