
What you will make
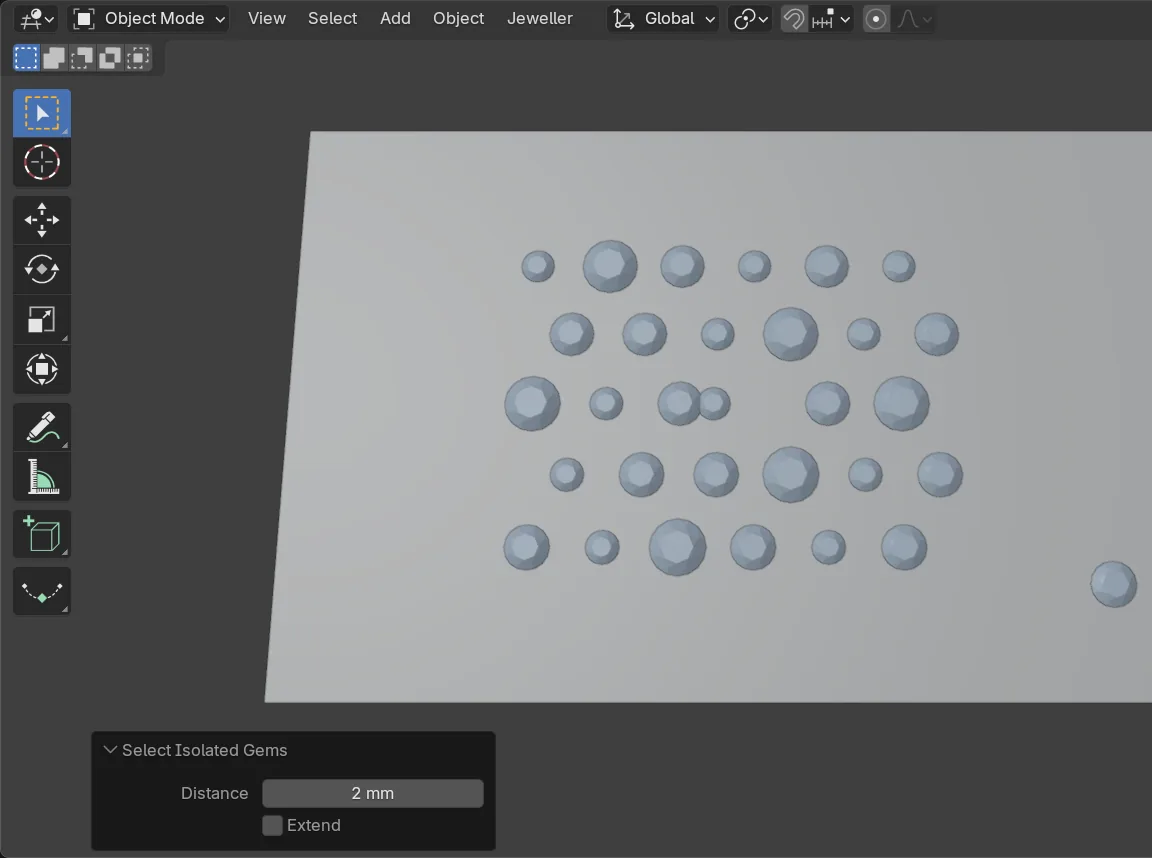
A field of 31 round stones on a plate, sorted three ways: every stone of one size selected at once, a pair that overlaps found and named as a group of your own, and the one stone far from the rest found. A jeweller checks a field of stones like this before any seat is cut: two stones that overlap cannot both be set, and a stone left alone is worth a question: ask why it is there. Nothing is set yet: the stones lie on the plate.
About 15 minutes.
Files
- p3-04-start.blend (118 KB): open this one to begin.
- p3-04-finished.blend (125 KB): the result, to compare with yours.
Both were made in Blender 5.2.0.
Before you start
- You have done Part 0, Blender from nothing, and Place stones on a dome and keep the gap you set (P3-02): the stones, the gap and the Place & Guides panel.
- The add-on is installed: CAD/CAM Jeweller 2.22.0 or later (Preferences > Add-ons shows the version). The start file holds a plate with 31 round stones on it, in millimetres, so every number on this page is millimetres. The stones are three stocked sizes: Round 1.50, Round 2.00 and Round 2.50.
Build it
Step 1. Open the start file and save your copy
WhereThe top bar: the row of words that begins File, Edit.
DoDownload p3-04-start.blend from Files above and open it. Then choose File > Save As and save it under the name below, in a folder of yours. Open an exercise file and keep the start file safe (P0-07) shows how.
Typemy-field.blend
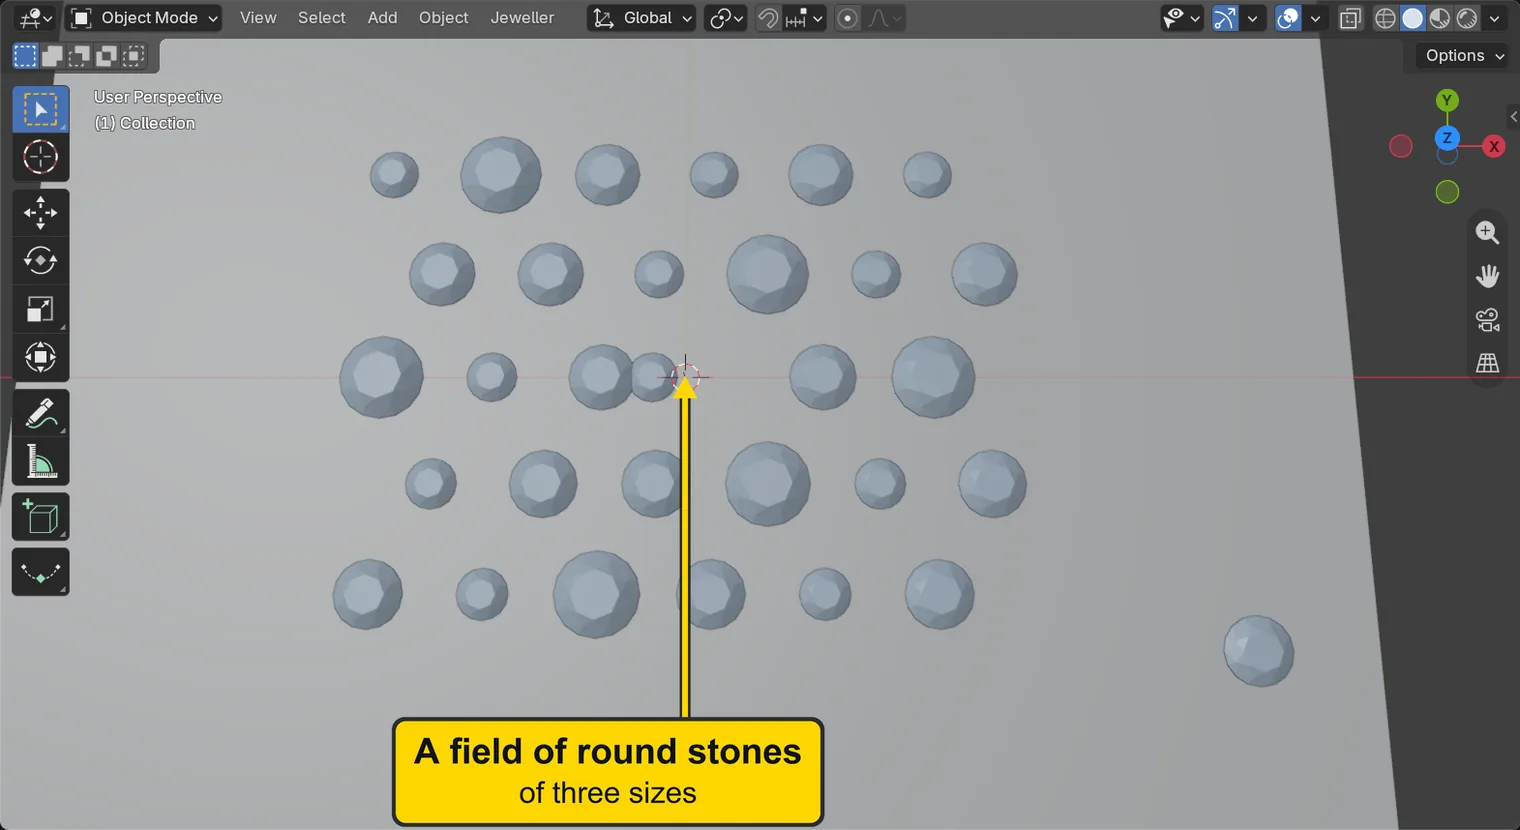
You should seeThe 3D view shows a flat plate seen from above, with a field of small pale round stones of three sizes on it, and one stone by itself at the right. Nothing is selected. The title bar, the strip above File and Edit, begins my-field. The first picture is the 3D view and the second is the title bar.
It worked whenThe title bar, the strip above File and Edit, begins my-field.

Step 2. Open Gem Groups
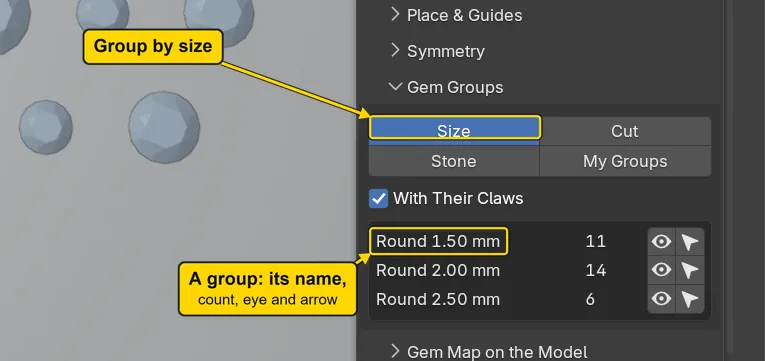
WhereThe sidebar. If it is shut, press N with the pointer over the 3D view. Click the CAD/CAM tab, then Gems in the section bar. The sub-panel Gem Groups is under Gems: click its title to open it.
DoOpen Gem Groups, and click Size if it is not lit.
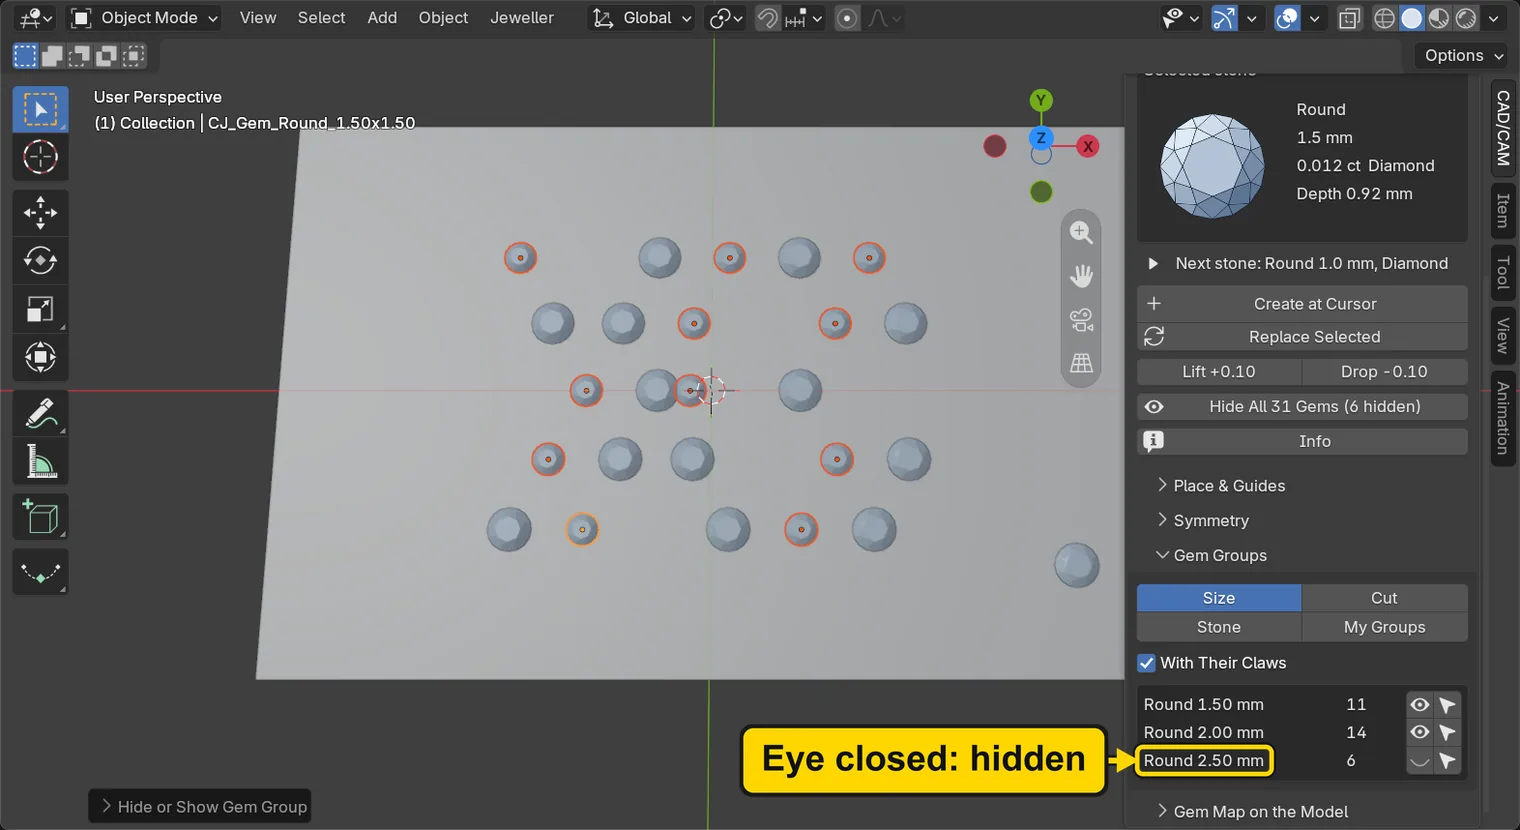
You should seeFour buttons, Size, Cut, Stone and My Groups, and under them one row for each size: a name such as Round 1.50 mm, a count, an eye and an arrow. The counts add up to 31. The eye hides or shows the group, and the arrow selects it. Under the buttons stands a tick box, With Their Claws: leave it ticked. When you hide a group with its eye, it hides the claws built for those stones too, and this field has none.
It worked whenThe panel lists Round 1.50 mm, Round 2.00 mm and Round 2.50 mm.
Step 3. Select every Round 1.50 with its arrow
WhereThe row Round 1.50 mm of Gem Groups: the arrow is the last button at its right end.
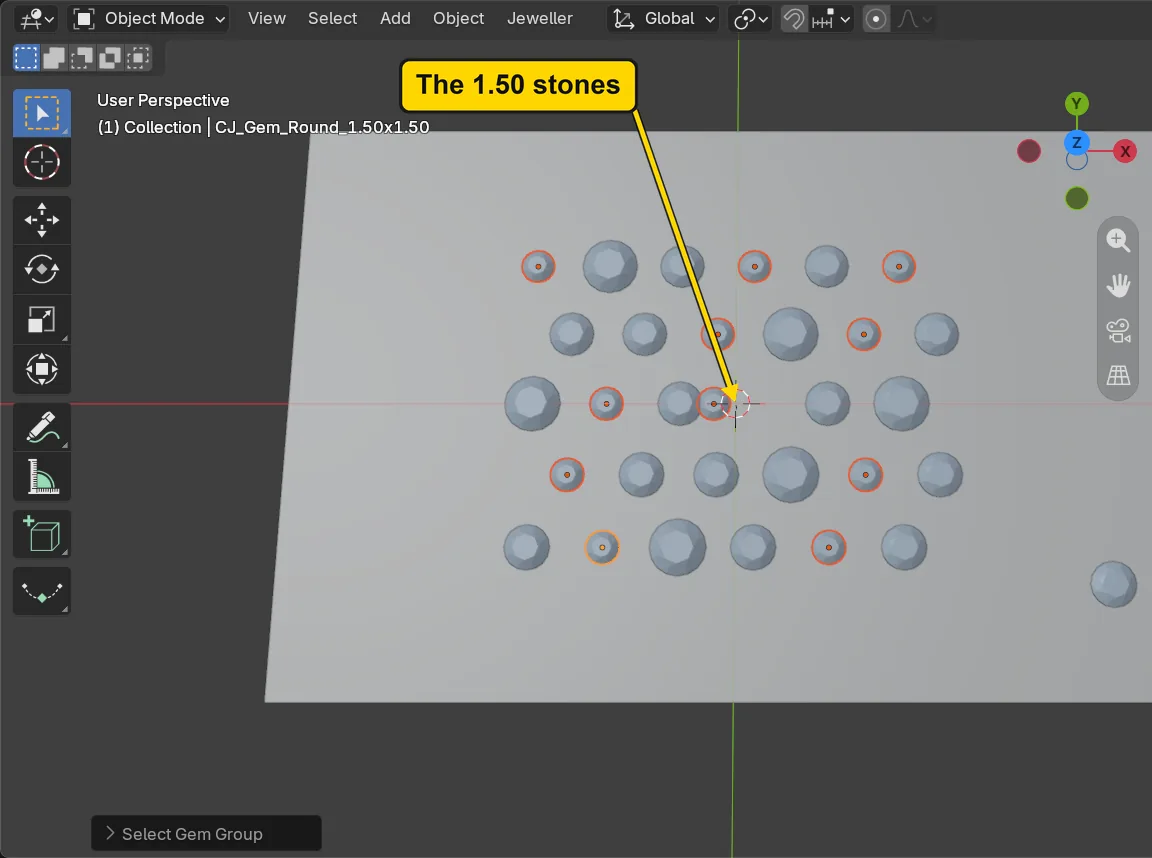
DoClick the arrow of Round 1.50 mm.
You should seeEvery stone of that size has an orange outline, and no other. There are 11 of them, the count in the row. The status bar says how many were selected, but its message fades.
It worked whenOnly the Round 1.50 stones have an orange outline.
Step 4. Hide a group with its eye, and show it again
WhereThe row Round 2.50 mm of Gem Groups: the eye is the button before the arrow.
DoClick the eye of Round 2.50 mm, look, then click it again.
You should seeThe first click hides every Round 2.50, and their row’s eye closes. The second shows them again. Hiding a group takes it out of the way so that you can see the others: it does not delete anything.
It worked whenThe Round 2.50 stones show again.
Step 5. Find the overlapping pair
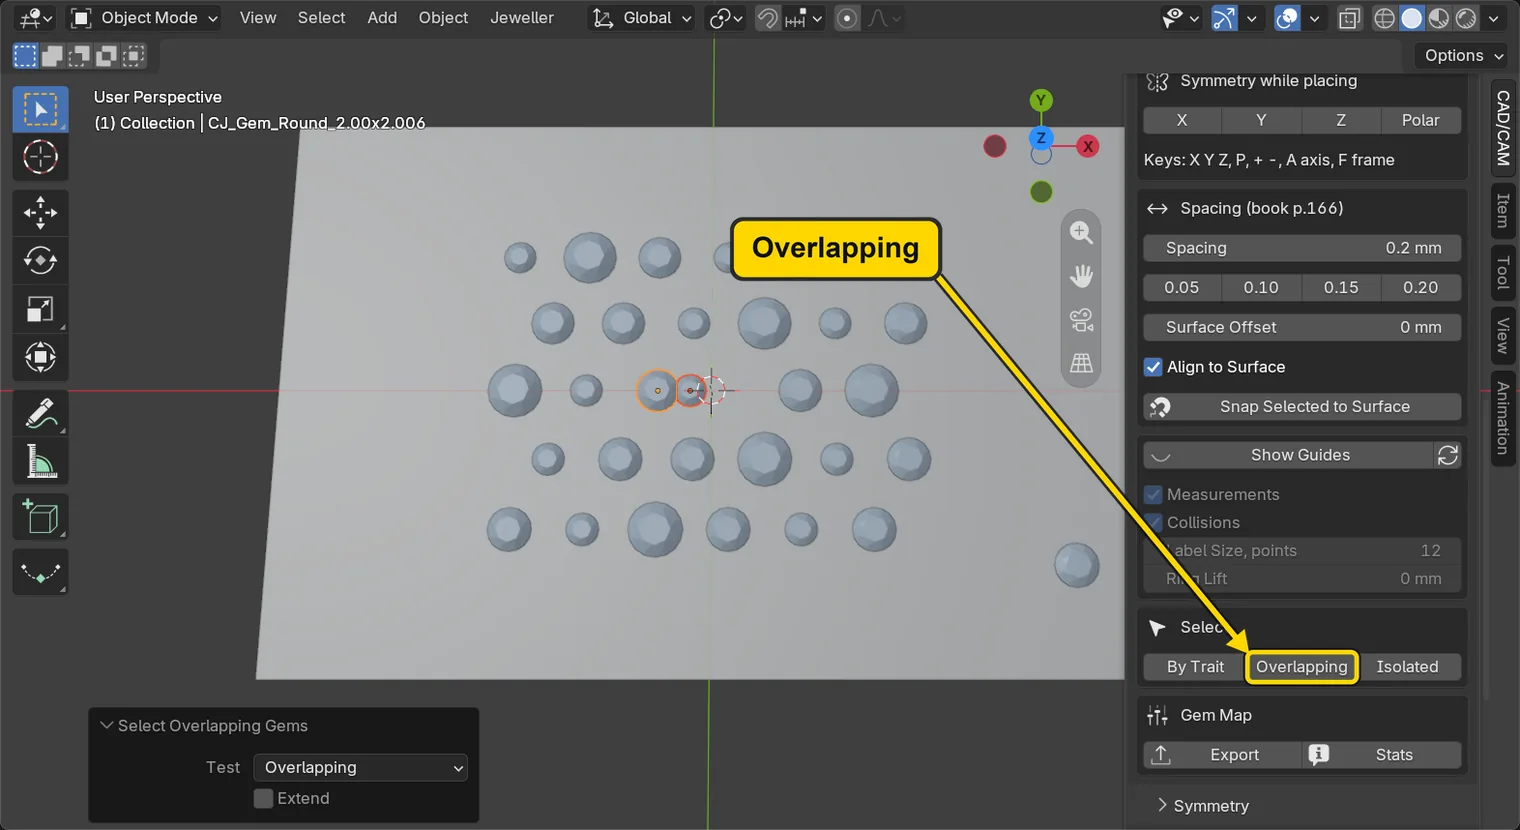
WhereThe sub-panel Place & Guides, the box Select: three buttons, By Trait, Overlapping and Isolated. Scroll the sidebar to it.
DoPress Overlapping.
You should seeTwo stones have an orange outline: a pair whose edges cross, so they cannot both be set. The box at the bottom left, Blender’s Adjust Last Operation box, lists Select Overlapping Gems with a field Test set to Overlapping. It stands folded to its title: click the title to open it. A different test, Under Spacing, would find stones closer than the spacing you set.
It worked whenTwo stones have an orange outline.
Step 6. Name a group of your own
WhereThe sub-panel Gem Groups: click My Groups. The button Add Selected to Group stands under the list.
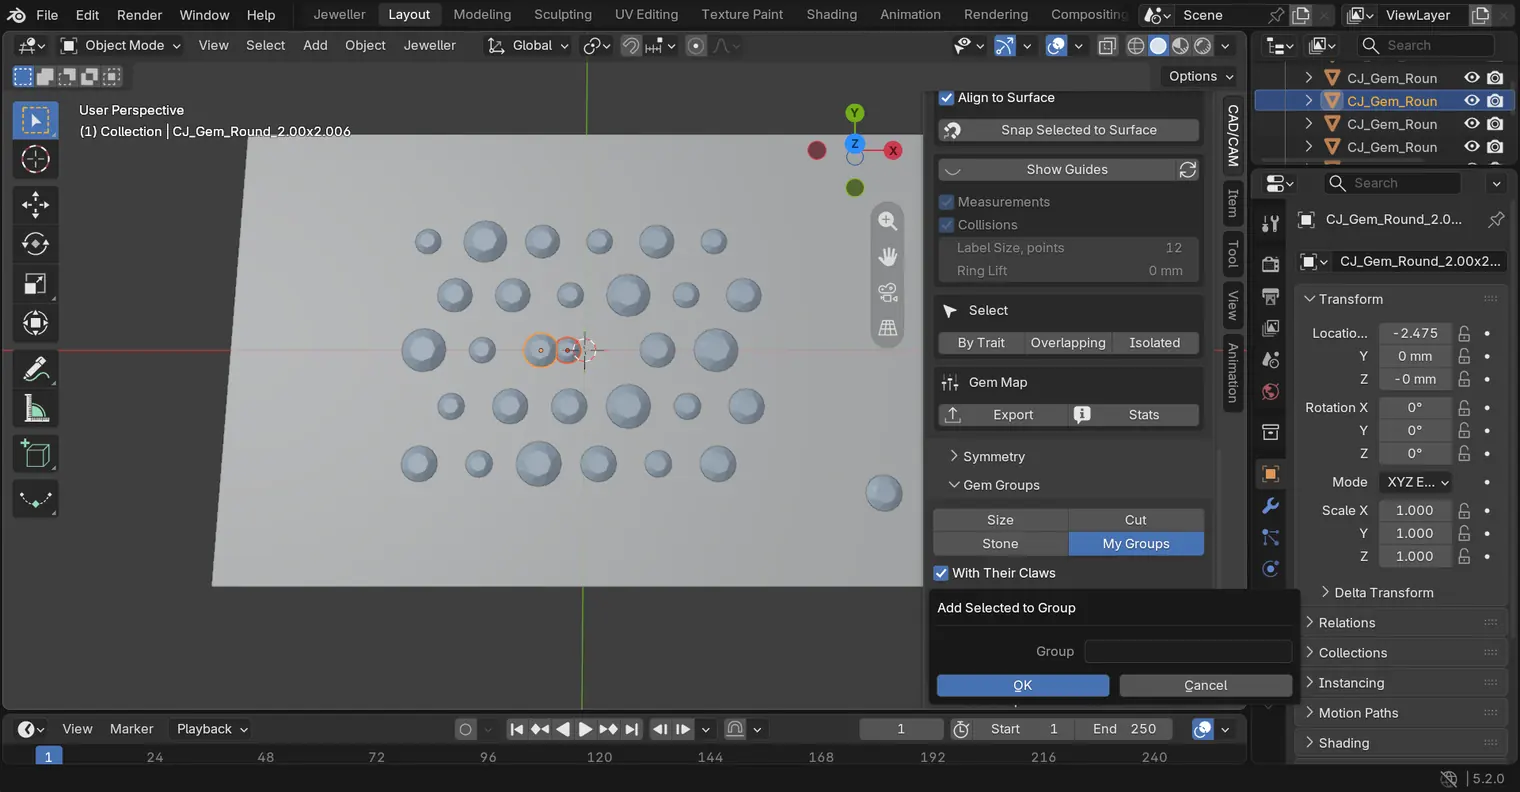
DoClick My Groups, press Add Selected to Group, click the Group field, type a name and press Enter, then click OK.
TypeLook at these
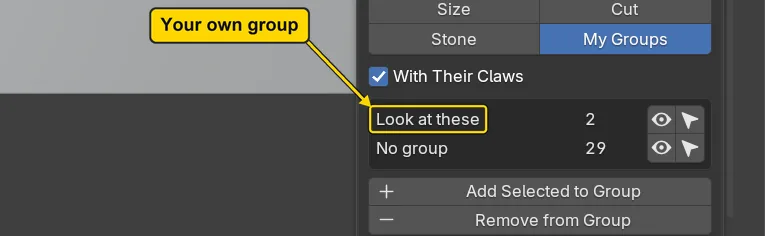
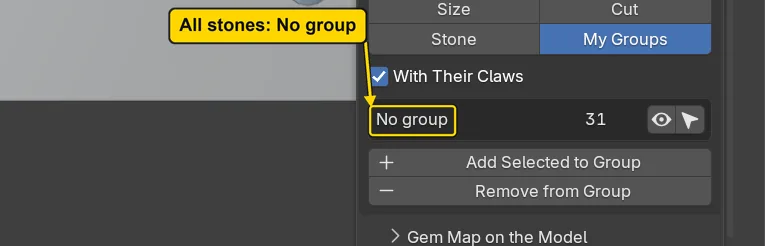
You should seeA window asks for the group’s name, with a field Group, OK and Cancel: the first picture shows it, and Cancel shuts it and changes nothing. After OK the list shows a row with your name and a count of 2, and a row No group with the others, as the second picture shows. A stone is in one group at a time, and the name is kept with the file.
It worked whenA row Look at these reads 2.
Step 7. Find the lone stone
WhereThe sub-panel Place & Guides, the box Select.
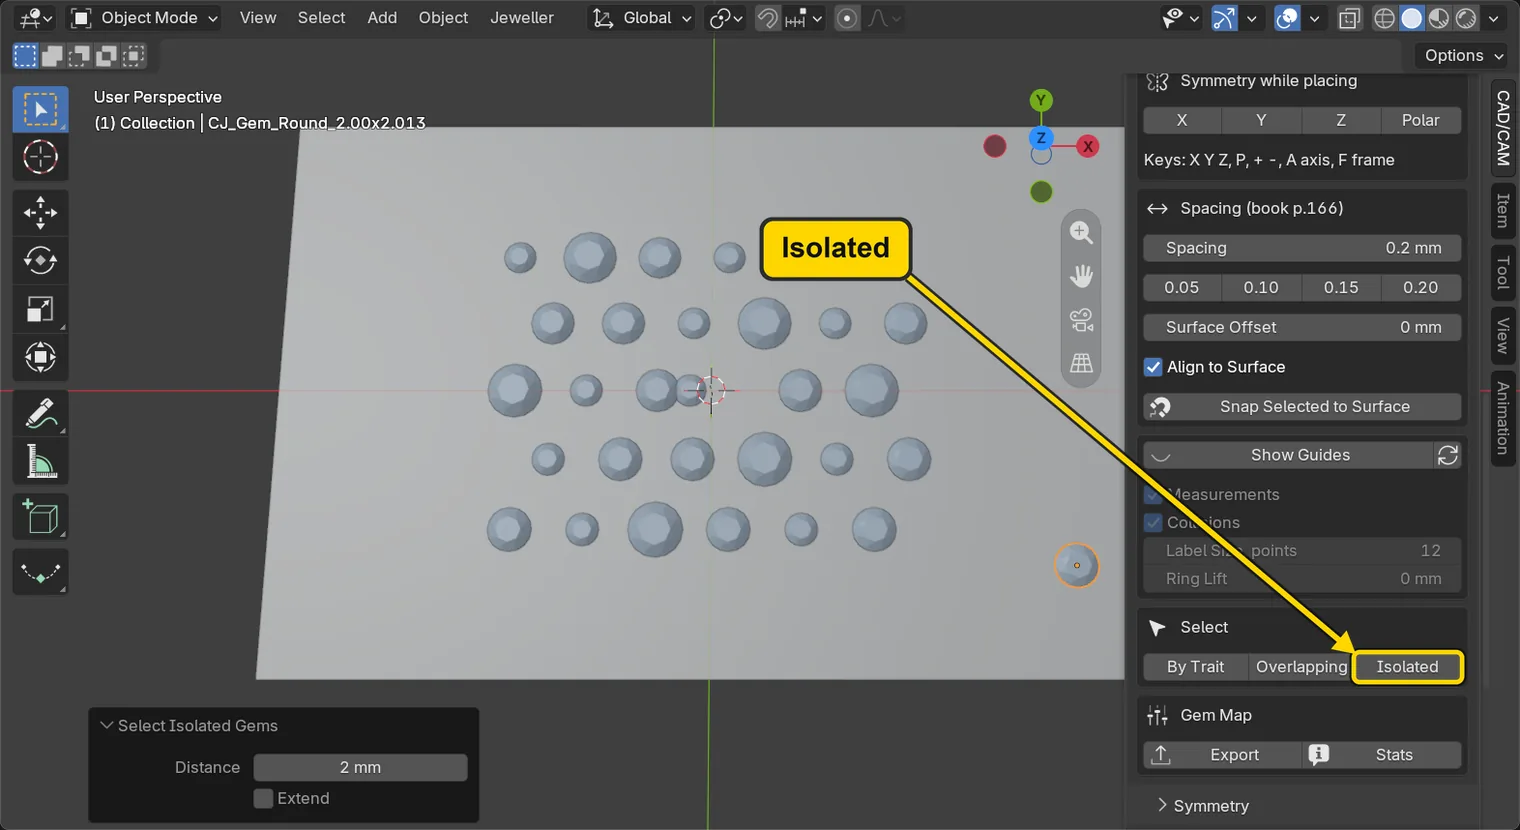
DoPress Isolated.
You should seeOne stone has an orange outline, the one far from the field. Isolated finds stones with no neighbour closer than a distance, edge to edge: Blender’s Adjust Last Operation box, the box at the bottom left, lists Distance at 2.00 mm (click its title to open it). A bigger distance would find more stones.
It worked whenOne stone has an orange outline.
Step 8. Select by a trait
WhereThe sub-panel Place & Guides, the box Select, then the box at the bottom left.
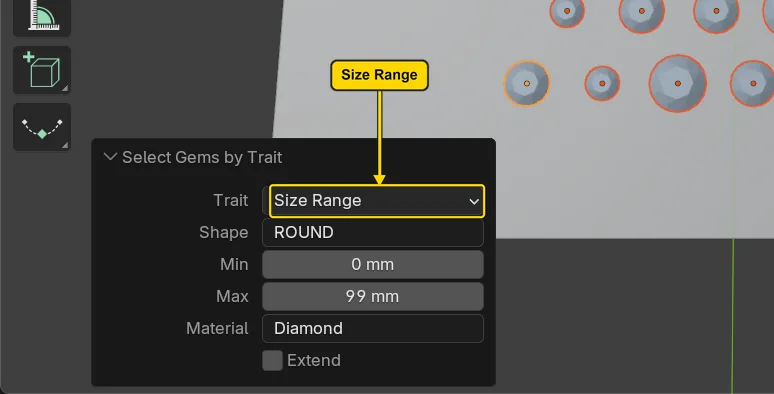
DoPress By Trait, then in the box at the bottom left open Trait and choose Size Range.
You should seeThe first press selects every stone: the Trait is All Gems. Choosing Size Range shows Min and Max, and the selection follows them. The other traits are Shape and Material.
It worked whenThe box at the bottom left shows Trait Size Range.
Step 9. Take the pair out of its group
WhereThe sub-panel Gem Groups, on My Groups: the row with your name, its arrow, then the button Remove from Group under the list.
DoClick the arrow of the row Look at these, then press Remove from Group.
You should seeThe row with your name goes, and every stone is under No group again. The stones themselves have not changed.
It worked whenThe list shows only No group.
Step 10. Look at the finished field
WhereThe 3D view.
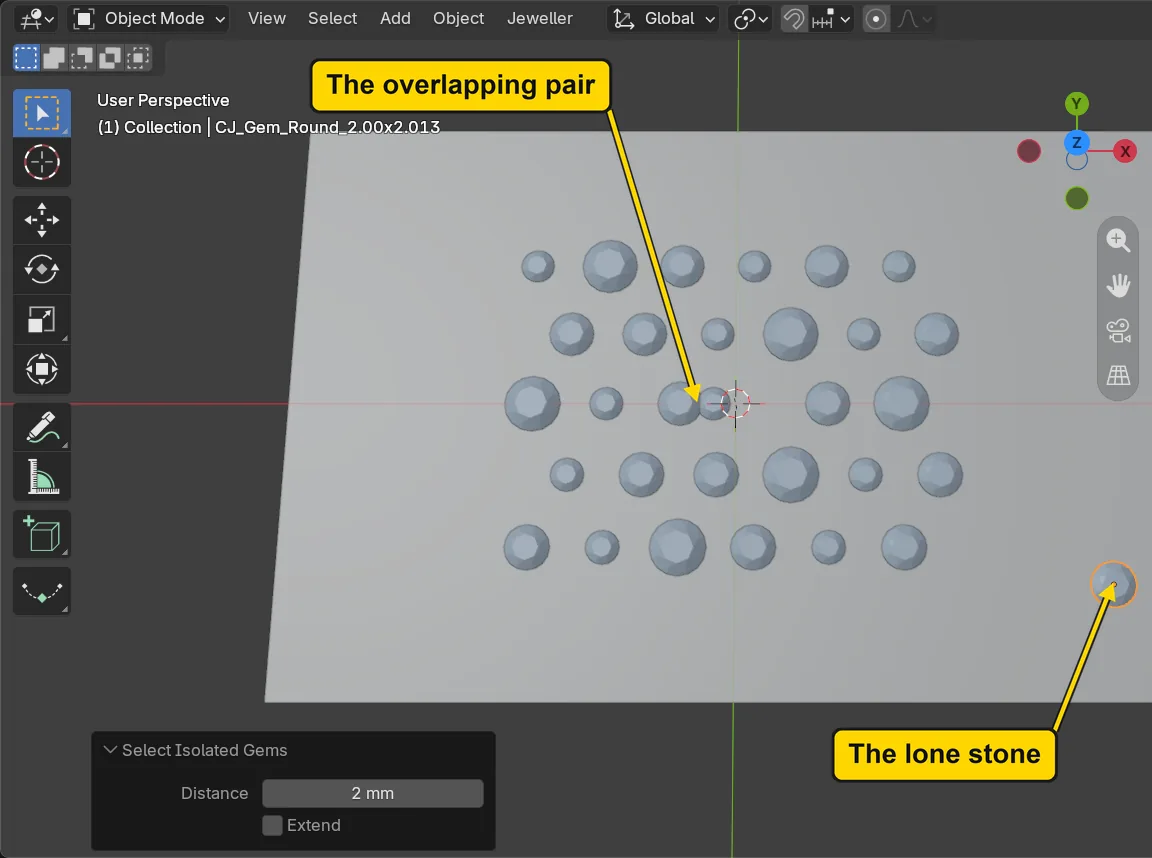
DoLook at the picture. To see your field like this, choose View > Frame All.
You should seeThe field of stones with the pair that overlaps and the stone far from the rest marked in the picture. This file is not ready for seats: the pair must be mended first. Moving the stone that overlaps is the next job at the bench, and Edit on Surface in Slide a placed stone over the metal (P3-03) does it. The lone stone may be wrong or may be on purpose: ask why it is there.
It worked whenYou see the field, the pair and the lone stone.
Step 11. Save your work
WhereThe 3D view: move the pointer over it.
DoPress Ctrl+S.
You should seeBlender writes your copy at once, with no question, because the file already has a name. An asterisk, *, in the title bar marks changes that are not saved, and it goes now. Save your work and get it back (P0-12) says more about saving.
It worked whenThe title bar begins my-field and carries no asterisk.
No picture: the only change is a message on the status bar, and it fades.
Check your result
| What to read | Where | What it should say |
|---|---|---|
| The 1.50 stones | The Gem Groups panel, the row Round 1.50 mm | It reads 11, and its arrow selects exactly those |
| The pair | The Gem Groups panel, My Groups, the row Look at these | It reads 2 |
| The lone stone | The box at the bottom left, Select Isolated Gems (click its title to open it), the field Distance | It reads 2.00 mm and one stone is selected, far from the field |
Try it yourself
Open your copy again. In Gem Groups click Cut, then Stone: each shows a single row, because every stone here is a round diamond. Back on Size, click the eye of Round 2.00 mm to hide those stones, and look at what is left. Click the eye again to bring them back.
What you learned
- Gem Groups sorts stones by size, cut, stone or your own names. A row’s arrow selects the group and its eye hides or shows it.
- Overlapping finds stones whose edges cross. Isolated finds stones with no neighbour within 2.00 mm. By Trait selects by shape, size range or stone.
- Add Selected to Group names a group of your own, and Remove from Group takes stones out of it.
Next: See every stone on a map