
What you will make
An oval plate 30 x 20 mm with its 34 holes gathered into a smaller oval in the middle, a wide plain rim round them, and one cell left as metal. A plain rim gives a pendant strength, room for the jump ring, a small ring of wire, that carries the bail (the loop a chain passes through), and a place for the hallmark. This is a drill, to teach Leave Out. On a piece, one filled cell can look like a casting fault: leave out a group, where it reads as meant.
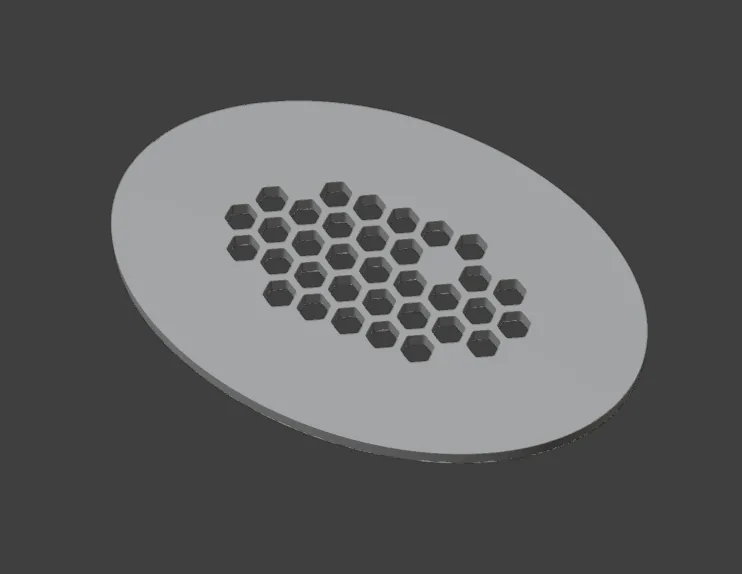
About 15 minutes.
Files
- p10-02-start.blend (101 KB): open this one to begin.
- p10-02-finished.blend (186 KB): the result, to compare with yours.
Both were made in Blender 5.2.0.
Before you start
- You have done Part 0, Blender from nothing.
- You have done Pierce a plate from an outline (P10-01): you know Make Pattern and the section bar’s Flow.
- The add-on is installed, and its CAD/CAM tab is in the sidebar.
- Nothing else: the start file is already in millimetres, with both ovals drawn.
Build it
Step 1. Open the start file and save your copy
WhereBlender’s top menu bar, File > Open, then File > Save As.
DoOpen p10-02-start.blend. Then choose File > Save As and give the file a name of your own, so that the start file stays clean.
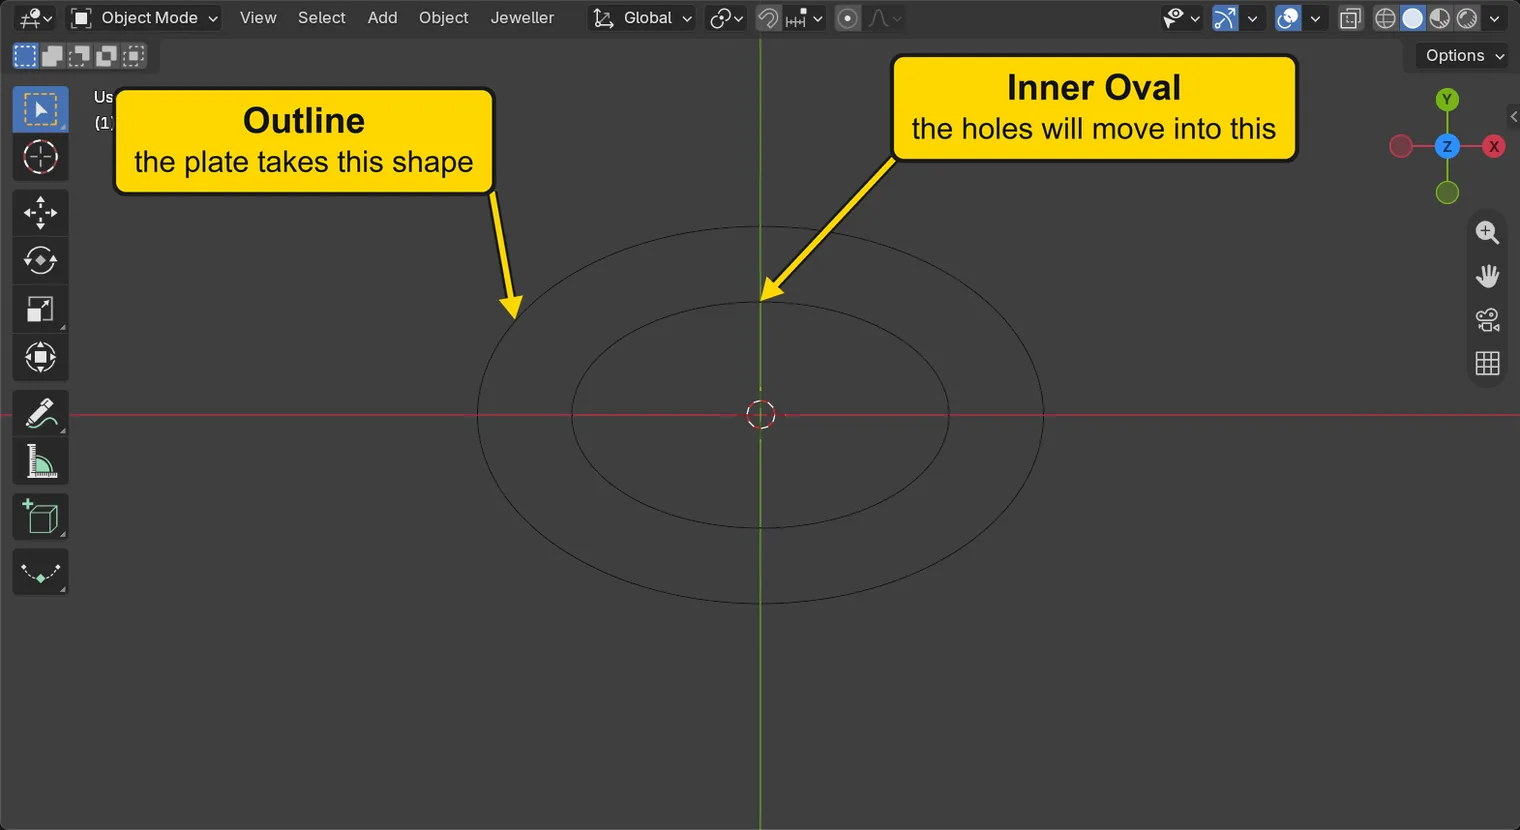
You should seeTwo thin ovals, one inside the other, seen from above.
It worked whenYou can see both ovals.
Step 2. Find the Pattern Builder panel
WhereThe sidebar at the right of the 3D view (press N with the pointer over the 3D view if it is shut), the CAD/CAM tab.
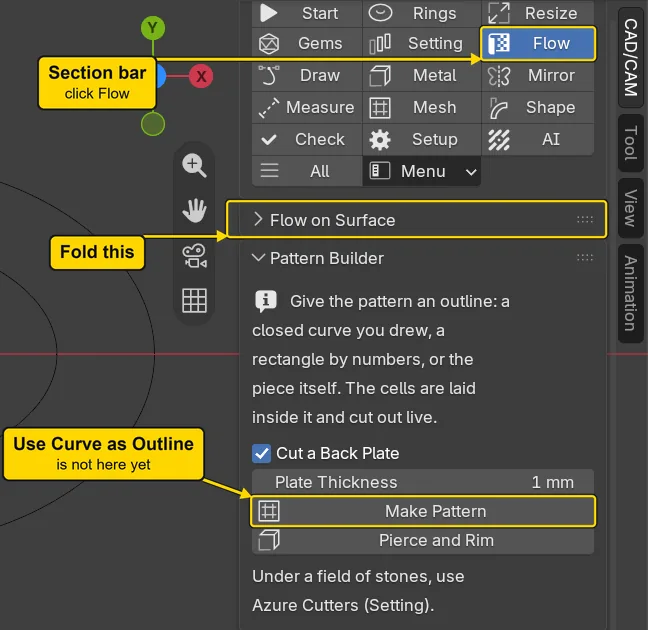
DoClick Flow in the section bar, the small word buttons at the top of the tab. Then click the words Flow on Surface once, to fold that panel.
You should seeThat panel shuts up to its title. Under it, the Pattern Builder panel has only two buttons, Make Pattern and Pierce and Rim.
It worked whenYou can read Make Pattern without scrolling.
Step 3. Make a pattern on the outer oval
WhereThe 3D view, then the Pattern Builder panel.
DoClick once on the outer oval’s line, at its right-hand end, then press Make Pattern.
You should seeThe outer oval fills with metal and small holes, and the panel fills with numbers. The panel’s first line, which wraps over several rows, stands under the words “Pattern 1” and counts the cells. The status bar at the very bottom says it too, but its message fades, and the panel keeps the same figure. Scroll down the sidebar: a new button stands near the foot of the panel, Use Curve as Outline.
It worked whenThe panel’s first line begins “97 cells”, and you can see Use Curve as Outline.
Step 4. Select the inner oval
WhereThe 3D view. Zoom in on the oval’s right-hand end with the mouse wheel if you need to: the line is thin.
DoClick once on the inner oval’s line, a thin dark line among the holes. Or click “Inner Oval” in the Outliner, the list at the top right of the window: scroll it if you need to.
You should seeOnly that line turns orange, and the orange outline on the plate’s holes goes away.
It worked whenThe words at the top left of the 3D view end in “Inner Oval”.
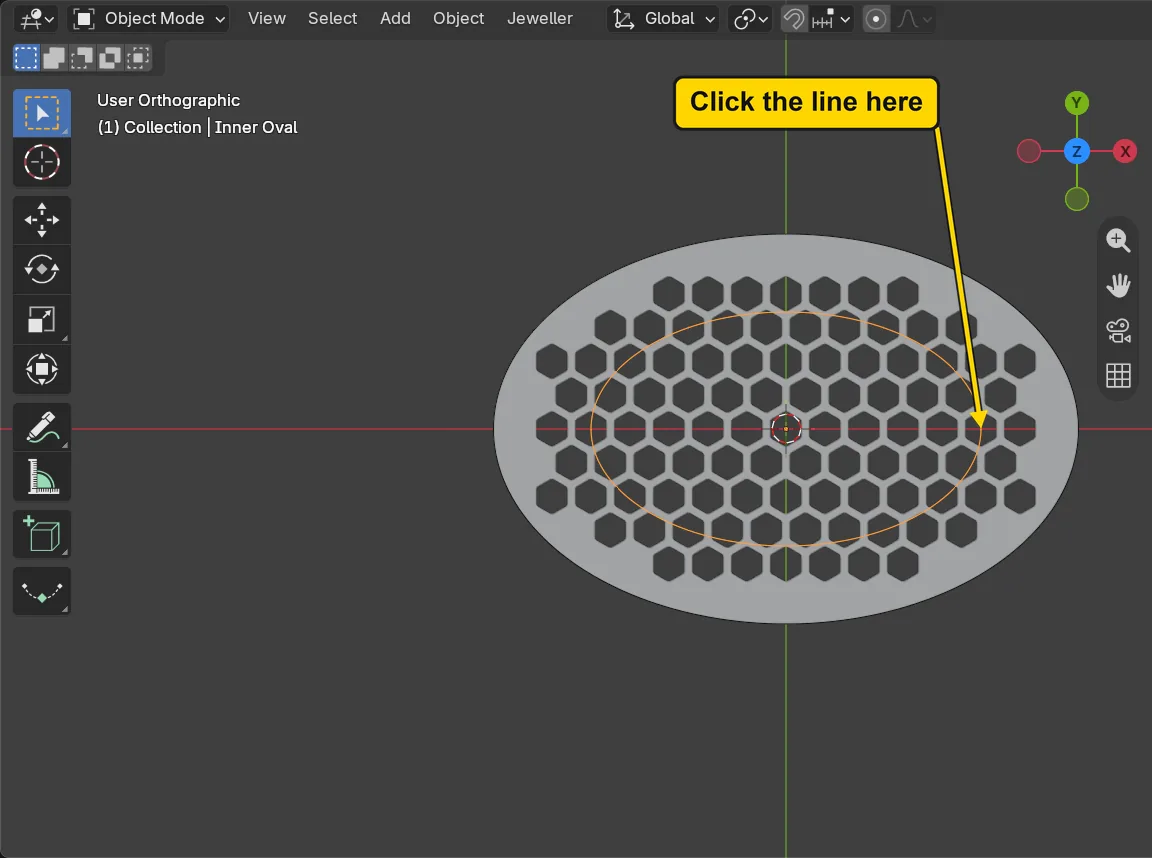
If it goes wrongThe plate’s holes stay orange, and the next press shows a yellow warning on the status bar: “Select a closed curve first”: your click landed on the plate, not on the line. Click again, right on the thin line. The warning fades: Last message, at the foot of the Pattern Builder panel, keeps it.
Step 5. Press Use Curve as Outline
WhereThe Pattern Builder panel, near its foot.
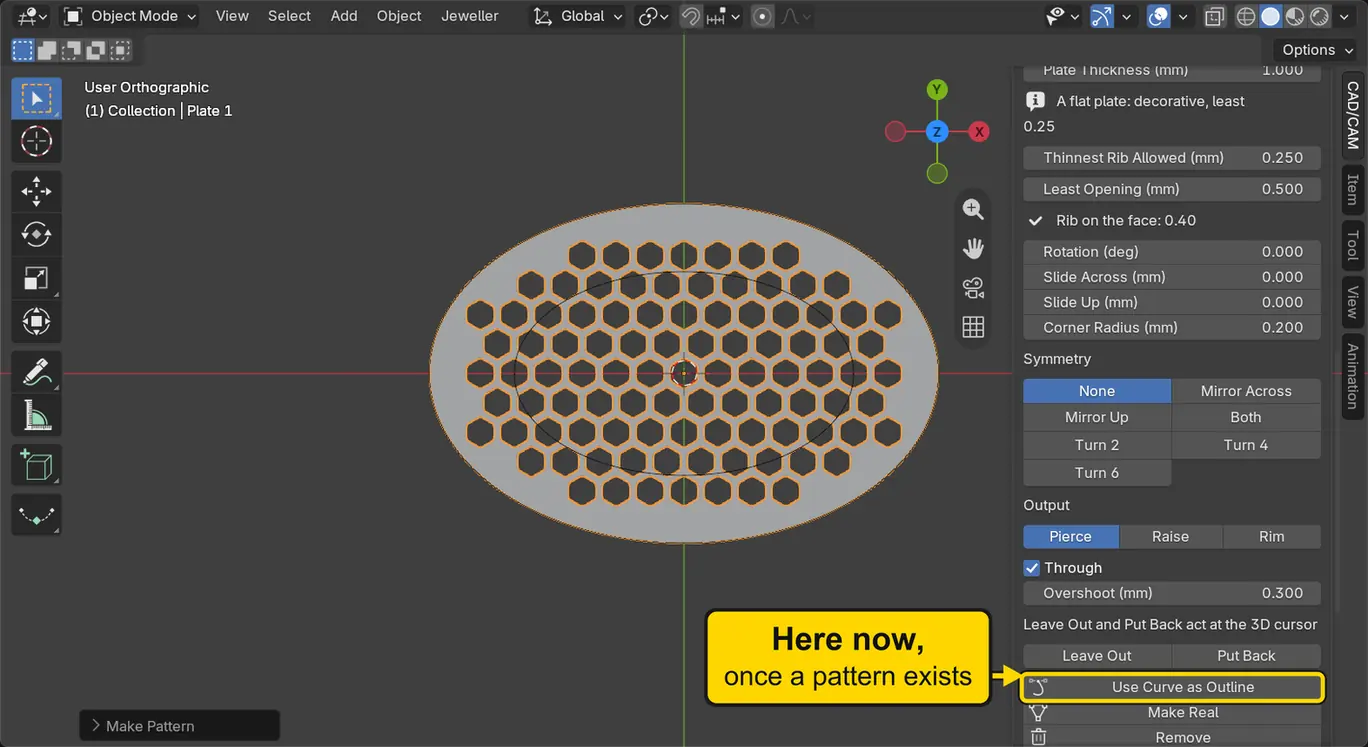
DoPress Use Curve as Outline.
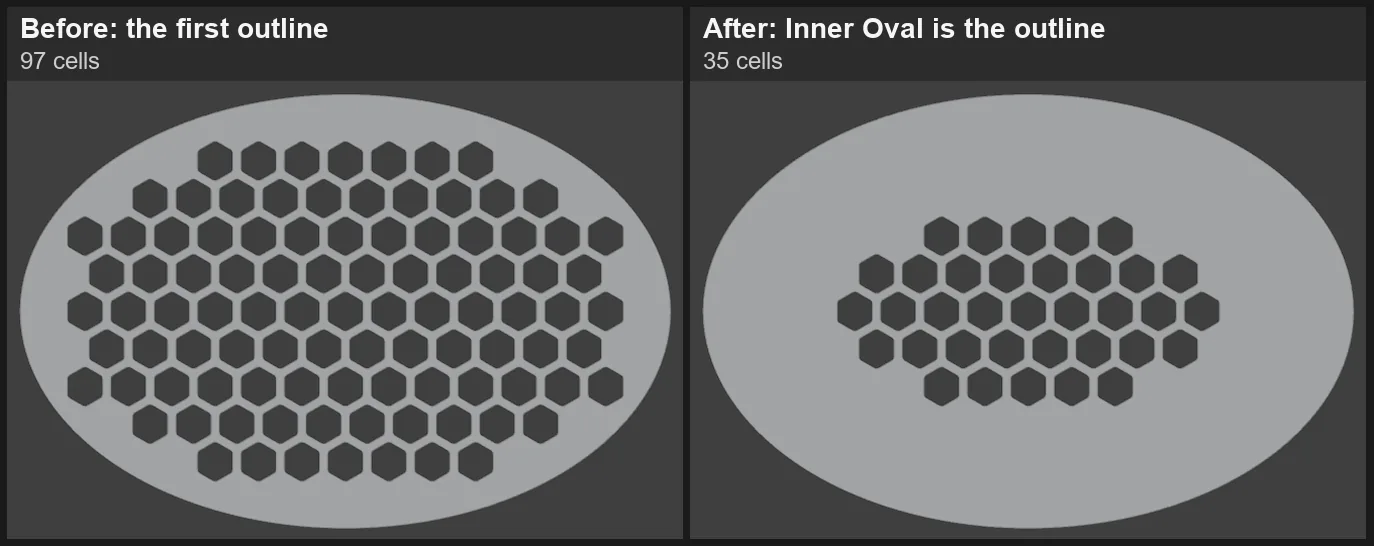
You should seeThe holes leave the rim and gather inside the inner oval, as in the pictures. The plate stays just as it was. The panel’s first line now warns that “Inner Oval” is 1.50 mm off the plane this pattern lies on. Ignore it: this file keeps the oval a little above the plate so that you can click it, and the add-on moves the cells down onto the plate. The line under the warning counts the cells.
It worked whenThe holes stand inside the inner oval, and the line that counts the cells reads “35 cells”.
Step 6. Put the 3D cursor on a cell
WhereThe 3D view. Zoom in with the mouse wheel until a hole is as big as your thumbnail.
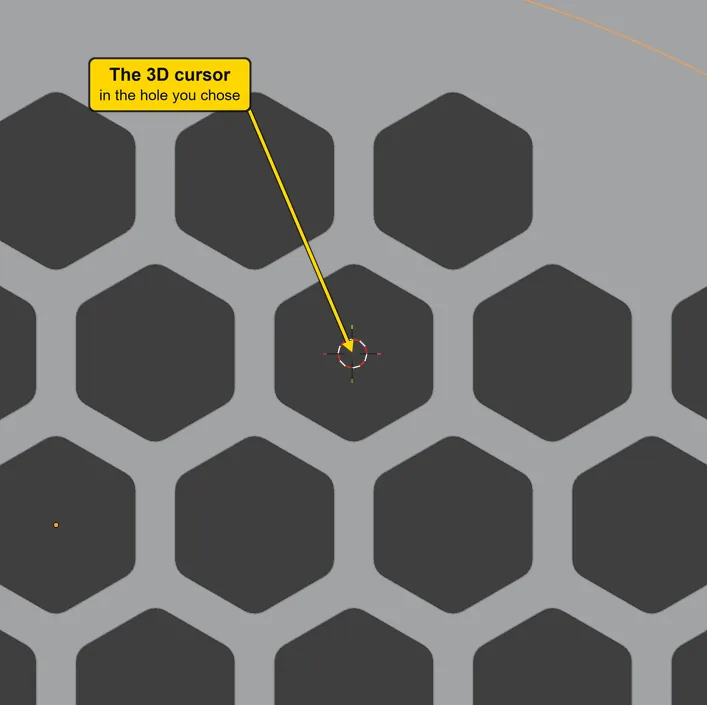
DoHold Shift and right click in the middle of a hole, a little up and to the right of the plate’s middle.
You should seeThe 3D cursor, a small red and white ring with a cross through it, jumps to that hole. It is Blender’s marker for a place. Nothing is selected or changed by it.
It worked whenThe ring stands inside the hole you chose.
If it goes wrongA menu opens at the pointer: you right clicked without Shift. Press Esc, then hold Shift and right click again.
Step 7. Press Leave Out
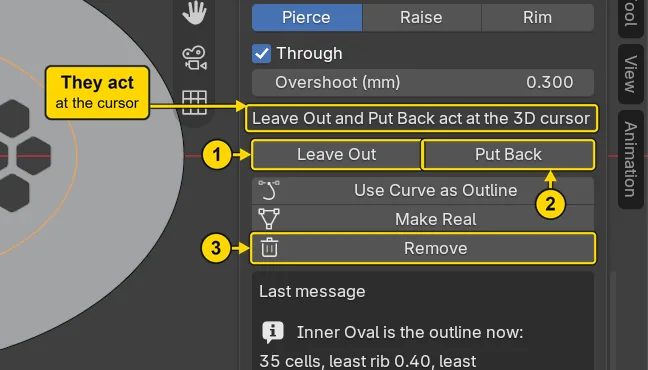
WhereThe Pattern Builder panel, the row under the words “Leave Out and Put Back act at the 3D cursor”.
DoPress Leave Out, the button marked 1.
You should seeThe hole under the cursor fills with metal. The other holes stay where they are.
It worked whenThe place is plain metal, and the line that counts the cells reads “34 cells”.
If it goes wrongThe status bar shows a yellow warning, “No cell is near the 3D cursor. Place the cursor on a cell first”: the cursor stands on plain metal, away from every cell. Shift+right click on a hole, then press again.
Step 8. Press Put Back
WhereThe same row of the Pattern Builder panel. Leave the 3D cursor where it is.
DoPress Put Back, the button marked 2 in the picture of step 7.
You should seeThe hole comes back, as in the second picture.
It worked whenThe hole is open again, and the line that counts the cells reads “35 cells”.
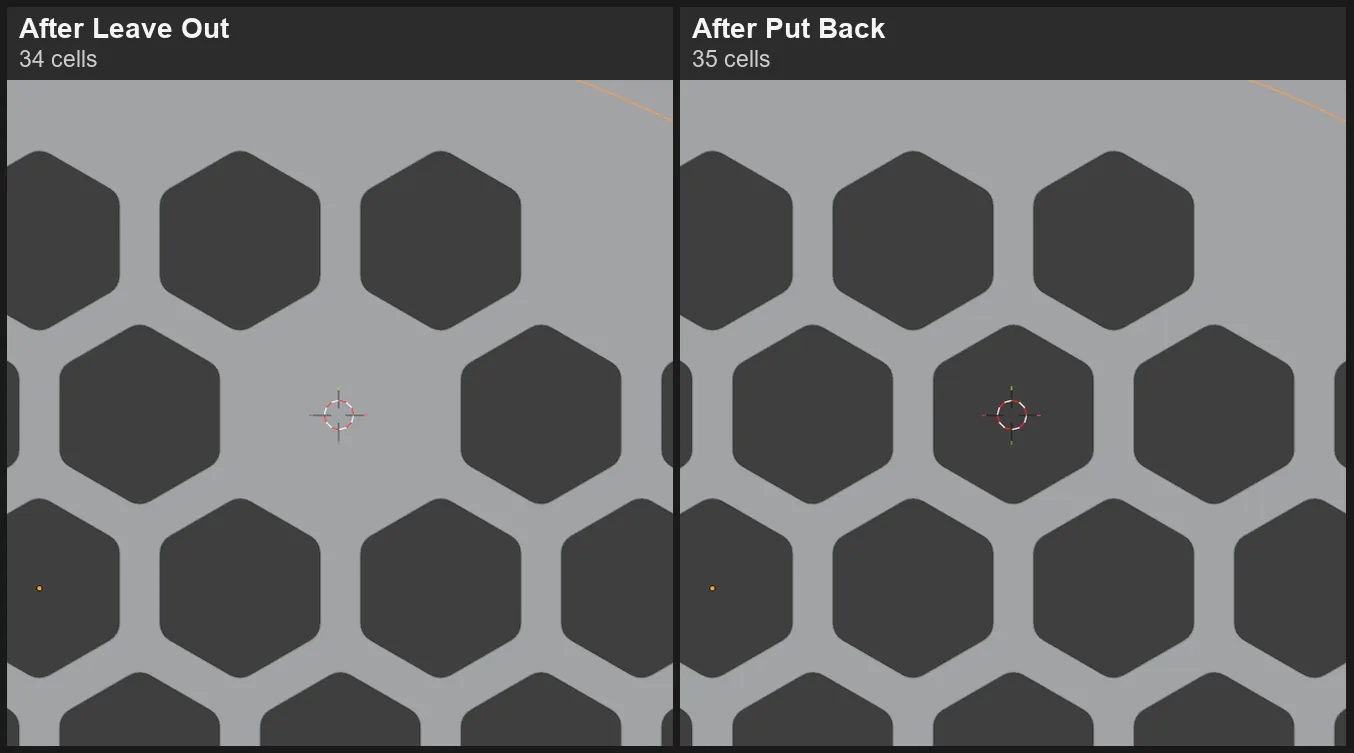
If it goes wrongThe status bar shows a yellow warning, “No left-out cell is near the 3D cursor”: the cell is already back, or the cursor has moved off it. Shift+right click on the cell that is metal, then press again.
Step 9. Press Remove, and see what it leaves
WhereThe foot of the Pattern Builder panel.
DoPress Remove, the button marked 3 in the picture of step 7.
You should seeThe holes go. Three things stay: the plate, now solid, and your two curves (the outer one hides under the plate’s edge). Use Curve as Outline has gone with the pattern. Scroll back out to see the whole plate.
It worked whenThe plate has no holes, and the panel is back at Make Pattern.
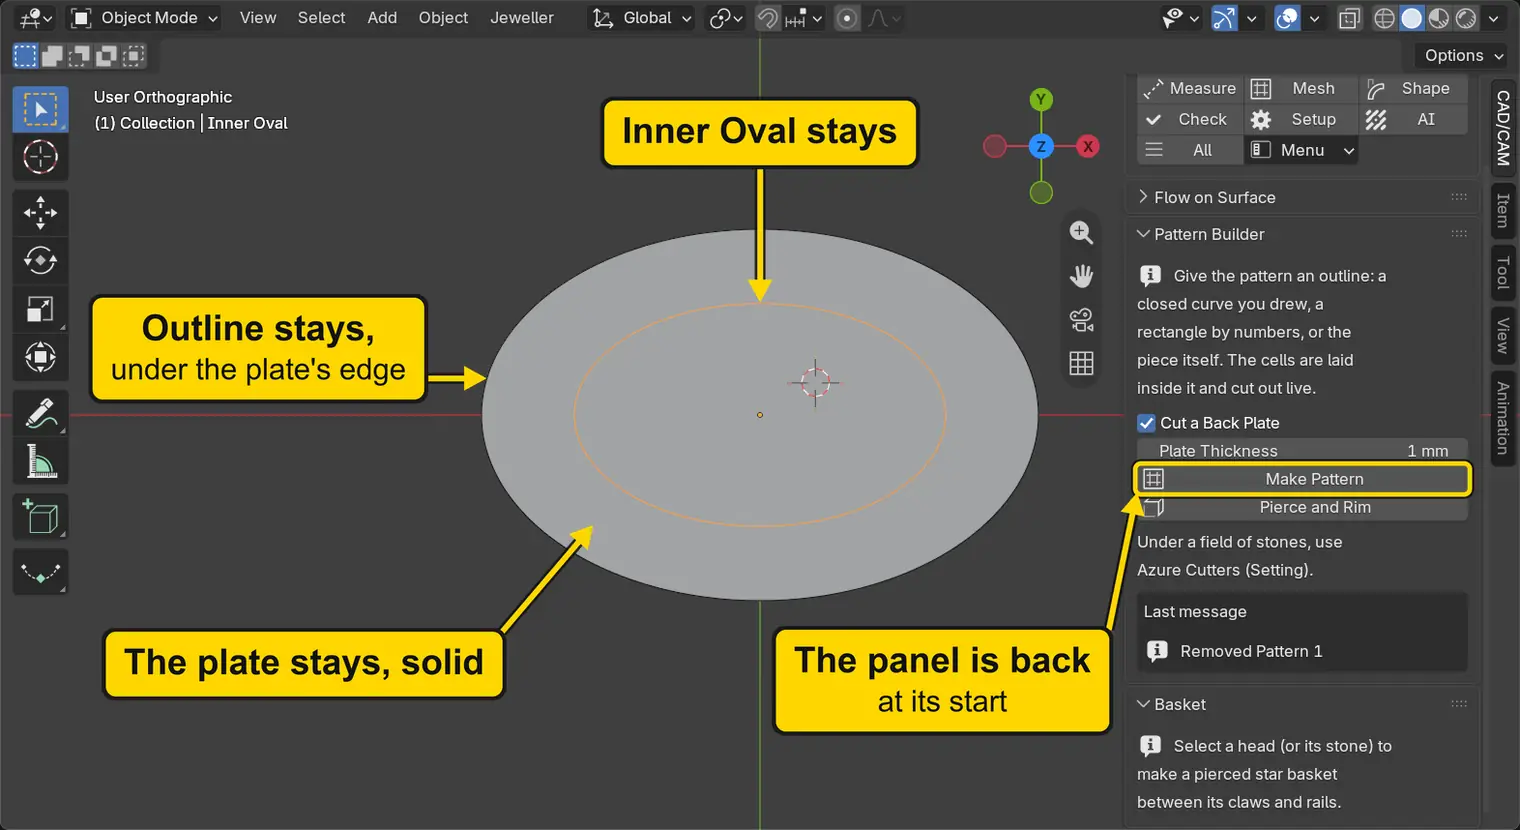
Step 10. Take it back with Ctrl+Z
WhereThe 3D view, with the pointer over it.
DoPress Ctrl+Z twice: once for Remove, once for Put Back.
You should seeThe pattern comes back with its holes in the inner oval, and your cell is left out again.
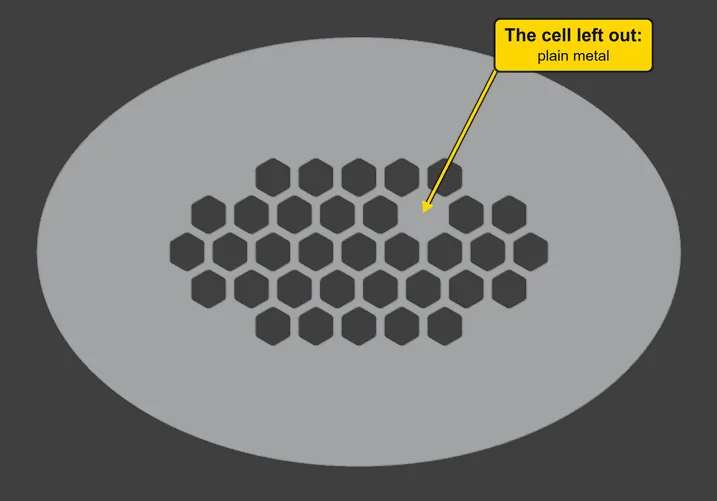
It worked whenThe line that counts the cells reads “34 cells”, with one solid hexagon where the 3D cursor stands (the picture has the cursor off).
Step 11. Look round your plate and save your copy
WhereThe 3D view, with the pointer over it.
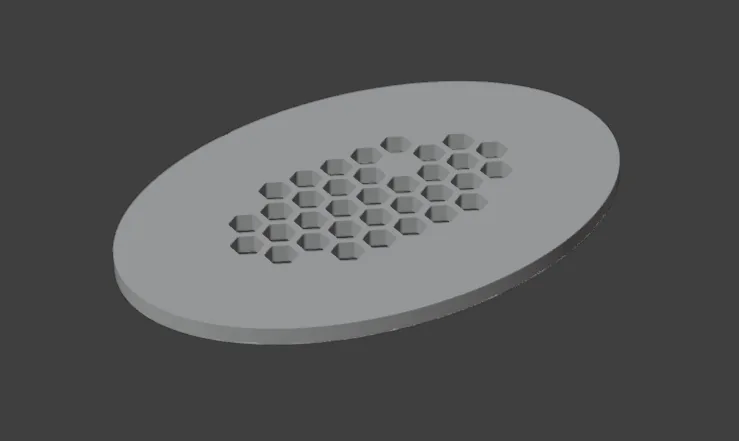
DoOrbit the view lower, until you look across the plate as in the picture. Then press Ctrl+S to save your copy.
You should seeThe wide plain rim, the holes going right through in the middle, and the one place that stays solid.
It worked whenYour own copy is saved, and the 3D view still shows the pattern.
Check your result
| What to read | Where | What it should say |
|---|---|---|
| The cells | With the plate selected, Flow in the section bar, the Pattern Builder panel, the line that counts cells | “34 cells”: the 35 of the inner oval, less the one you left out |
| The plate’s size | With the plate selected, the Item tab, on the sidebar’s edge just below CAD/CAM: Dimensions | X 30 mm, Y 20 mm: the outer oval’s size, not the inner oval’s. Z 1 mm, the add-on’s starting number |
| The cell you left out | The 3D view from straight above: click the blue Z ball on the small coloured axes at the top right of the 3D view | One solid hexagon of plain metal, where the 3D cursor stands (the picture has the cursor off) |
Try it yourself
Carry on from your finished plate, with your cell still left out. Type 2.40 in Cell (mm): 13 larger holes. Type 1.60 back: the 34 holes return, and your cell is still left out. Leave Out keeps a place on the plate, not a cell’s number, so it lasts through a change of numbers.
What you learned
- Use Curve as Outline appears once a pattern exists. It moves the cells into the curve you selected, and the plate keeps its first shape.
- Leave Out and Put Back act at the 3D cursor, which Shift+right click puts on the model.
- Remove takes the pattern and the helpers it made, and leaves your plate, solid, and your curves.
Ctrl+Zbrings it back.