

Resize takes a ring or a bangle made anywhere (here, imported, scanned or modelled by hand) to a list of sizes. Each size is a complete ring in a row beside the original, with its head, stones and claws. Reach for it when one design is wanted in several sizes.
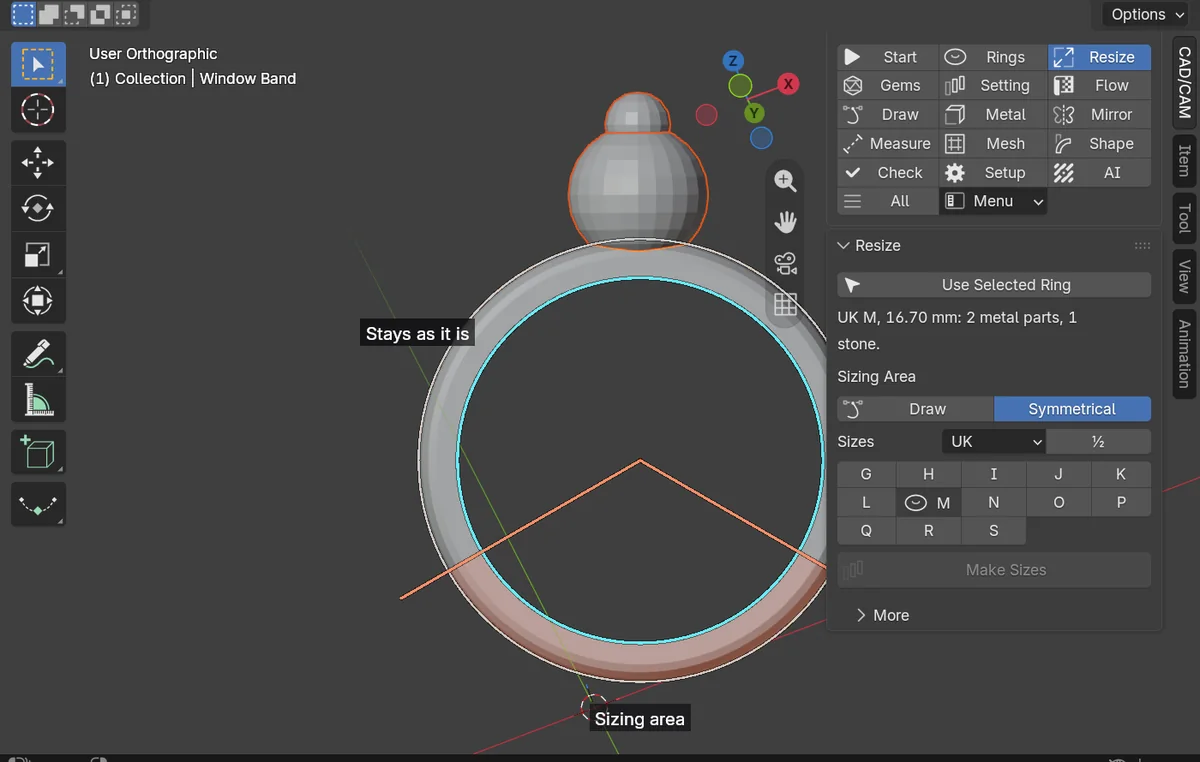
Where to find it
CAD/CAM tab > Resize section, directly after Rings. The Rings panel keeps one line, Resize a Ring…, that switches to it. Menu: Jeweller > Ring. There is no key.
Use it
Step 1. Select the ring
Wherethe 3D view, in Object Mode.
Doclick any part of the ring: the head, the shank, either half of a two-part shank, or all of it.
You should seethat part selected.
Step 2. Read the ring
WhereCAD/CAM tab > Resize section > Resize panel.
Doclick Use Selected Ring.
You should seeone line that says what was found, for example “UK M, 16.70 mm: 2 metal parts, 1 stone.” Every part found (the head, both halves of a two-part shank, the stones and the claws) is now selected. Nothing is changed and nothing is added to the scene.
If it goes wronga ring more than 1.2 % out of round is refused out loud, and nothing is changed. True the Bore, under More, makes an uneven ring round first.
Step 3. Mark the sizing area
Wherethe Resize panel, Sizing Area.
Doleave the two lines where they are, or click Draw and then click in the 3D view to set them.
You should seea circle at the band and two lines from the centre, with the words “Sizing area” and “Stays as it is”. Below the lines the band takes the whole change. Above them the metal keeps its length and only bends, so the shoulders, the seats and the stones are not stretched.
Draw turns the view to look through the finger, with 12 o’clock up, and the line follows the mouse. With Symmetrical on, both lines move together and one click sets them. With it off, the first click sets one line and the second sets the other. Esc puts the lines back and gives you your old view. The angles are whole degrees from 12 o’clock, from the head’s edge plus 5 degrees to 170 degrees. The lines start 135 degrees from 12 o’clock, so the bottom quarter is the sizing area.
Step 4. Tick the sizes
Wherethe Sizes row.
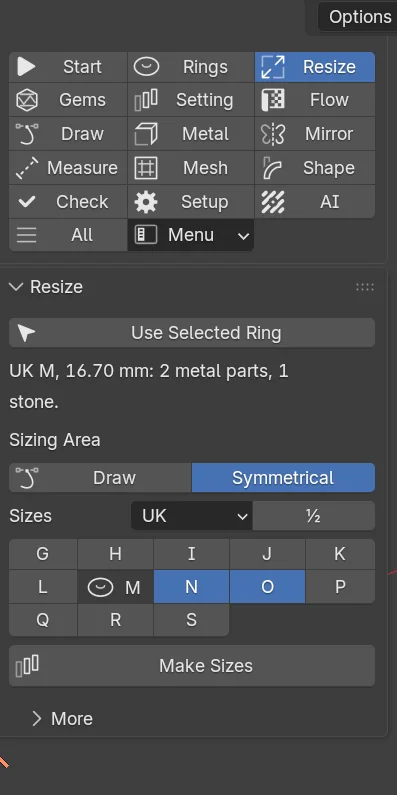
Dochoose the system (UK, US, EU or JP) and tick the sizes you want: six whole sizes either way of the ring’s own. Click the half-size switch for the half sizes, where the system has them.
You should seethe ticked sizes pressed. The ring’s own size is marked and cannot be ticked.
Step 5. Make the sizes
Wherethe Resize panel, Make Sizes.
Doclick Make Sizes.
You should seeone complete ring for each size, in a row beside the original, each in its own collection named for its size. Under the button, one line for each: for example “UK N 17.10 mm 7.92 g” (the size, the inner diameter and the weight in the alloy chosen in Setup).
If it goes wronga size the ring cannot be makes nothing and says why. Ctrl+Z takes the whole row back in one step.
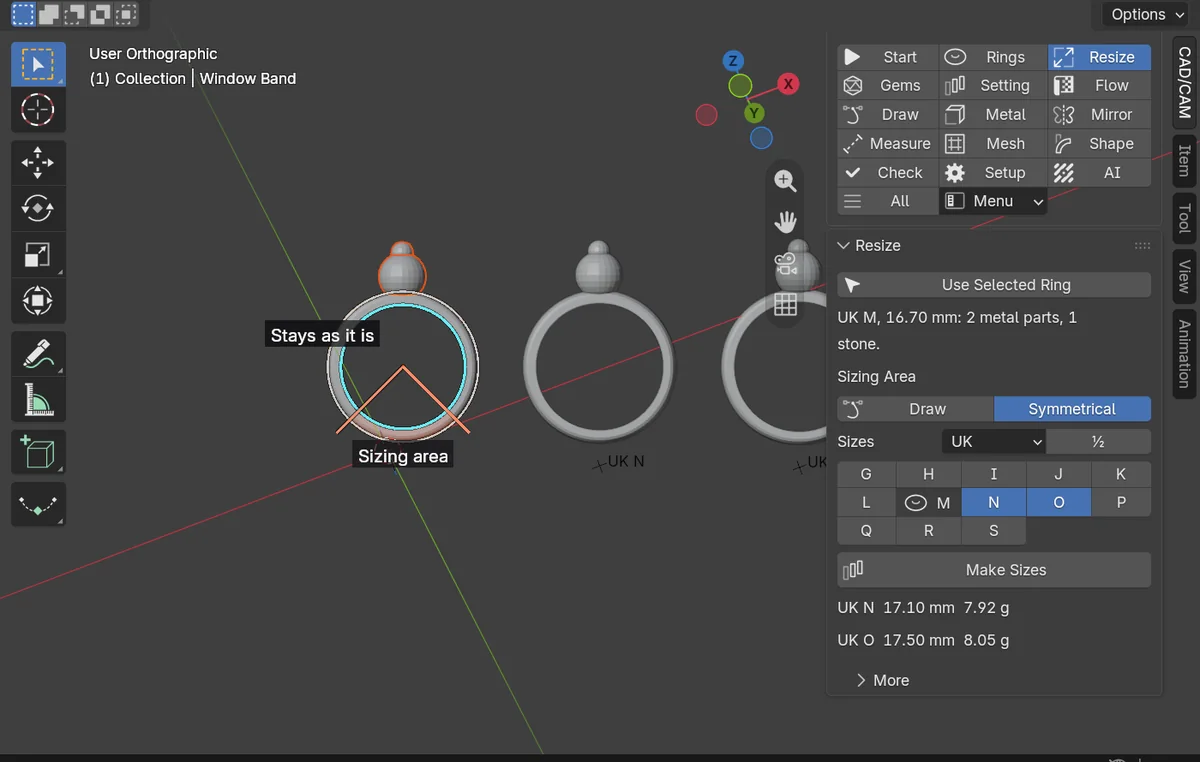
Press Make Sizes again to carry on along the row. A size already in it is not made twice.
Settings
| Setting | Default | What it changes |
|---|---|---|
| Sizes | The ring’s own system | UK, US, EU or JP. The ring’s own size is marked and cannot be ticked. |
| Symmetrical | On | Draw moves both lines together. Off, the first click sets one line and the second sets the other. |
| Sizing Area angles | 135 degrees each | The two lines as numbers, under More. Whole degrees, from the head’s edge plus 5 to 170. |
| Gap Between Rings | 6 mm | The space between one made ring and the next. A house default, under More. |
| Head Zone | 0 (auto) | How many degrees of band the head covers. 0 lets the add-on find it from the shape. Under More. |
Everything else is under More, closed: the Bangle switch with the oval and typed targets, Measure Any Ring, True the Bore, Resize in Place (which changes the ring itself instead of making a row) and Re-space Stones.
Good to know
- The band’s section is kept, the head moves out as one rigid body, the sizing area takes the change, and the stones and claws follow. A claw never comes away from its stone.
- The size is read to within 0.02 mm and the section at 6 o’clock to within 0.01 mm. A made size that measures more than 0.02 mm off what was asked is sized once or twice more, by what is left, and its line says if it is still off.
- A head on an open band closes it: the ring is a closed ring and you do not need the Bangle switch. A two-part shank is one band. A split shank, a band that divides into two strands, is one closed ring: its size is read from the half the finger sits in, and the strands keep their shape and spread in every size.
- The Bangle switch is for bangles. A bore over 26 mm is a bangle by itself, and the sizes then show the house bangle sizes.
- Every resize tool leaves Edit Mode first. A band still in Edit Mode is refused, having changed nothing.
- A band with a Subdivision Surface modifier is made as a plain mesh at the smoother of its viewport and render levels. The original keeps its modifier.
- Sizing down by more than the shank can give is refused, with the figures.
- On a cut eternity band, a change of more than about three sizes opens the cut seats, and the read-back says they should be re-cut. The stones keep their size, so the gaps change. Re-space Stones applies the choice you make (keep, one more stone or one fewer) and refuses a band whose seats are already cut, so re-space before Cut Metal.
- Resize in Place keeps the original hidden in a collection called Before resize, and
Ctrl+Ztakes the whole resize back. - A greyed button says why in its tooltip.