

Stone Settings puts a bezel, an under-bezel or a collet round every selected stone with one button. All the settings share one section, so when you move a number or a point of the section every setting redraws at once. Reach for it once the stones are placed.
Where to find it
CAD/CAM tab > Setting section > Stone Settings, the first panel of the section. Menu: Jeweller > Setting.
Use it
Step 1. Select the stones
Wherethe 3D view, in Object Mode.
Doclick a stone, then Shift+click the others. Any number, any cut. For Bezel for Any Stone, select one mesh or one closed curve instead.
You should seethe stones selected, and the panel counting them.
Step 2. Pick the tool
Wherethe Stone Settings panel.
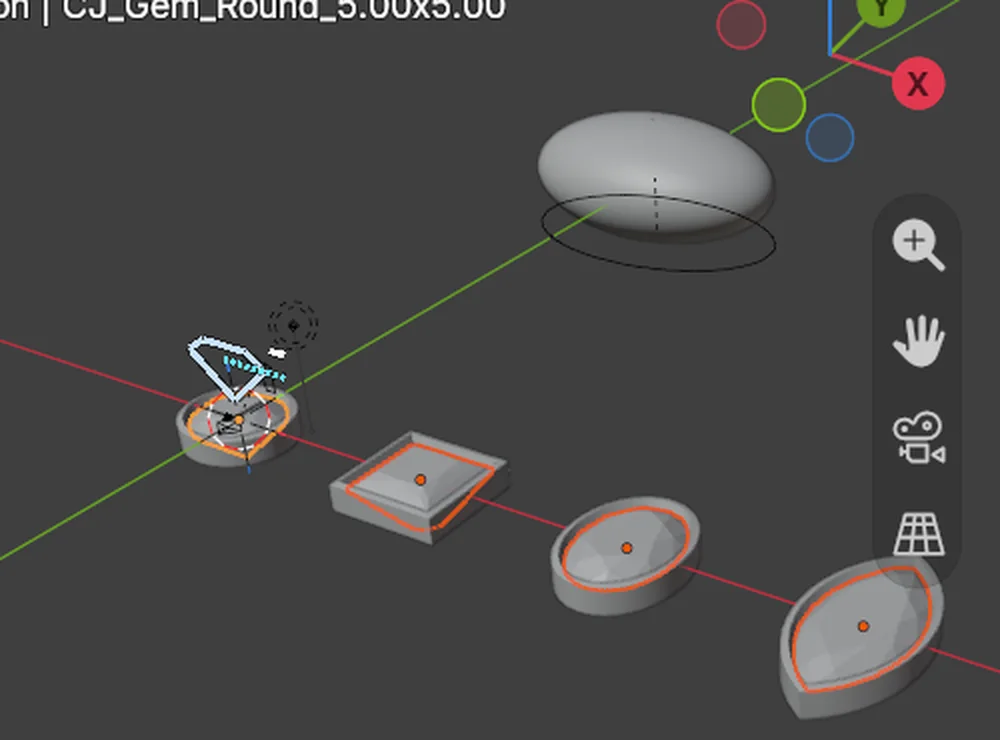
Doclick the picture of Bezel, Under-Bezel, Collet or Bezel for Any Stone.
You should seethe tool’s own sections as pictures, then your saved sections. No tool shows more than three numbers on its face. The rest are under More.
| Tool | What it makes |
|---|---|
| Bezel | A wall round the girdle that holds the stone from the side, its top pushed over the crown. |
| Under-Bezel | A ring under the girdle that the stone rests on. Switch on Second rail and a lower ring joins it. |
| Collet | A collar the stone sits inside, wrapping the girdle, with a second rail below it that you can switch off. |
| Bezel for Any Stone | A wall round the outline of any mesh or closed curve, found from the mesh alone. |
Step 3. Pick a section
Wherethe section pictures under the tool.
Doclick one. One click picks it.
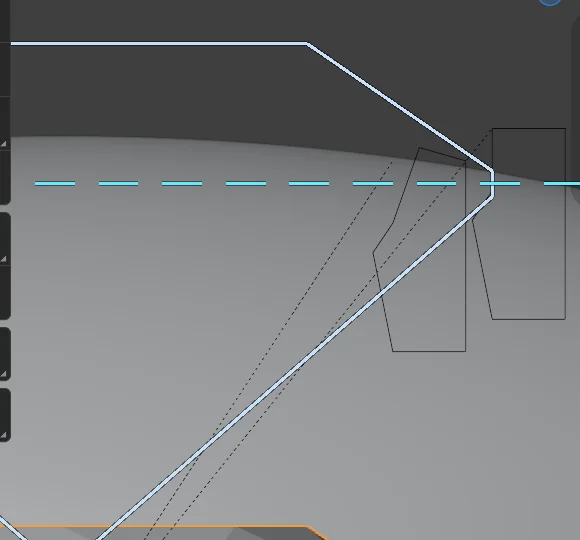
You should seethe section drawn true size beside the first stone, with the stone’s half outline next to it and a dashed line at the girdle.
Step 4. Set the stones
Wherethe Stone Settings panel.
Doclick the one button, which counts your stones, for example Set 6 Stones.
You should seeevery stone with a live setting, all sharing one section. There is no OK and no Cancel.
If it goes wrongone Ctrl+Z takes the whole set back. A ring that reaches into the stone’s pavilion says so at once, in plain words, with the number to change.
Step 5. Adjust
Wherethe Stone Settings panel.
Dochange a number, or click Edit Section and move a point of the section in Edit Mode. Alt+G slides a point along its segment.
You should seeevery setting of the set redraw at once, and the stone drawn beside the section slide against it when you change Lip, Gap or Drop.
Step 6. Make it real
Wherethe Stone Settings panel.
Doclick Make Real.
You should seeone solid for each stone.
The list of settings
At the top of the panel a list shows every set in the file, one row each, for example “Bezel, 2 stones”.
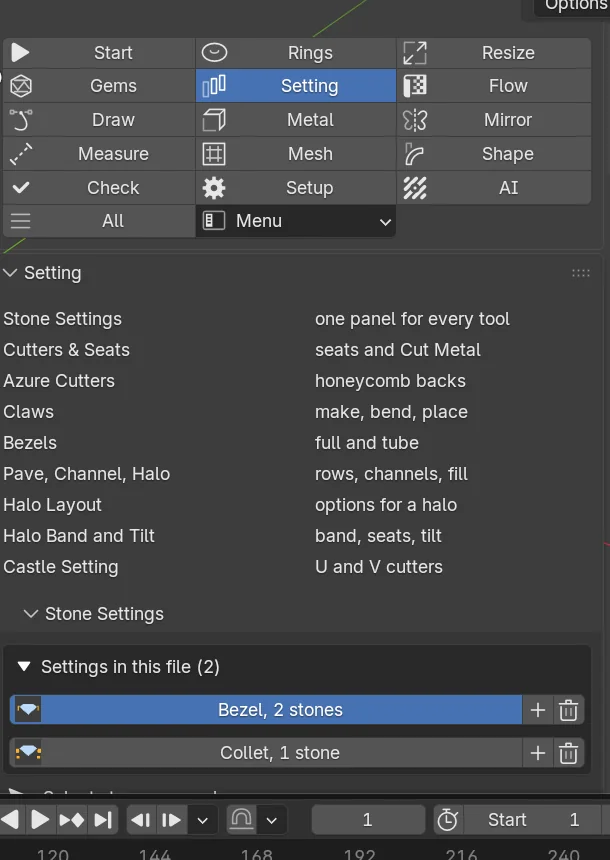
- Click a row and the set’s forms are selected and highlighted in the 3D view, one of them active, and the panel shows its tool and numbers.
- The plus gives the selected stones the same setting. They join that set, sharing its section and numbers, live. A stone already in the set is skipped. A stone that holds another set of the same tool moves over. A stone that holds a set of another tool keeps it and gains this one, so a Collet stays when a Bezel is added.
- The bin removes the set and everything made for it: the settings, their sections, the hidden views and the outline curves no other set uses. It asks once, naming what goes. The stones, the other sets and your saved sections are never touched. Real solids made from the set stay unless Also its real solids is ticked. One
Ctrl+Zbrings all of it back. With Only the selected ticked, only the selected members are taken out and the rest of the set keeps working.
Sections
A section is one closed curve. Under Sections:
- Edit Section and Show Section open the curve for editing and hide it or bring it back.
- Save keeps the shown section under a name for every file. It comes back in the grid with its own picture. Saving under a name that exists replaces it.
- Reset puts the named start and its numbers back.
- Make Default makes new sets of this tool start from the shown section.
- Remove Saved takes a saved section off the list. Its file is kept in a removed folder. The settings made with it stay.
A shape that cannot be swept is refused in words and the last good section is kept. Wall, Width, Thickness and the other numbers that change the shape of the section are held while you edit it by hand. The panel greys them and says “The section was edited by hand. Reset Section gives these numbers back.” Numbers that only move the setting (Lip, Gap, Drop, Pull in, Rail gap) stay live.
The seat: the stone drops in
Every section a stone rests in has a seat. Going down its inner side, the face stands straight up on the girdle’s line. At the girdle’s lower edge the seat runs in and down, steeper than the pavilion, so only the girdle touches it and the stone cannot go lower. Nothing comes inside the girdle’s outline above the seat, so the stone drops in from above and the setter pushes the top over the crown. Below the seat there is room for a pavilion 25 % deeper than the ideal, because coloured stones are seldom ideal cuts.
Settings
| Setting | Default | What it changes |
|---|---|---|
| Wall | 0.55 mm | How thick the wall is. |
| Over the girdle | 0.32 mm | How far the wall’s top stands over the girdle’s upper edge: the metal the setter pushes over the crown. Every stone keeps it. |
| Seat | 0.15 mm | How far the seat reaches in from the wall’s inner face, under the girdle. |
| Seat angle | 56 degrees | How steeply the seat runs in from the girdle’s lower edge. Under More. |
| Depth under the girdle | 0.97 mm | How far the wall reaches down below the girdle’s lower edge. Under More. |
| Gap | 0.00 mm | How far the wall’s inner face stands from the stone. |
| Room for a real stone | 25 % | How much deeper than the ideal pavilion a real stone may be. Under More. |
| Collet thickness, Rail gap | 1.00 mm, 0.50 mm | The Collet’s own numbers. They fit all six cuts at 5 mm and 8 mm. |
These are the Bezel’s start, Wall with a seat. The other tools and sections have their own starts.
Good to know
- A number under a minimum of the book or the house stays where you put it. A plain sentence under the numbers says which minimum it is under and where it comes from. Nothing is changed in silence.
- The Check lines speak in words: how far the pavilion clears the ring, metal inside the girdle above the seat so that the stone cannot drop in, a seat that does not reach 0.10 mm inside the girdle, a wall too low to push over the crown, and the room for a real stone. The book’s least wall is 0.30 mm (p.166) and the house wall is 0.50 mm.
- Where a stone’s pavilion is steeper than the seat, as a princess or an emerald is against 56 degrees, the setting goes down until it clears, so no metal is inside the stone, and the Check line asks for a steeper seat.
- The Under-Bezel with its Second rail, and the Collet, have two rails and a section for each. The Section for switch says which one the section pictures. On a stone smaller than about 4.4 mm across the second rail is left out and the Check line says what to lower.
- Bezel for Any Stone stands on the stone’s lowest point, on the ground or at a height you choose. The traced outline is an ordinary curve that you may move.
- A head is not made for a stone under 2.00 mm. For those, use the Bezel or the Under-Bezel here.
- While a section or a number moves, only the metal is rebuilt. The checks follow a quarter of a second after it stops.
- Rub-over and Knife-edge lip are no longer offered. A file that has one still opens.