
What you will make
The drop outline of Draw any outline with a pen (P2-02), reshaped: a fuller bottom, the widest place moved out to exactly 12.0 mm across, and one more point on its right side, the height unchanged at 18.0 mm. A jeweller reshapes an outline by its points, not by drawing it again, so that the part of it that is right stays right.
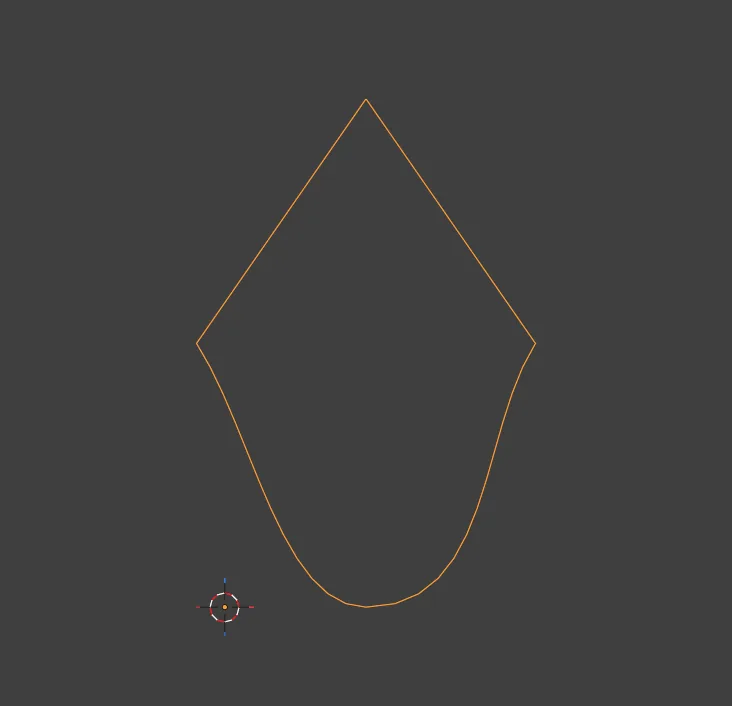
About 10 minutes.
Files
- p2-03-start.blend (99 KB): open this one to begin.
- p2-03-finished.blend (104 KB): the result, to compare with yours.
Both were made in Blender 5.2.0.
Before you start
- You have done Draw any outline with a pen (P2-02). The start file holds that drop, already drawn, selected and in millimetres: exactly 18.0 mm high. A drop you drew by hand in P2-02 reads close to that, within 0.3 mm.
- The add-on is installed. Edit Points works on the selected drawing, so keep the drop selected.
Build it
Step 1. Open the start file and save your copy
WhereThe top bar: the row of words that begins File, Edit.
DoDownload p2-03-start.blend from Files above and open it. Then choose File > Save As and save it under the name below, in a folder of yours. Open an exercise file and keep the start file safe (P0-07) shows how.
Typemy-drop-reshaped.blend
You should seeThe 3D view shows the drop outline in orange: it is selected. The words at the top left of the 3D view end with CJ Pen.
It worked whenThe title bar, the strip above File and Edit, begins my-drop-reshaped.
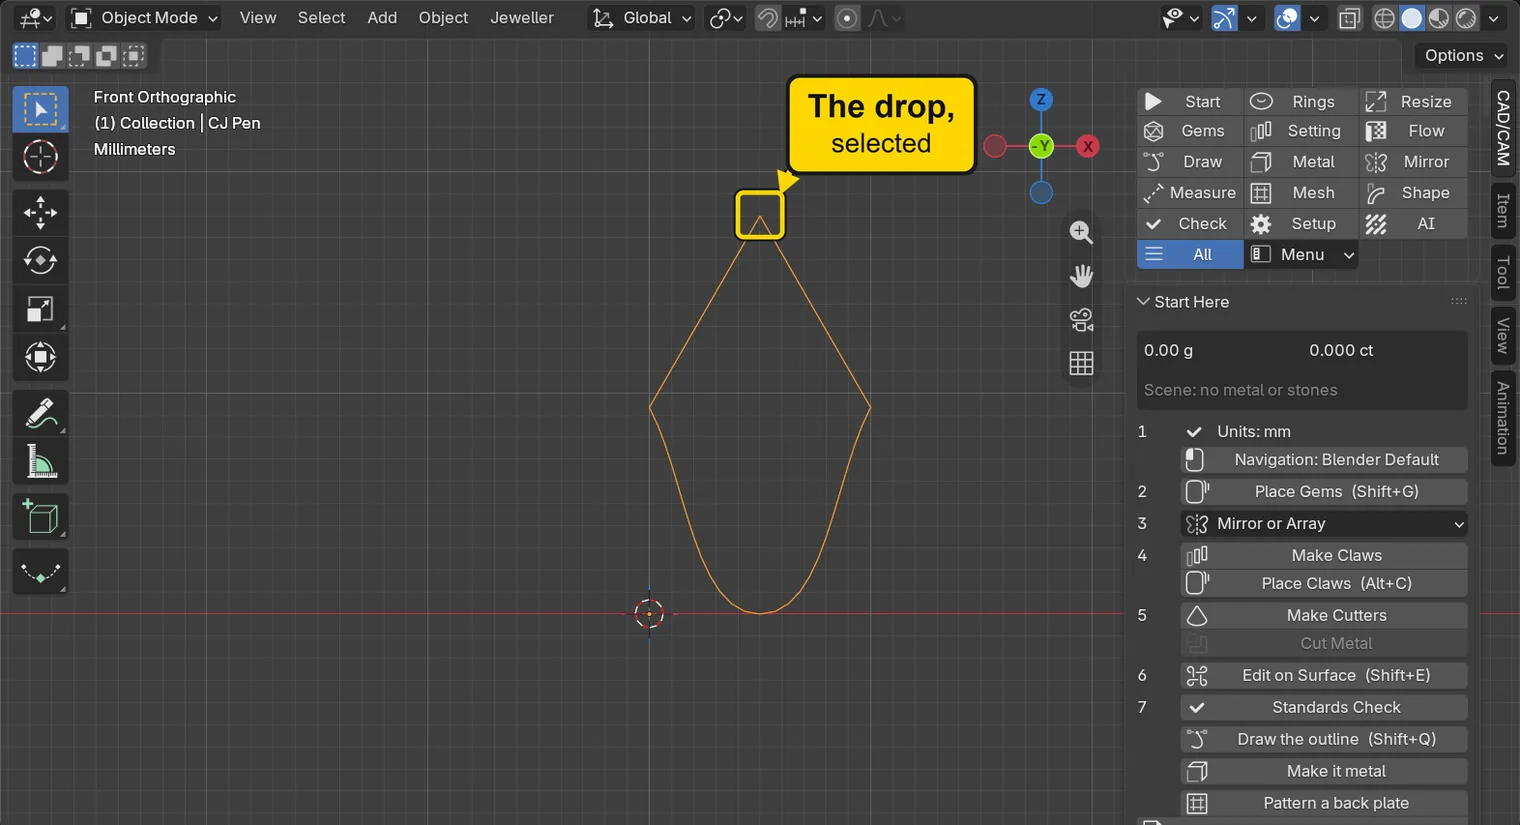
Step 2. Open the Draw section and press Edit Points
WhereThe sidebar: the CAD/CAM tab, then Draw in the section bar, the small word buttons at the top of the tab.
DoClick the CAD/CAM tab, click Draw in the section bar, then press Edit Points.
You should seeThe drop’s points as small squares, and no handles yet. The tool’s line, just under the header, reads “Edit Points | 0 selected: click a point to see its handles”. A handle is the round end of a line through a smooth point: dragging it bends the line. The tool runs until you press Enter, which finishes it, or Esc, which cancels it: the status bar, along the very bottom of the window, lists its keys, among them “Enter finish” and “Esc cancel”.
It worked whenThe tool’s line begins “Edit Points” and says “0 selected”.
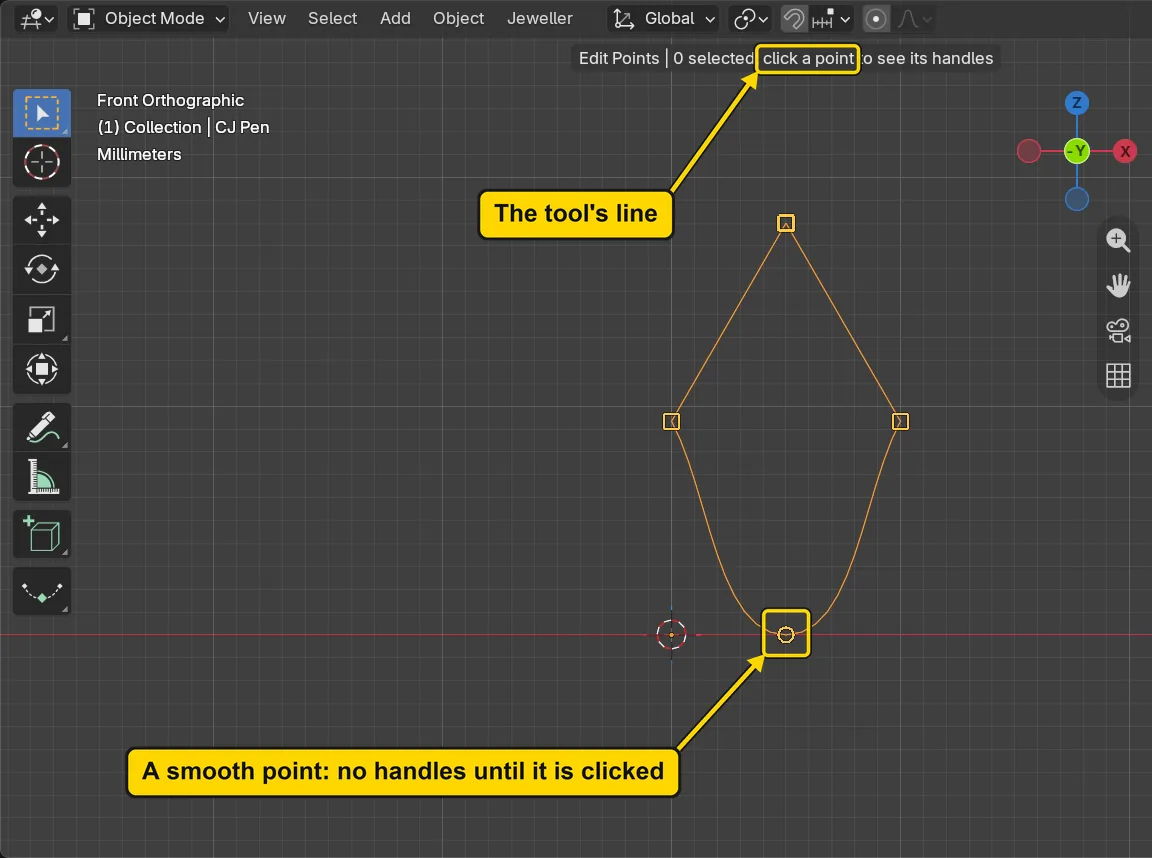
If it goes wrongThe status bar says to select a drawn curve first: The drop is not selected. Click it in the 3D view, then press Edit Points again.
Step 3. Select the bottom point and drag its handle
WhereThe 3D view: the round point at the bottom of the drop, on the red line.
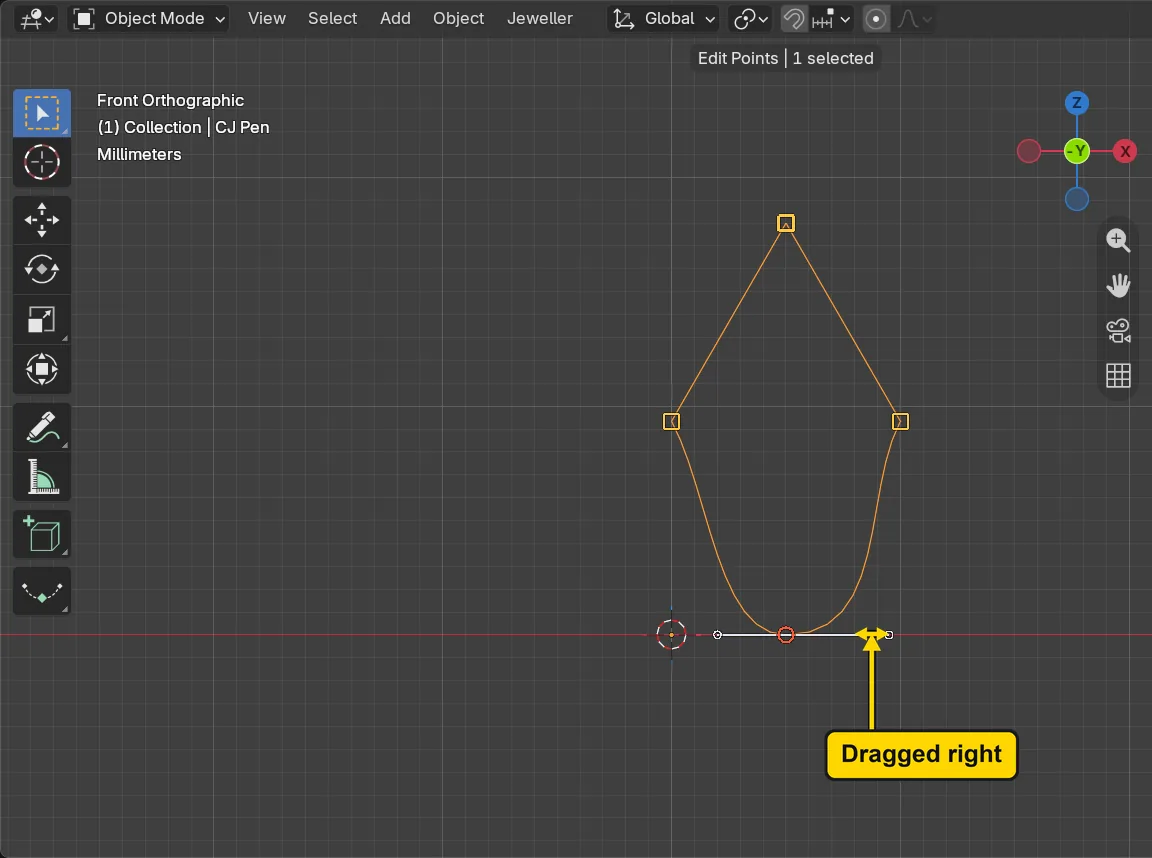
DoClick the round point at the bottom. Two handles show. Press the left button on the one to the right, drag it a little further right and let go.
You should seeThe bottom point turns red, with a line through it and a small round handle at each end. A handle only shows once its point is selected. The right handle is now longer, so the outline leaves the point further out on the right and the bottom is fuller on that side. The left handle did not move: the two handles stay in one straight line through the point, and the other end only turns if you drag off that line. The tip, the height and the width stay as they were.
It worked whenThe bottom of the drop is fuller on the right than before.
Step 4. Hold the right corner and type its place
WhereThe 3D view: the right corner, the widest place on the right.
DoPress the left button on the right corner and keep it down (on a touchpad, hold it with your thumb). With the button still down, type 1,0 (with the comma), press Enter, then let go.
Type1,0
You should seeThe corner moves exactly 1 mm to the right. The two numbers are across and up, measured from where the corner started: 1 across, 0 up. The tool’s line showed what you typed while you held the point. Enter here lets go at the typed place; it does not end the tool.
It worked whenThe right corner stands 1 mm further out than it did.
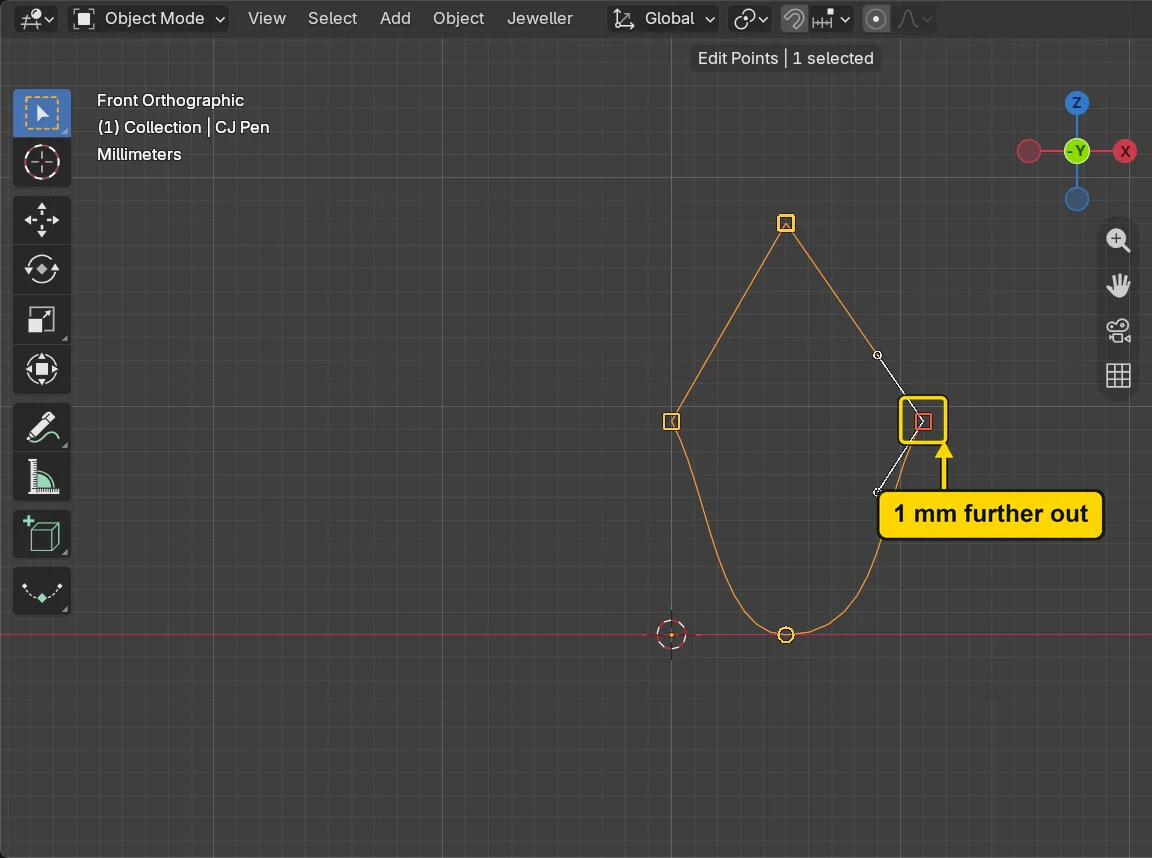
If it goes wrongThe corner moves with the pointer and not to the number: A number is only taken while the button is held. Hold it down, type the number, then press Enter.
Step 5. Hold the left corner and type its place
WhereThe 3D view: the left corner, level with the right one.
DoPress the left button on the left corner and keep it down, type -1,0 (with the comma), press Enter, then let go.
Type-1,0
You should seeThe corner moves exactly 1 mm to the left: a minus sign moves it the other way. The drop is now 12 mm across: 10 plus the 1 and the 1 you typed.
It worked whenBoth corners stand 1 mm further out, and the drop is wider.
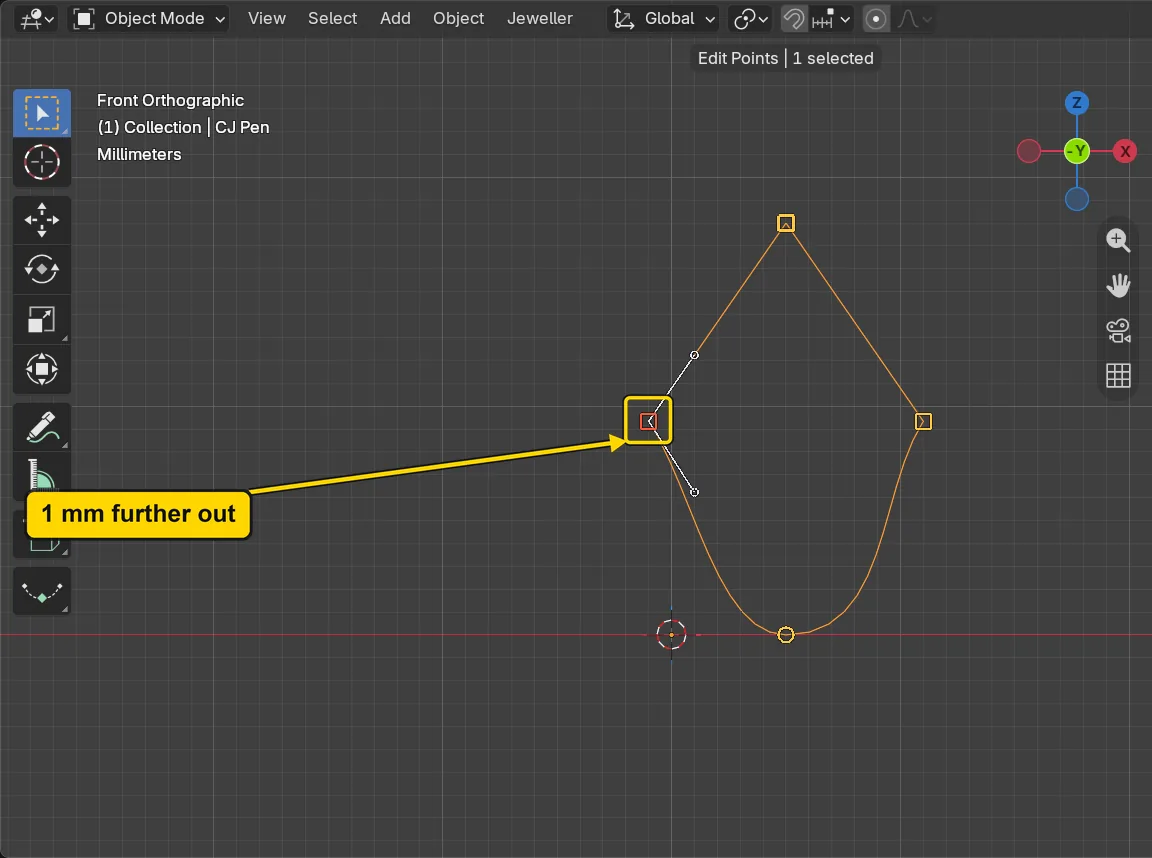
Step 6. Add a point with Ctrl+click
WhereThe 3D view: the straight side from the right corner up to the tip.
DoHold Ctrl and click in the middle of that side.
You should seeA new point on the side, red because it is selected, with its two handles. The line has not moved: a point added on a straight side stays on the line until you move it. The drop has one point more than before. You can hold it and type a place, as you did with the corners.
It worked whenA new point stands in the middle of the right side.
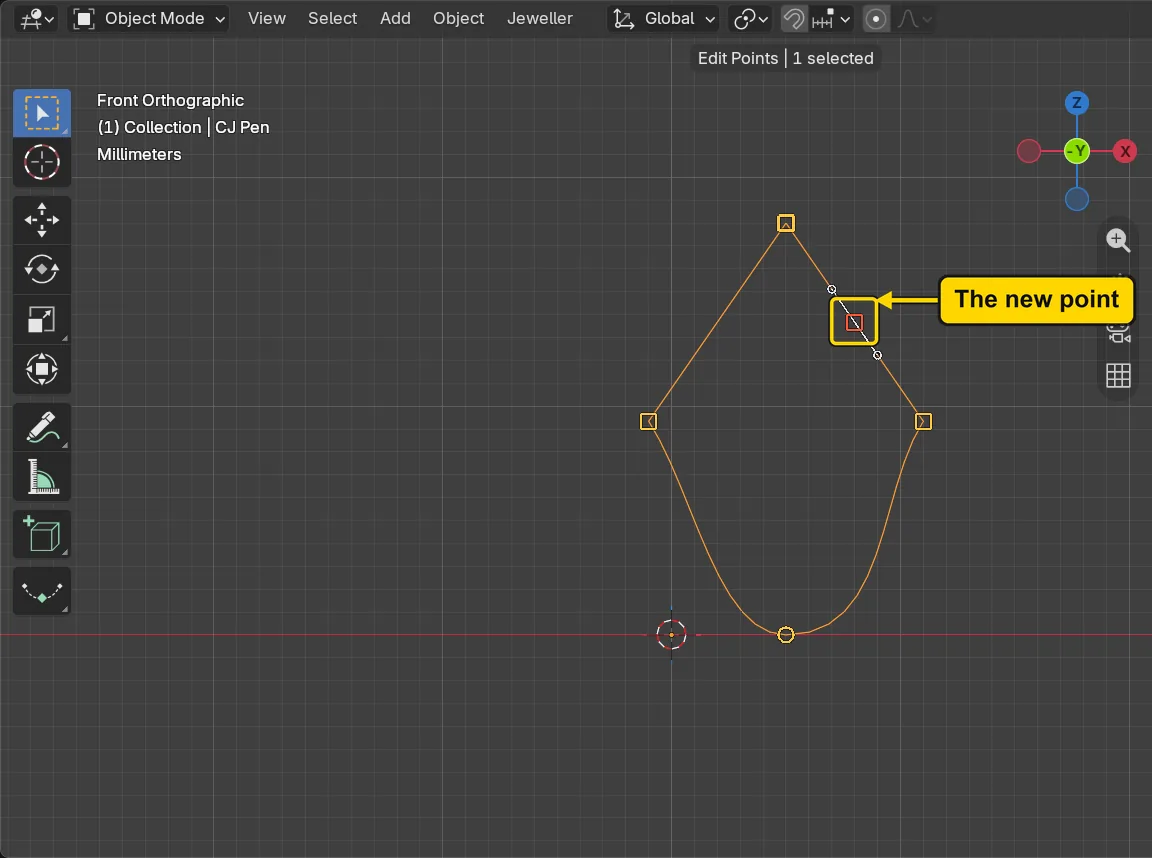
Step 7. Press Enter to finish, then read the size
WhereThe 3D view: leave the pointer over it. Then the sidebar: the Item tab, the strip of tabs at the right edge of the sidebar.
DoPress Enter to finish Edit Points, then click the Item tab and read Dimensions:. Then click the CAD/CAM tab to come back.
You should seeThe tool’s line has gone back to the header’s small buttons: nothing was held, so this Enter ends the tool. Dimensions: reads X 12.0 mm, Y 18.0 mm, Z 0 mm: wider by the 2 mm you typed, and as tall as before.
It worked whenDimensions: reads X 12.0 mm and Y 18.0 mm.
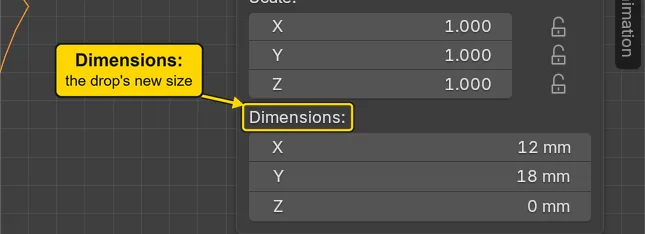
Step 8. Save your work
WhereThe 3D view: move the pointer over it.
DoPress Ctrl+S.
You should seeBlender writes your copy at once, with no question, because the file already has a name. An asterisk, *, in the title bar marks changes that are not saved, and it goes now. Save your work and get it back (P0-12) says more about saving.
It worked whenThe title bar begins my-drop-reshaped and carries no asterisk.
No picture: the only change is a message on the status bar, and it fades.
Check your result
| What to read | Where | What it should say |
|---|---|---|
| The drop’s size | The Item tab of the sidebar, under Dimensions: | X 12.0 mm, Y 18.0 mm, Z 0 mm |
| The drawing’s name | The words at the top left of the 3D view | They end with CJ Pen: it is the same drawing, reshaped |
| The tool has ended | The header, the row of words along the top of the 3D view | It shows its small buttons again, not a tool’s line that begins “Edit Points” |
Try it yourself
Open your copy again and press Edit Points. Hold the tip, type 0,2 (with the comma) and press Enter: the tip moves 2 mm up. Press Enter to finish. Dimensions: then reads Y 20.0 mm.
What you learned
- Edit Points works on the selected drawing: click a point to select it and show its handles, drag a handle to bend the line, and
Ctrl+click on a line to add a point. - Hold a point and type a place such as
1,0(with the comma): across, then up, from where the point started.Enterlets go there, exactly. Enterfinishes Edit Points. The drawing keeps its name and its plane.