
What you will make
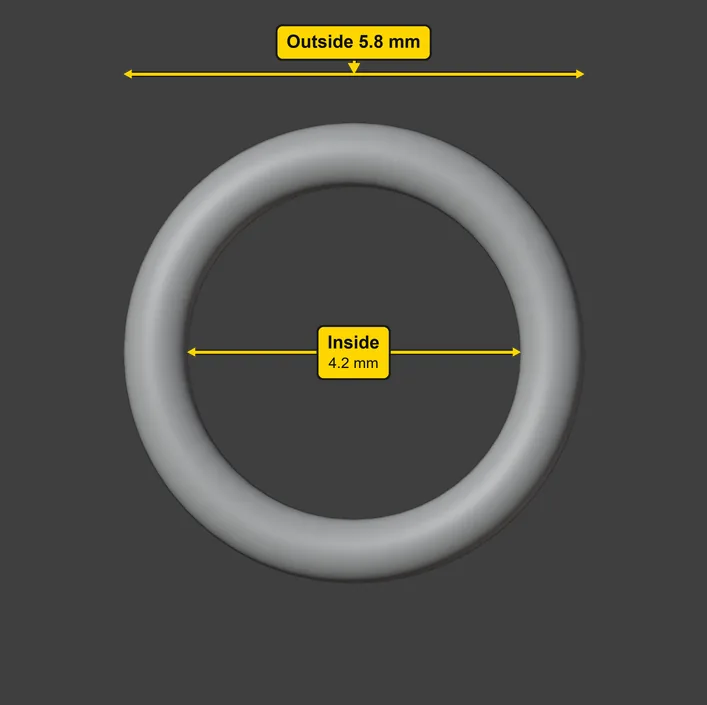
A jump ring and a strip of metal, each made from a drawing and each still joined to it. The ring is round wire 0.8 mm thick bent into a closed circle, with about 4.2 mm inside and 5.8 mm across the outside. A jump ring is modelled closed. At the bench it is opened sideways by twisting its two ends apart, never pulled into a C, then linked to a chain and closed again. The strip is flat wire, a band 1.5 mm wide that follows an open arc 30 mm across. Wire and strip are the first metal you make from a drawing: a jeweller reaches for wire for links and rings, and for strip for bands, clasp tongues and the frame of a setting. The Metal panel writes the ring’s weight as “Weight 0.12 g (18ct yellow)”. That is the weight of the finished ring: the metal to cast it is more, and your caster will give a figure.
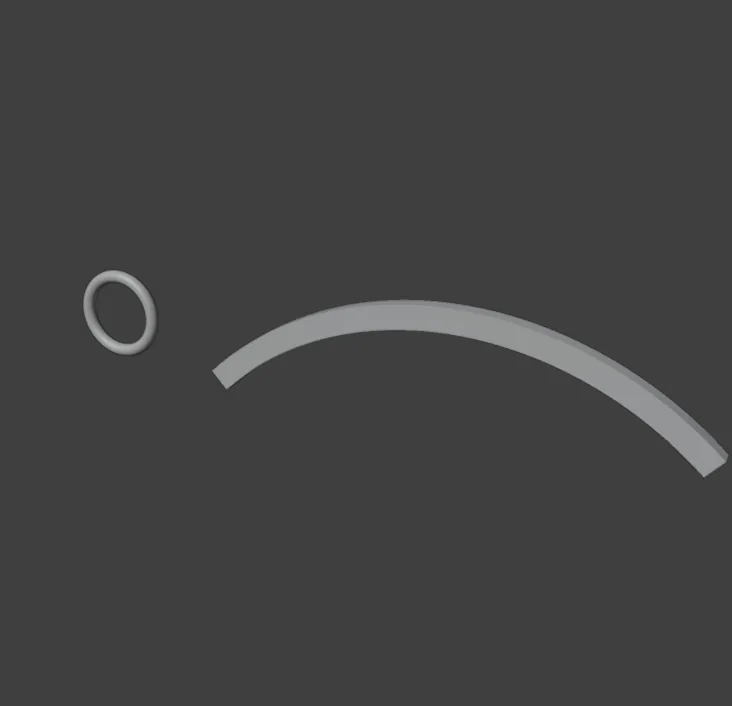
About 15 minutes.
Files
- p2-07-start.blend (99 KB): open this one to begin.
- p2-07-finished.blend (127 KB): the result, to compare with yours.
Both were made in Blender 5.2.0.
Before you start
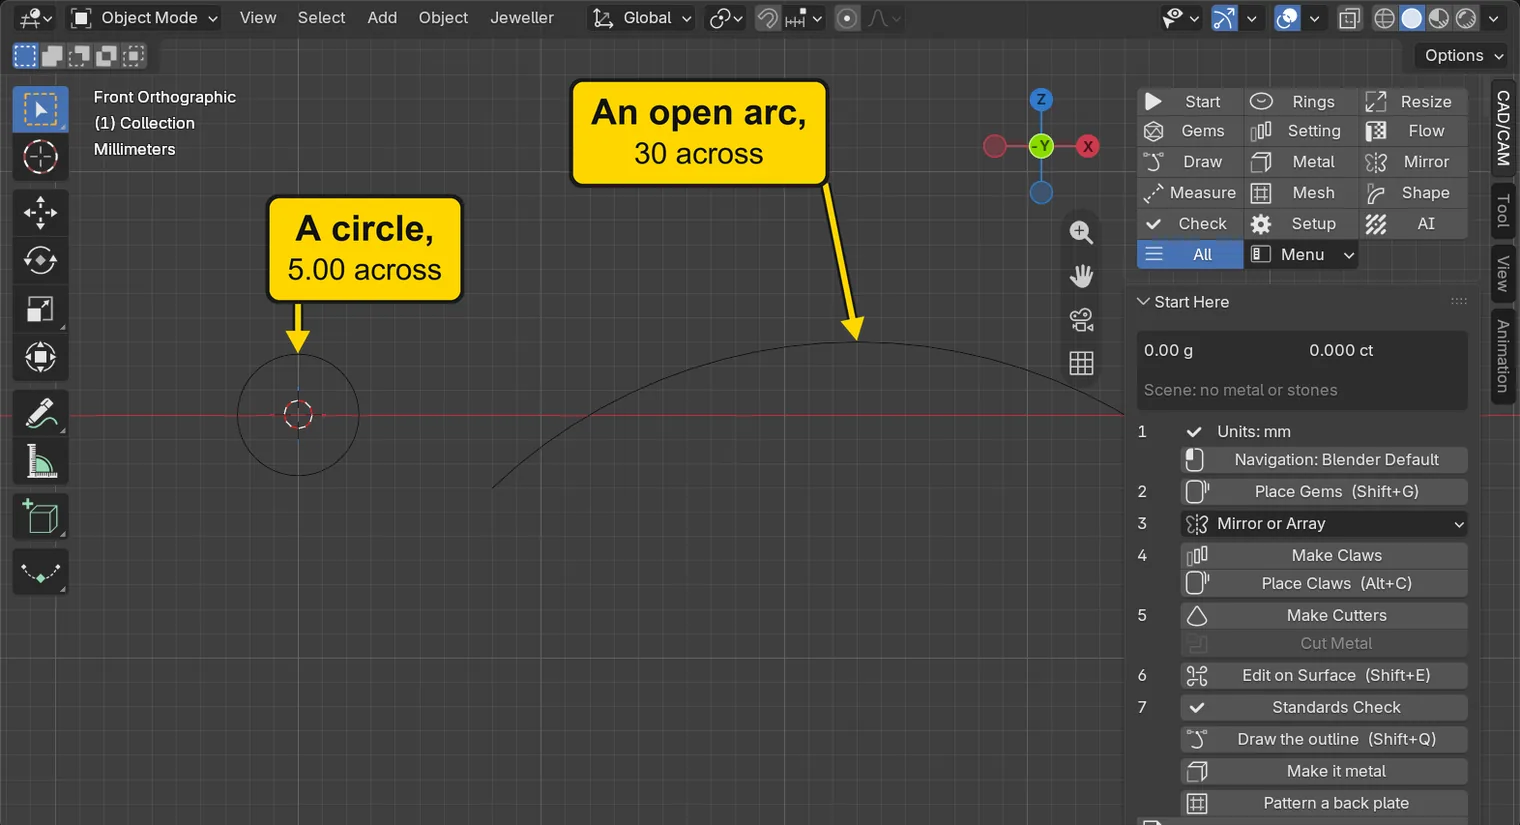
- You have done Part 0, and you know how to draw a circle and an open curve (Draw a rectangle and a circle to exact sizes, P2-01, and Draw any outline with a pen, P2-02). The start file holds both, in millimetres.
- The add-on is installed, and its CAD/CAM tab is in the sidebar.
Build it
Step 1. Open the start file and save your copy
WhereThe top bar: the row of words that begins File, Edit.
DoDownload p2-07-start.blend from Files above and open it. Then choose File > Save As and save it under the name below, in a folder of yours. Open an exercise file and keep the start file safe (P0-07) shows how.
Typemy-wire.blend
You should seeThe 3D view looks straight at the front: a small circle on the left and a long open arc to its right, two thin lines with no thickness.
It worked whenThe title bar, the strip above File and Edit, begins my-wire.
Step 2. Click the circle
WhereThe 3D view. Move the pointer over the small circle.
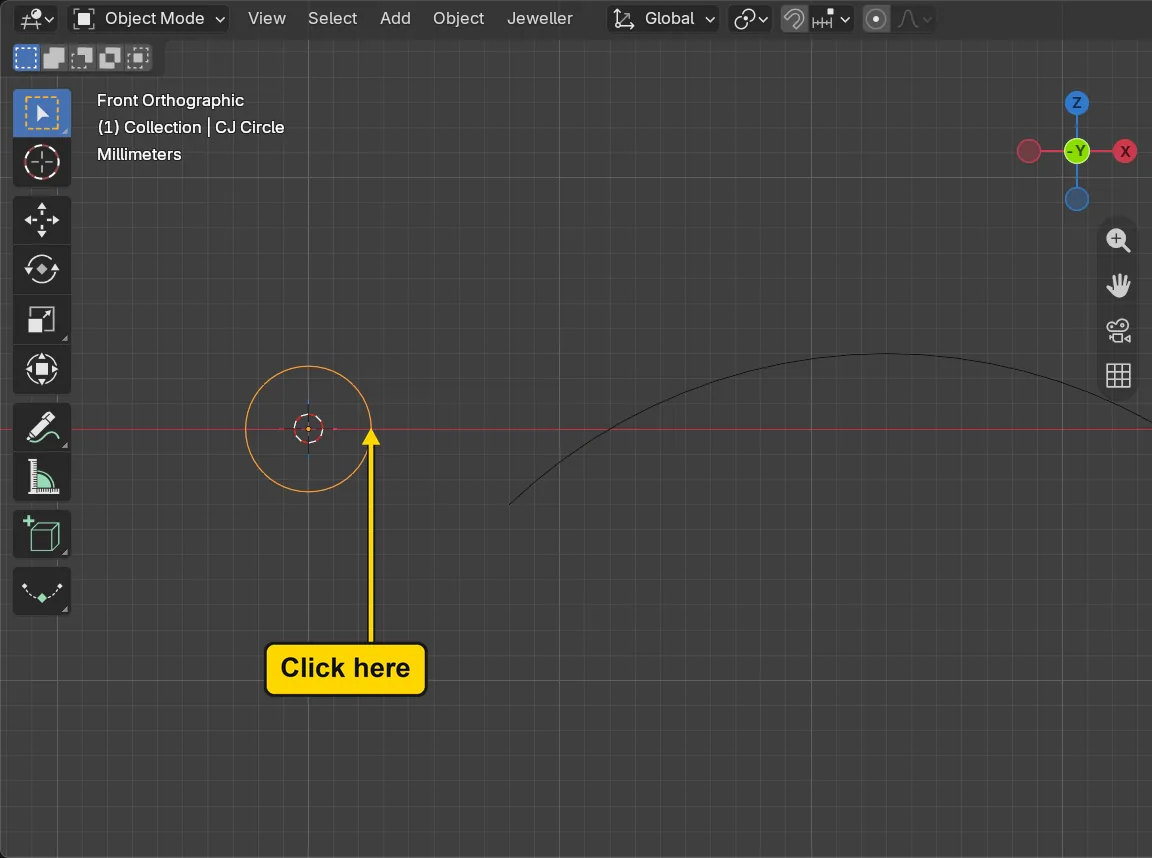
DoClick the circle’s line once, at the place marked.
You should seeThe circle turns orange. A drawing is a line with no thickness: it has no metal yet. The words at the top left of the 3D view name what is selected.
It worked whenThe circle is orange.
Step 3. Open the Metal section
WhereThe section bar: the small word buttons at the top of the CAD/CAM tab.
DoClick Metal.
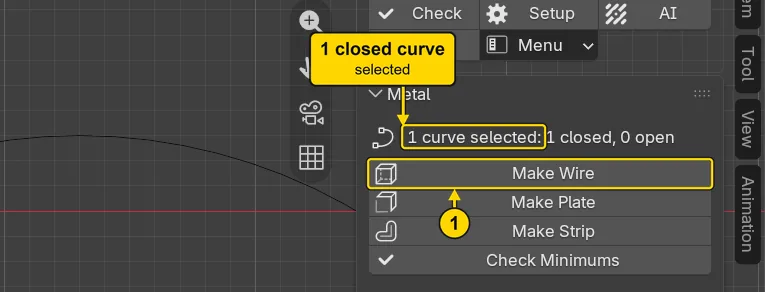
You should seeThe Metal panel. Its first line counts what you selected: “1 curve selected: 1 closed, 0 open”. A closed curve ends where it began, like a circle. Under it stand the buttons Make Wire, Make Plate and Make Strip, and Check Minimums. They are grey while no curve is selected.
It worked whenThe first line of the panel reads “1 curve selected: 1 closed, 0 open”.
Step 4. Press Make Wire
WhereThe Metal panel.
DoPress Make Wire.
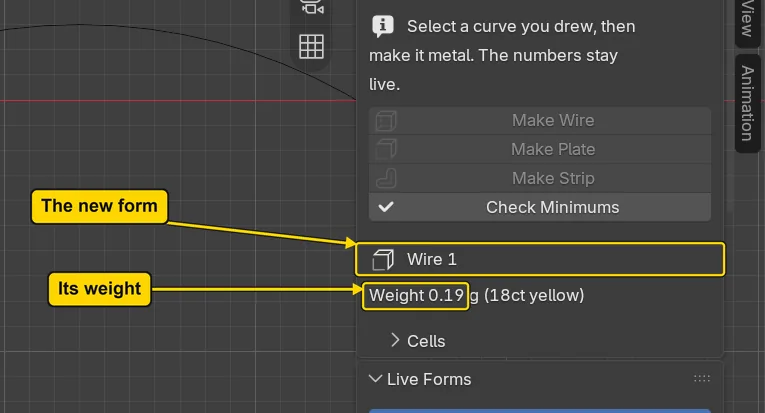
You should seeA ring of round wire along the circle, selected. The Metal panel now names it Wire 1 and writes its weight, and the Live Forms panel, further down the sidebar, lists it. A form that follows its drawing is live. This wire is 1 mm thick, the add-on’s starting number. The start file holds 18ct yellow, so another alloy gives another weight.
It worked whenThe Metal panel names Wire 1.
Step 5. Make the wire 0.80 thick
WhereThe Live Forms panel, This Form, the box Wire numbers. Scroll the sidebar down to it (turn the mouse wheel, or slide two fingers on the touchpad).
DoClick the middle of Diameter (mm) once, type the number, and press Enter.
Type0.80
You should seeThe field reads 0.80 and the weight line changes from 0.19 g to 0.12 g. A jump ring carries the pull of whatever hangs from it, so it is structural metal: a bench designs to 0.80 mm, and 0.60 is the least. The curve is the wire’s middle line, so the ring is about 5.8 mm across the outside and 4.2 mm inside.
It worked whenDiameter (mm) reads 0.8.
Step 6. Click the arc
WhereThe 3D view. Move the pointer over the long arc.
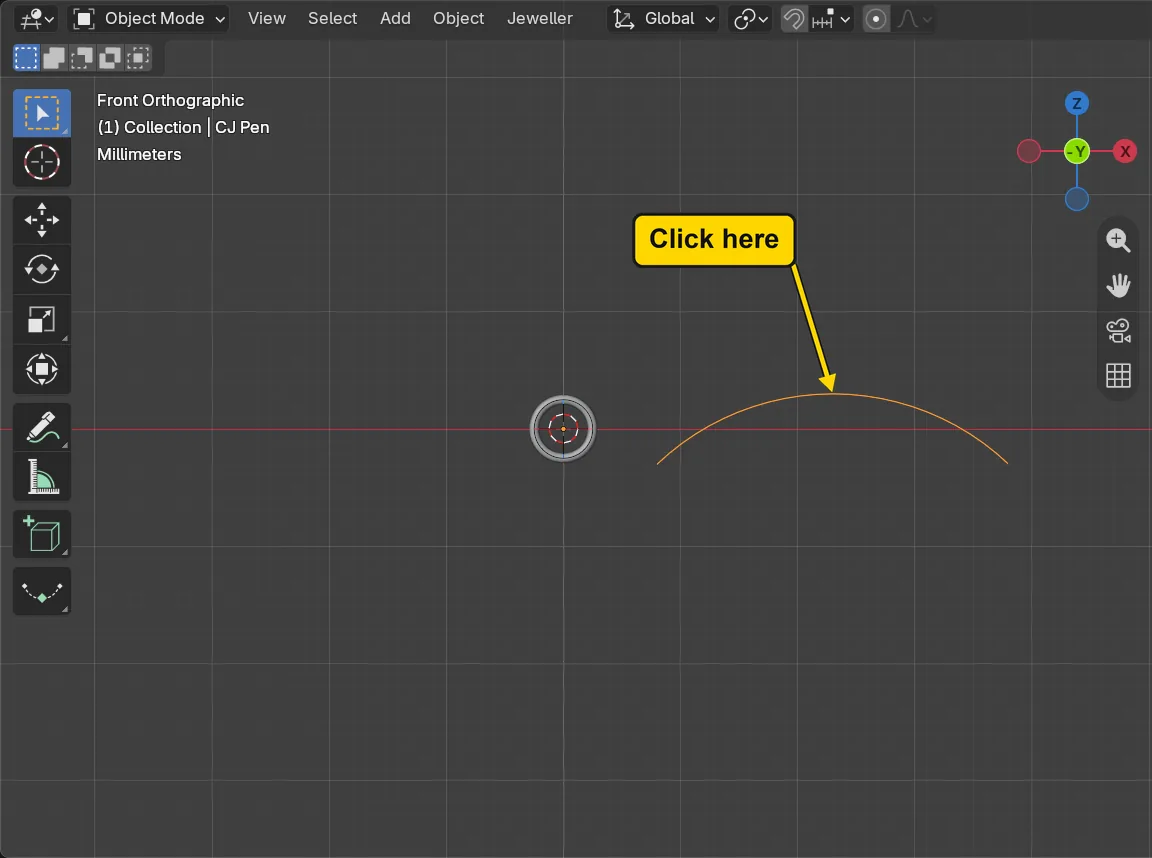
DoClick the arc’s line once, at the place marked.
You should seeThe arc turns orange, and the first line of the Metal panel reads “1 curve selected: 0 closed, 1 open”. An open curve has two ends, like this arc. The ring is no longer selected.
It worked whenThe arc is orange.
Step 7. Press Make Strip
WhereThe Metal panel.
DoPress Make Strip.
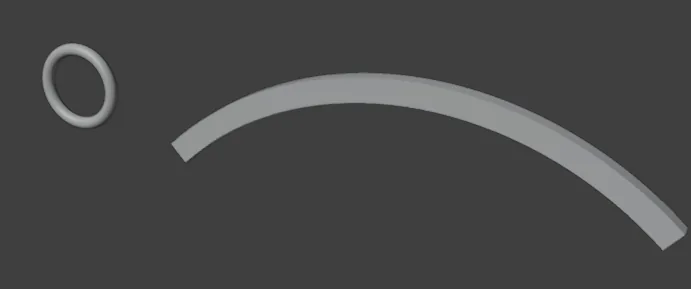
You should seeA flat band along the arc, 1.5 mm wide, named Strip 1 in the Metal panel and the list. Its width lies across the curve, in the drawing’s plane, the flat surface it was drawn on. Its thickness stands out from that plane, 1 mm, the add-on’s starting number, so the band is flat wire with a little depth.
It worked whenThe Metal panel names Strip 1.
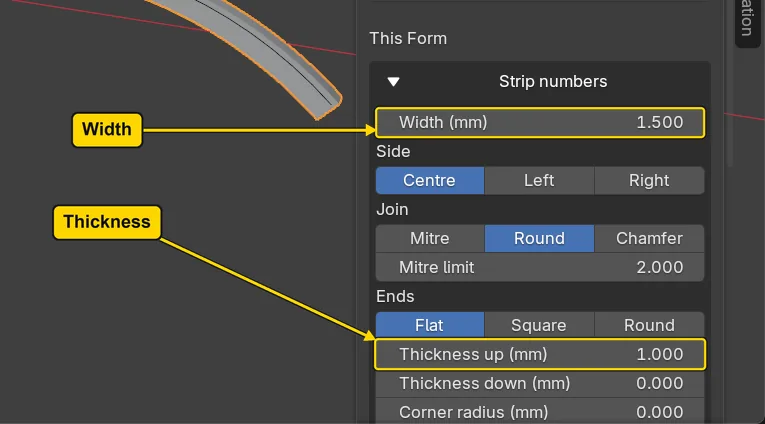
Step 8. Read the strip’s width
WhereThe Live Forms panel, This Form, the box Strip numbers. Scroll the sidebar down to it.
DoLook at Width (mm) and Thickness up (mm).
You should seeWidth (mm) reads 1.5 and Thickness up (mm) reads 1. Both are above the 0.80 a bench keeps for metal that carries load. Type another width and the strip follows at once, as the ring did.
It worked whenWidth (mm) reads 1.5.
Step 9. Make the strip real
WhereThe Live Forms panel, under This Form.
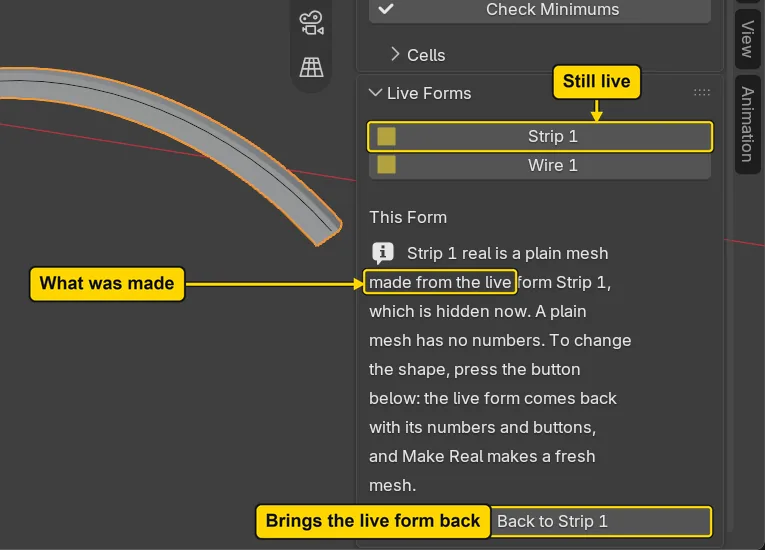
DoPress Make Real.
You should seeAn ordinary object called Strip 1 real now stands over the strip and is selected. It does not follow the curve any more. The live Strip 1 stays in the list of forms, and so does Wire 1, so a number can still change them and the strip can be made real again. The box This Form now says what was made, “Strip 1 real is a plain mesh made from the live form Strip 1” (a plain mesh is an ordinary object that no longer follows the drawing), and gives a button, Back to Strip 1, that brings the live form back with its numbers.
It worked whenThe words at the top left of the 3D view end Strip 1 real.
Step 10. Save your work
WhereThe 3D view: move the pointer over it.
DoPress Ctrl+S.
You should seeBlender writes your copy at once, with no question, because the file already has a name. An asterisk, *, in the title bar marks changes that are not saved, and it goes now. Save your work and get it back (P0-12) says more about saving.
It worked whenThe title bar begins my-wire and carries no asterisk.
No picture: the only change is a message on the status bar, and it fades.
Check your result
| What to read | Where | What it should say |
|---|---|---|
| The ring’s wire | The Live Forms panel, This Form, the box Wire numbers | Diameter (mm) reads 0.8 |
| The ring’s weight | The Metal panel, under Wire 1 | A line that begins “Weight 0.12 g” |
| The strip’s width | The Live Forms panel, This Form, the box Strip numbers | Width (mm) reads 1.5 |
| The list of forms | The Live Forms panel, the list at its top | It names Strip 1 and Wire 1 |
Try it yourself
Open your copy again. Click the ring, then in This Form type another Diameter (mm), for example 1.20, and watch the weight line in the Metal panel change with it. Then click the arc, press Make Strip once more, and read the Width (mm) of the second strip.
What you learned
- Make Wire turns a selected curve into round wire of the Diameter (mm) you type. The curve is the wire’s middle line, so a circle makes a ring that is wider than the circle by one diameter.
- Make Strip turns a curve into a flat band of the Width (mm) you type. Both stay live: they follow their curve until you make them real.
- A jump ring is round wire modelled closed and opened sideways at the bench. Metal that carries load is 0.80 mm or more.