
What you will do
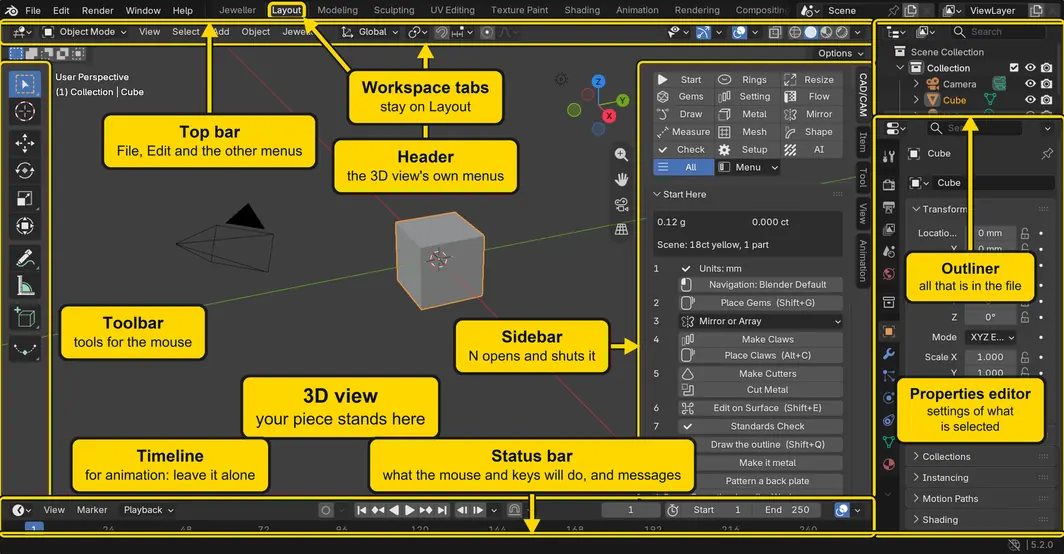
You will learn the name of every part of Blender’s window, on a new file that holds only Blender’s own cube, camera and light. Every later page uses these names, so this is the picture to come back to.
About 5 minutes.
Files
No file to download. You begin from Blender’s own File > New.
Before you start
- Blender and the add-on are installed: Install Blender and the add-on (P0-01).
- The pictures show Blender’s words at 1.5 times their usual size, so that they can be read on this page. Your words may be smaller and more rows may fit. To match the pictures: Edit > Preferences > Interface, Resolution Scale.
Build it
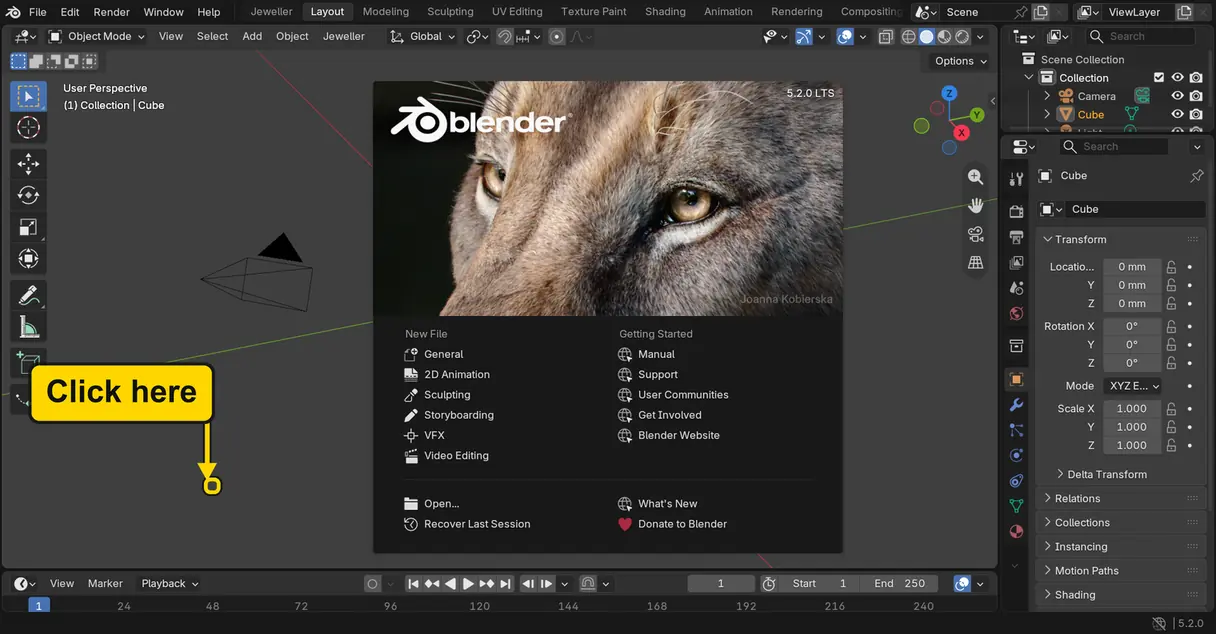
Step 1. Click the splash away
WhereThe box in the middle of the window, when Blender has just started. It is called the splash. No box? Blender is already open: go on to step 2.
DoClick once on the dark space outside the box, at the place marked on the picture.
You should seeThe box goes. The splash only greets you, and it never comes back until the next start.
It worked whenNo box stands in the middle of the window, and a grey cube stands in the large dark area.
If it goes wrongA second box opens, with the words Jeweller Workspace in its heading: it offers to show the add-on’s own tab in the top bar. Press Cancel. It comes once, a few seconds after the Start Here panel first shows at a start of Blender later than the one that installed the add-on. Every page of this workbook stays on the Layout tab.
Step 2. Start a new file
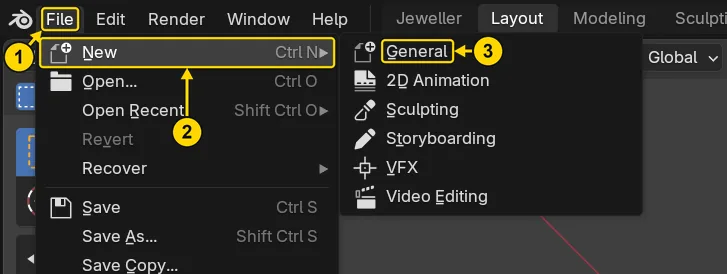
WhereThe top bar: the row of words that begins File.
DoClick File (marked 1), rest the pointer on New (marked 2), then click General (marked 3).
You should seeA new file: a grey cube in the middle of the 3D view, with a camera and a light round it.
It worked whenIn the Outliner, at the top right of the window, you can read Camera and Cube.
If it goes wrongA box asks whether to save your changes: press Don’t Save. You only have Blender’s own cube to lose.
Step 3. Open a menu in the header
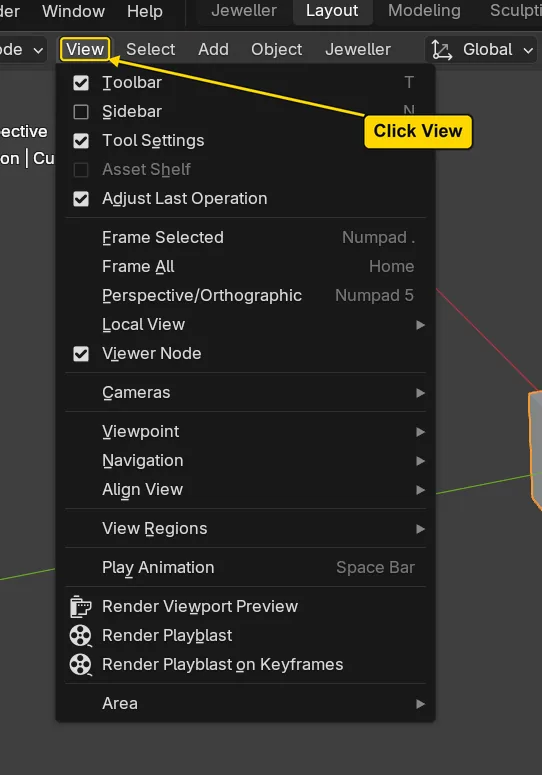
WhereThe 3D view is the large dark area in the middle of the window. The header is the row of words along its top: View, Select, Add, Object and Jeweller, the add-on’s own menu.
DoClick View. Then press Esc to shut the menu again.
You should seeA menu drops down under the word. The header belongs to the 3D view: its menus act on the 3D view.
It worked whenAfter Esc the menu has gone and nothing else has changed.
Step 4. Rest the pointer on the toolbar
WhereThe toolbar: the column of small icons down the left side of the 3D view.
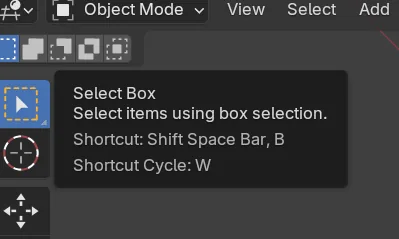
DoRest the pointer on the top icon, without clicking, until a small label opens. Then move the pointer away.
You should seeThe small label is a tooltip. It names the tool. Any button in Blender gives one when the pointer rests on it.
It worked whenThe tooltip names the tool, and it goes when the pointer moves away.
Step 5. Open the sidebar
WhereAnywhere over the 3D view: the pointer must stand over it.
DoPress N once.
You should seeThe sidebar opens at the right of the 3D view. The words turned on its right edge are its tabs, and CAD/CAM is the add-on’s tab. Leave it open.
It worked whenThe sidebar stands at the right of the 3D view, with CAD/CAM on its edge.
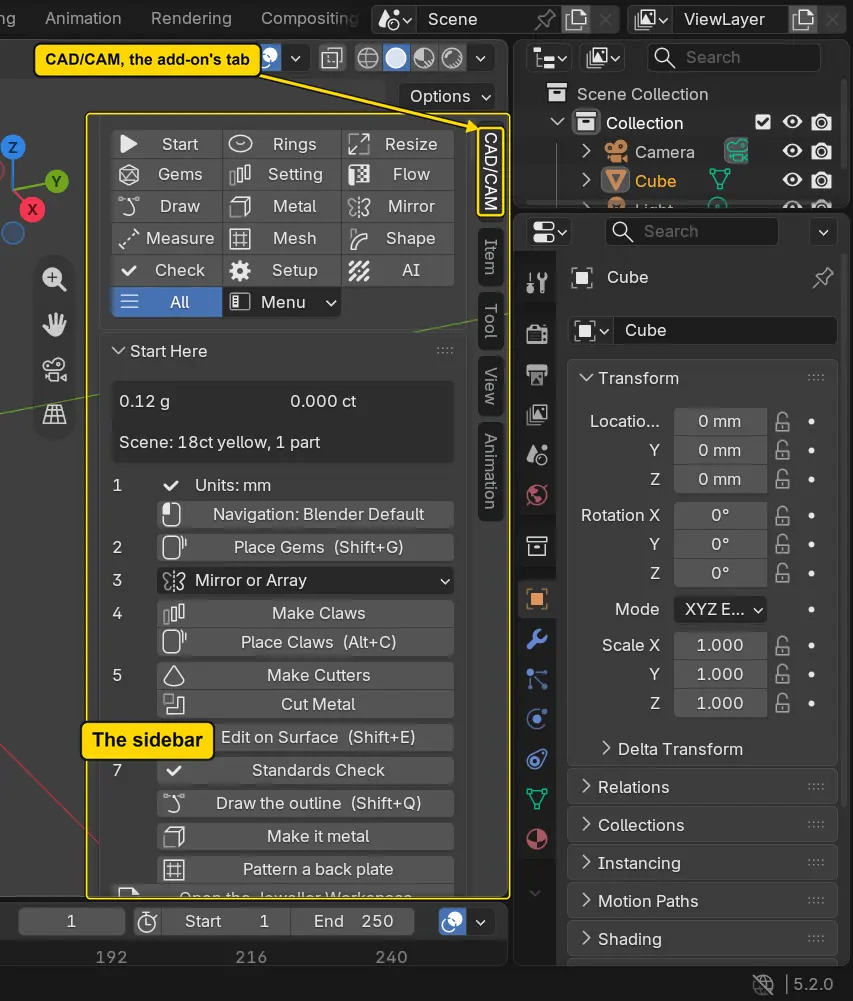
If it goes wrongNothing opens: the pointer was not over the 3D view. Move it there and press N again.
Step 6. Click a row in the Outliner
WhereThe Outliner: the list at the top right of the window. If you cannot see Camera, turn the mouse wheel, or slide two fingers on the touchpad, with the pointer over the list.
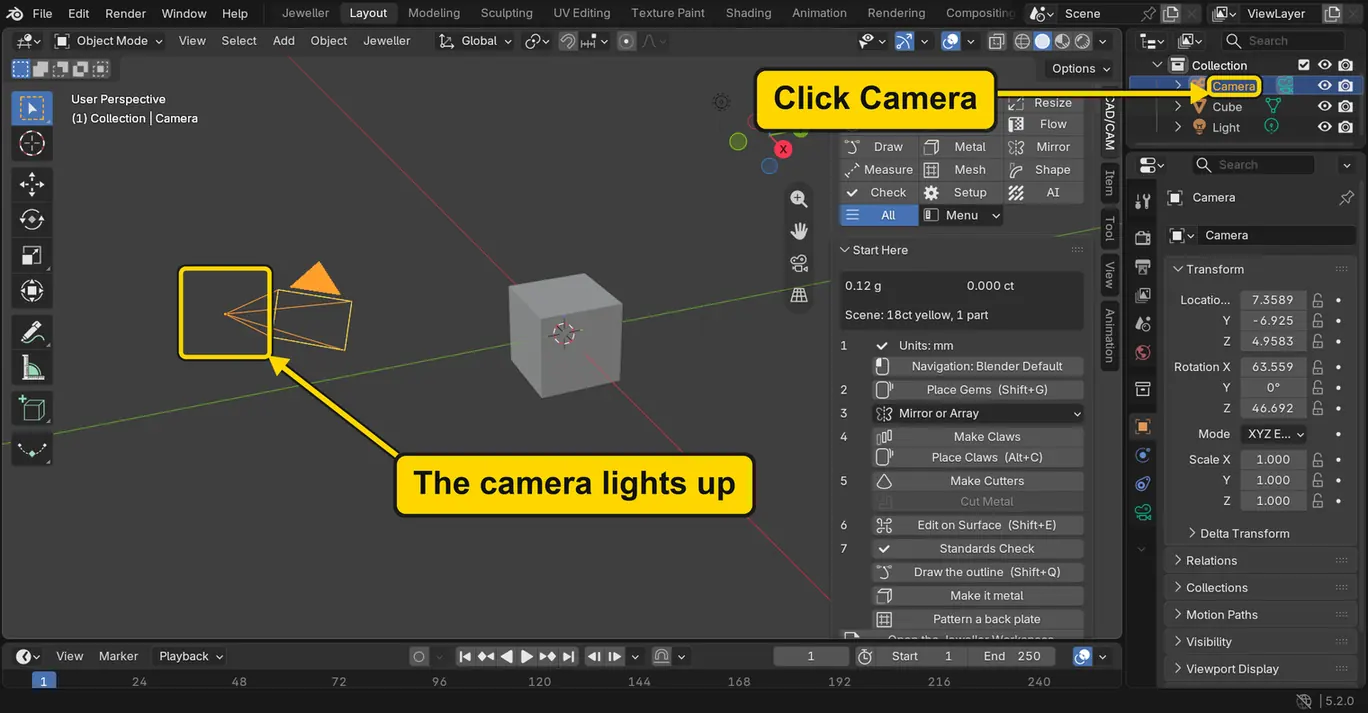
DoClick the word Camera.
You should seeThe row lights up, and in the 3D view the camera takes the orange outline from the cube. The list and the 3D view show the same things.
It worked whenThe words at the top left of the 3D view end in Camera.
Step 7. Click a tab in the Properties editor
WhereThe Properties editor: under the Outliner. Its tabs are the column of small icons down its left edge.
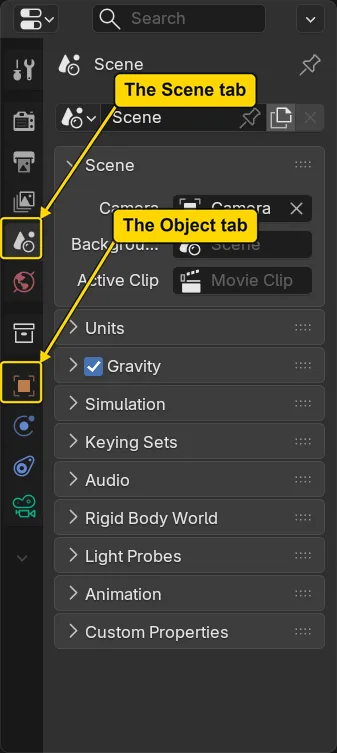
DoClick the icon marked on the picture, the Scene tab.
You should seeThe panels change: these are the settings of the whole scene. Each tab holds the settings of one thing, and the tabs change with what is selected. The Object tab, also marked, holds the selected thing’s Location, Rotation and Scale: later pages read it.
It worked whenThe Properties editor shows a panel headed Units.
Step 8. Read the status bar
WhereThe status bar: the line along the very bottom of the window. Put the pointer over the 3D view.
DoPress G, read the left end of the line, then press Esc.
You should seeWhile G is working the status bar lists the keys you can press, such as Confirm and Cancel. Esc cancels, so nothing has moved. At other times the line says what the mouse will do, and it carries Blender’s messages, which fade.
It worked whenAfter Esc, the camera stands in the 3D view just where it stood.

G is workingCheck your result
| What to read | Where | What it should say |
|---|---|---|
| The list of things | The Outliner, at the top right of the window | Camera, Cube, Light. If a row is out of sight, turn the mouse wheel (or slide two fingers on the touchpad) over the list |
| What is selected | The words at the top left of the 3D view | They end in Camera |
| The sidebar | The right of the 3D view | Open, with CAD/CAM on its edge |
Try it yourself
Click Modeling in the top bar: the whole window changes to suit that job, with the same cube in it. Click Layout to come back. These words are the workspace tabs, and every page of this workbook stays on Layout.
What you learned
- The large area is the 3D view: the header runs along its top, the toolbar down its left, and the sidebar opens at its right with
N. - The Outliner lists everything in the file. The Properties editor holds its settings.
- The status bar, along the very bottom, says what the mouse will do and carries Blender’s messages.