
What you will make
A soft cushion 24 mm across and 5 mm thick, hollowed to an even wall of 1.00 mm: 29.62 g of solid metal comes down to 16.35 g in 18ct yellow gold, with two drains on its back. A jeweller hollows a large piece so that it casts lighter and costs less, and looks just as full from the front.
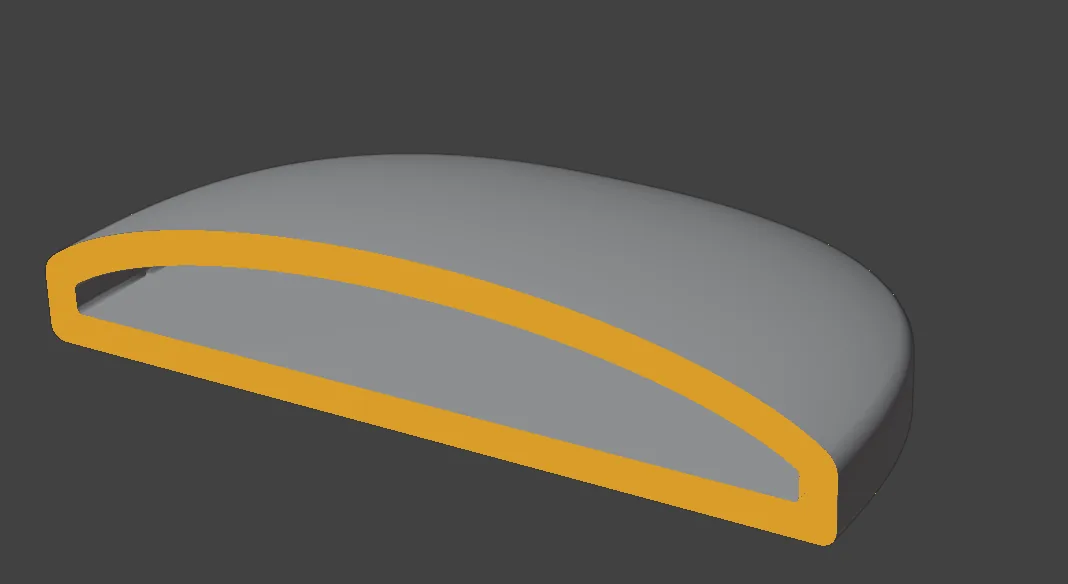
About 15 minutes.
Files
- p10-08-start.blend (674 KB): open this one to begin.
- p10-08-finished.blend (6.42 MB): the result, to compare with yours.
Both were made in Blender 5.2.0.
Before you start
- You have done Part 0, Blender from nothing.
- The add-on is installed, and its CAD/CAM tab is in the sidebar.
- Put the downloaded files in one folder you can find again. The start file is already in millimetres.
Build it
Step 1. Open the start file, and save your own copy
WhereBlender’s top menu bar, File > Open, then File > Save As.
DoOpen p10-08-start.blend. Then choose File > Save As and give it a name of your own, so that the start file stays clean.
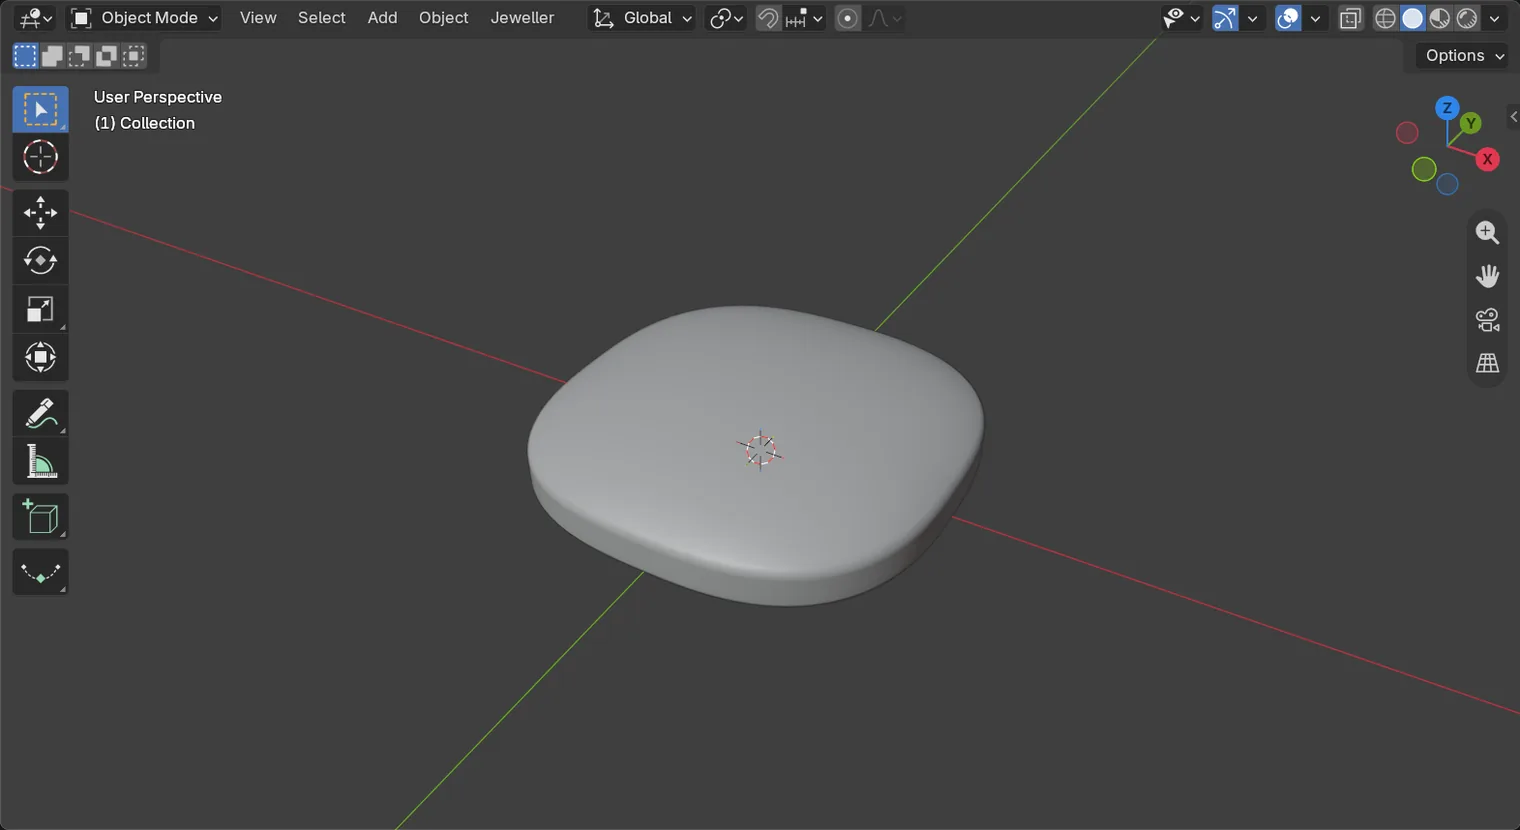
You should seeOne soft cushion, 24 mm across and 5 mm thick: a closed solid with a smooth crown, a straight rim about 1.50 mm high and a flat back. Nothing is selected.
It worked whenThe cushion is the only thing in the 3D view.
Step 2. Open the Shape section
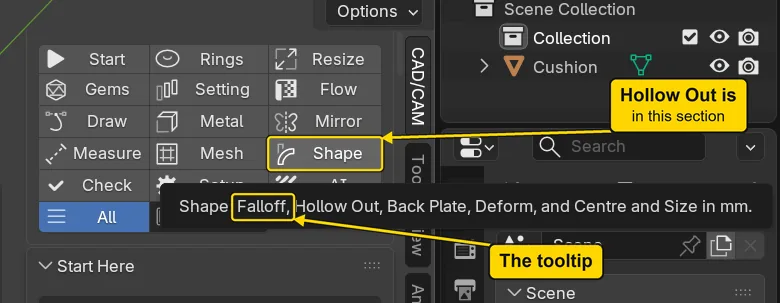
WhereThe sidebar at the right of the 3D view (press N with the pointer over the 3D view if it is shut), the CAD/CAM tab, the section bar at the top: the small word buttons.
DoRest the pointer on Shape for a second, without clicking. Then click Shape.
You should seeFirst a tooltip, a small label, that reads “Shape: Falloff, Hollow Out, Back Plate, Deform, and Centre and Size in mm.” It lists Hollow Out and Back Plate among the tools of this section. Then the section opens.
It worked whenThe Hollow Out panel stands at the top of the section.
Step 3. Read why the button is grey
WhereThe Hollow Out panel, the top row.
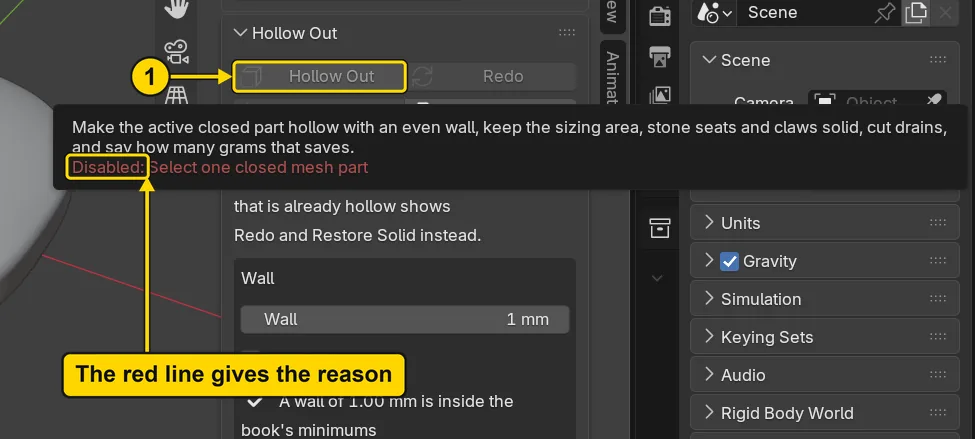
DoRest the pointer on the grey Hollow Out button, without clicking.
You should seeA tooltip whose last line, in red, reads “Disabled: Select one closed mesh part.”
It worked whenYou can read the red line while the pointer rests there.
Step 4. Select the cushion
WhereThe 3D view.
DoClick once on the cushion.
You should seeAn orange line round the cushion, and Hollow Out (marked 1) is no longer grey.
It worked whenThe words at the top left of the 3D view end in “Cushion”.
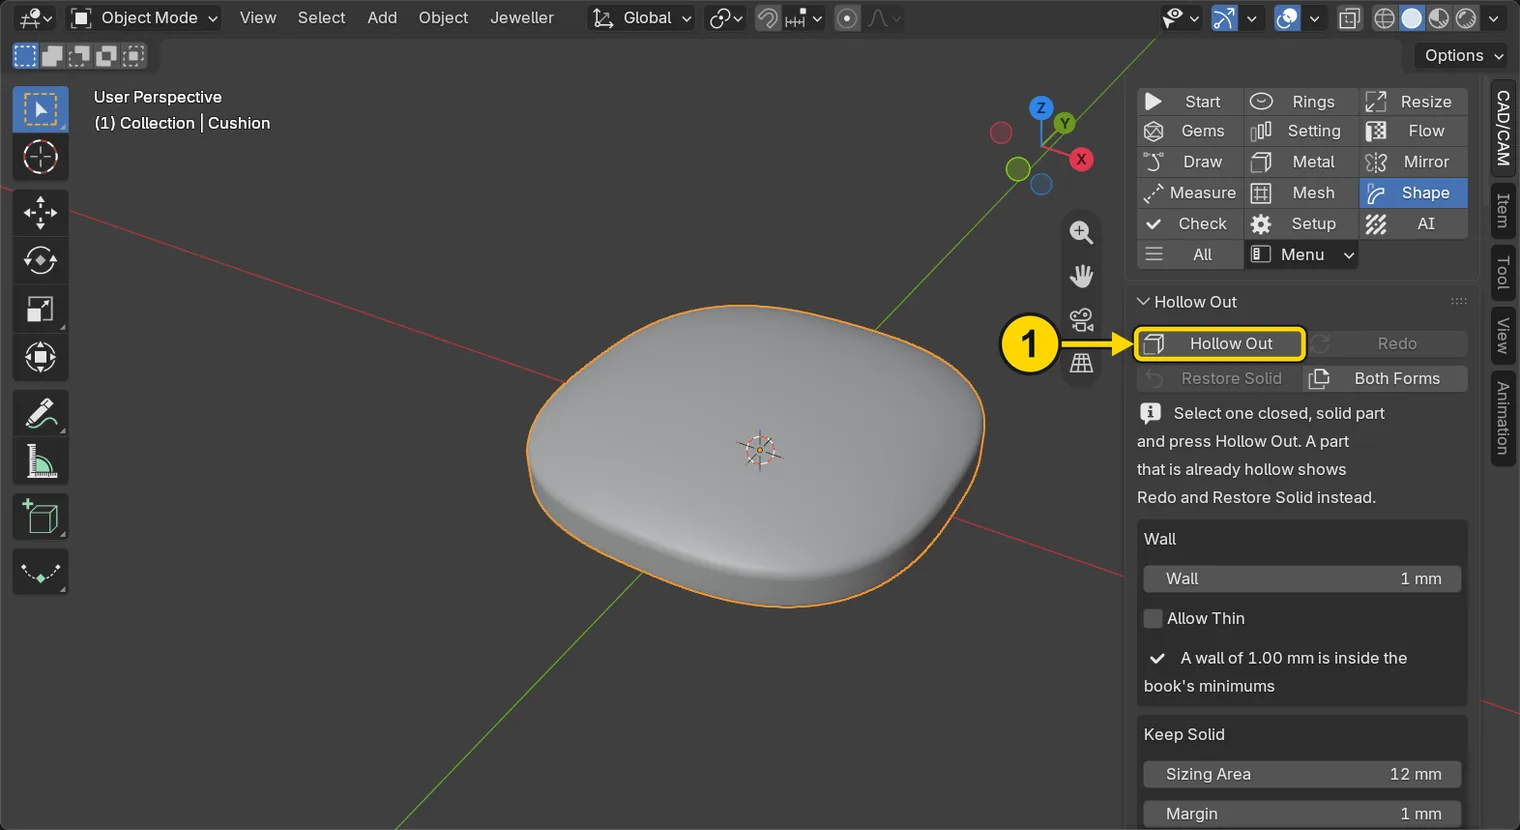
Step 5. Press Hollow Out
WhereThe Hollow Out panel, the top row.
DoPress Hollow Out. Blender stands still for about 18 s: wait for it.
You should seeThe cushion looks the same from here. Under the buttons there is now a sentence. Read three things only, marked in the picture: the grams, “Thinnest wall”, and “One body, closed”. The drains come in step 7.
It worked whenThe sentence ends “One body, closed”, then how long it took.
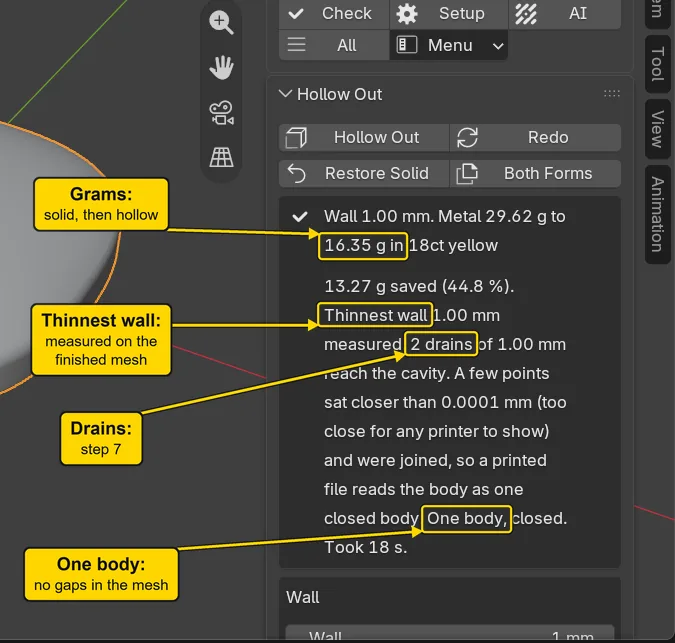
If it goes wrongThe status bar says “This part is already hollow”: you pressed twice, and the second press was refused. Nothing has changed. The status bar’s message fades, and the panel’s sentence stays.
Step 6. Look through the metal
WhereThe 3D view, with the pointer over it.
DoPress Alt+Z to see through the metal, look at the cushion, then press Alt+Z again.
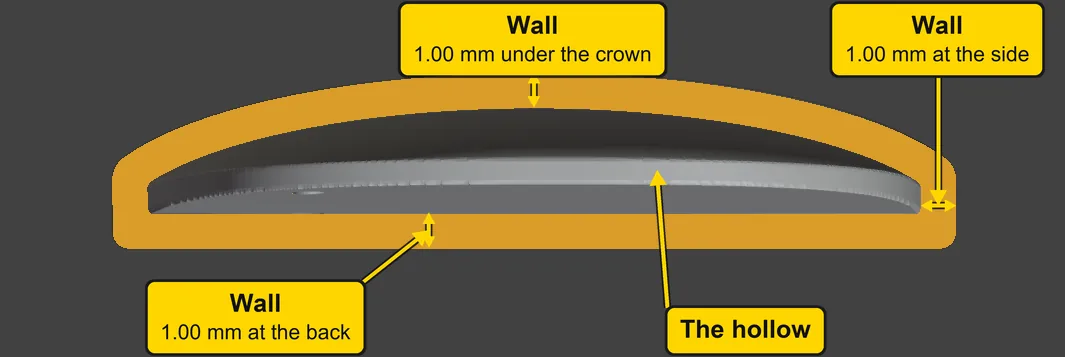
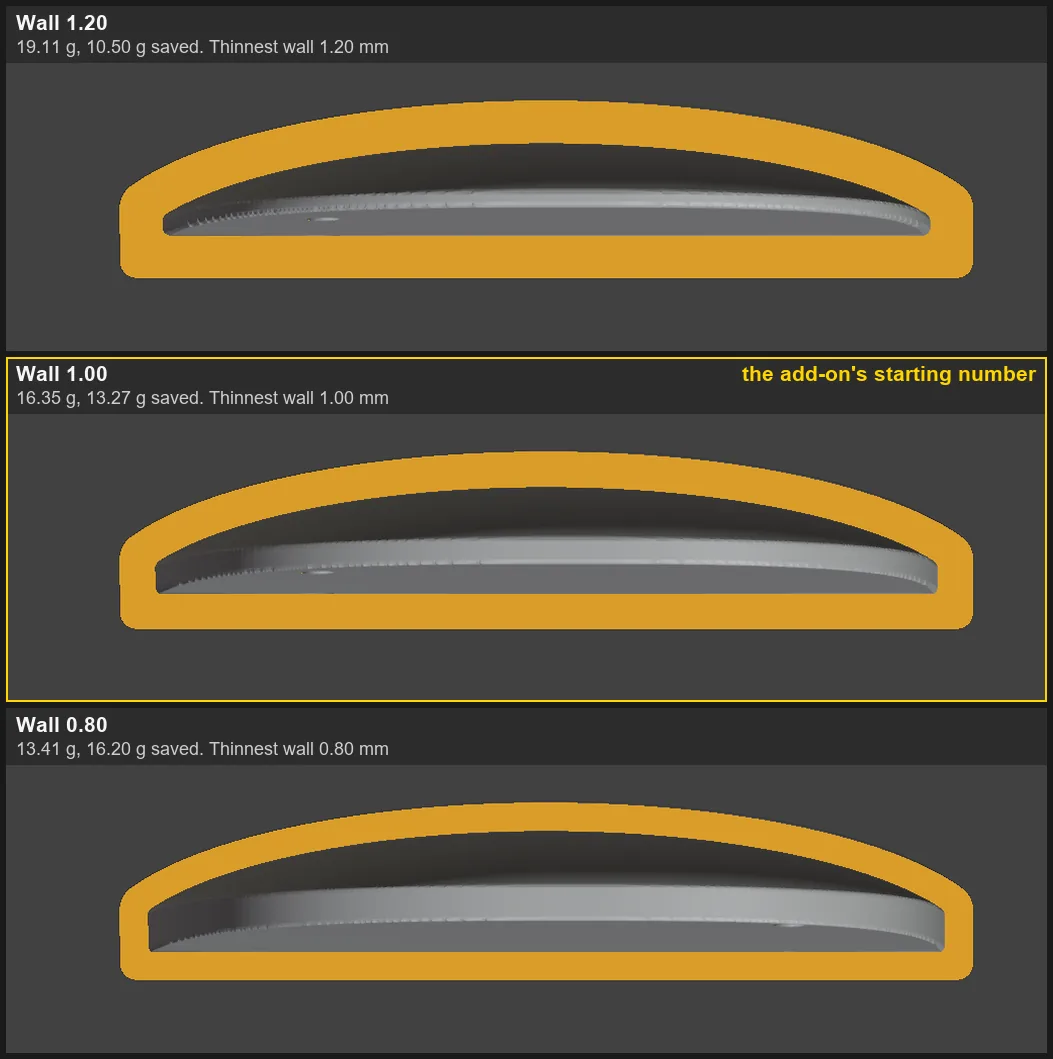
You should seeA second shape inside the first: that is the hollow. The picture shows the same thing as a true cut: the same thickness of metal under the crown, at the side wall and at the back. That metal is the wall.
It worked whenYour view is solid again, and the cushion looks as it did.
Step 7. Find the two drains
WhereThe 3D view.
DoClick the blue ball with no letter on the small coloured axes at the top right of the 3D view: you look at the cushion’s flat back from underneath.
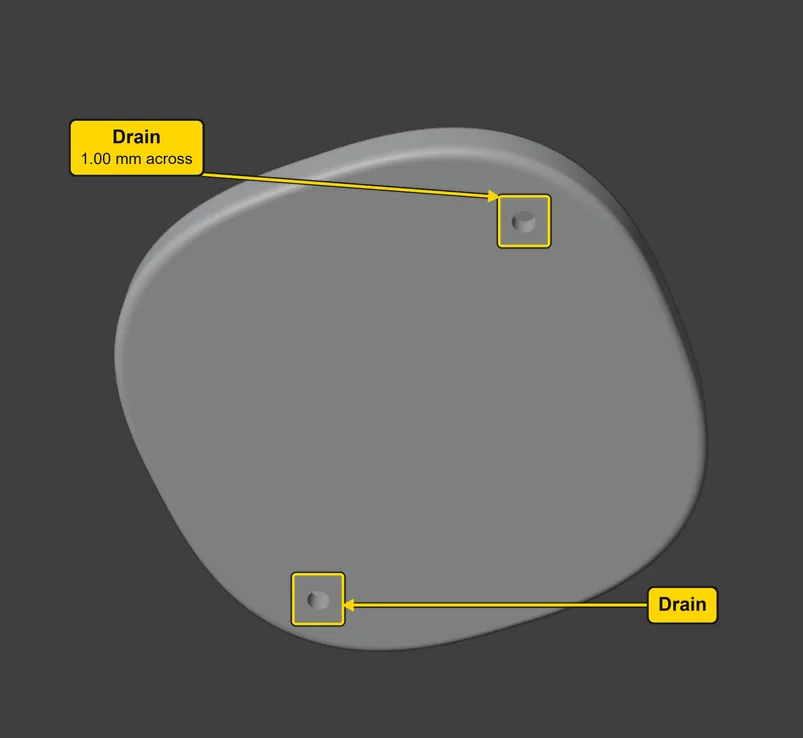
You should seeTwo small round holes, far apart, made for you when you pressed. A drain is a small hole from the hollow to the outside, here on the back, where it does not show. With no hole the investment, the material of the casting mould, cannot get in to fill the hollow, so the piece casts solid and you save nothing. A printed model must also let its liquid resin out, and after the cast the investment washes out through the same holes.
It worked whenYou can see both holes.
Step 8. Change the wall and press Redo
WhereThe Hollow Out panel, the box headed Wall under the sentence.
DoClick the middle of the number in Wall (marked 1) once, type the new one, press Enter. Then press Redo, the button above the sentence, and wait.
Type0.80
You should seeWhile you type, the sentence does not change. The picture shows the panel scrolled down to the Wall box. After Redo, about 26 s later, the sentence begins “Wall 0.80 mm. Metal 29.62 g to 13.41 g.”
It worked whenThe sentence says “Wall 0.80 mm” and “Thinnest wall 0.80 mm” measured.
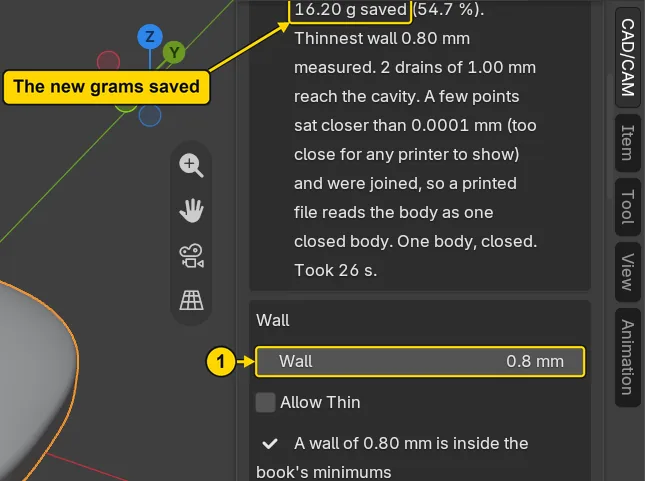
If it goes wrongThe sentence still says the old wall: a new number alone changes nothing. Press Redo.
Step 9. Compare the walls, and come back to 1.00
WhereThe same Wall box, and Redo.
DoFor each row of the table, type the number, press Enter, press Redo, and wait for the new sentence.
You should seeThe outside never moves. Only the hollow grows or shrinks, and the grams follow. The two drains may land on other corners of the back at each Redo. You have seen 0.80: the pictures show all three.
| Type in Wall | Then | The sentence reads |
|---|---|---|
1.20 | press Redo, and wait | “Metal 29.62 g to 19.11 g” |
1.00 | press Redo, and wait | “Metal 29.62 g to 16.35 g” |
It worked whenWall reads “1 mm”, and the sentence reads “Metal 29.62 g to 16.35 g” again.
Step 10. Read what Back Plate says
WhereThe sidebar: scroll it down with the mouse wheel to the panel under Hollow Out, Back Plate.
DoRead the words under its buttons.
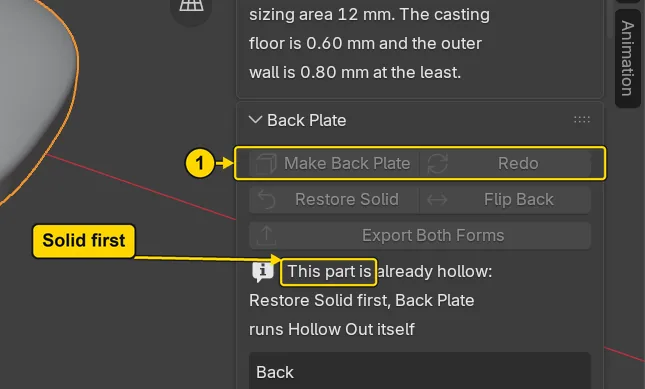
You should seeMake Back Plate (marked 1) is grey, and the panel says why: “This part is already hollow: Restore Solid first, Back Plate runs Hollow Out itself.” A back plate is a flat plate that closes the back of a hollow piece. Fit a back plate to a solid (P10-09) makes one, and it starts from the solid.
It worked whenYou can read “This part is already hollow” on the panel.
Step 11. Put the solid back
WhereThe Hollow Out panel, the second row of buttons. Scroll the sidebar back up.
DoPress Restore Solid.
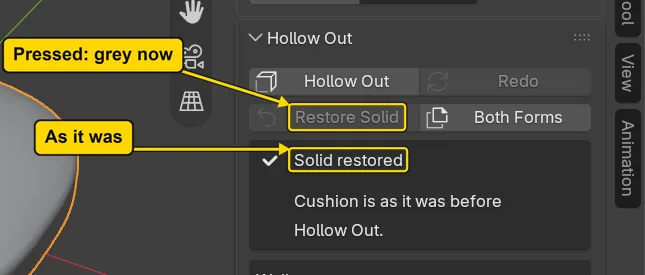
You should seeThe sentence is replaced by: “Solid restored: Cushion is as it was before Hollow Out.” The very same mesh is back, and Make Back Plate is no longer grey. Restore Solid is grey now: it has done its work.
It worked whenThe panel reads “Solid restored”.
Step 12. Change your mind with Ctrl+Z
WhereThe 3D view, with the pointer over it.
DoPress Ctrl+Z once.
You should seeThe piece is hollow again, with its sentence, and Restore Solid is ready for the next time. You keep this hollow copy for your file.
It worked whenThe sentence begins “Wall 1.00 mm” again.
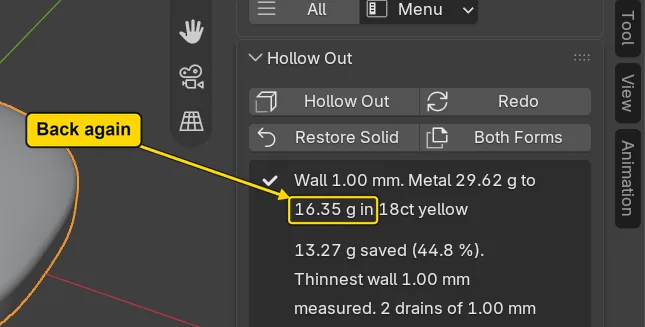
Step 13. Save your copy with Ctrl+S
WhereThe 3D view, with the pointer over it.
DoPress Ctrl+S. It saves the copy you named at step 1.
No picture: nothing on the screen changes.
Check your result
| What to read | Where | What it should say |
|---|---|---|
| The grams | Shape section, Hollow Out panel, the sentence under the buttons | “Wall 1.00 mm. Metal 29.62 g to 16.35 g in 18ct yellow”: 13.27 g saved (44.8 %) |
| The thinnest wall | The same sentence | “Thinnest wall 1.00 mm” measured |
| The drains | The same sentence. It is the tool’s own result, not a casting’s word | “2 drains of 1.00 mm reach the cavity. One body, closed” |
| The outside | The Item tab on the sidebar’s edge, Dimensions, with the cushion selected | X 24 mm, Y 24 mm, Z 5 mm: hollowing never changes the outside |
Try it yourself
Carry on from your hollow piece, as you left it: the 3D cursor stands at the middle of its back. Scroll to the Drains box, lower in the Hollow Out panel, press Add Drain at Cursor, then Redo. The sentence now reads “1 drain of 1.00 mm reaches the cavity”: a drain you put by hand takes the place of the two the add-on chose, though Drains still reads 2.
What you learned
- Hollow Out is in the Shape section. A grey button may give its reason only in its tooltip: read the panel’s words first, then the tooltip’s red line.
- The sentence gives the grams, the thinnest wall and the drains. Redo makes the hollow again with a new Wall. A new number alone changes nothing.
- A back plate does its own hollowing, so it wants the solid: Restore Solid first.