
What you will make
A smooth dome 24 mm across and 5 mm high, its wall 1.00 mm thick on a short upright foot, its crown pierced with 55 hexagon holes of one true size, on the outside and on the inside. 1.88 g of metal comes out of it. A dome is the first shape here that will not lie flat, so it is where you learn what true size means.
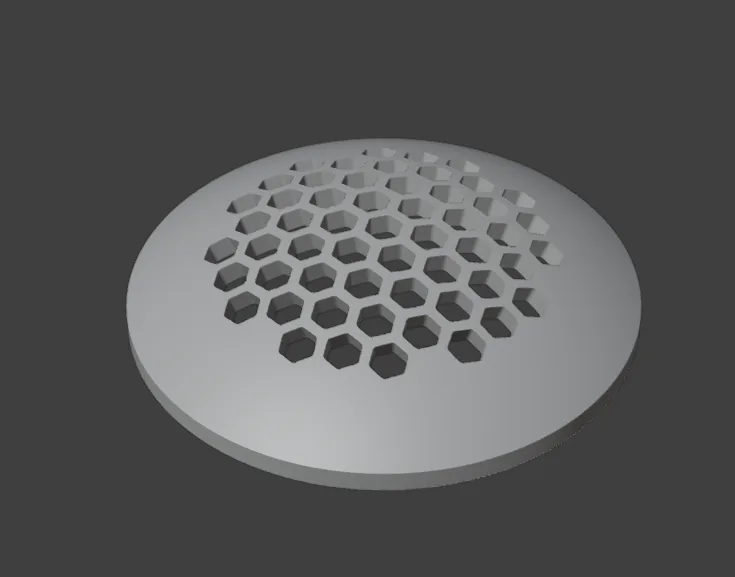
About 20 minutes.
Files
- p10-05-start.blend (270 KB): open this one to begin.
- p10-05-finished.blend (682 KB): the result, to compare with yours.
Both were made in Blender 5.2.0.
Before you start
- You have done Part 0, Blender from nothing.
- You have made a pattern with Make Pattern and made it real with Make Real, in Keep a stone’s place clear (P10-03).
- The add-on is installed, and its CAD/CAM tab is in the sidebar. Put the downloaded files in one folder you can find again.
- Steps marked Meet the refusal break something on purpose: the refusal is safe and the piece is not harmed.
Build it
Step 1. Open the start file, and save your own copy
WhereBlender’s top menu bar, File > Open, then File > Save As.
DoOpen p10-05-start.blend. Then choose File > Save As and give it a name of your own, so that the start file stays clean.
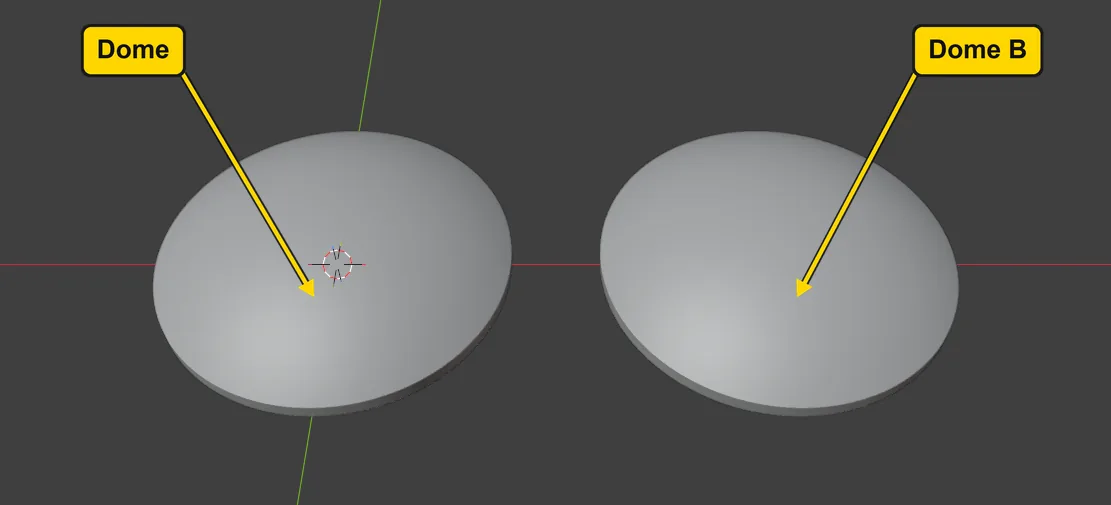
You should seeTwo smooth domes side by side, each 24 mm across and 5 mm high: a thin shell with a wall of 1.00 mm, hollow underneath, on a short upright foot 1.00 mm high. You use Dome first and Dome B near the end.
It worked whenThe 3D view shows the two domes and nothing else.
Step 2. Find the Pattern Builder panel
WhereThe sidebar at the right of the 3D view (press N with the pointer over the 3D view if it is shut), the CAD/CAM tab.
DoClick Flow in the section bar, the small word buttons. Then click the words Flow on Surface once to fold that panel: it shuts up to its title.
You should seeThe Pattern Builder panel, with Make Pattern in it (marked 1).
It worked whenYou can read Make Pattern without scrolling.
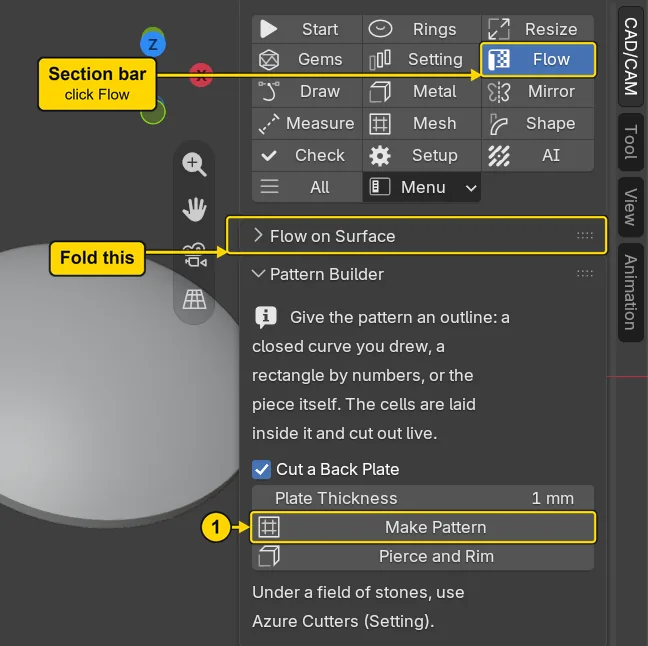
If it goes wrongYou cannot see Pattern Builder: the panel above it is open and takes the room. Click the words Flow on Surface once.
Step 3. Select Dome
WhereThe 3D view.
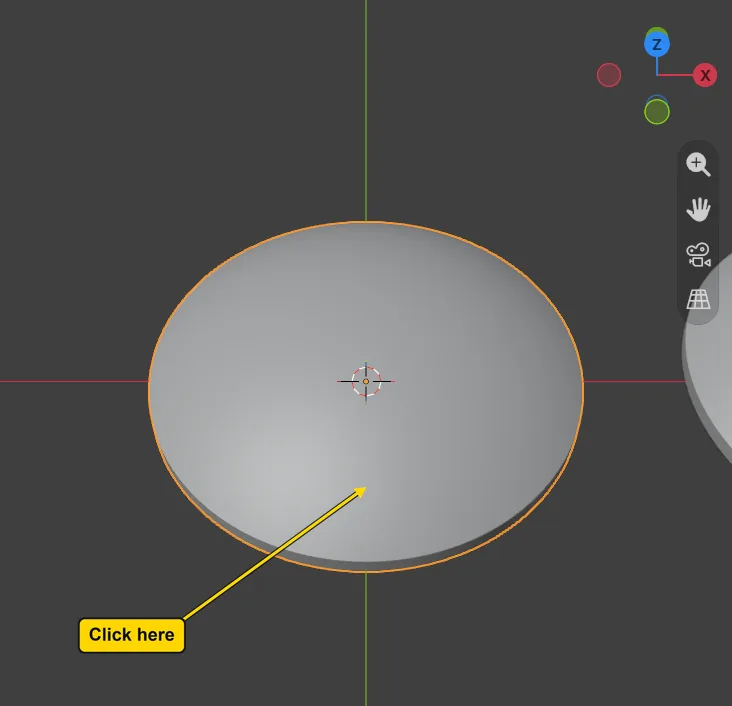
DoClick once on the left-hand dome, on its near side.
You should seeAn orange outline round that dome.
It worked whenThe words at the top left of the 3D view end in “Dome”.
Step 4. Go into Edit Mode
WhereThe 3D view, with the pointer over it.
DoPress Tab.
You should seeEdit Mode is where you work on one piece’s own faces, edges and points. The faces of the dome’s crown are already picked for you, and show orange. The lower part of the dome, near its foot, is not picked. The blue-green line round the foot is only how Blender draws a sharp edge.
It worked whenThe menu at the top left of the 3D view reads “Edit Mode”.
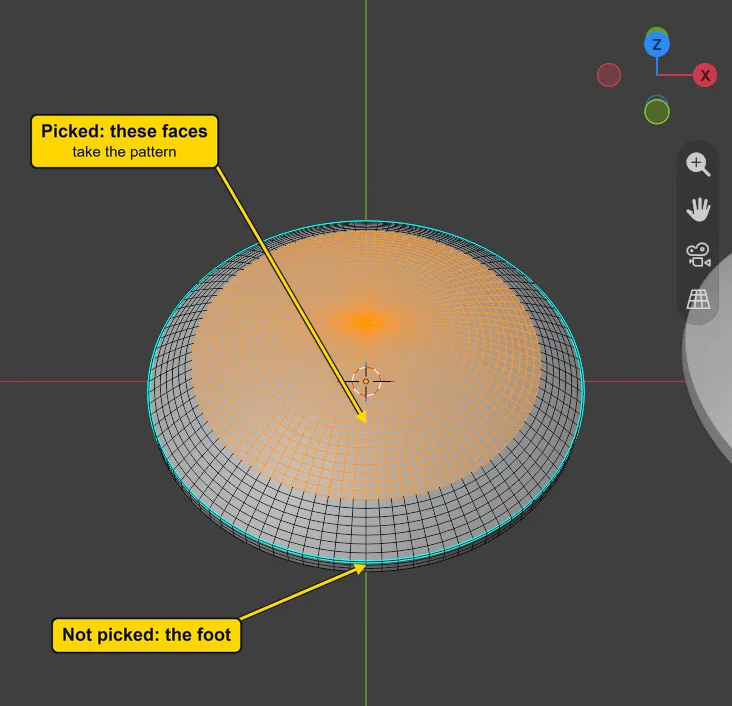
Step 5. Press Make Pattern
WhereThe Pattern Builder panel. You are still in Edit Mode.
DoPress Make Pattern.
You should seeHexagon posts on the crown, solid until Make Real cuts them. The guide lies in front of the dome: a flat round copy of the picked faces, with the same cells on it. It is no part of the piece. The blue marks and the word “Done” are handles: leave them alone for now. You may click Done when they get in your way. It may take a few seconds.
It worked whenThe panel’s line with the tick, which counts the cells, begins “55 cells”. The status bar says so too, but its message fades: the panel keeps the same figure.
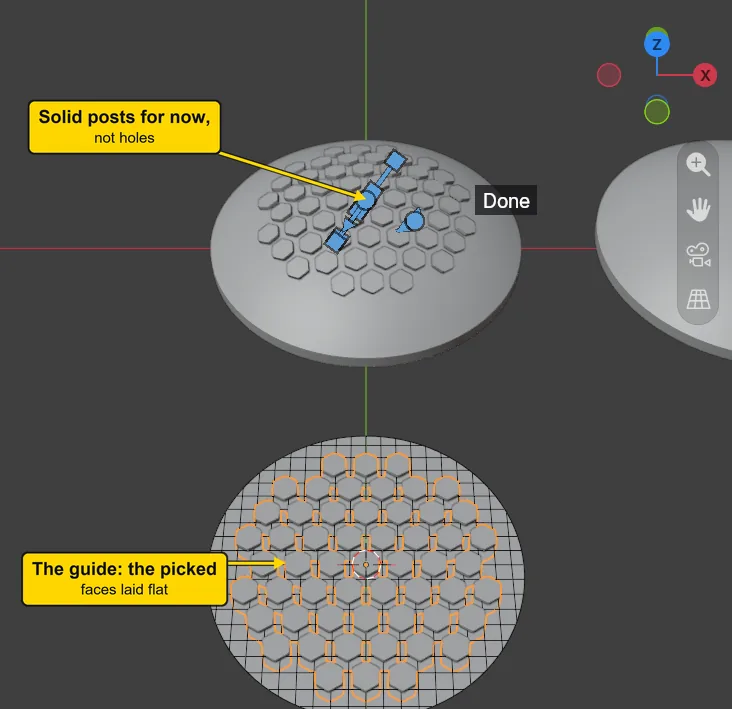
Step 6. Read the guide’s percentage
WhereThe sidebar, the words Flow on Surface.
DoClick Flow on Surface to open that panel.
You should seeA little below the Make Guide button, a line that reads “Within 2.0 %, worst -3.1 %”. A dome will not lie flat, any more than orange peel will, so the guide cannot be true everywhere.
It worked whenYou can read that line on the panel.
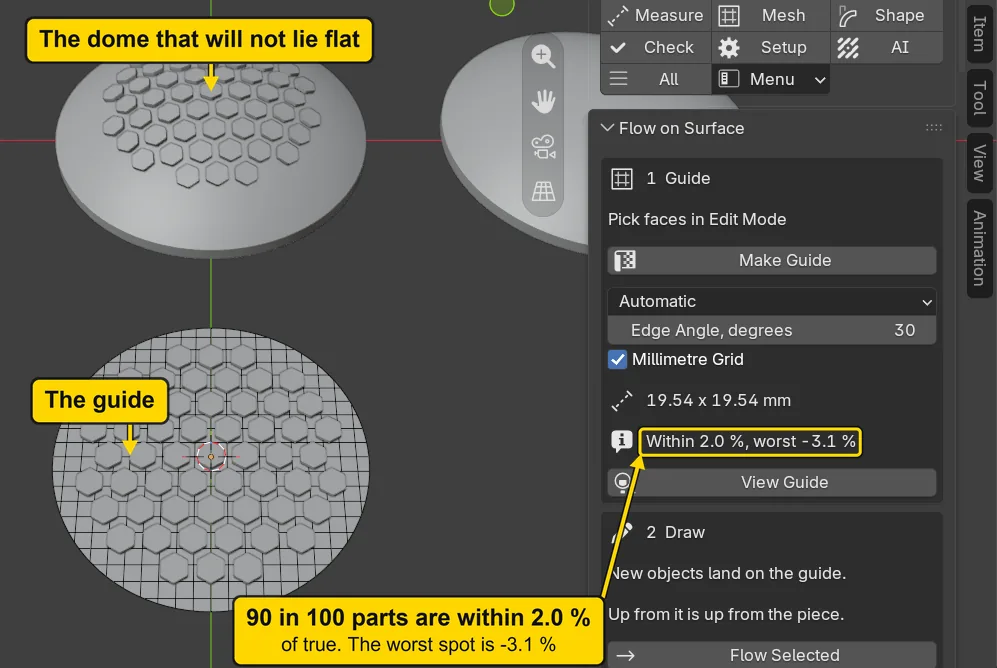
Step 7. Find the row Land
WhereThe sidebar, the words Flow on Surface, then More Pattern Settings at the foot of the Pattern Builder panel.
DoClick Flow on Surface to fold it, then click More Pattern Settings to open it, and scroll down.
You should seeThe settings open below those words, so scroll down to the row “Land”. Land here means how a cell lands on the surface. Land Whole is lit: it is the add-on’s choice, and you keep it.
It worked whenLand Whole is the lit one.
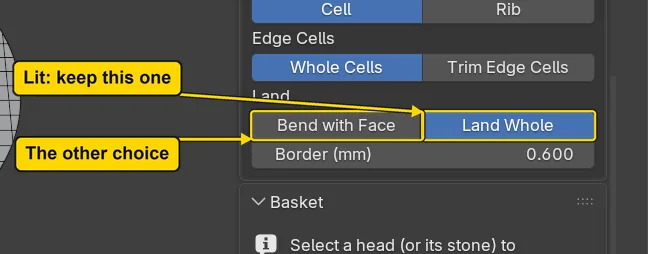
Step 8. See what Land does, and come back
WhereThe row Land, under More Pattern Settings.
DoPress Bend with Face, read the panel’s first line, then press Land Whole again.
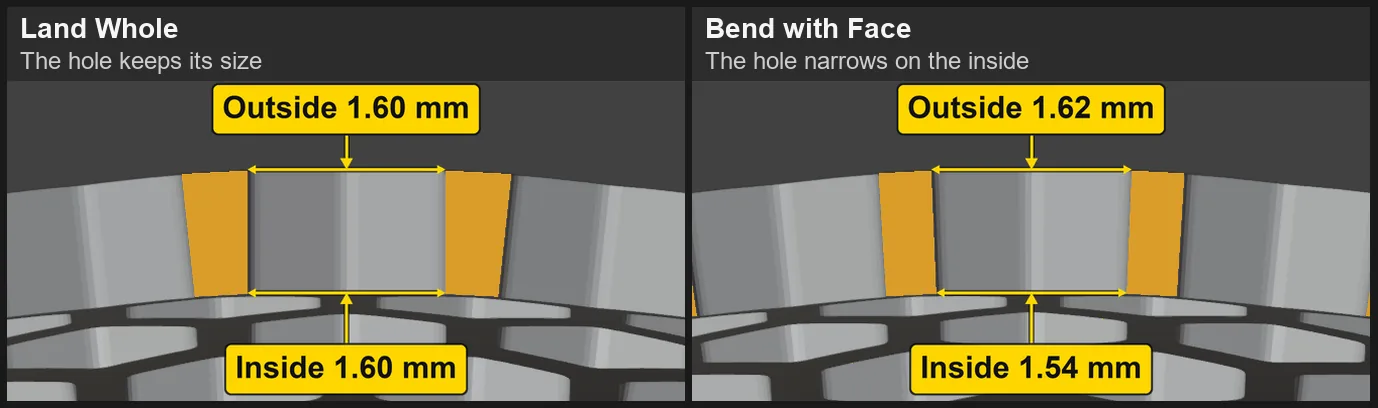
You should seeThe panel’s first line goes to “61 cells” and back to “55 cells”. The pictures below show one hole cut through the middle with each choice. With Land Whole the hole’s walls run straight: 1.60 mm outside, 1.60 mm inside. With Bend with Face the walls lean in: 1.62 mm outside, 1.54 mm inside, and the cut makes 61 holes for 55.
It worked whenLand Whole is the lit one again.
Step 9. Make it real
WhereThe Pattern Builder panel, near its foot.
DoPress Make Real.
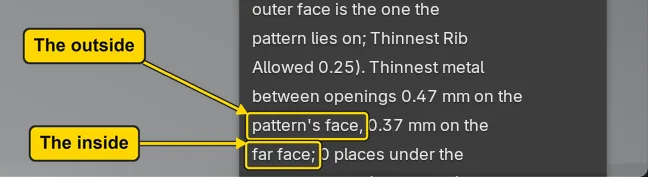
You should seeThe posts become holes, after a few seconds. Scroll up to Least Opening (mm): the new sentence, “Thinnest metal between openings”, stands below it, after the line about the rib. It gives the metal left between the holes, and the panel says openings for holes. It reads 0.47 mm on “the pattern’s face”, which is the outside, and 0.37 mm on “the far face”, which is the inside. The inside figure is the one that counts. Land Whole keeps every hole one size, and a rib, the bar of metal between two holes, pays for it.
It worked whenThe holes show on the dome, and the panel’s sentence begins “Thinnest metal between openings”. The status bar begins “Cut 121.2 mm3 from Dome” as well, for a few seconds.
Step 10. Save your copy with Ctrl+S
WhereThe 3D view, with the pointer over it.
DoPress Ctrl+S. It saves the copy you named at step 1.
No picture: nothing on the screen changes.
Step 11. Open the start file again, for Dome B
WhereBlender’s top menu bar, File > Open.
DoOpen p10-05-start.blend again. If Blender asks whether to save the changes, choose Don’t Save.
You should seeThe two whole domes again. Click Flow in the section bar if it is not lit, then click the words Flow on Surface once to fold that panel, as in step 2: Make Pattern shows on the panel. This time you use the right-hand dome.
It worked whenYou can read Make Pattern without scrolling.
No picture: the screen is as it was at step 2.
Step 12. Select Dome B, and go into Edit Mode
WhereThe 3D view.
DoClick once on the right-hand dome, on its near side, then press Tab with the pointer over the 3D view.
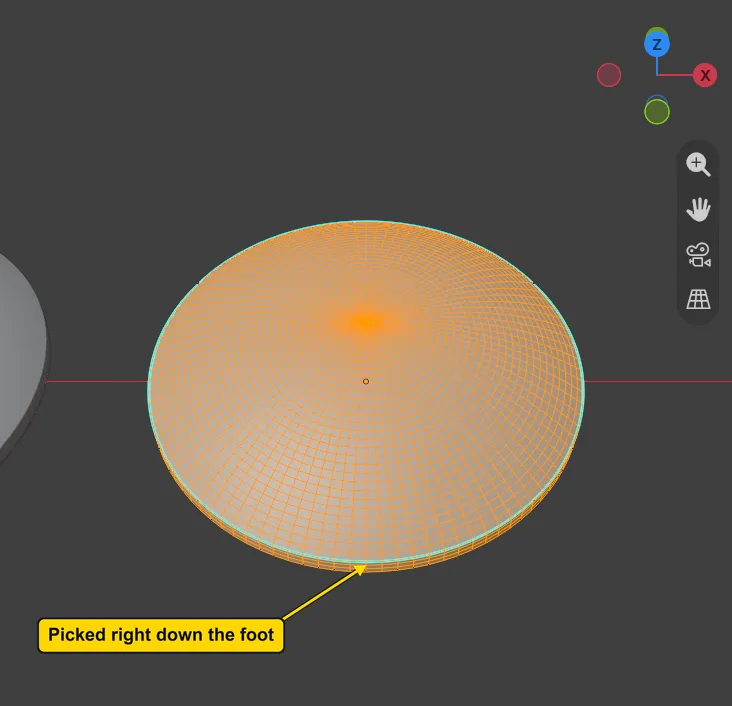
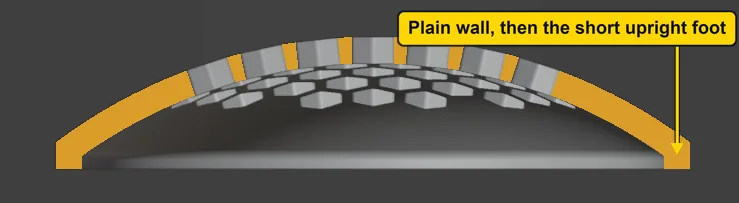
You should seeThis time every outer face is picked, as in the picture, down the foot to the ground.
It worked whenThe words at the top left of the 3D view end in “Dome B”, and the menu reads “Edit Mode”.
Step 13. Press Make Pattern on every outer face
WhereThe Pattern Builder panel.
DoPress Make Pattern.
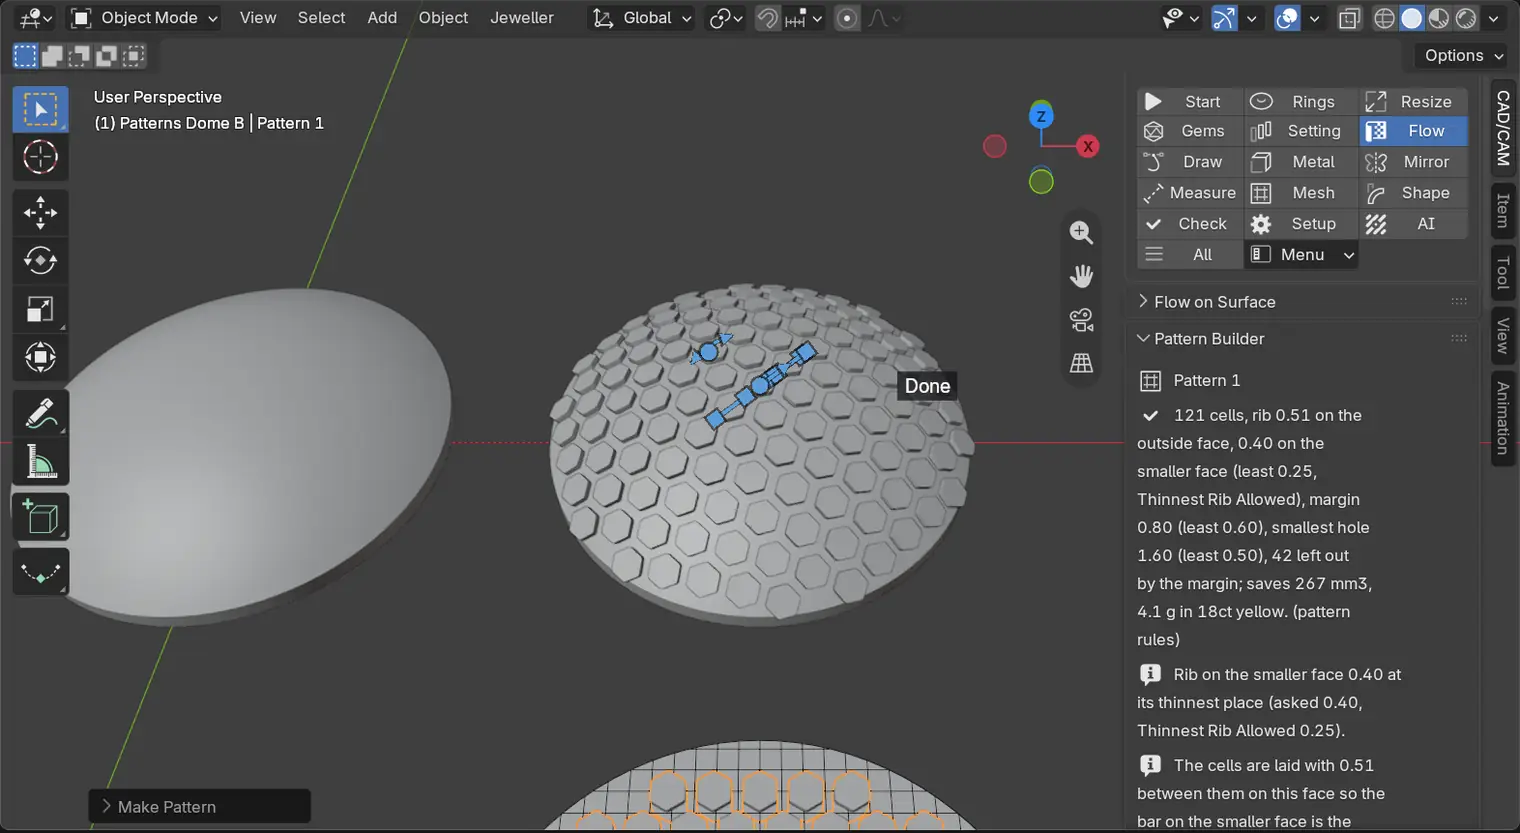
You should seeThe posts cover the whole dome, over its shoulder and down the foot. Nothing has complained yet.
It worked whenThe panel’s line with the tick, which counts the cells, begins “121 cells”.
Step 14. Meet the refusal: press Make Real
WhereThe Pattern Builder panel, near its foot.
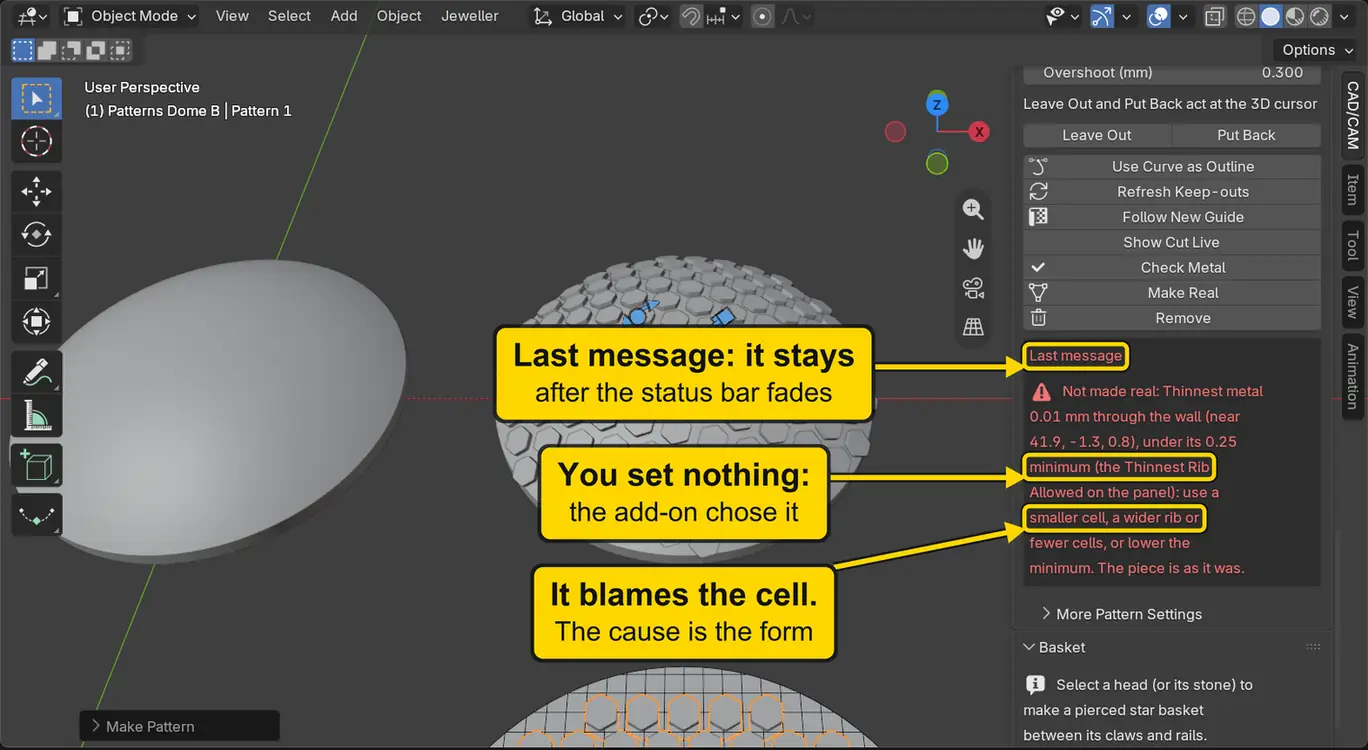
DoThis press is refused, to show you a refusal caused by the form: the dome is not harmed. Press Make Real, then read the red words under Last message, lower on the panel.
You should seeAfter a few seconds Last message turns red. It begins “Not made real: Thinnest metal 0.01 mm through the wall”, then says “under its 0.25 minimum (the Thinnest Rib Allowed on the panel)”, offers a smaller cell, a wider rib or fewer cells, and ends “The piece is as it was.” The status bar says the same, but fades. Those offers are not the cause, as the next step shows.
It worked whenThe dome still has its posts and no holes.
Step 15. See the place: it is on the foot
WhereThe Pattern Builder panel, near its foot, then the 3D view.
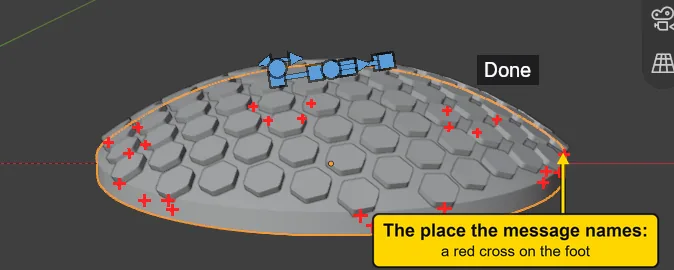
DoPress Check Metal, then look level with the dome’s foot, as in the picture.
You should seeSmall red crosses where a cell comes down over the shoulder onto the foot: there the cut leaves almost no metal. The panel says “24 places under” the 0.25 minimum. To look level with the dome, click the green ball with no letter on the small coloured axes at the top right of the 3D view, and choose View > Frame Selected if the dome slips out of view. 12 of the 24 crosses stand on the foot nearest you. The 12 that seem to float high on the dome stand on the far side of the foot, seen through the metal.
It worked whenYou can point to the red crosses round the foot.
Check your result
| What to read | Where | What it should say |
|---|---|---|
| Dome B’s guide | In the file you end on: click the words Flow on Surface to open that panel, and read under Make Guide | “26.85 x 26.85 mm”, then “Within 4.3 %, worst -10.6 %“ |
| Dome B | The 3D view, in the same file | Posts all over it and no holes: the refusal left it whole |
| Your saved copy | Open your copy. If Blender asks whether to save the changes to this file, choose Don’t Save. Click the pierced dome, then the Item tab on the sidebar’s edge, Dimensions | X 24 mm, Y 24 mm, Z 4.98 mm: a hole stands at the very top |
Try it yourself
Hold a dome to 0.60. Open the start file as in step 1, do steps 2 to 5, then type 0.60 in Thinnest Rib Allowed (mm): the add-on raises the Rib to 0.60 to meet it, warns that every window would close, and the panel reads 43 cells. Type 0.70 in Rib (mm): 37 cells. Press Make Real: it cuts, with 0.68 mm on the far face. Or open the start file as in step 1, do steps 2 to 5, click Bend with Face under More Pattern Settings, and press Make Real: 61 cells this time, and the holes narrow on the inside.
What you learned
- A dome will not lie flat. The guide’s percentage says how true the flat copy is: 90 in 100 parts within the first figure, its worst spot at the second.
- Land Whole keeps every hole its size, on the outside and on the inside, and the rib pays for it. Leave it on.
- A refusal can be about the form: on a dome the foot stops every outer face, so pick the crown. The minimum is yours to set: the add-on cannot know what your dome is for.