
What you will make
A plain ring band, 1.80 thick and 3.00 wide, inside 16.70 across (a UK L and a half), made from one wedge of it: one eighth of the band, turned eight times round the ring’s axis. Live Turn makes the copies live, the way Blender’s own Array does, with a small empty, an object that marks a place and holds a turn. The wedges are joined at their seams. Copies is the count of wedges, and it counts the original too: Copies 8 is the original and seven copies. The wedge is plain on purpose, so that the seams are all there is to see. A jeweller models one piece and lets the ring repeat it, and changes the count to try the spacing. The wedge here is a little short of an eighth, 44.2 degrees against 45, so each seam stands open by a hair, and one press closes it.
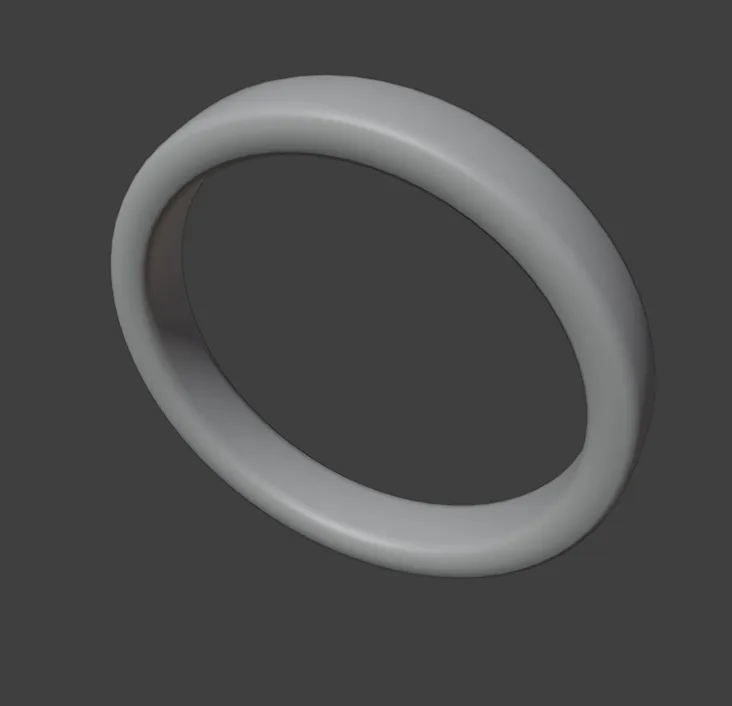
About 15 minutes.
Files
- p3-15-start.blend (104 KB): open this one to begin.
- p3-15-finished.blend (130 KB): the result, to compare with yours.
Both were made in Blender 5.2.0.
Before you start
- You have done Part 0, and you have used Live Mirror (Model one half and see both, live, P3-14). The start file holds one wedge of a band and a thin circle round it, in millimetres.
- CAD/CAM Jeweller 2.22.0 or later is installed (Preferences > Add-ons shows the version), and its CAD/CAM tab is in the sidebar.
Build it
Step 1. Open the start file and save your copy
WhereThe top bar: the row of words that begins File, Edit.
DoDownload p3-15-start.blend from Files above and open it. Then choose File > Save As and save it under the name below, in a folder of yours. Open an exercise file and keep the start file safe (P0-07) shows how.
Typemy-wedge.blend
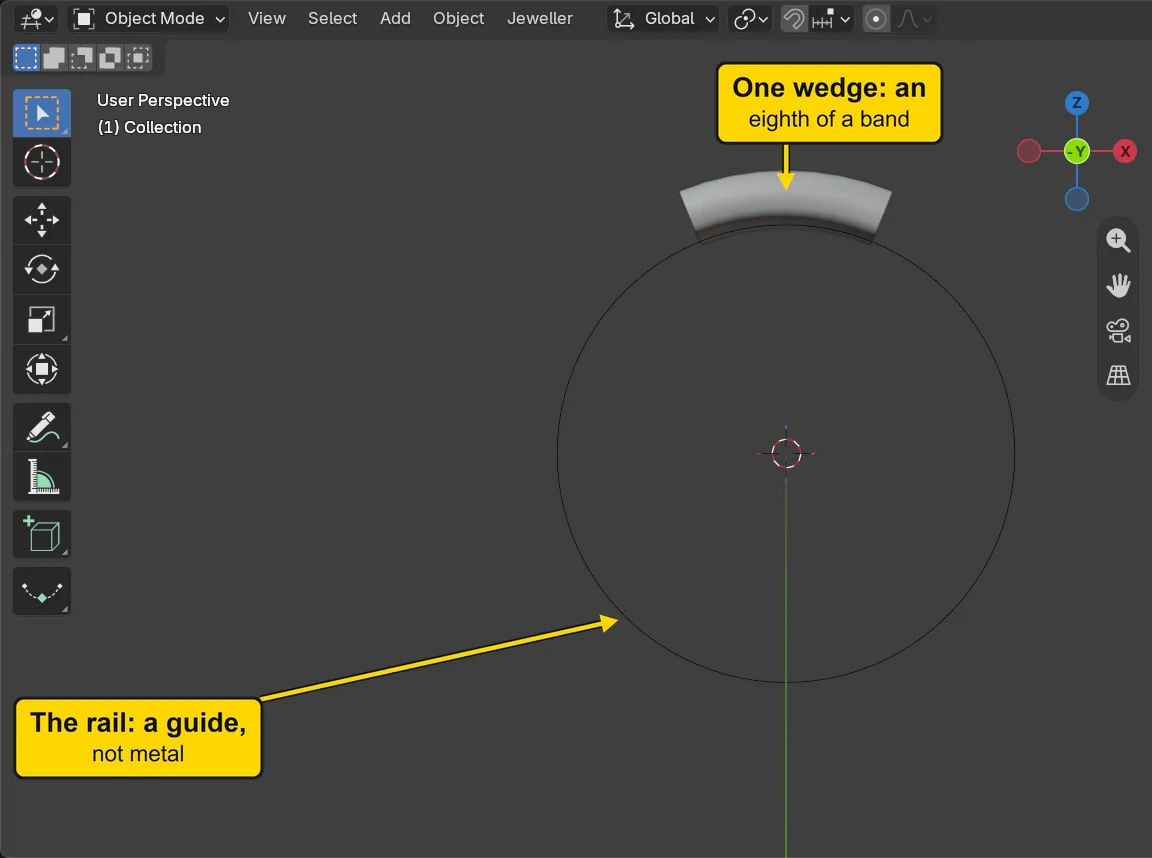
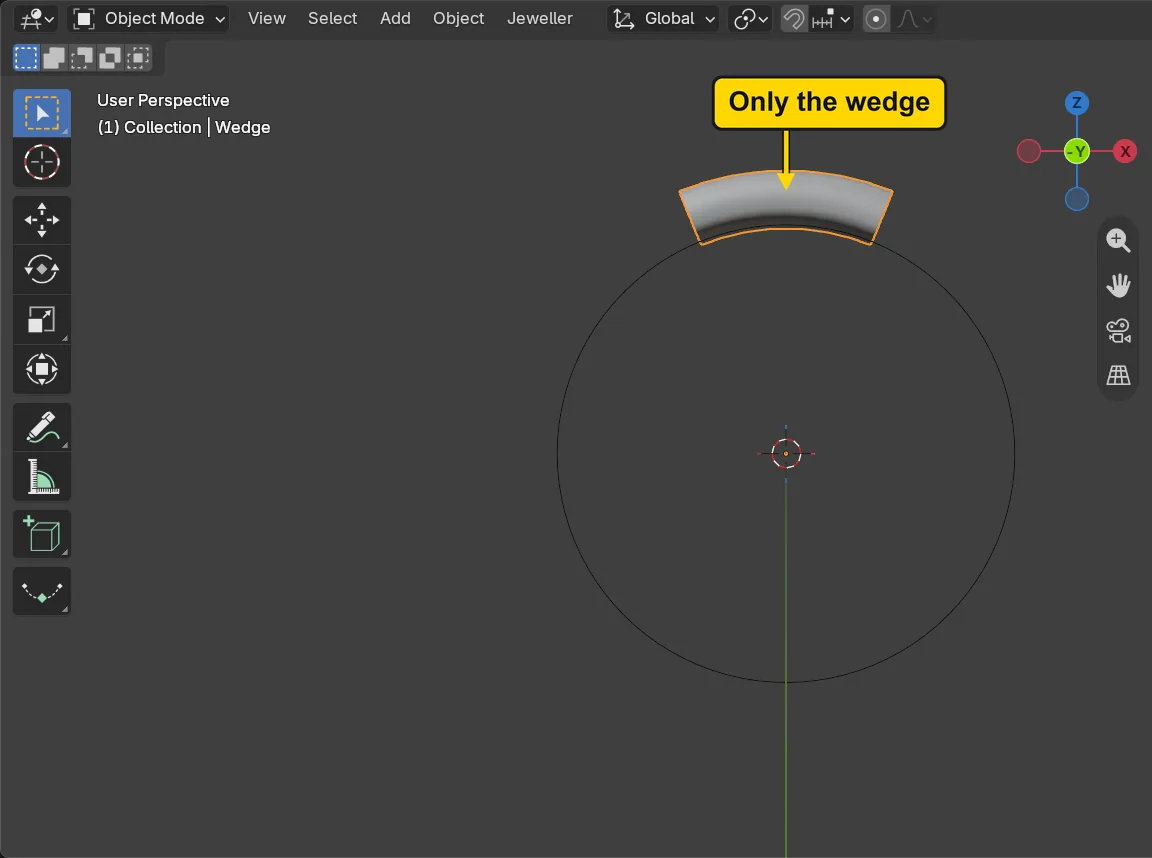
You should seeThe 3D view looks at a ring from the front: a short curved wedge of metal at the top, an eighth of a band, and a thin circle that is the ring’s rail, a guide for the work and no metal. The Outliner, the list at the top right of the window, lists the wedge and the rail.
It worked whenThe title bar, the strip above File and Edit, begins my-wedge.
Step 2. Press Live Turn
WhereThe sidebar, the CAD/CAM tab. Click Mirror in the section bar, the small word buttons at the top. In the Live Mirror and Turn panel, the second block is Live Turn: scroll the sidebar down to it (turn the mouse wheel, or slide two fingers on the touchpad).
DoClick the wedge, then press Live Turn.
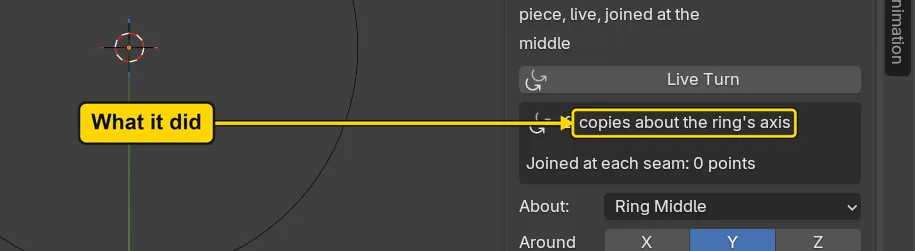
You should seeA second wedge at the bottom of the ring: Copies starts at 2, the original and one copy, half a turn apart. A box of lines says “2 copies about the ring’s axis” and “Joined at each seam: 0 points”. Around is Y, the ring’s own axis, which the add-on took from the rail: the copies turn round the finger, not across it.
It worked whenThe box of lines reads “2 copies about the ring’s axis”.
Step 3. Take it off with Remove, and put it back
WhereThe Live Mirror and Turn panel: the buttons Make Real and Remove at the foot of the Live Turn block. Scroll the sidebar down to them.
DoPress Remove, look at the 3D view, then press Live Turn again.
You should seeAfter Remove the second wedge is gone, and so is the small empty that marked the turn: Remove takes the turn and its empty off and leaves the mesh as it is. The panel is back to “One click”. The second press makes the turn again.
It worked whenThe box of lines is back and reads “2 copies about the ring’s axis”.
Step 4. Type 8 in Copies
WhereThe Live Turn block: the field Copies, between the - and + buttons.
DoClick the middle of Copies once, type 8 and press Enter.
Type8
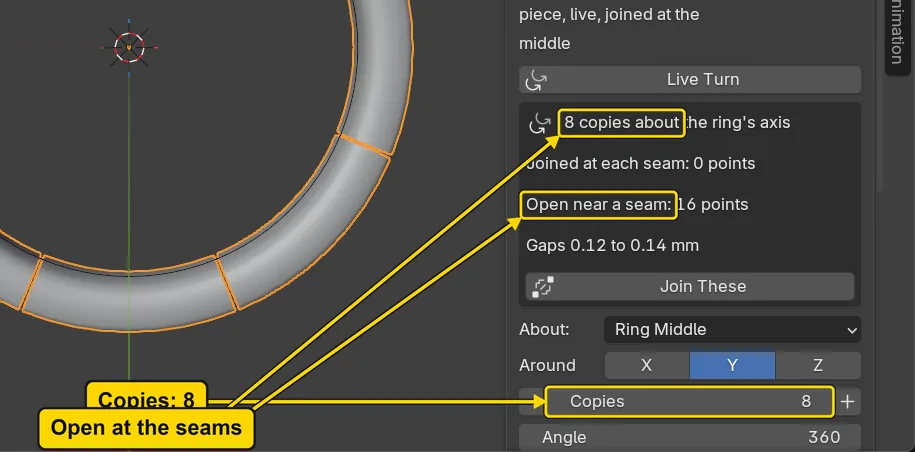
You should seeEight wedges round the ring, so that it looks whole. The box reads “8 copies about the ring’s axis” and “Open near a seam: 16 points” with “Gaps 0.12 to 0.14 mm”: at every seam the two wedges stand a hair apart, because each wedge is a little short of 45 degrees. A seam that stands open this wide counts as open, and the add-on says how many points. Leave Angle (360) and Join the Copies as they are.
It worked whenThe box of lines reads “8 copies about the ring’s axis”.
Step 5. Press Join These
WhereThe Live Turn block, the box of lines: the button Join These under it.
DoPress Join These.
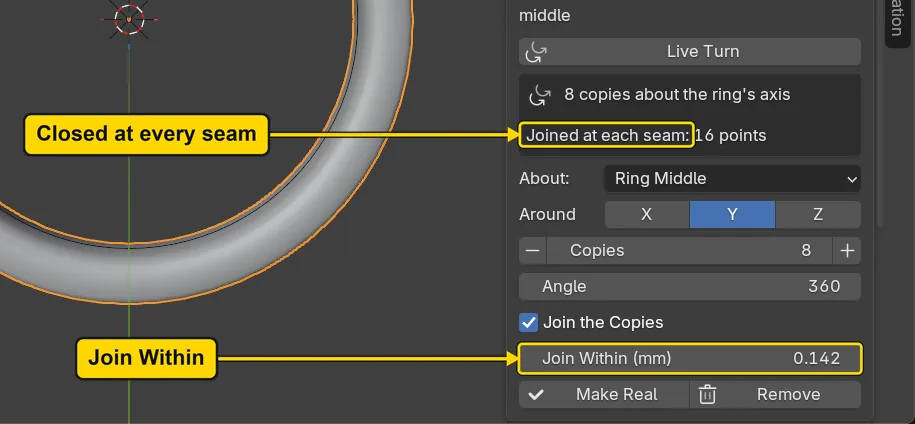
You should seeThe box now reads “Joined at each seam: 16 points” and the lines about open points are gone. Join Within (mm), further down, reads 0.142: the widest gap at the seams with a hair added. Points that lie closer than that are one point now.
It worked whenThe box of lines reads “Joined at each seam: 16 points”.
Step 6. Press + for a ninth wedge, then - to go back
WhereThe Live Turn block: the + button at the right of Copies, and the - button at its left.
DoPress the small + button, look at the box, then press the small - button.
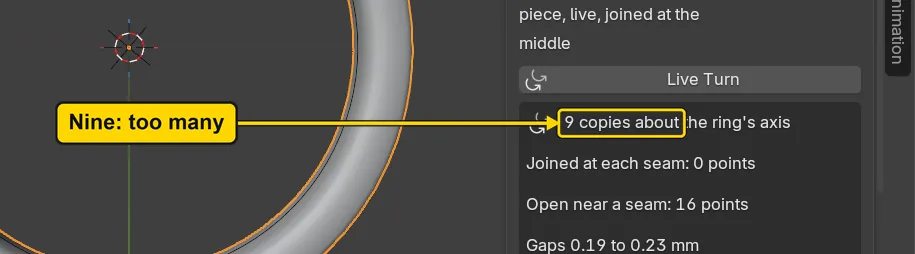
You should seeAfter + the field reads 9 and the box reads “9 copies about the ring’s axis”, “Open near a seam: 16 points” and “Gaps 0.19 to 0.23 mm”: the join, which was set for the gaps at 8, closes none of the seams now (Joined at each seam: 0 points). The box counts the seams as open and does not say overlap. Nine wedges of 44.2 degrees add up to 397.8 degrees, more than the 360 of a ring, so they overlap by 4.2 degrees at each seam, and an overlap is two layers of metal in one place. After - the field reads 8 and the box closes again. + and - change Copies by one, and the copies spread again over the same angle.
It worked whenThe field reads 8 and the box reads “Joined at each seam: 16 points”.
Step 7. Press Make Real
WhereThe Live Turn block: Make Real, at its foot, beside Remove.
DoPress Make Real.
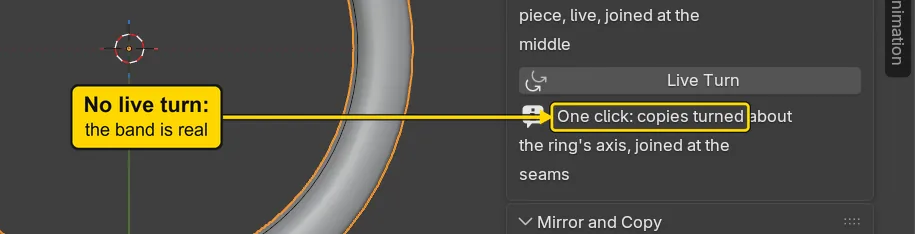
You should seeThe box of lines gone and the panel back to “One click”: the copies are one real mesh, joined at the seams, and the small empty is gone. The ring looks the same, and it has no live part now. The status bar, the line along the very bottom of the window, says for a moment “Made real: 1024 points, one piece”: one piece means the wedges are joined at every seam.
It worked whenThe panel reads “One click: copies turned about the ring’s axis, joined at the seams”.
Step 8. Save your work
WhereThe 3D view: move the pointer over it.
DoPress Ctrl+S.
You should seeBlender writes your copy at once, with no question, because the file already has a name. An asterisk, *, in the title bar marks changes that are not saved, and it goes now. Save your work and get it back (P0-12) says more about saving.
It worked whenThe title bar begins my-wedge and carries no asterisk.
No picture: the only change is a message on the status bar, and it fades.
Check your result
| What to read | Where | What it should say |
|---|---|---|
| The band is whole | The Item tab of the sidebar, Dimensions:, with the band selected | X reads 20.3 mm and Z reads 20.3 mm: the same, because it is a ring (the sidebar drops trailing zeros) |
| The turn is real | The Live Mirror and Turn panel, with the band selected | The line “One click: copies turned about the ring’s axis, joined at the seams”, and no box of figures |
| The empty is gone | The Outliner, the list at the top right of the window | It lists the band and the rail, and no object that begins CJ Turn |
| The seams are closed | The box of lines in the Live Mirror and Turn panel, at steps 4 and 5 | At step 4 the box reads “Open near a seam: 16 points”. At step 5 it reads “Joined at each seam: 16 points” and the line about open points is gone |
Try it yourself
Open the start file again (Blender will ask whether to save the changes: choose Don’t Save). Do steps 2 to 5 again, then press the small + and - buttons a few times and read the box: it reads open seams at 9 and the join at 8.
What you learned
- Live Turn copies what you are working on about the ring’s axis, live. Copies counts the original too, and the + and - buttons change it by one.
- The wedges join at the seams: Join These raises Join Within (mm) to just above the widest gap. Nine wedges of 44.2 degrees overlap, though the box does not say it, but nine wedges overlap, and an overlap is two layers of metal in one place: go back to 8.
- Make Real turns the copies into one real mesh and removes the empty. Remove takes the turn off and leaves the mesh as it is.