
What you will make
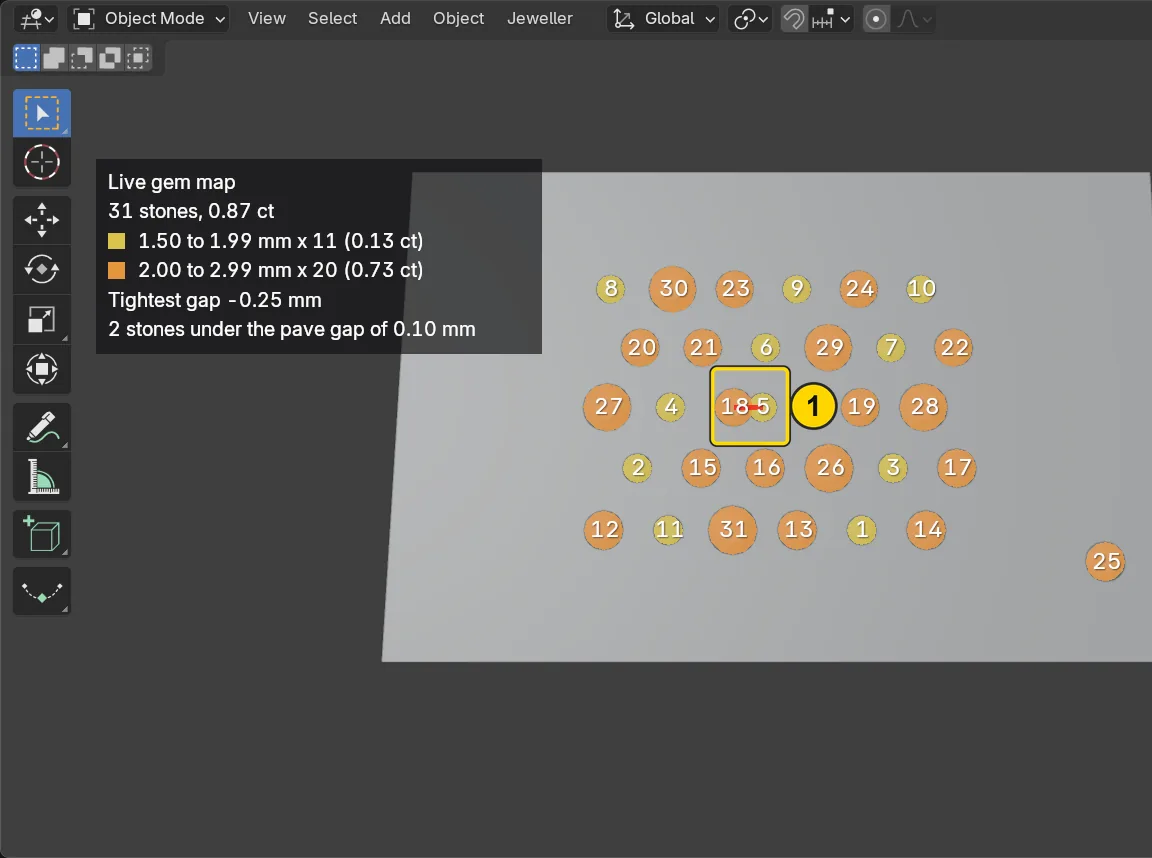
The field of 31 stones of Group stones and find the odd one (P3-04), drawn as a map in the 3D view: every stone coloured by its size range, numbered, with a red line from the pair that is too close, and a legend on the panel that counts the stones and their weight. Then the same map is written to a file you can open in a web browser. A jeweller reads a map like this before cutting any seat: it shows at a glance how many stones fall in each size range, and where two are crowded. The map groups Round 2.00 and Round 2.50 in one range, so to count what to buy you read the rows of Gem Groups in P3-04.
About 10 minutes.
Files
- p3-05-start.blend (118 KB): open this one to begin.
- p3-05-finished.blend (125 KB): the result, to compare with yours.
Both were made in Blender 5.2.0.
Before you start
- You have done Part 0, Blender from nothing, and Group stones and find the odd one (P3-04): the field, the overlapping pair and the lone stone.
- The add-on is installed: CAD/CAM Jeweller 2.22.0 or later (Preferences > Add-ons shows the version). The start file holds the plate with 31 round stones, in millimetres, so every number on this page is millimetres.
Build it
Step 1. Open the start file and save your copy
WhereThe top bar: the row of words that begins File, Edit.
DoDownload p3-05-start.blend from Files above and open it. Then choose File > Save As and save it under the name below, in a folder of yours. Open an exercise file and keep the start file safe (P0-07) shows how.
Typemy-map.blend
You should seeThe 3D view shows a flat plate seen from above and a little in front, with a field of small pale round stones of three sizes on it, and one stone by itself at the right. Nothing is selected. The title bar, the strip above File and Edit, begins my-map. The first picture is the 3D view and the second is the title bar.
It worked whenThe title bar, the strip above File and Edit, begins my-map.
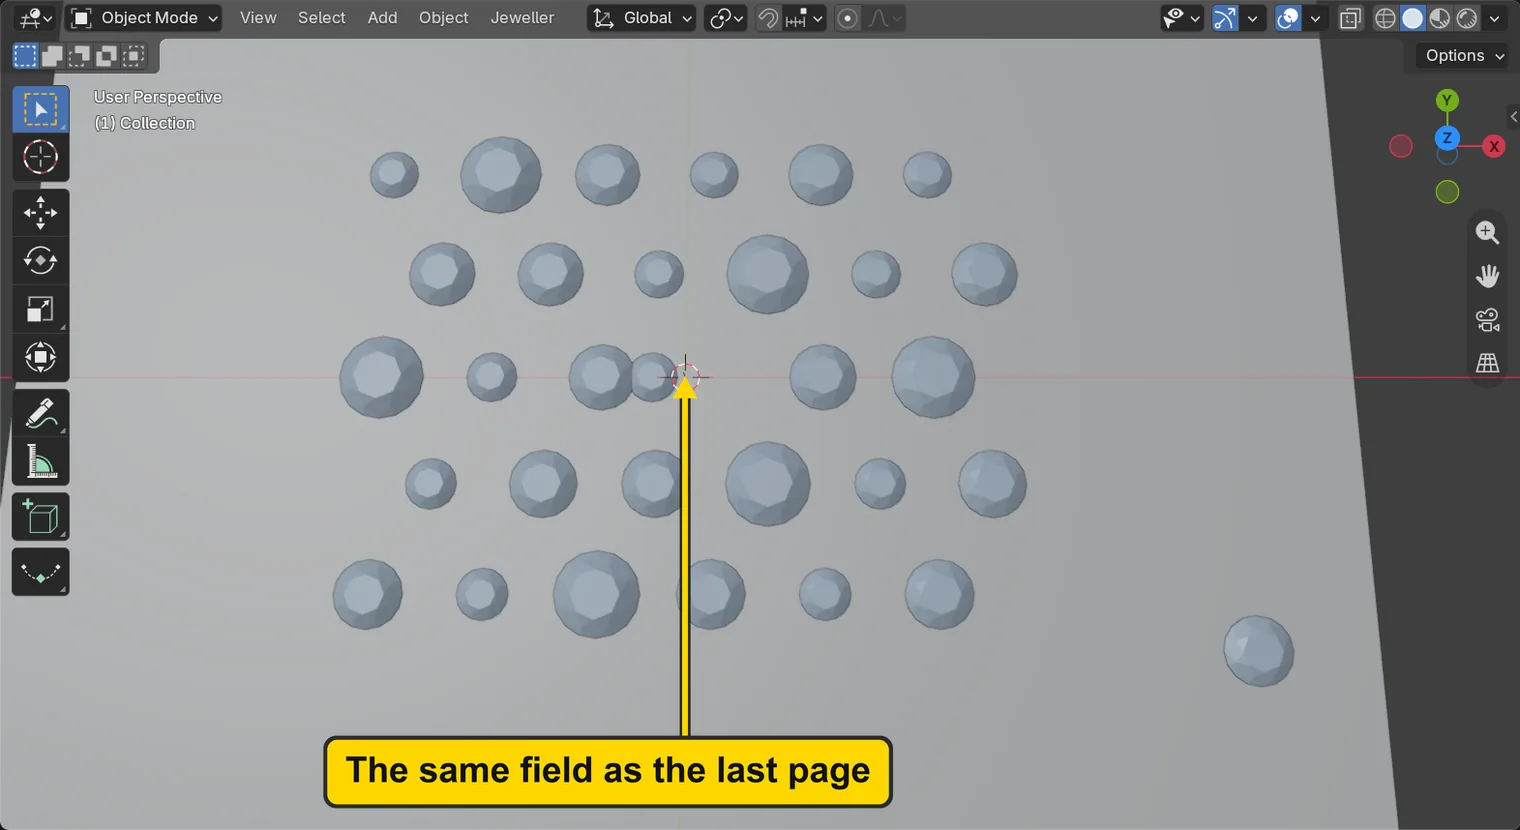

Step 2. Open the Gem Map on the Model
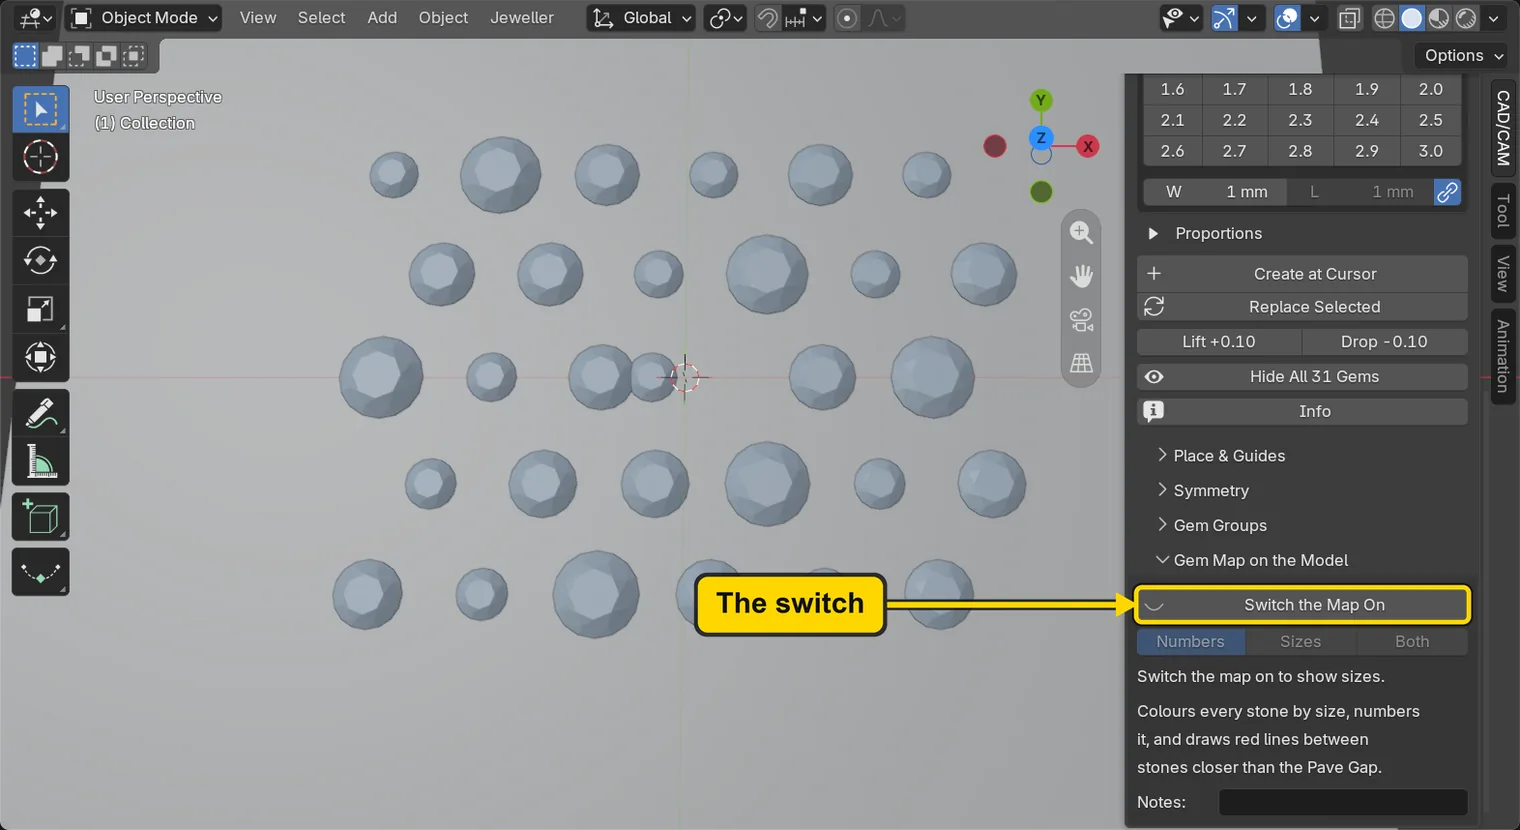
WhereThe sidebar. If it is shut, press N with the pointer over the 3D view. Click the CAD/CAM tab, then Gems in the section bar. The sub-panel Gem Map on the Model is under Gems, near the foot: click its title to open it.
DoOpen Gem Map on the Model.
You should seeA short sentence that says what the map does, a button Switch the Map On, and under it a row of three buttons, Numbers, Sizes and Both. The add-on calls that row Show. That row is grey: it works once the map is on. Under it a field Notes holds words that go into the exported map. The map is off until you switch it on: a file with the map off pays nothing for it.
It worked whenThe panel shows the button Switch the Map On.
Step 3. Switch the map on
WhereThe Gem Map on the Model panel, the button Switch the Map On.
DoClick Switch the Map On.
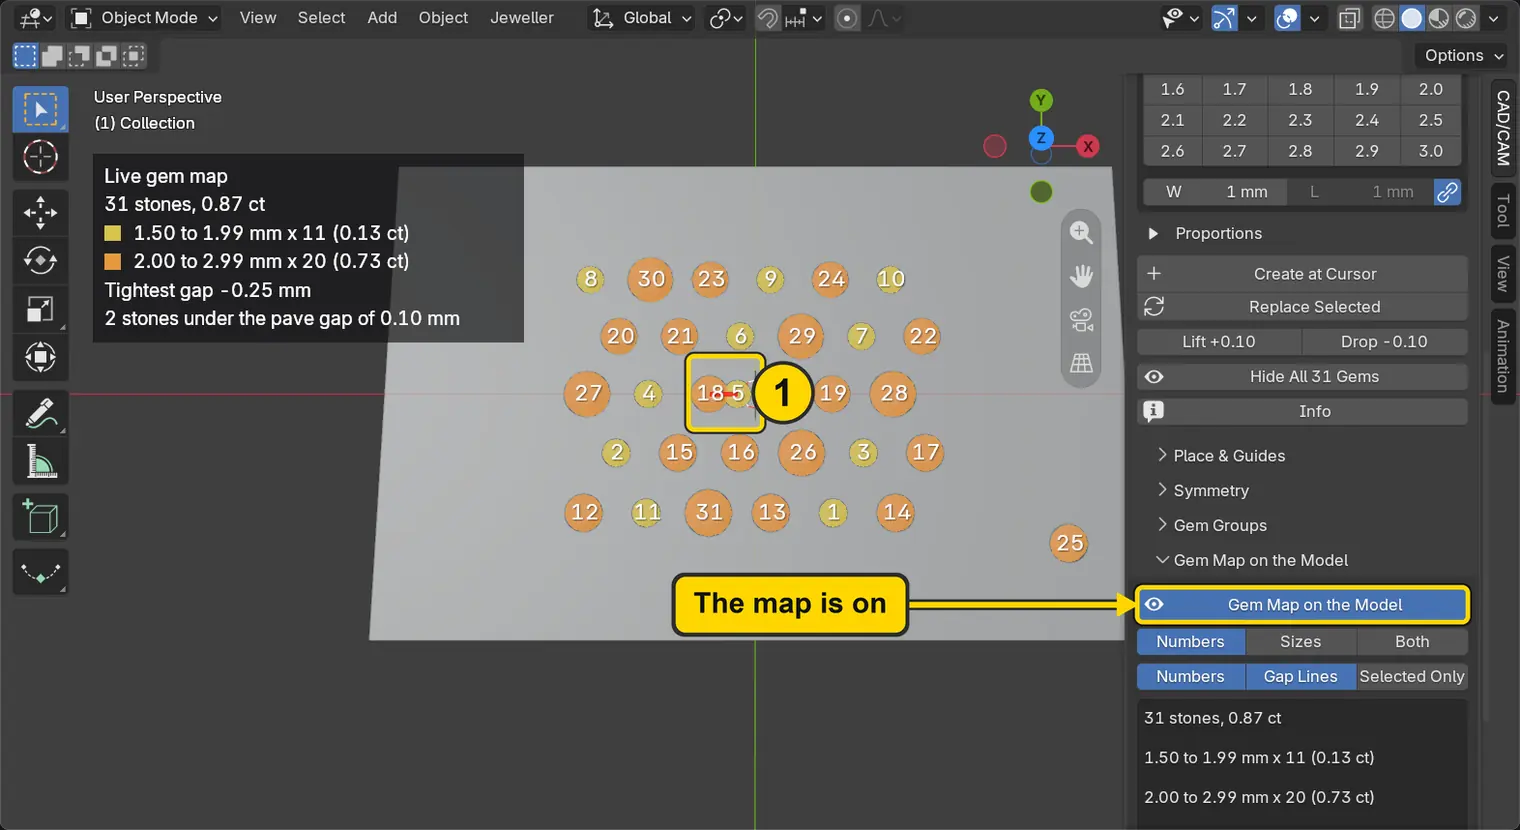
You should seeThe button lights and its words change to Gem Map on the Model. Every stone in the 3D view turns into a coloured disc with a number on it, a colour for each size range, yellow for 1.50 to 1.99 mm and orange for 2.00 to 2.99 mm, and a short red line joins the two stones that overlap. The row of three is no longer grey. Under it stand three small buttons, Numbers, Gap Lines and Selected Only, and a box with the legend. The same legend is drawn at the top left of the 3D view.
It worked whenThe button now reads Gem Map on the Model and the stones are coloured.
Step 4. Choose what a disc says
WhereThe Gem Map on the Model panel, the row of three buttons under the switch, which the add-on calls Show: the three words Numbers, Sizes and Both.
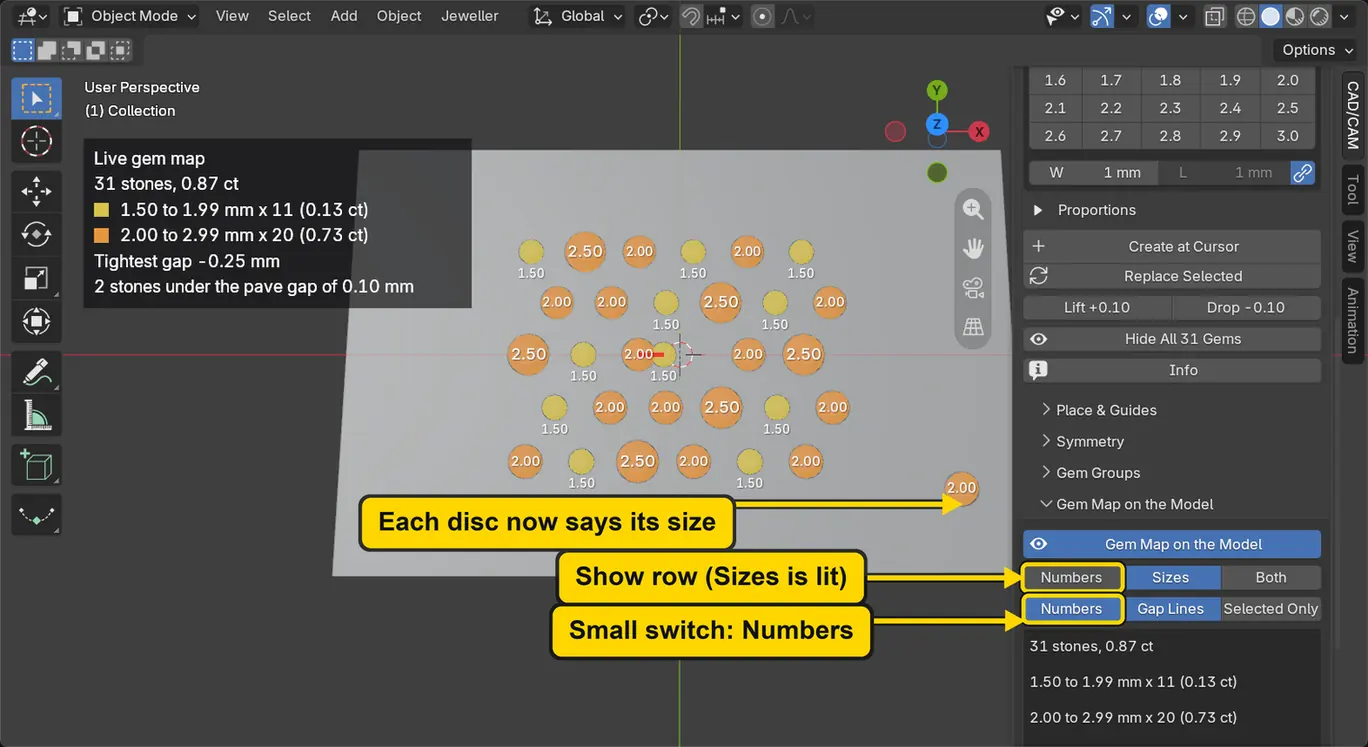
DoClick Sizes, look at the discs, then click Numbers in the same row.
You should seeThe first click writes each stone’s size in millimetres on its disc in place of its number, such as 1.50. Both writes the two. The second click brings the numbers back. The small button Numbers under that row is a different switch: it shows or hides the writing on the discs altogether. In the picture it is lit, and so is Sizes.
It worked whenThe discs carry numbers again.
Step 5. Read the legend
WhereThe Gem Map on the Model panel: the box under the three small buttons. Scroll the sidebar down if it is out of view.
DoRead the lines in the box.
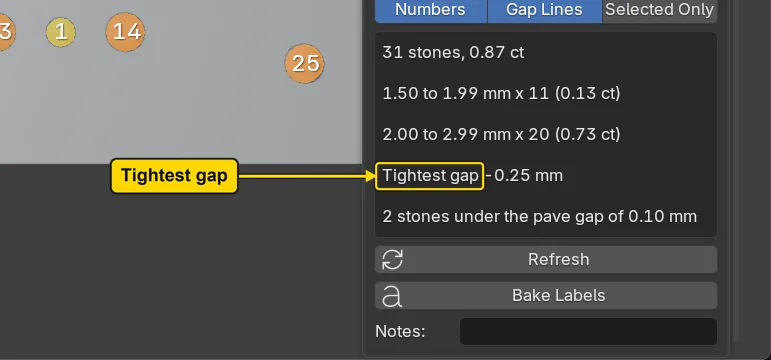
You should seeThe first line counts the stones and gives their weight: “31 stones” and carats. Then a line for each size range, such as “1.50 to 1.99 mm x 11” with its carats: the range and how many stones fall in it. Then Tightest gap with a number: a minus number means two stones overlap, by that much. The last line counts the stones under the pave gap, 0.10 mm.
It worked whenThe first line begins “31 stones”.
Step 6. Switch the red lines off and on
WhereThe Gem Map on the Model panel, the small button Gap Lines.
DoClick Gap Lines, look at the 3D view, then click it again.
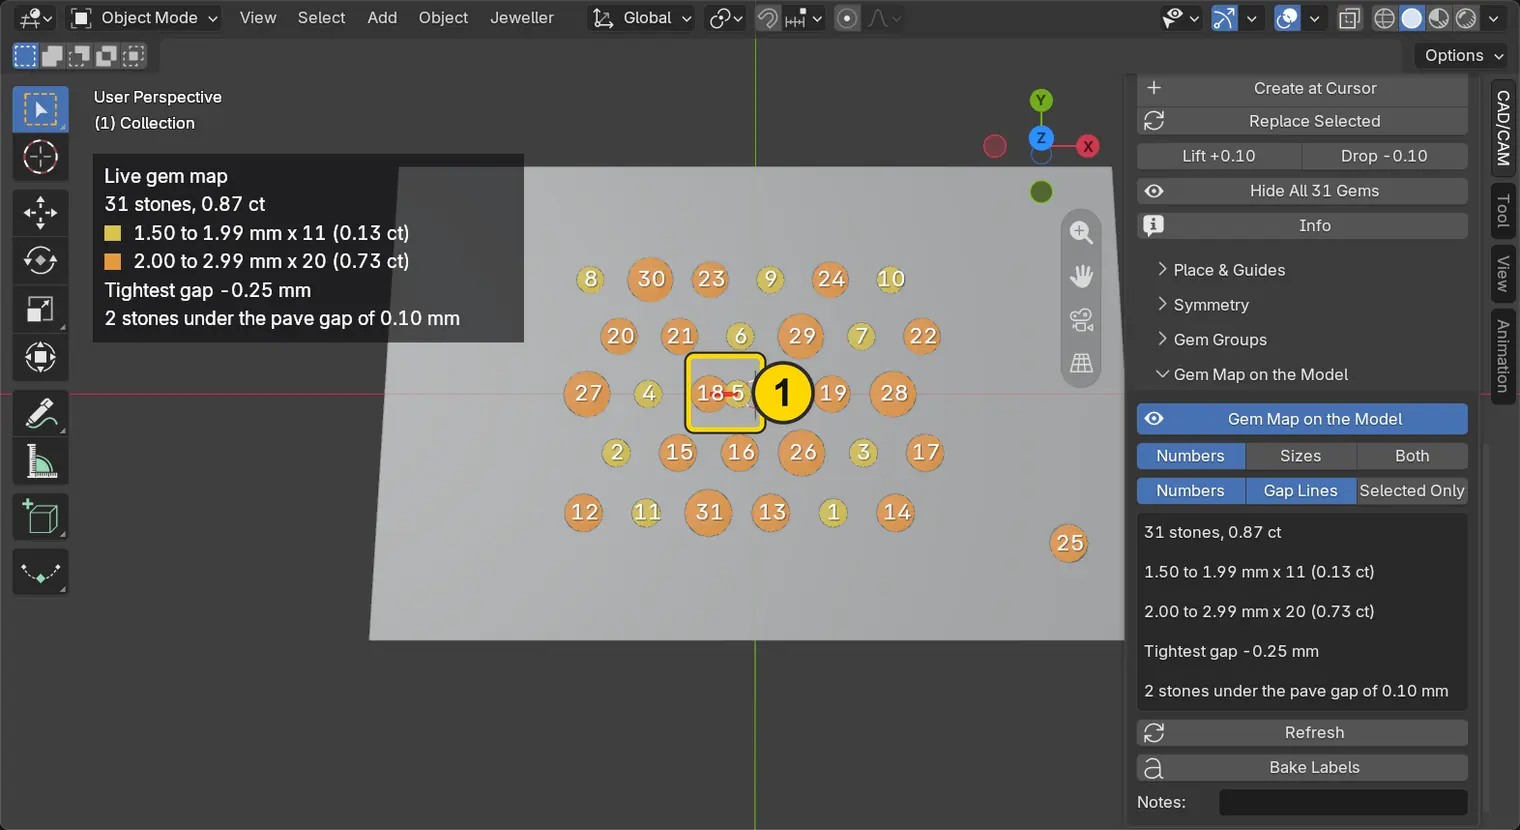
You should seeThe first click takes the red line away: the stones keep their colours and numbers. The second brings it back. Numbers does the same for the numbers on the stones, and Selected Only maps only the stones you have selected.
It worked whenThe red line shows again, and Gap Lines is lit (blue).
Step 7. Press Refresh
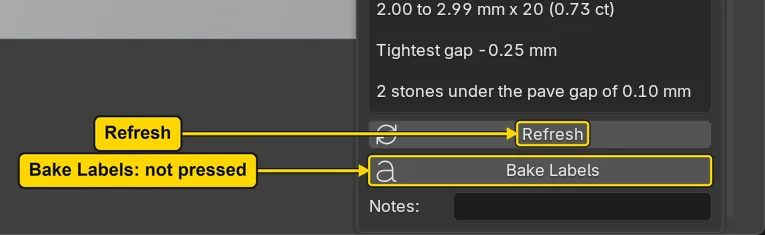
WhereThe Gem Map on the Model panel, the button Refresh, under the legend.
DoPress Refresh.
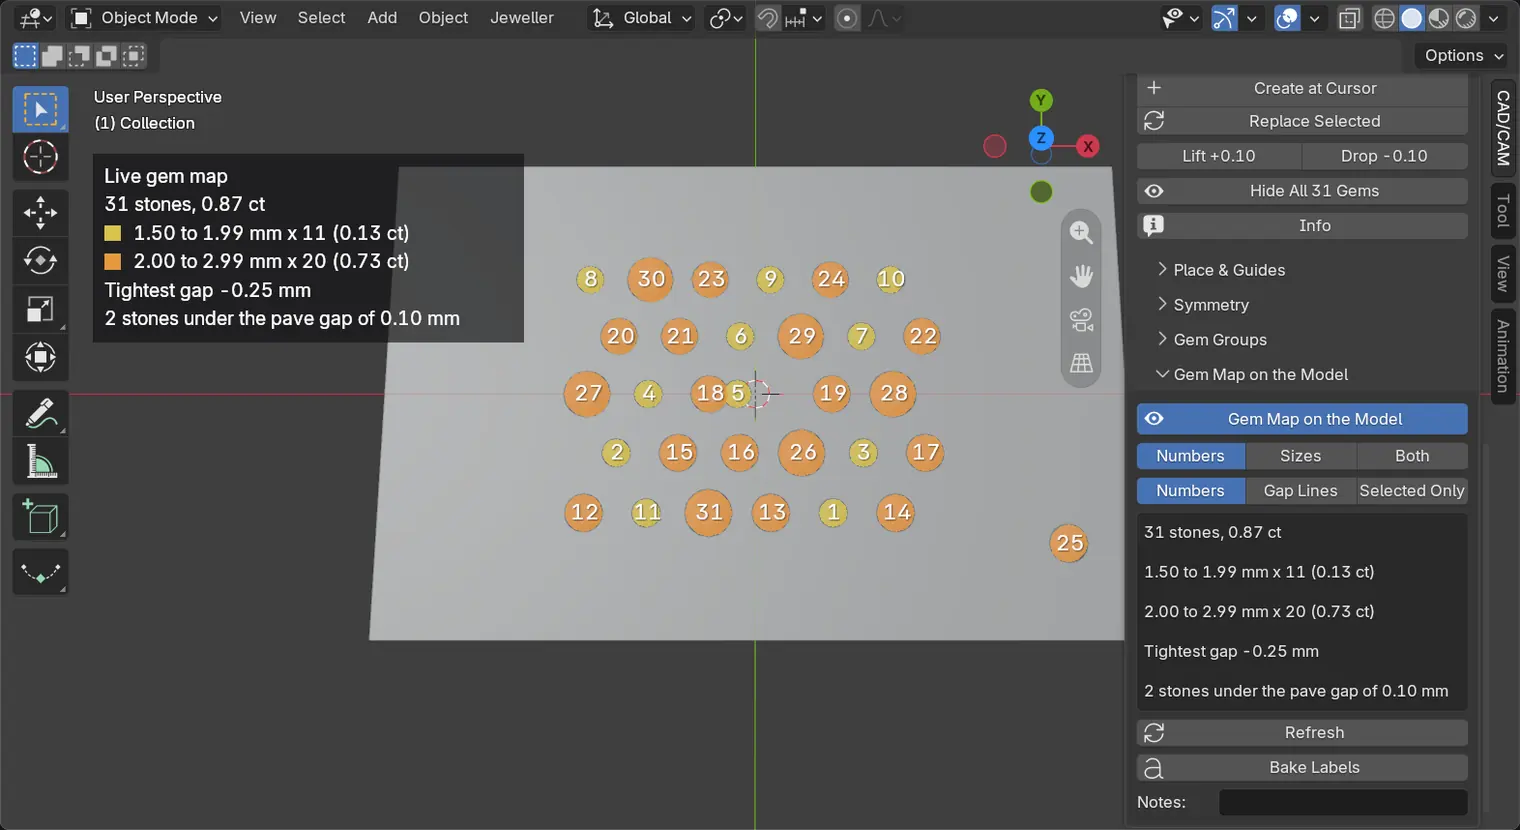
You should seeThe legend does not change, because no stone has moved. The status bar reads “Gem Map on the Model: 31 stones, 0.87 ct” for a moment, then the message fades. Under Refresh stands one more button, Bake Labels, with a letter a on it. Leave it alone here.
It worked whenThe legend still reads “31 stones”.
Step 8. Write the map to a file
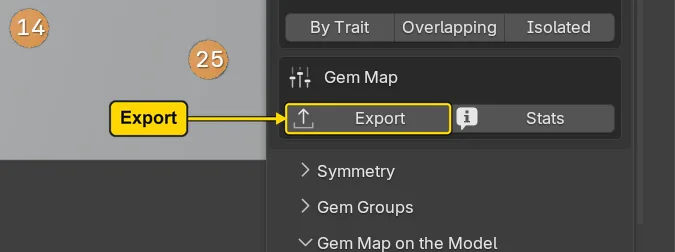
WhereThe sub-panel Place & Guides, shut under Gems; the box Gem Map at its foot holds the button Export. Blender’s File Browser opens.
DoClick the title of Place & Guides to open it and press Export in the box Gem Map at its foot. In the File Browser choose a folder of your own, type the name below, press Export Gem Map.
Typegem-map.html
You should seeThe File Browser shuts, and the file is in the folder you chose, about 15 KB. Nothing is drawn in Blender: the button writes a web page. Open it in a web browser: it opens with the totals (the stones, their weight and the tightest gap), then the spacing warnings, 2 here, one for each stone that overlaps its neighbour, then a table with a row for each stone, 31 in all, and the columns #, Name, Shape, L, W, Depth, Material, ct, X, Y, Z, Gap. The status bar says where it was written, but its message fades: look in the folder. The File Browser shows your own folders and drives, so no picture of it is shown here.
It worked whenThe file gem-map.html is in your folder.
If it goes wrongThe file is not where you looked: the File Browser opened in another folder. Type the folder’s path in its top field before you press Export Gem Map.
Step 9. Look at the finished map
WhereThe 3D view.
DoLook at the picture.
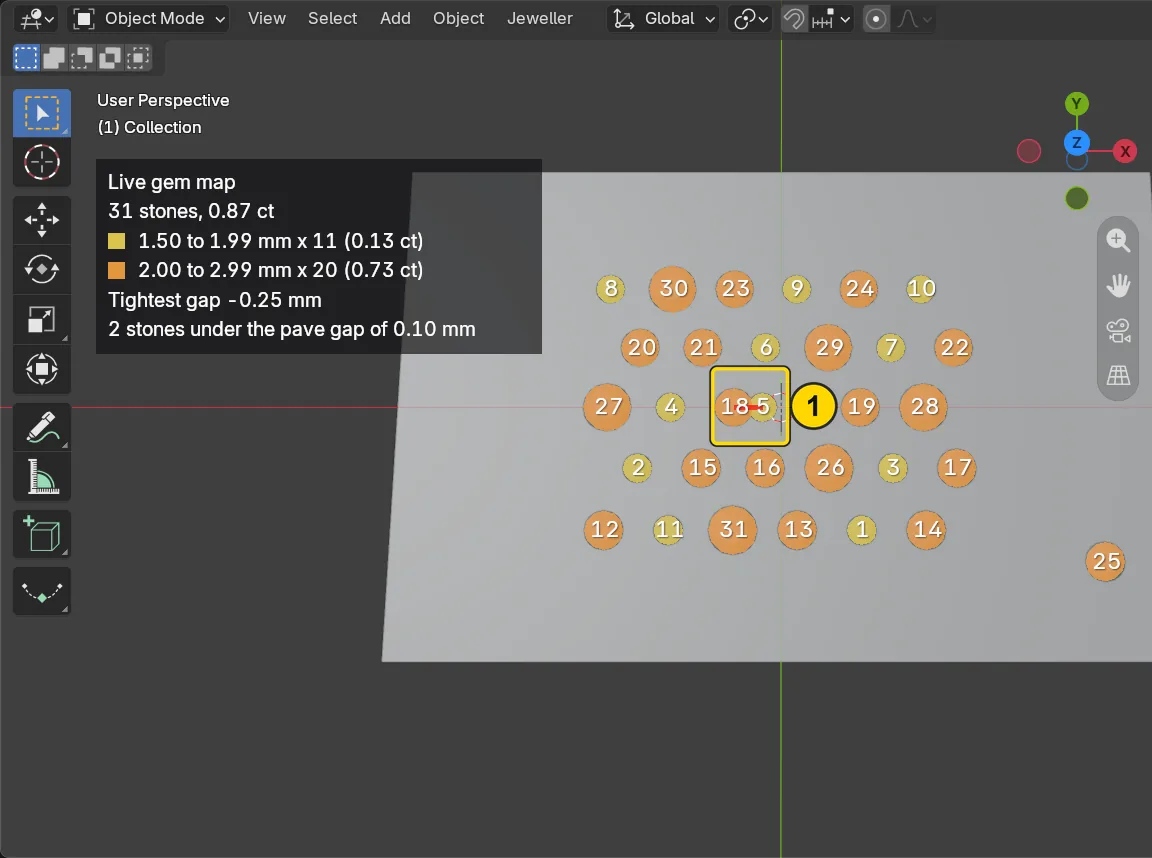
You should seeThe field as a map: a coloured disc and a number on every stone, and a red line from the pair that overlaps. The map is drawn over the stones and changes nothing in them.
It worked whenYou see numbered coloured discs and a red line on the overlapping pair.
Step 10. Save your work
WhereThe 3D view: move the pointer over it.
DoPress Ctrl+S.
You should seeBlender writes your copy at once, with no question, because the file already has a name. An asterisk, *, in the title bar marks changes that are not saved, and it goes now. Save your work and get it back (P0-12) says more about saving.
It worked whenThe title bar begins my-map and carries no asterisk.
No picture: the only change is a message on the status bar, and it fades.
Check your result
| What to read | Where | What it should say |
|---|---|---|
| The legend’s count | The CAD/CAM tab, Gems section, Gem Map on the Model panel, the first line of the box | It begins “31 stones” |
| The tightest gap | The same box, the line Tightest gap | It reads -0.25 mm: a minus number means two stones overlap, by that much |
| The crowded stones | The same box, the last line | It reads “2 stones under the pave gap of 0.10 mm” |
| The written map | The folder you chose in the File Browser, the file gem-map.html | The file is there, about 15 KB: open it in a web browser to see a table of 31 stones |
Try it yourself
Open your copy again, switch the map on with Switch the Map On, and move a stone with G and a typed distance: the map follows it, and the legend’s tightest gap changes a moment later. Tick Selected Only to map only the stones you have selected.
What you learned
- The Gem Map on the Model colours every stone by size, numbers it and draws a red line from stones closer than the pave gap. It follows the stones as they move.
- Its legend counts the stones and their weight, size by size, and gives the tightest gap. The Show row chooses whether a disc carries the stone’s number, its size or both.
- Export Gem Map writes the same map to a file, a table and a plan view, that a bench or a client can open in a web browser.
Next: Lay stones along a curve