
What you will make
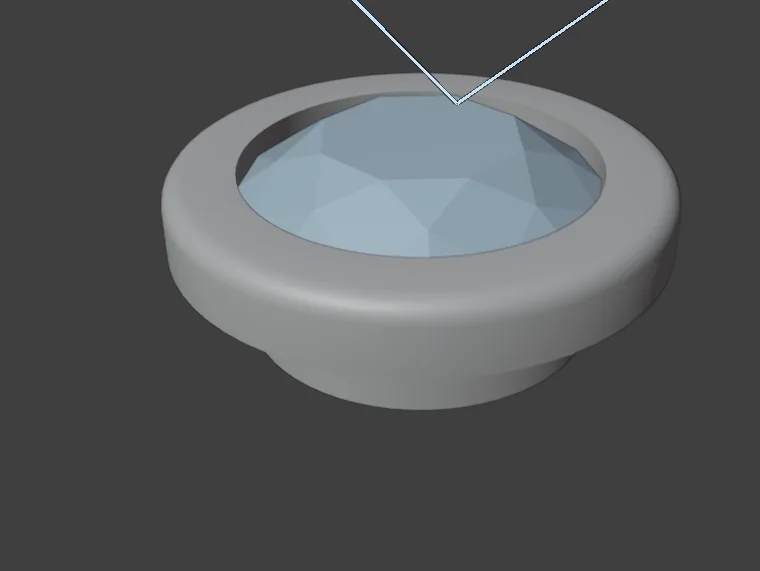
A Round 6.00, a round stone 6.00 mm across, in a Collet, a collar of metal that the stone sits inside, with a second rail below it. What makes a Collet unlike the Bezel of P5-01 is its rounded top and that second rail. This collet is a collar for looking at: its rim is 1.00 wide, too thick for a setter to rub over a stone. Its collar carries load, and 1.00 is over the 0.80 structural metal. A setting shows small pink marks on its metal. Each is a handle: a place on the metal that you drag to change a number, and the number on the panel follows. You reach for a handle when the place matters more than the figure. Every drag on this page is put back, so the Collet ends at the add-on’s own numbers: Width 1 mm and Thickness 1 mm. Only the stone changes, to a Round 5.00.
About 10 minutes.
Files
- p5-04-start.blend (133 KB): open this one to begin.
- p5-04-finished.blend (140 KB): the result, to compare with yours.
Both were made in Blender 5.2.0.
Before you start
- You have done Part 0, Blender from nothing, Shape a bezel’s section and make it real (P5-02) and Drag a number on the model (P4-02): a handle, a button on the model and a drag are not explained again here, and Stone Settings is not explained again.
- CAD/CAM Jeweller 2.22.0 or later (Preferences > Add-ons shows the version). The start file holds a Round 6.00 in a live Collet, in millimetres.
- A drag’s size depends on your zoom: your numbers will differ from these. What must match is that the panel reads what the handle reads.
Build it
Step 1. Open the start file and save your copy
WhereThe top bar: the row of words that begins File, Edit.
DoDownload p5-04-start.blend from Files above and open it. Then choose File > Save As and save it under the name below, in a folder of yours. Open an exercise file and keep the start file safe (P0-07) shows how.
Typemy-collet.blend
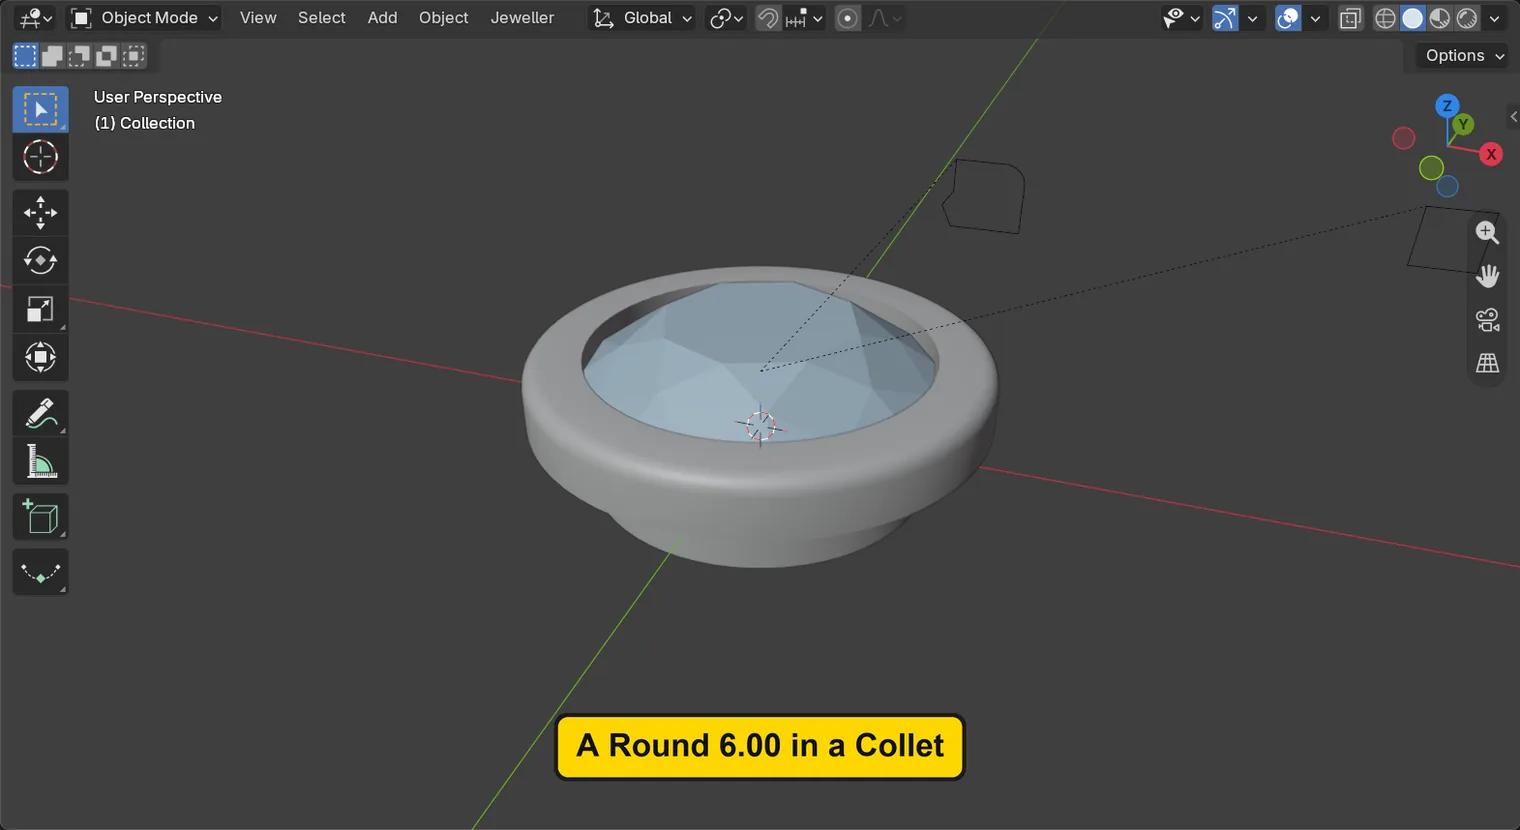
You should seeThe 3D view shows a round stone inside a collar of metal, and nothing is selected. The title bar, the strip above File and Edit, begins my-collet. The first picture is the 3D view and the second is the title bar.
It worked whenThe title bar, the strip above File and Edit, begins my-collet.

Step 2. Click the stone to bring up the handles
WhereThe sidebar: press N with the pointer over the 3D view if it is shut, click the CAD/CAM tab, then Setting in the section bar. Then the 3D view.
DoClick the stone, in the middle of its flat top, between any pink marks. Then bring the setting up large: choose View > Frame Selected (or two fingers up on a touchpad).
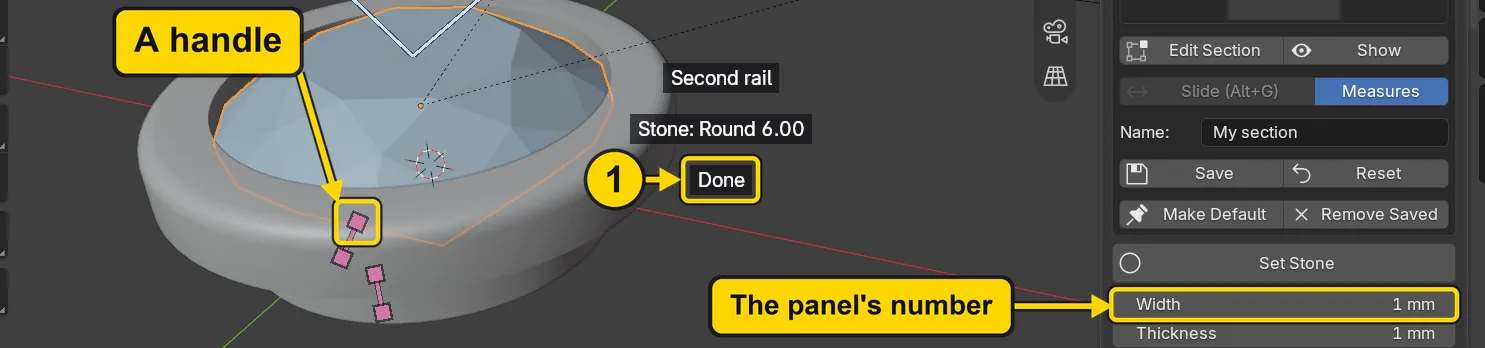
You should seeSmall pink marks stand on the collar, and buttons on the model stand to the right of it: Second rail, Stone and Done. The picture marks the button Done, one of the words beside the setting; a click on any of them acts at once. The panel Stone Settings shows the Collet’s numbers: Width 1 mm and Thickness 1 mm, and the second rail’s switch. Each pink mark stands where its number acts on the metal.
It worked whenPink marks stand on the collar and the word Done shows beside it.
Step 3. Open More and rest the pointer on a handle
WhereThe Stone Settings panel: the closed panel More, under Make Real. Then the 3D view.
DoClick the title More, then rest the pointer on the handle on the collar’s outside, without pressing, and wait a moment. If a label other than Width shows, move the pointer to the next pink mark.
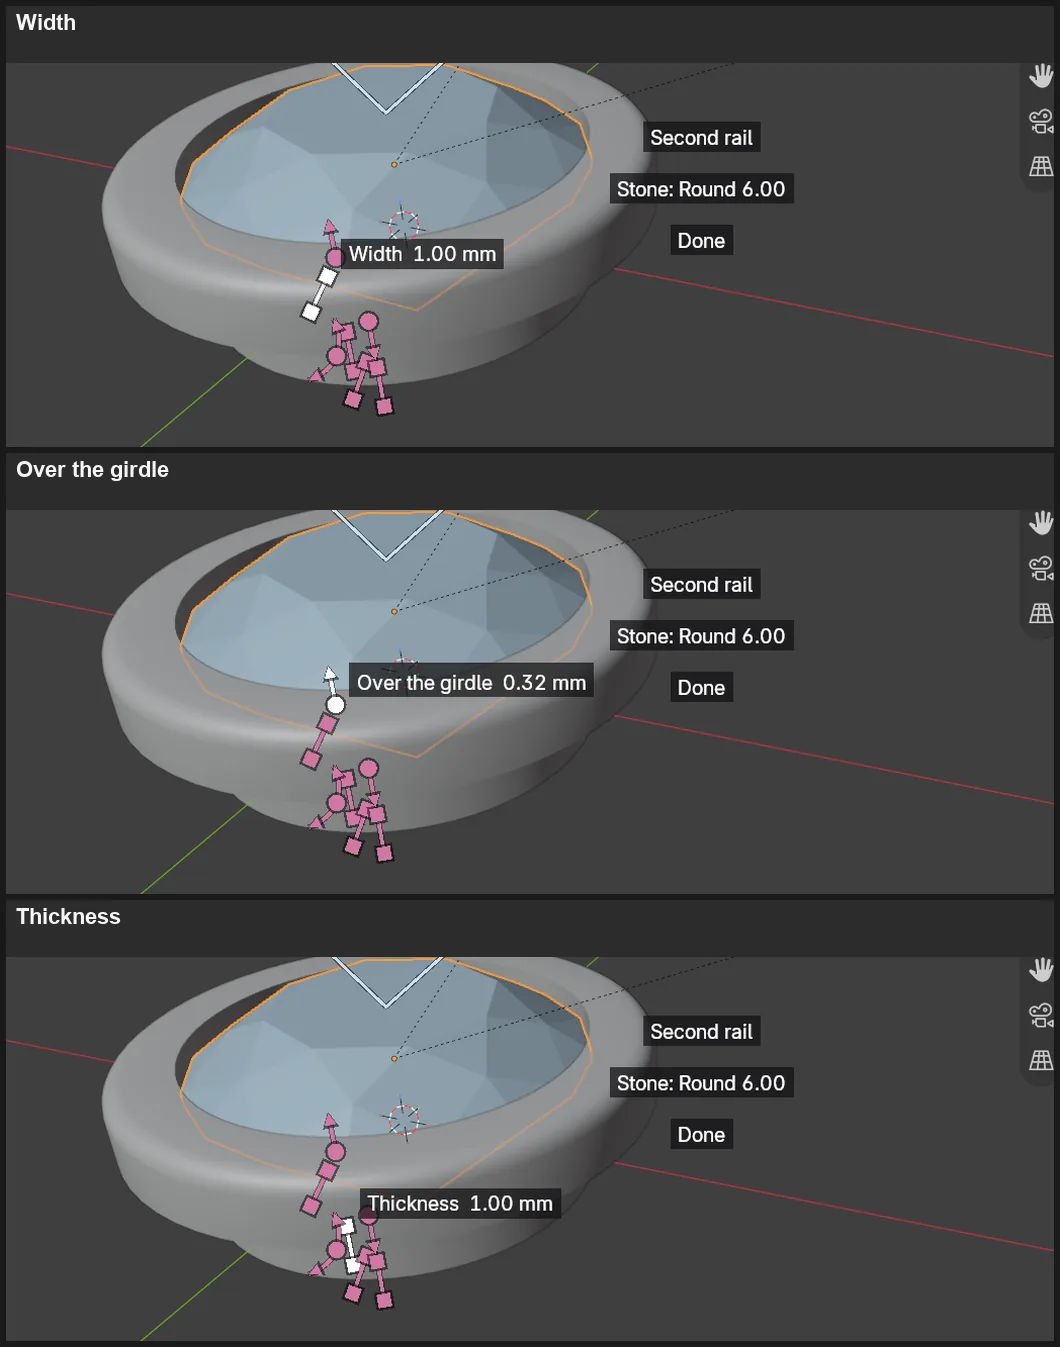
You should seeA label shows beside the handle, its name and its number: “Width 1.00 mm”. The mark turns white. With More open the numbers under it show as handles too: Over the girdle, Lean and the second rail’s. The three pictures show three handles that way: Width on the outside, Over the girdle on the top, Thickness at the foot.
It worked whenA label shows beside the handle and the mark is white.
Step 4. Drag Width
WhereThe 3D view, the handle on the collar’s outside.
DoRest the pointer on the handle on the collar’s outside until its label reads Width, then press on it, drag it a little outward, and let go.
You should seeThe collar grows wider as you drag. On a touchpad, press the pad down and keep it down while you slide. Rest the pointer on the handle again: its label reads “Width 1.76 mm”. Width in the panel reads the same, with fewer decimals.
It worked whenWidth in the panel has changed from 1 mm. Here it reads about 1.8 mm.
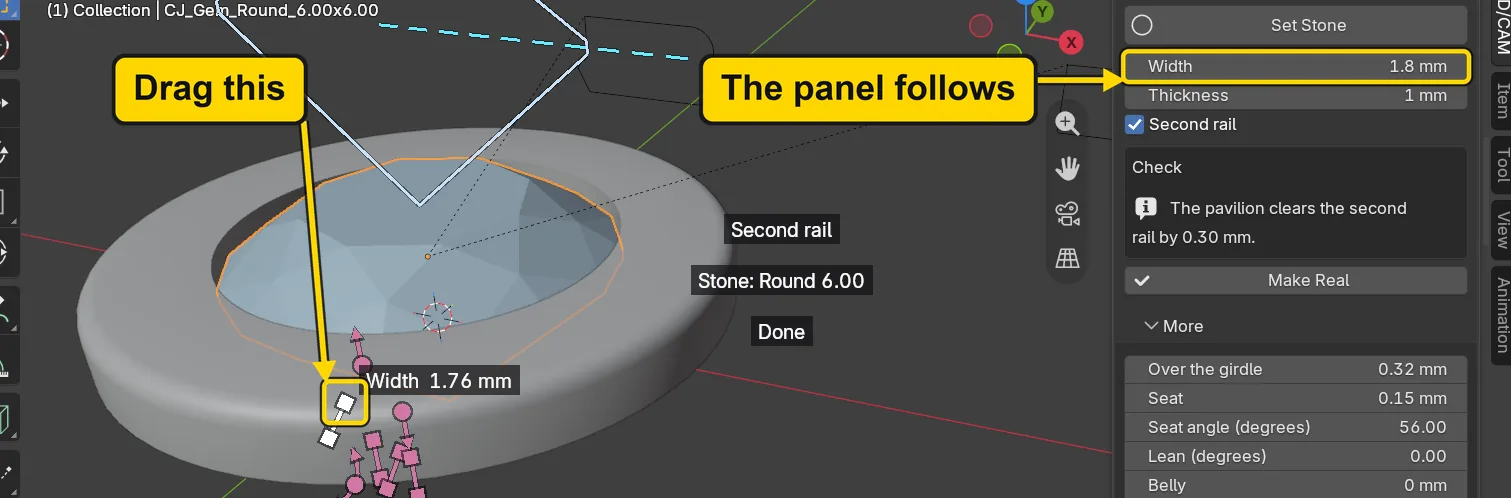
If it goes wrongA different label shows, or a different number changes: a wrong pink mark was pressed. It only changes another number: press Esc, or Ctrl+Z, and rest the pointer on the next mark.
Step 5. Take the drag back with Ctrl+Z
WhereThe 3D view: move the pointer off the sidebar and into the dark area.
DoPress Ctrl+Z once.
You should seeThe collar goes back to its first width: the whole drag is one step. The label reads “Width 1.00 mm” and the panel reads 1 mm.
It worked whenWidth in the panel reads 1 mm.
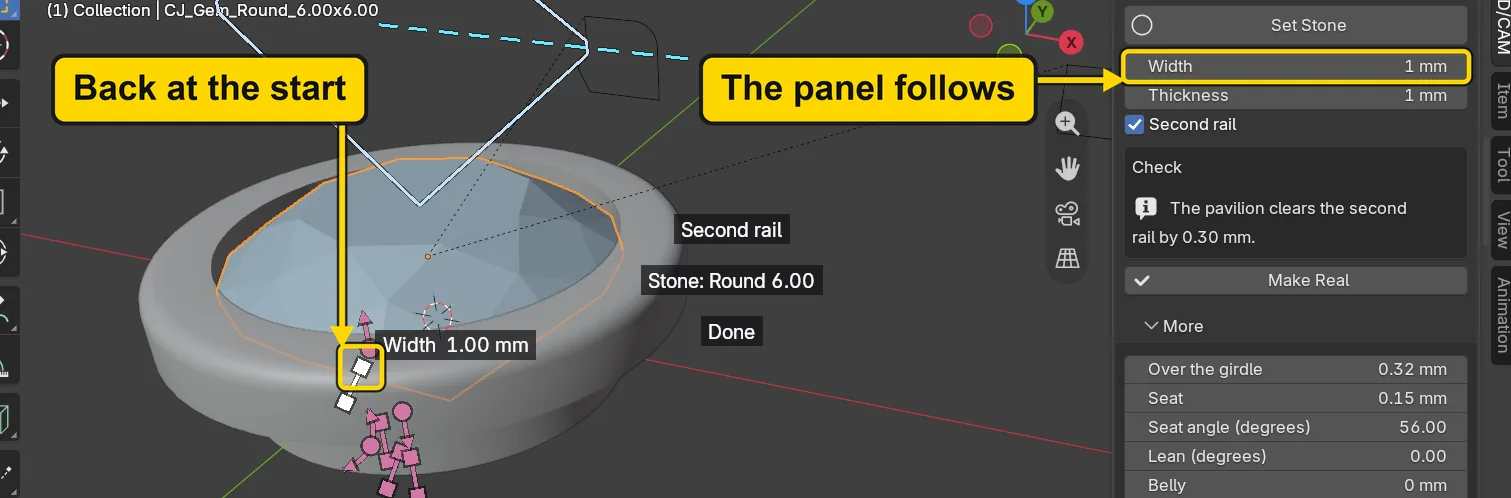
If it goes wrongNothing moves: the pointer is still over the sidebar. Move it over the 3D view and press Ctrl+Z again.
Step 6. Press Esc in the middle of a drag
WhereThe 3D view, the handle at the collar’s foot: Thickness.
DoRest the pointer on the handle first: the label must read Thickness. Then press on it and drag it down. Keep the button down, press Esc, then let go. A wrong mark only changes another number: Esc, or Ctrl+Z.
You should seeThe collar springs back to its first height. Esc is the way out of a drag you do not want: nothing is left to undo. While you held the button the number read 1.47, and now the label reads “Thickness 1.00 mm”.
It worked whenThickness in the panel reads 1 mm.
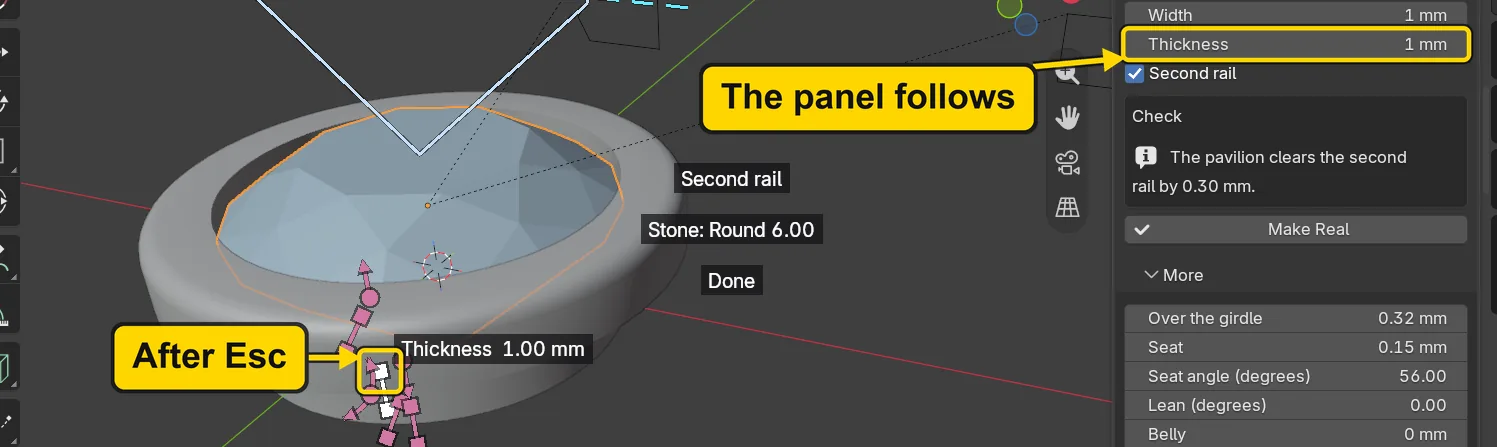
Step 7. Switch the second rail off and on
WhereThe 3D view, the button Second rail, to the right of the setting. To look from low down, click the green ball marked -Y on the small coloured axes at the top right of the 3D view; choose View > Frame All to come back.
DoClick the button Second rail, look, then click it again.
You should seeThe two pictures, seen from low down: the second rail, the thin ring under the collar, goes. With it off nothing holds the stone from below: the stone’s culet, the point at the bottom of the stone, hangs out under a bare collar, which is why this switch is for looking. A second click brings it back. The button acts once, at the press, and does not need a drag. The collar’s own numbers do not change.
It worked whenThe second rail stands under the collar again, and the second rail is on in the panel.
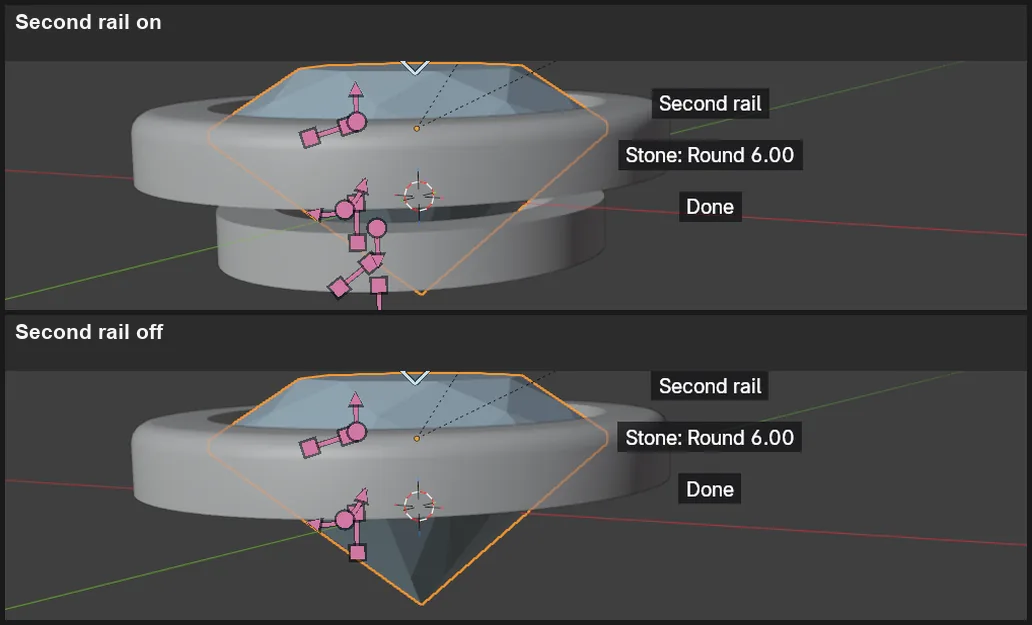
Step 8. Swap the stone with its button
WhereThe 3D view, the button Stone: Round 6.00, to the right of the setting.
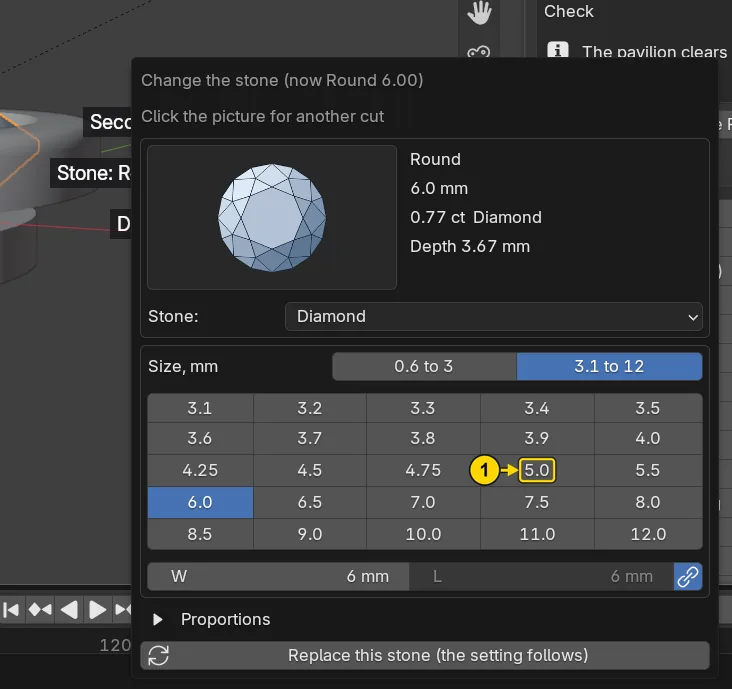
DoClick the button, click the chip 5.0 in the box that opens (a chip is a small button with a size on it), then press Replace this stone (the setting follows).
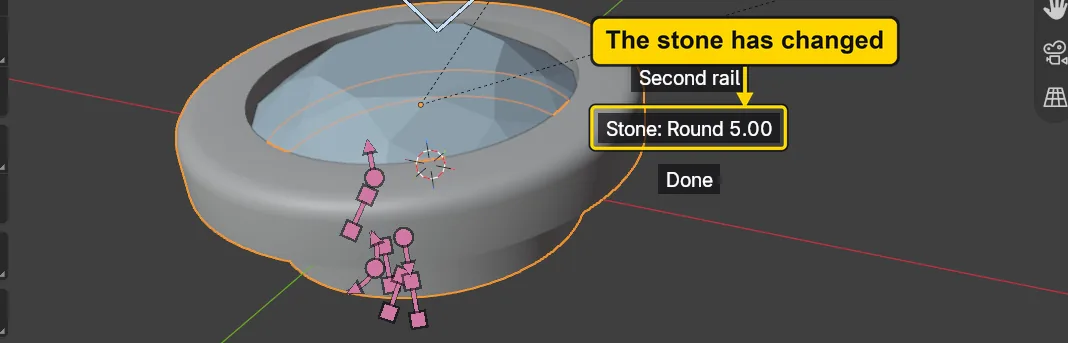
You should seeThe box that opens holds the same chips as the Gems panel, and the second picture marks the chip 5.0 with a 1. The button reads “Stone: Round 5.00” afterwards, the stone is a Round 5.00, and its Collet has followed: the collar now sits round the smaller stone, with the same numbers.
It worked whenThe button reads “Stone: Round 5.00”.
Step 9. Put the handles away with Done
WhereThe 3D view, the button Done on the model.
DoClick Done, and look at the setting with nothing over it. Choose View > Frame All if the setting is out of sight.
You should seeThe handles go, so that you can judge the setting, and the orange line goes too. A click on the stone brings them back. The numbers did not change.
It worked whenThe pink marks are gone and the setting stands alone.
Step 10. Save your work
WhereThe 3D view: move the pointer over it.
DoPress Ctrl+S.
You should seeBlender writes your copy at once, with no question, because the file already has a name. An asterisk, *, in the title bar marks changes that are not saved, and it goes now. Save your work and get it back (P0-12) says more about saving.
It worked whenThe title bar begins my-collet and carries no asterisk.
No picture: the only change is a message on the status bar, and it fades.
Check your result
| What to read | Where | What it should say |
|---|---|---|
| The handle’s label | The 3D view: click the stone, then rest the pointer on the handle on the collar’s outside | “Width 1.00 mm” |
| The panel after a drag | The Stone Settings panel, Width, at step 4 | It reads 1.76 mm, the number the handle read |
| After Ctrl+Z | The Stone Settings panel, Width, after step 5 | It reads 1 mm again |
| After Esc | The Stone Settings panel, Thickness, after step 6 | It reads 1 mm again; in the middle of the drag it read 1.47 |
| The second rail | The 3D view, step 7, the two pictures | The ring under the collar is gone in the second picture and back after the second click |
| The stone | The button on the model, after step 8 | It reads “Stone: Round 5.00” |
Try it yourself
Open your copy and click the stone. Open More and drag Lean on the collar’s outside, then press Ctrl+Z once. Rest the pointer on the handle first and read its label: it says what the number is and how far it runs.
What you learned
- Click a stone that has a setting and the numbers on the panel show as handles on the metal. The numbers under More show when More is open.
- A handle’s drag changes the whole set.
Escbefore you let go puts it back, and oneCtrl+Ztakes back a whole drag. - The button Second rail switches the second rail off and on, and the button Stone swaps the stone: the Collet follows. With the second rail off, nothing holds the stone from below. The next page, Put a wall round any carved stone (P5-05), sets a wall round a stone that has no girdle.