
What you will do
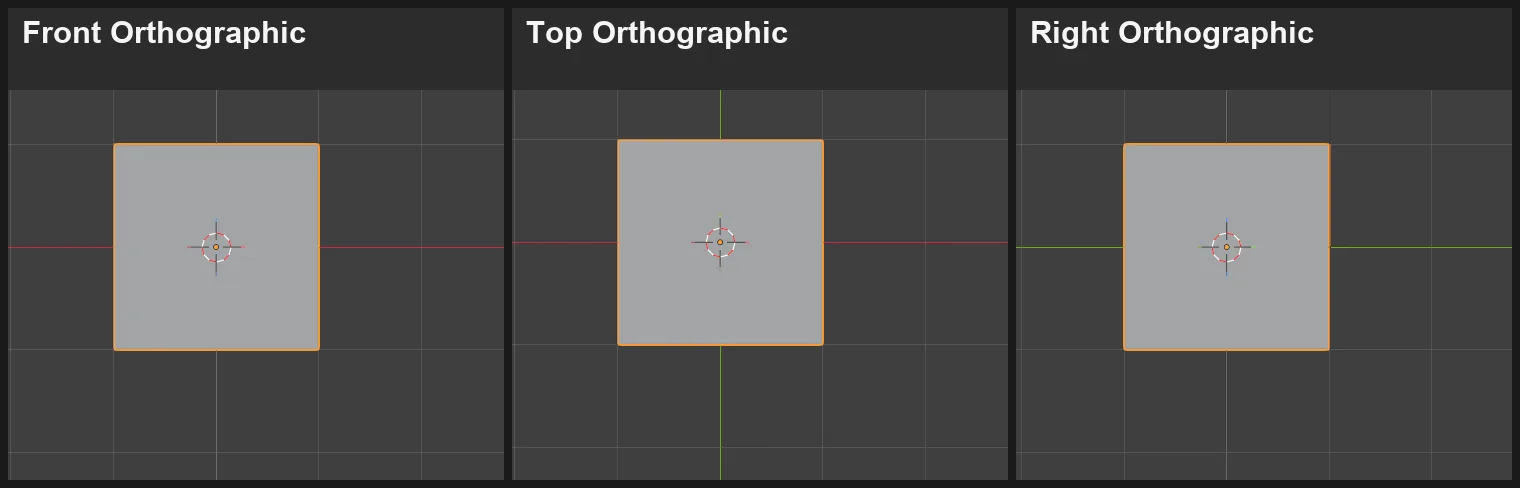
You will look at Blender’s cube square on from the front, the top and the right. A jeweller checks a piece this way, because a side seen square on shows its true shape. Every way here needs only the mouse, so a laptop will do.
About 5 minutes.
Files
No file to download. You begin from Blender’s own File > New.
Before you start
- You can turn the view: Turn, slide and zoom the view with a middle button (P0-04), or Turn, slide and zoom with no middle button (P0-05).
- You know the 3D view and its header: Name every part of Blender’s screen (P0-02).
Build it
Step 1. Start a new file
WhereThe top bar: the row of words that begins File, Edit.
DoStart a new file: File > New > General, as in Name every part of Blender’s screen (P0-02).
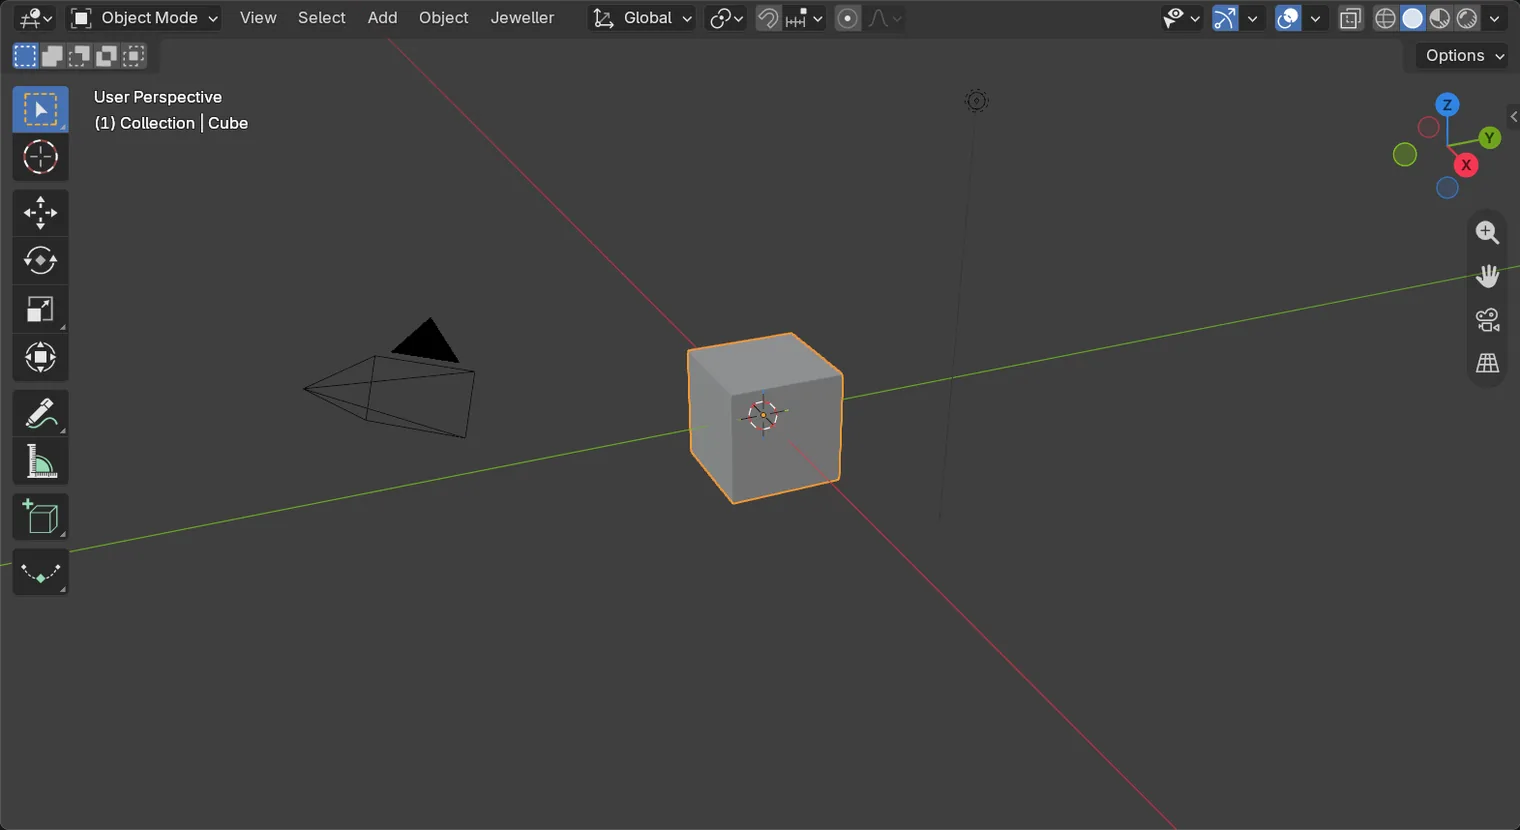
You should seeA new file: a grey cube in the middle of the 3D view, with a camera and a light round it.
It worked whenIn the Outliner, at the top right of the window, you can read Camera and Cube.
If it goes wrongA box asks whether to save your changes: press Don’t Save. You only have Blender’s own cube to lose.
Step 2. Look from the front by the menu
WhereThe header, along the top of the 3D view.
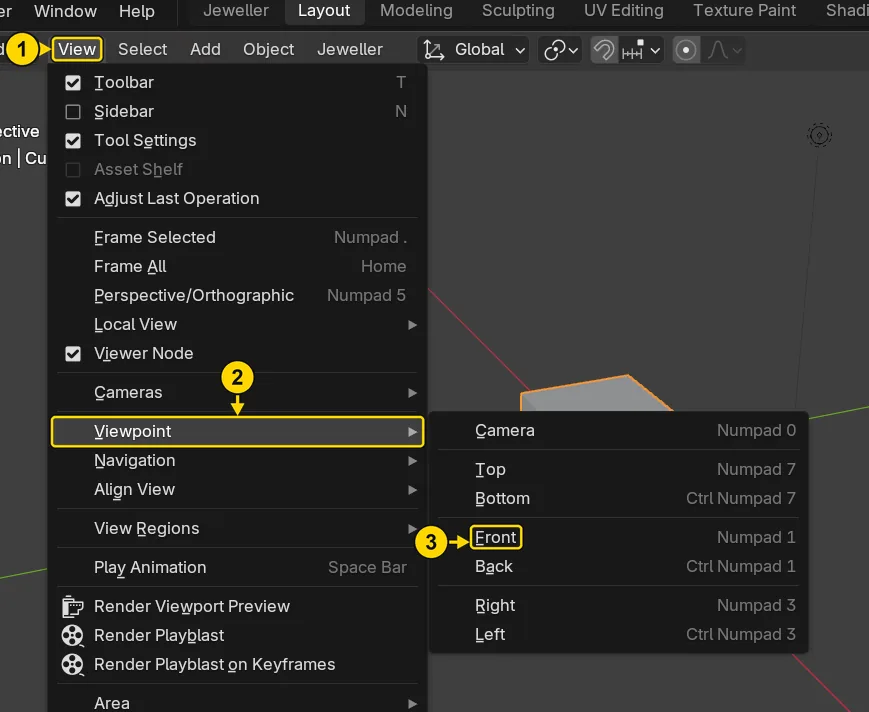
DoClick View (marked 1), rest the pointer on Viewpoint (marked 2), then click Front (marked 3).
You should seeThe view jumps to look at the cube square on from the front. The menu also shows the key for each view, on the number pad. Orthographic means drawn flat, with no perspective, so that sizes can be compared.
It worked whenThe words at the top left of the 3D view begin Front Orthographic.
Step 3. Look from the top and the right
WhereThe same menu: View, then Viewpoint.
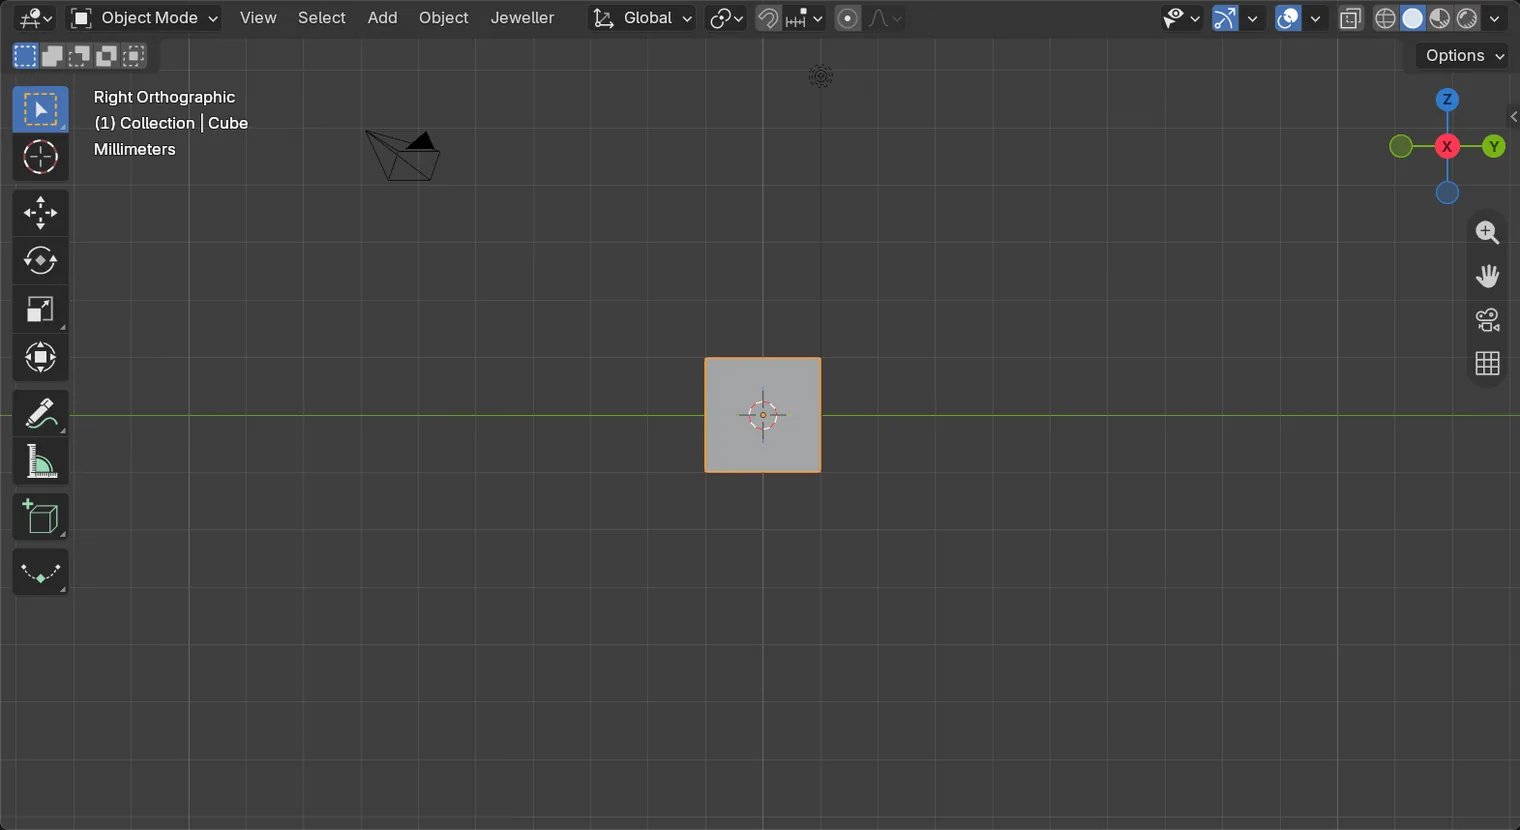
DoClick Top, read the words at the top left of the 3D view, then open the menu again and click Right.
You should seeEach view jumps square on. The table says what to read.
| Click | The words at the top left begin |
|---|---|
| Top | Top Orthographic |
| Right | Right Orthographic |
It worked whenThe words at the top left of the 3D view begin Right Orthographic.
Step 4. Click the Z on the gizmo
WhereThe gizmo: the small ball of coloured letters at the top right of the 3D view. Its letters turn as your view turns.
DoClick the blue ball marked Z.
You should seeThe view jumps to look straight down: Z is up, in Blender.
It worked whenThe words at the top left of the 3D view begin Top Orthographic.
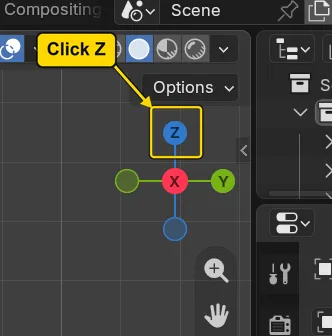
If it goes wrongThe view turned a little and the words begin User: the pointer moved during the click, and a drag on the gizmo turns the view. Click the ball again, keeping the mouse still.
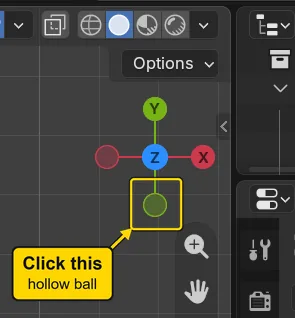
Step 5. Click a hollow ball
WhereThe gizmo again. From the top it shows a hollow green ball at the bottom, opposite the green Y.
DoClick the hollow green ball.
You should seeThe view jumps to the front. A hollow ball is the opposite side of a lettered ball of its colour, so the hollow green ball, not the Y, gives the front.
It worked whenThe words at the top left of the 3D view begin Front Orthographic.
Step 6. On a number pad: the same views by key
WhereThe number pad: the block of keys at the right of a full keyboard. A laptop may have none, so skip this step.
DoWith the pointer over the 3D view, press 3 on the number pad, then 7 on the number pad, then 1 on the number pad.
You should seeRight, then top, then front. These are not the number row above the letters: that row does something else in Blender and leaves the view alone.
It worked whenThe words at the top left of the 3D view begin Front Orthographic.
No picture: the views are the ones pictured at the top of this page.
Step 7. Turn away, then frame everything
WhereThe 3D view.
DoTurn the view a little, by the way you learned. Then press Home.
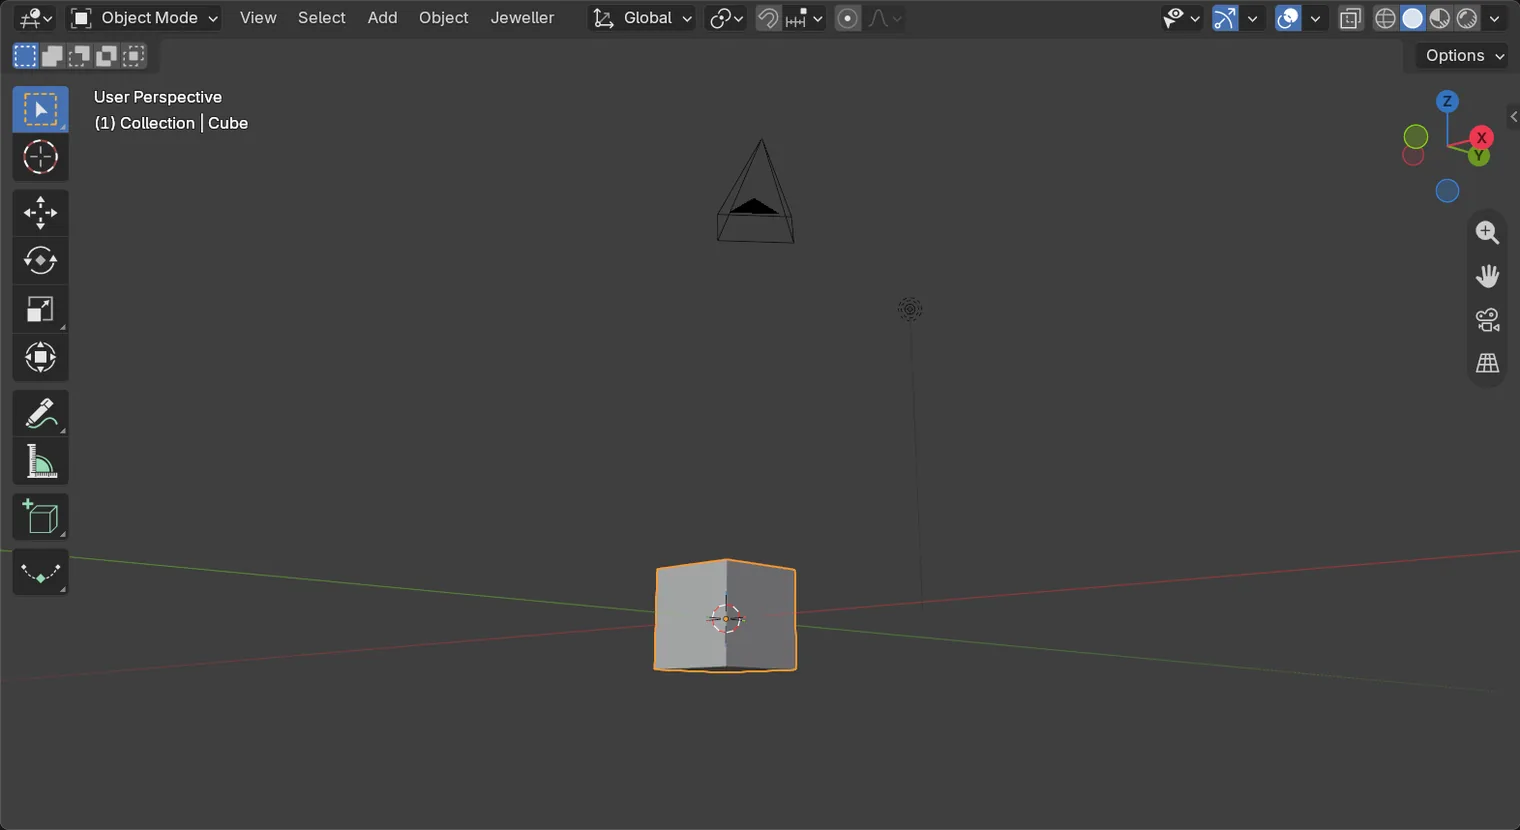
You should seeTurning takes you out of the square view, and the words at the top left of the 3D view change to User Perspective. Home then fits the cube, the camera and the light into the 3D view, without turning it. View > Frame All does the same, for a keyboard with no Home key.
It worked whenThe cube, the camera and the light can all be seen in the 3D view.
Home: everything in sightCheck your result
| What to read | Where | What it should say |
|---|---|---|
| The view’s name | The words at the top left of the 3D view | User Perspective, because you turned away from the front |
| All in sight | The 3D view | The cube, the camera and the light can all be seen, after Home |
Try it yourself
Begin from File > New > General. Click the red ball marked X on the gizmo: the words at the top left of the 3D view begin Right Orthographic. Click the same place again: they begin Left Orthographic, the opposite side.
What you learned
- View > Viewpoint gives every square view by the mouse, and the words at the top left of the 3D view always say which you are in.
- A click on a gizmo ball does the same: Z is the top, X the right, and the hollow green ball the front.
Homeframes everything. On a number pad,1,3and7are front, right and top. The number row does not turn the view.