
What you will make
A ring band made from half of one: 1.80 thick, 3.00 wide at the start and 20.30 across the outside, so the inside is 16.70 across, a UK L and a half. Live Mirror draws the other half of what you are modelling, live, the way Blender’s own Mirror does: you edit one half in Edit Mode and the other follows. The two halves are joined at the middle, so the band is one piece with no open ring of points where they meet, when you make the mirror real. Step 7 widens the band to 3.75. A jeweller models one half of a symmetrical piece and lets the other half be exact. The start file’s two halves stand 0.30 mm apart at the middle, and one press closes them.
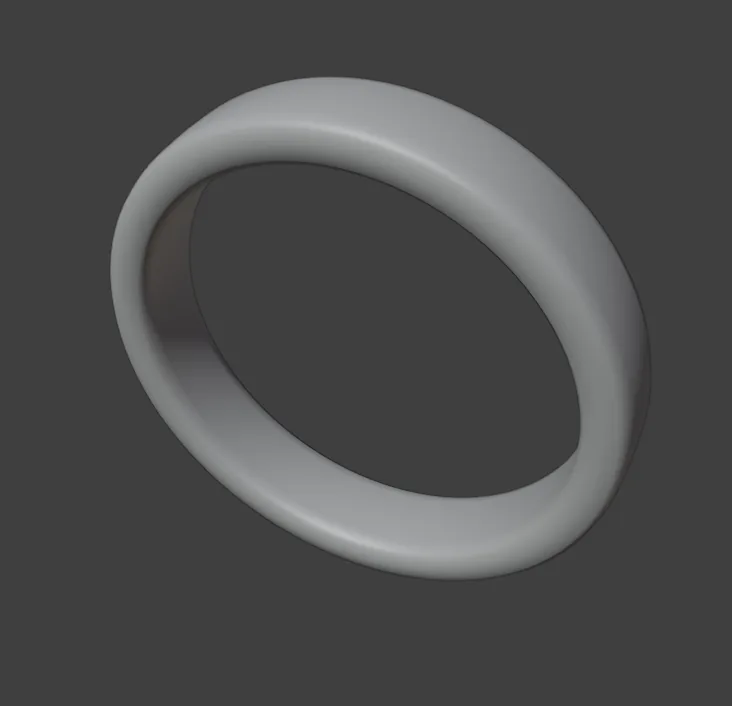
About 15 minutes.
Files
- p3-14-start.blend (119 KB): open this one to begin.
- p3-14-finished.blend (139 KB): the result, to compare with yours.
Both were made in Blender 5.2.0.
Before you start
- You have done Part 0, and you know Edit Mode and what live means (Draw any outline with a pen, P2-02, and the live forms of Part 2). The start file holds half a band and a thin circle round it, in millimetres.
- CAD/CAM Jeweller 2.22.0 or later is installed (Preferences > Add-ons shows the version), and its CAD/CAM tab is in the sidebar.
Build it
Step 1. Open the start file and save your copy
WhereThe top bar: the row of words that begins File, Edit.
DoDownload p3-14-start.blend from Files above and open it. Then choose File > Save As and save it under the name below, in a folder of yours. Open an exercise file and keep the start file safe (P0-07) shows how.
Typemy-band.blend
You should seeThe 3D view looks at a ring from the front: the right half of a band, a smooth curve of metal, and a thin circle round the inside of it that is the ring’s rail. The rail is a guide for the work and no metal: it marks the ring’s middle. The Outliner, the list at the top right of the window, lists the band and the rail.
It worked whenThe title bar, the strip above File and Edit, begins my-band.
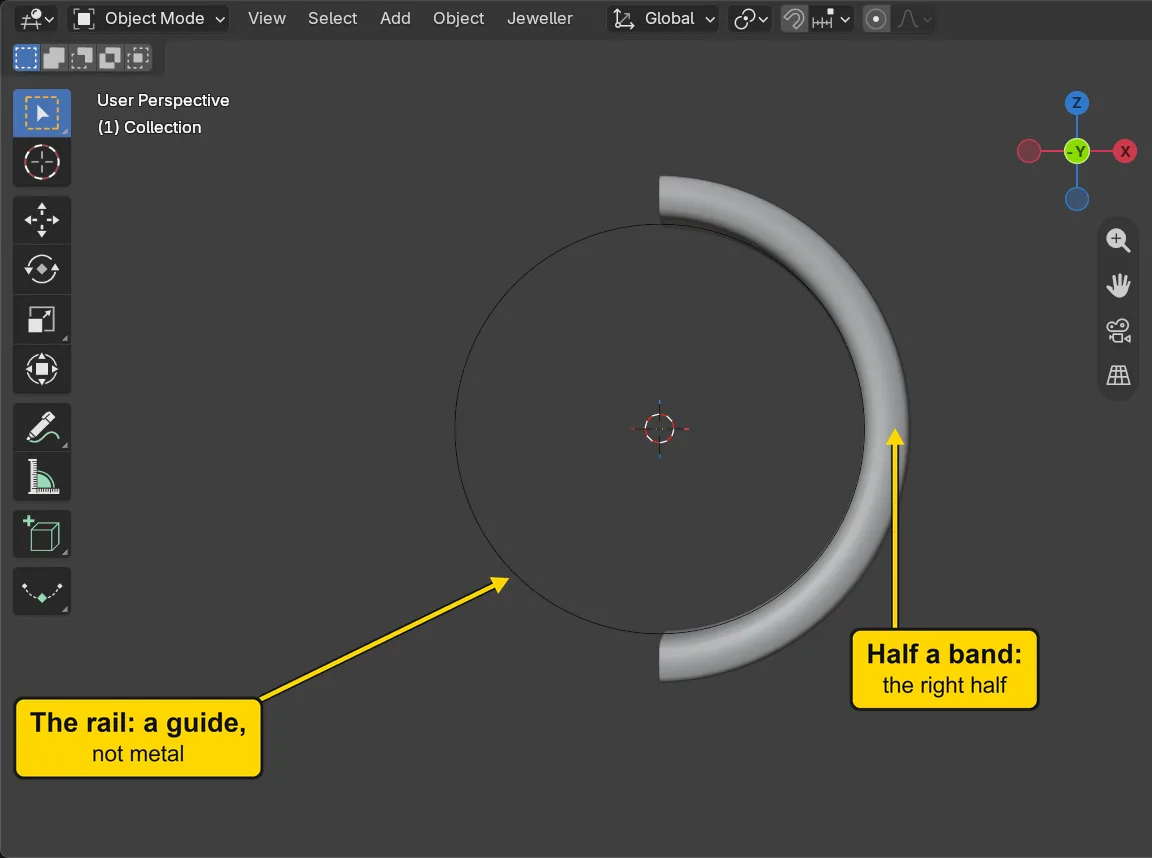
Step 2. Open the Live Mirror and Turn panel
WhereThe sidebar, the CAD/CAM tab. Click Mirror in the section bar, the small word buttons at the top.
DoClick Mirror, and look at the first panel, Live Mirror and Turn.
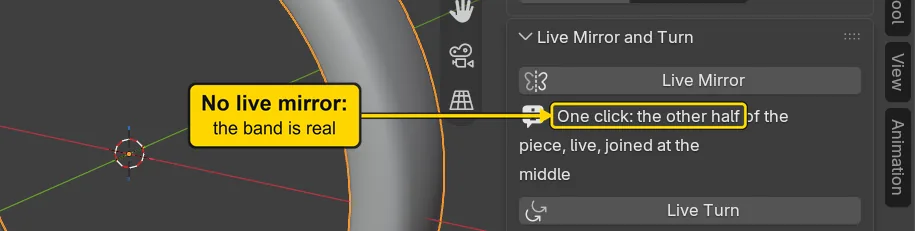
You should seeThe panel with a button Live Mirror and, under it, one line of words: “One click: the other half of the piece, live, joined at the middle”. Under that stands Live Turn (the next page’s tool). Nothing is selected, so the buttons are ready to take the band.
It worked whenThe button Live Mirror is on the screen.
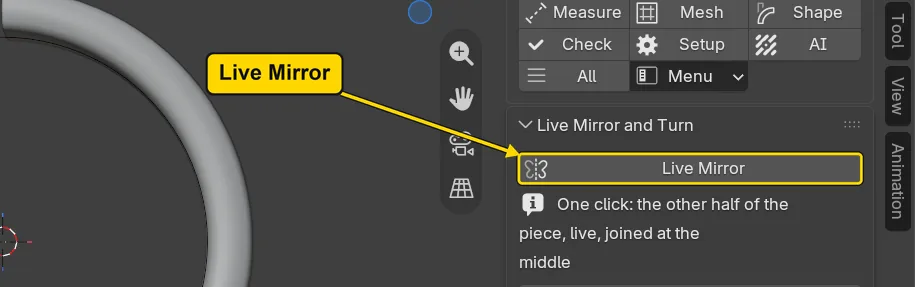
Step 3. Click the half band and go into Edit Mode
WhereThe 3D view. Move the pointer over the dark area.
DoClick the band, then press Tab.
You should seeThe words at the top left of the 3D view name the band, and the header reads Edit Mode. The band shows its points and lines. Edit Mode is where you change the shape of one object, point by point. Live Mirror works here, so you model the half and see the whole.
It worked whenThe header reads Edit Mode.
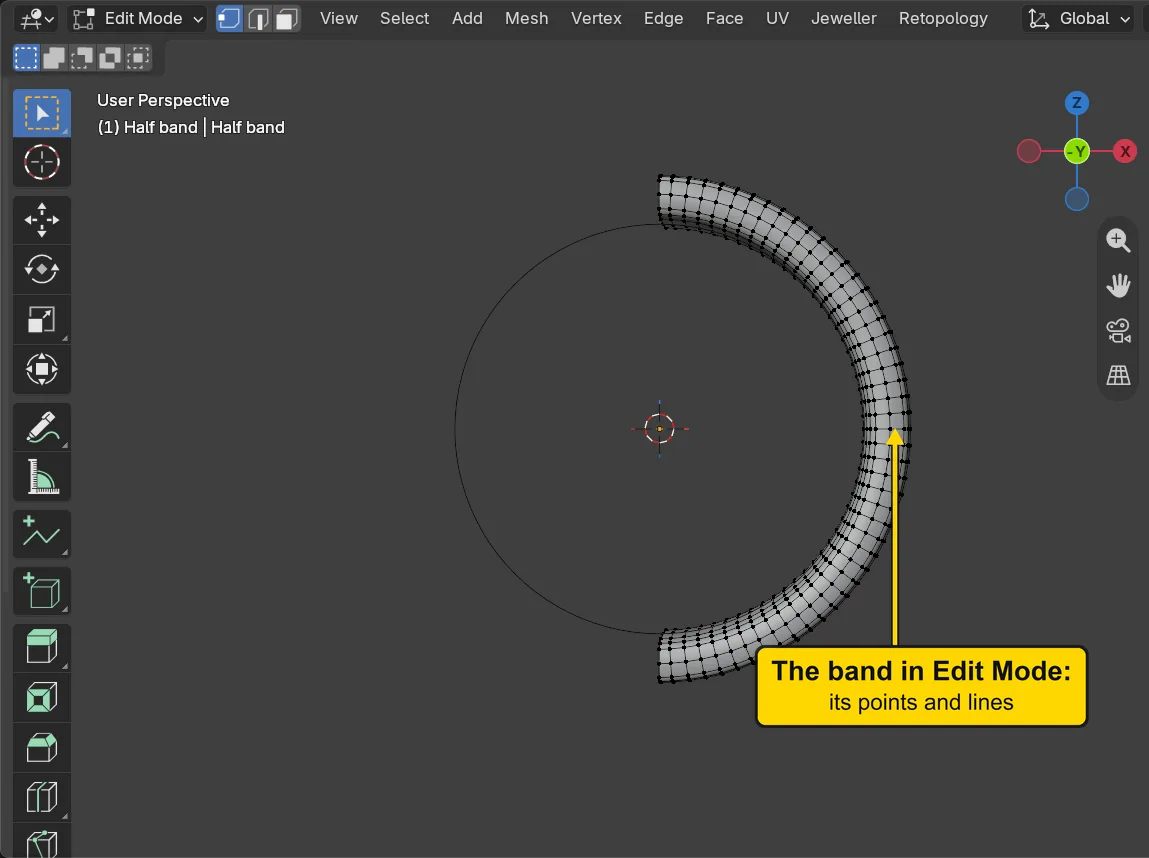
Step 4. Press Live Mirror
WhereThe Live Mirror and Turn panel.
DoPress Live Mirror.
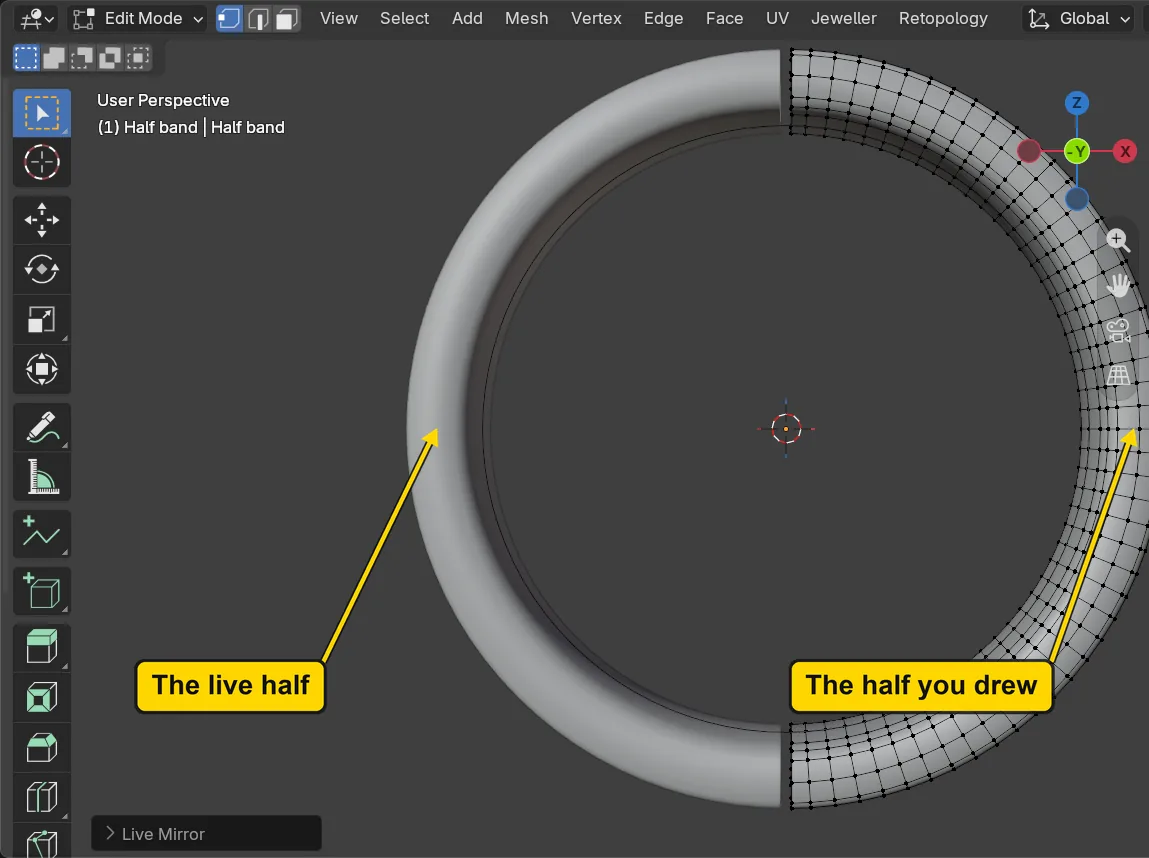
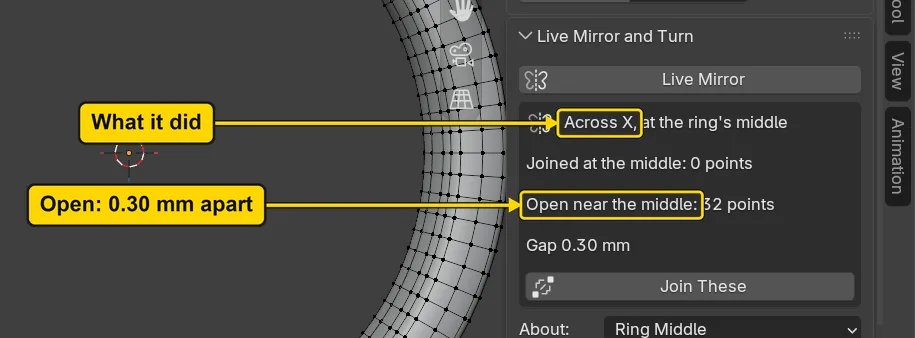
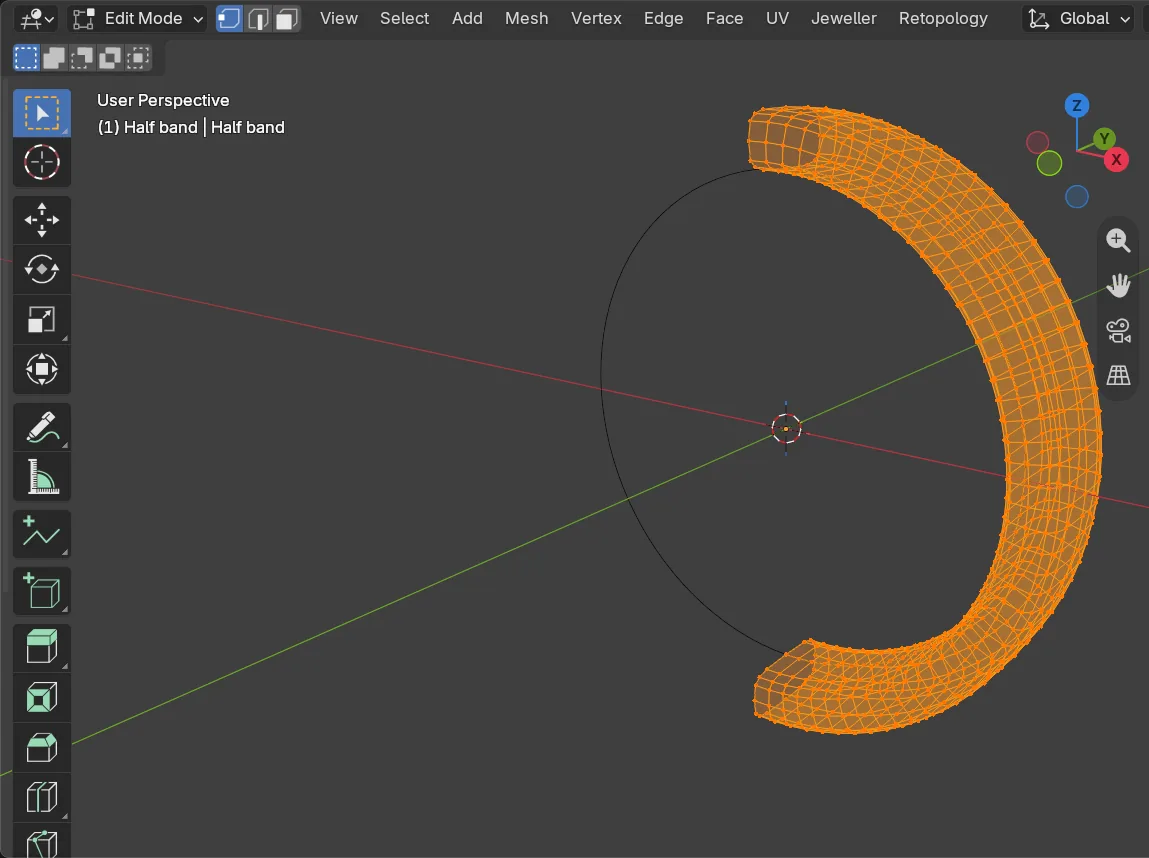
You should seeThe other half of the band, drawn at once on the left, so that you see a whole ring with a hair of space at the top and at the bottom. A box of short lines says what it did: “Across X, at the ring’s middle”, “Joined at the middle: 0 points”, “Open near the middle: 32 points” and “Gap 0.30 mm”. The ring’s middle comes from the rail, so the mirror is across X, the line down the middle of the front view. A gap of 0.30 mm is under 1 mm, so the add-on counts the points as open near the middle. The first picture shows the whole ring in the 3D view, the half you drew at the right and the live half at the left.
It worked whenThe box of lines reads “Across X, at the ring’s middle”.
Step 5. Take it off with Remove, and put it back
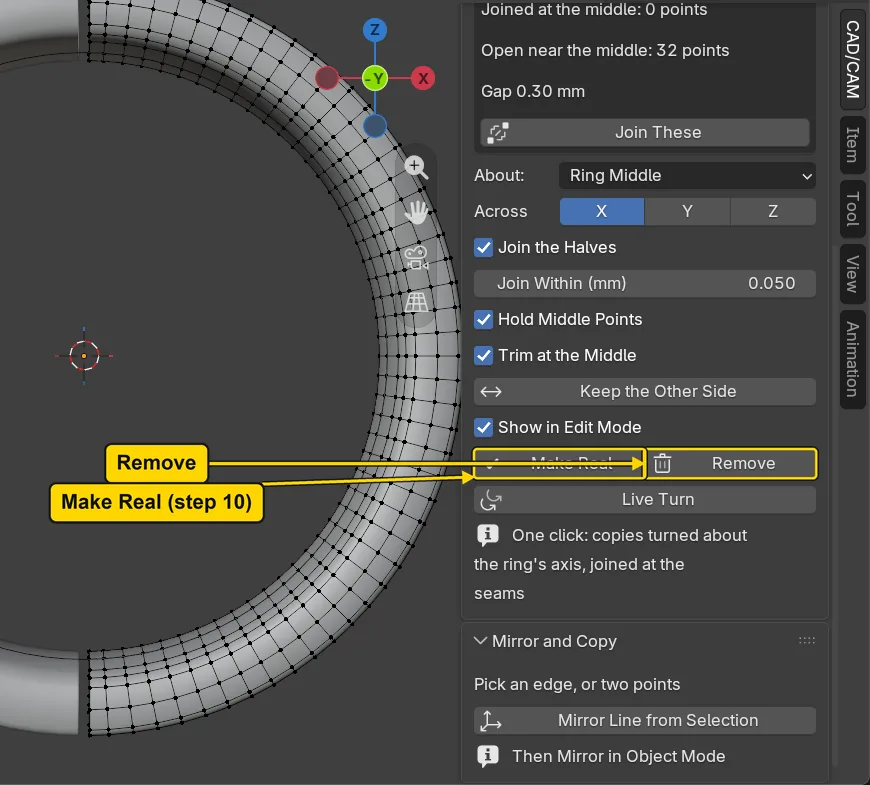
WhereThe Live Mirror and Turn panel: the buttons Make Real and Remove at the foot of the block. Scroll the sidebar down to them (turn the mouse wheel, or slide two fingers on the touchpad).
DoPress Remove, look at the 3D view, then press Live Mirror again.
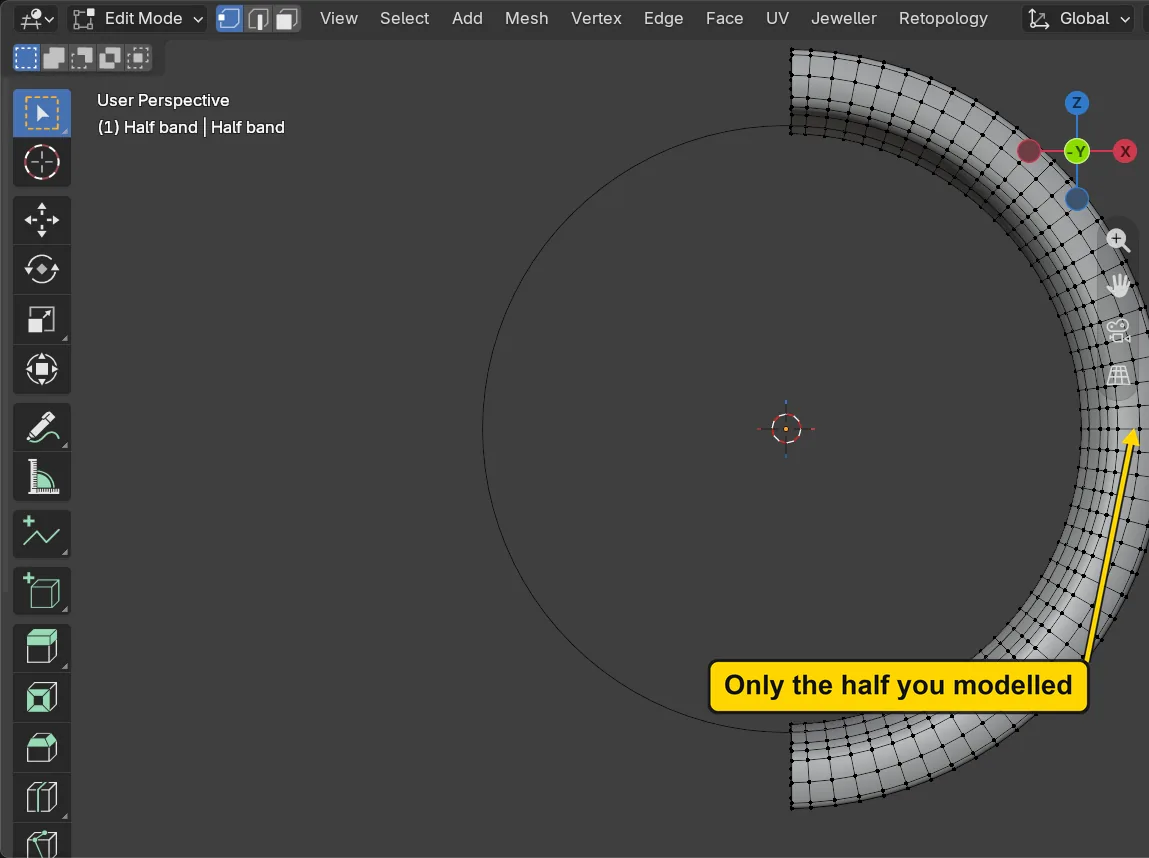
You should seeAfter Remove the left half goes and the right half stays as it was: Remove takes the live mirror off and leaves the mesh as it is. The panel is back to “One click”. The second press makes the mirror again, with the add-on’s own starting numbers.
It worked whenThe box of lines is back and reads “Across X, at the ring’s middle”.
Step 6. Press Join These
WhereThe Live Mirror and Turn panel, the box of lines: the button Join These under it.
DoPress Join These.
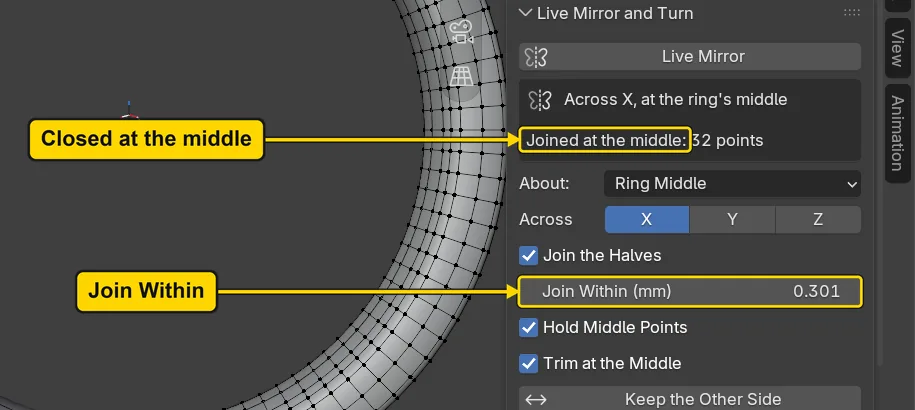
You should seeThe box now reads “Joined at the middle: 32 points”, and the line about open points is gone. Join Within (mm), further down, reads 0.301: the widest gap among the open points, 0.30, with a hair added. Points of the two halves that lie closer than that are one point now: each end of the band moves 0.15 mm to the middle, half the gap. Leave About, Across, Join the Halves and Hold Middle Points as they are.
It worked whenThe box of lines reads “Joined at the middle: 32 points”.
Step 7. Edit the half and watch both
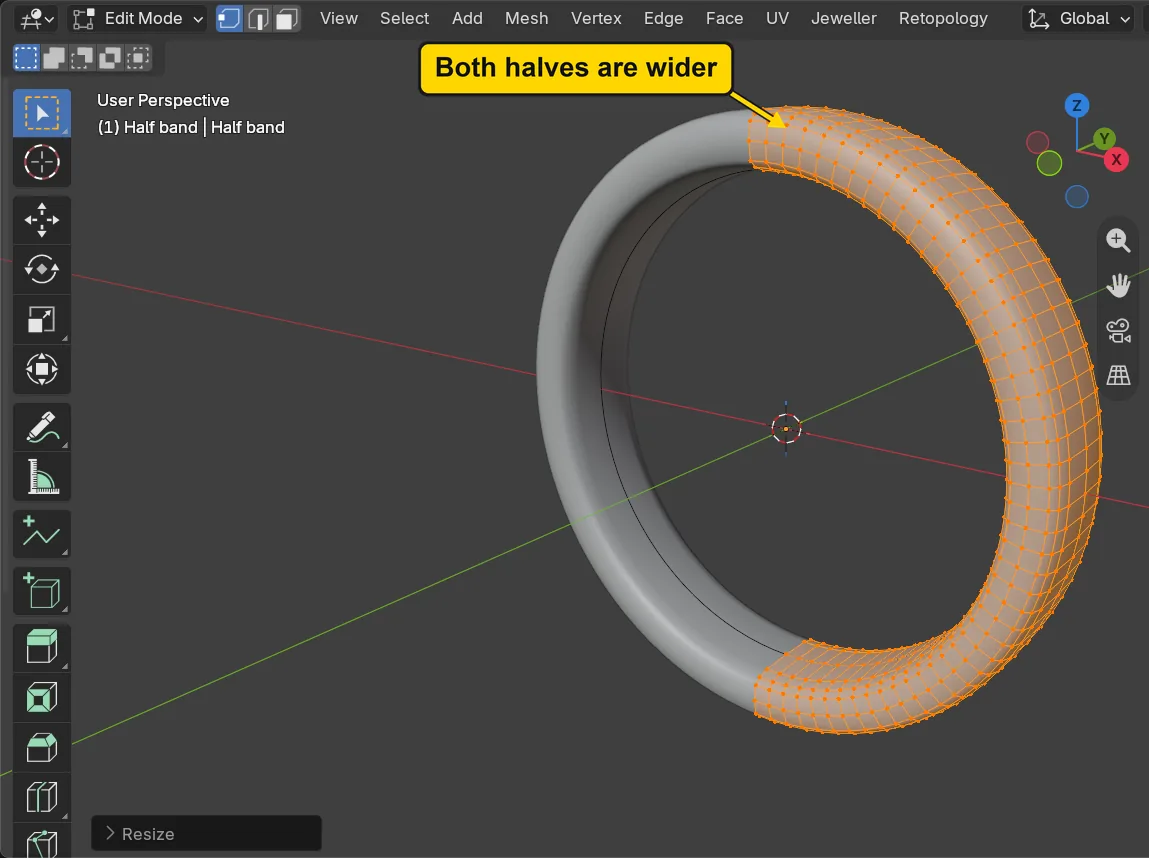
WhereThe 3D view, in Edit Mode. Move the pointer off the sidebar and into the dark area. To see the band from a little to the side, as the picture does, drag the gizmo, the small ball of coloured letters at the top right of the 3D view: that turns the view round the band.
DoPress A to pick every point, press S, Y, type 1.25 and press Enter.
TypeA, S, Y, 1.25, Enter
You should seeThe band wider: S scales, Y is the direction along the finger, and 1.25 makes it 25 per cent more. The half you edited was 3.00 mm wide and is 3.75 mm wide now, and the other half is wider by the same, because it follows. You edited one half and both changed. The box still reads “Joined at the middle”, for the points on the middle did not move.
It worked whenThe band is wider on both halves.
If it goes wrongNothing changes: The pointer is still over the sidebar. Move it over the 3D view and press the key again.
Step 8. Take the scale back with Ctrl+Z
WhereThe 3D view, in Edit Mode. Keep the pointer over the dark area.
DoPress Ctrl+Z, look at the band, then press Ctrl+Shift+Z.
TypeCtrl+Z, Ctrl+Shift+Z
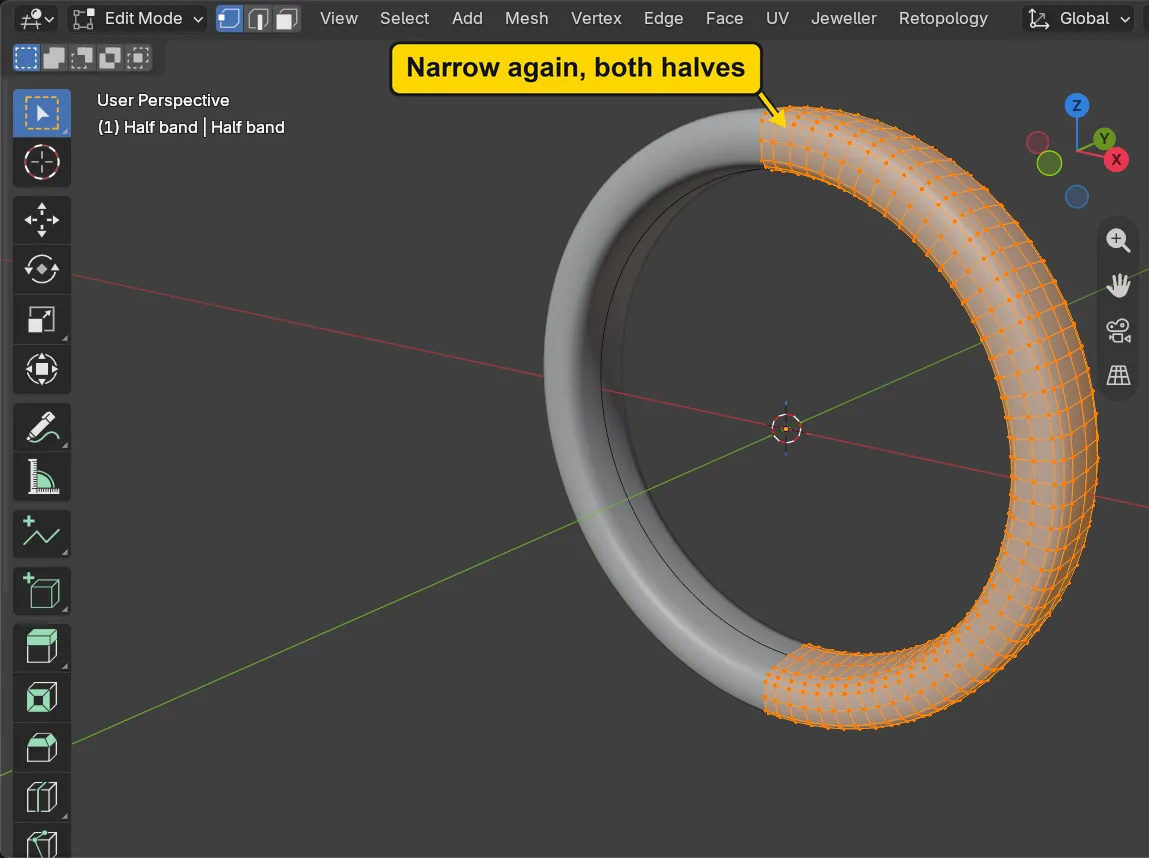
You should seeAfter Ctrl+Z the band is narrow again, 3.00 mm wide on both halves, and the mirror is still live: it took back only the scale. After Ctrl+Shift+Z the band is 3.75 mm wide again. Ctrl+Z is safe after a good press like this one.
It worked whenThe band is 3.75 mm wide again on both halves.
Step 9. Try Keep the Other Side
WhereThe Live Mirror and Turn panel, the button under Trim at the Middle. Scroll the sidebar down to it.
DoPress Keep the Other Side, look at the 3D view, then press it again.
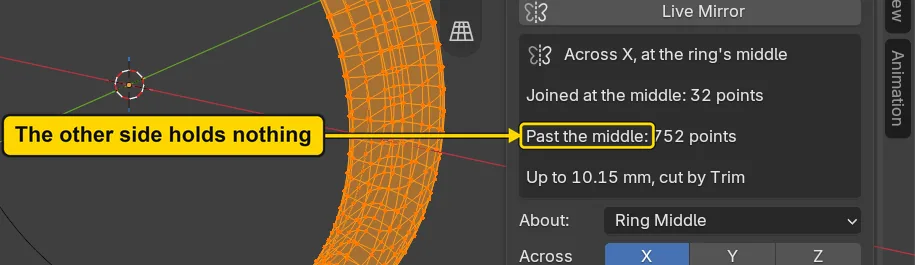
You should seeAfter the first press the live half is gone and only the half you drew stays, in orange. The box reads “Past the middle: 752 points” and “Up to 10.15 mm, cut by Trim”: the add-on kept the other side of the middle, and the half you drew runs past it. Trim at the Middle cuts what runs past the middle. The second press puts the live half back, and the band comes back with it. The mesh was never changed.
It worked whenThe band is back, whole, and the box reads “Joined at the middle: 32 points”.
Step 10. Press Make Real
WhereThe Live Mirror and Turn panel: Make Real, at the foot of the block, beside Remove.
DoPress Make Real, then press Tab to leave Edit Mode.
You should seeThe box of lines gone and the panel back to “One click”: the mirror is applied. The band is one real mesh: the other half is part of it now, and it stands joined at the middle, with no open edge there. The status bar, the line along the very bottom of the window, says for a moment “Made real: 1536 points, one piece”: one piece means the two halves are joined.
It worked whenThe panel reads “One click: the other half of the piece, live, joined at the middle”.
Step 11. Save your work
WhereThe 3D view: move the pointer over it.
DoPress Ctrl+S.
You should seeBlender writes your copy at once, with no question, because the file already has a name. An asterisk, *, in the title bar marks changes that are not saved, and it goes now. Save your work and get it back (P0-12) says more about saving.
It worked whenThe title bar begins my-band and carries no asterisk.
No picture: the only change is a message on the status bar, and it fades.
Check your result
| What to read | Where | What it should say |
|---|---|---|
| The band is whole | The Item tab of the sidebar, Dimensions:, with the band selected | X reads 20.3 mm: both halves, 20.3 across the outside (the sidebar drops trailing zeros) |
| The band’s width | The Item tab, Dimensions: | Y reads 3.75 mm: 3 at the start, scaled by 1.25 in step 7 |
| The seam is closed | The box of lines in the Live Mirror and Turn panel, at steps 4 and 6 | At step 4 the box reads “Open near the middle: 32 points”. At step 6 it reads “Joined at the middle: 32 points” and the line about open points is gone |
| The mirror is real | The Live Mirror and Turn panel, with the band selected | The line “One click: the other half of the piece, live, joined at the middle”, and no box of figures |
Try it yourself
Open the start file again (Blender will ask whether to save the changes: choose Don’t Save). Do steps 3, 4 and 7, then press Ctrl+Z and Ctrl+Shift+Z a few times, with the pointer over the 3D view: both halves narrow and widen together.
What you learned
- Live Mirror draws the other half live, and works in Edit Mode: model one half and the other follows. Remove takes it off and leaves the mesh as it is.
- Join These raises Join Within (mm) to just above the widest gap at the middle, so that the two halves become one. Keep the Other Side keeps the other side of the middle instead.
- Make Real applies the mirror: one real mesh, joined where it was set to join.