
What you will make
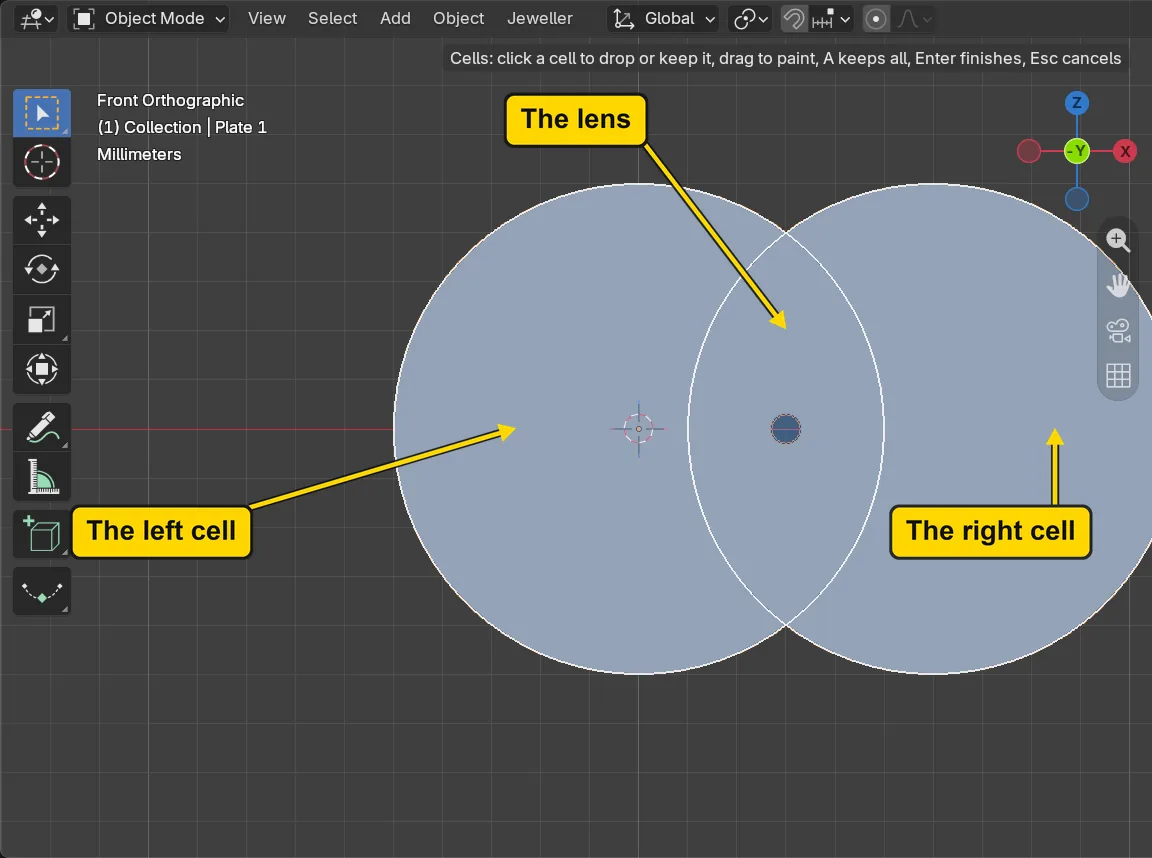
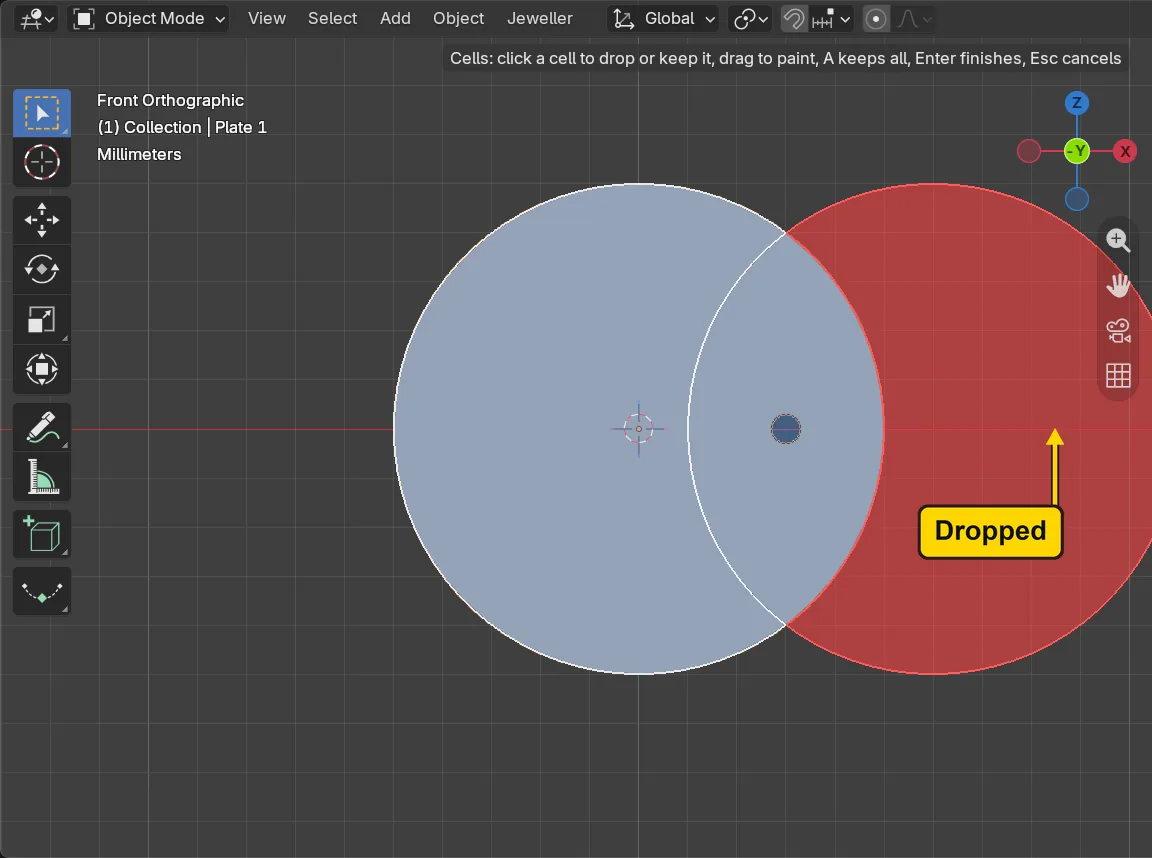
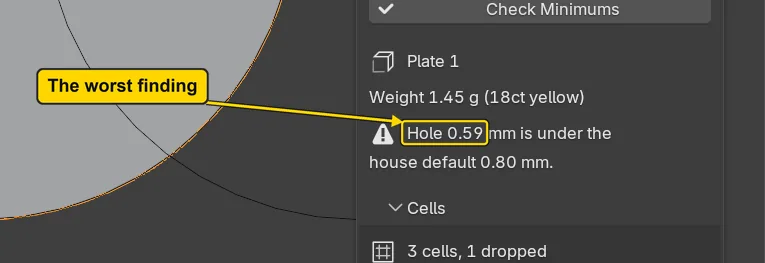
A plate from two overlapping circles, 10 mm across each. A cell is one of the pieces the circles cut each other into: the part of the left circle only, the lens where they overlap, and the part of the right circle only. Edit Cells lets you keep each cell or drop it, and a dropped cell is left out of the metal. Here the right cell is dropped, so what is left is the left circle on its own, with the small hole in it. The plate also has a hole 0.6 mm across, and Check Minimums names it: it is under the 0.80 mm that the add-on holds as its starting number for a small opening (the panel calls it the house default). That 0.80 is the add-on’s own number, not a rule from the bench: a bench may leave a 0.60 hole out and drill it after casting. A finding never stops you; it is a question to read before the piece goes anywhere.
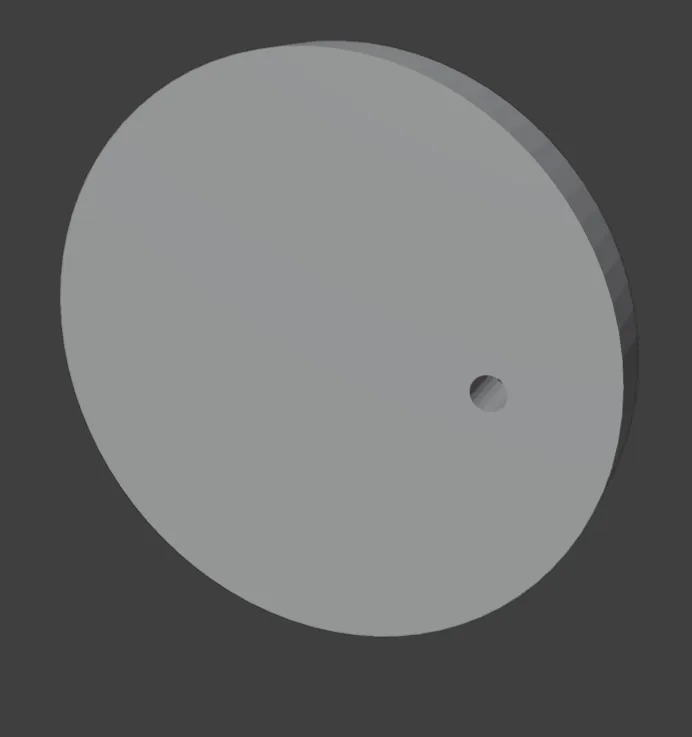
About 15 minutes.
Files
- p2-10-start.blend (112 KB): open this one to begin.
- p2-10-finished.blend (121 KB): the result, to compare with yours.
Both were made in Blender 5.2.0.
Before you start
- You have done Part 0, and you have cut a hole in a live plate (Cut a hole that stays live, P2-09). The start file holds a plate made from two overlapping circles, with a very small hole, in millimetres.
- The add-on is installed, and its CAD/CAM tab is in the sidebar.
Build it
Step 1. Open the start file and save your copy
WhereThe top bar: the row of words that begins File, Edit.
DoDownload p2-10-start.blend from Files above and open it. Then choose File > Save As and save it under the name below, in a folder of yours. Open an exercise file and keep the start file safe (P0-07) shows how.
Typemy-cells.blend
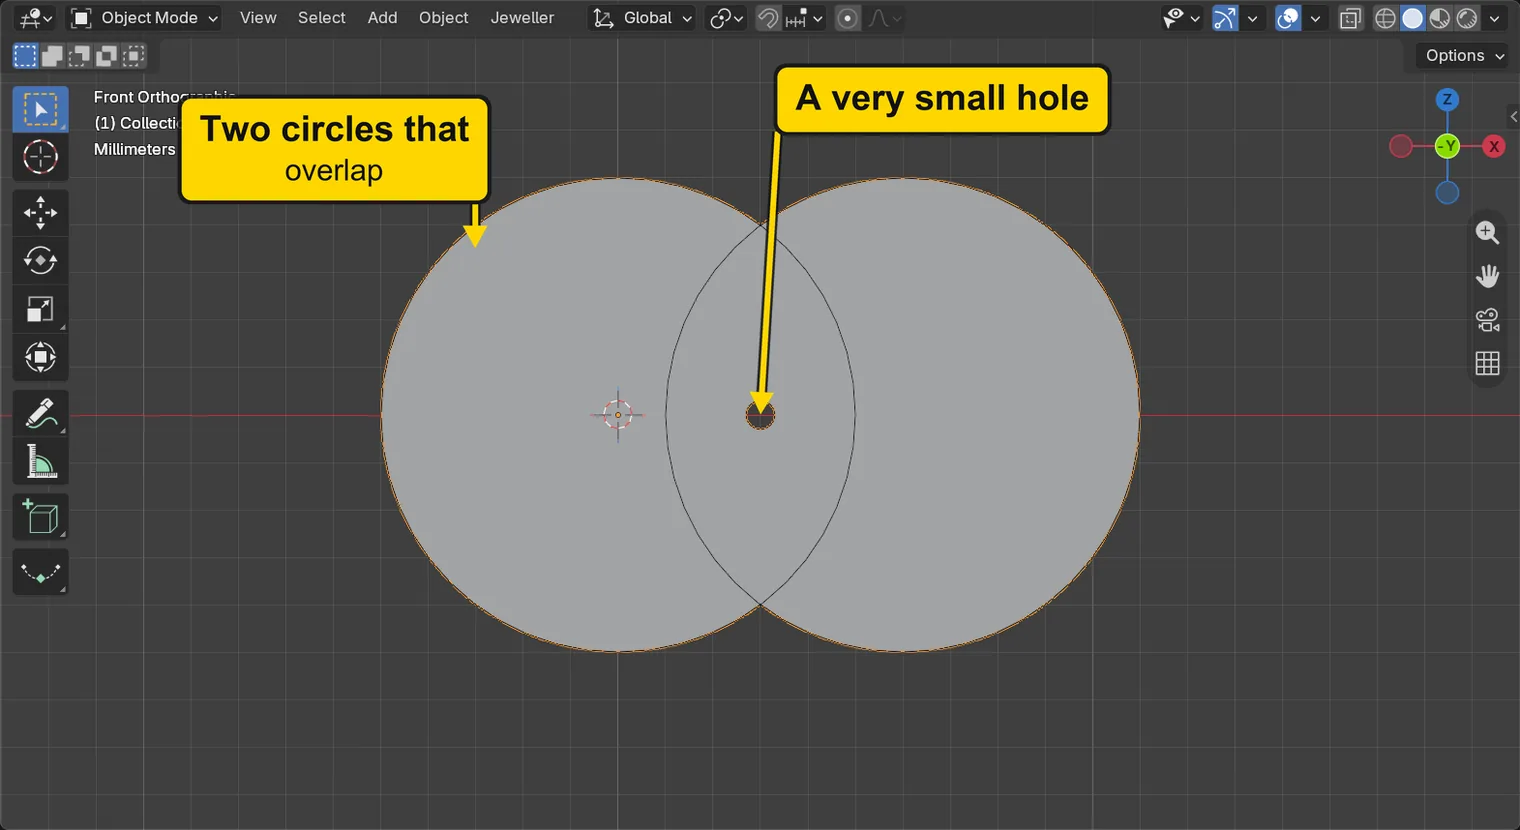
You should seeThe 3D view looks straight at the front: a grey plate made of two circles that overlap, with a very small dark dot, a hole, in the middle of the overlap. The title bar, the strip above File and Edit, begins my-cells.
It worked whenThe title bar, the strip above File and Edit, begins my-cells.
Step 2. Open the Metal section
WhereThe section bar: the small word buttons at the top of the CAD/CAM tab.
DoClick Metal.
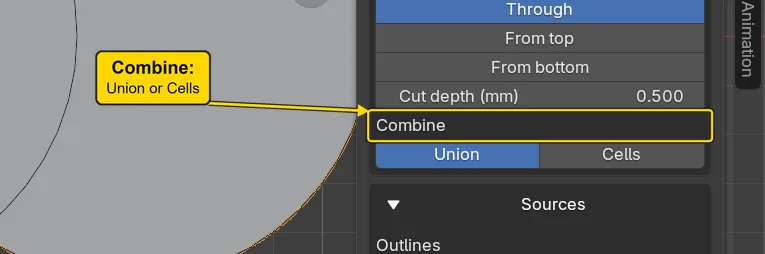
You should seeThe Metal panel and, lower down, the Live Forms panel with This Form open for Plate 1, because the plate is selected. In its Plate numbers, the row Combine has two buttons: Union, which makes one plate of the two circles, and Cells.
It worked whenThe Live Forms panel names Plate 1.
Step 3. Set Combine to Cells
WhereThe Live Forms panel, Plate numbers: the row Combine.
DoPress the Cells button in the row Combine.
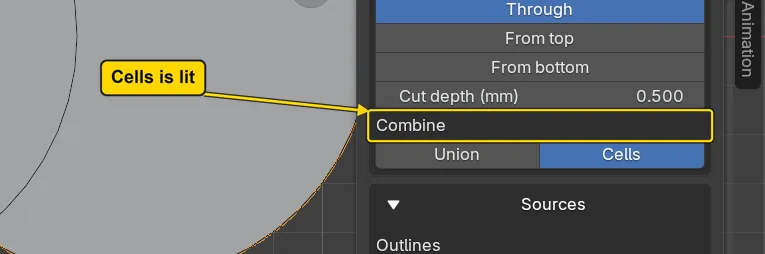
You should seeCells is lit. The plate looks the same, because a kept cell is still metal. The metal is now cut into the pieces the circles make, each of which you can keep or drop.
It worked whenCells is lit in the row Combine.
Step 4. Open the Cells panel
WhereThe sidebar: scroll up to the Metal panel. The Cells panel stands under its buttons, shut.
DoClick the words Cells to open the Cells panel, and read its first line.
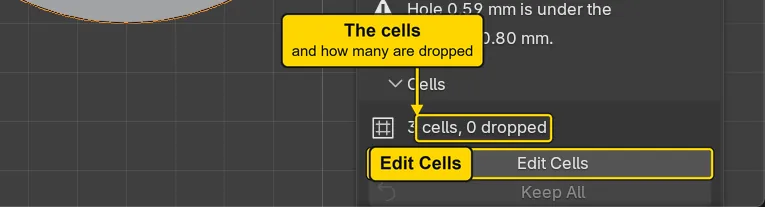
You should seeThe line “3 cells, 0 dropped”, and the buttons Edit Cells and Keep All. Keep All is grey while nothing is dropped. The three cells are the left circle only, the lens, and the right circle only.
It worked whenThe first line reads “3 cells, 0 dropped”.
Step 5. Press Edit Cells
WhereThe Cells panel, under the Metal panel.
DoPress Edit Cells.
You should seeThe kept cells pale blue on the plate, and the words along the top of the 3D view changed to tell you what the keys do: “Cells: click a cell to drop or keep it” and so on, ending “Enter finishes, Esc cancels”. A cell you drop turns red. The editor keeps running until you press Enter or Esc.
It worked whenThe plate shows pale blue cells, and the words along the top of the 3D view begin “Cells: click a cell”.
Step 6. Click the left cell to drop it
WhereThe 3D view. Click inside the left cell, away from its edge.
DoClick once inside the left cell, at the place marked.
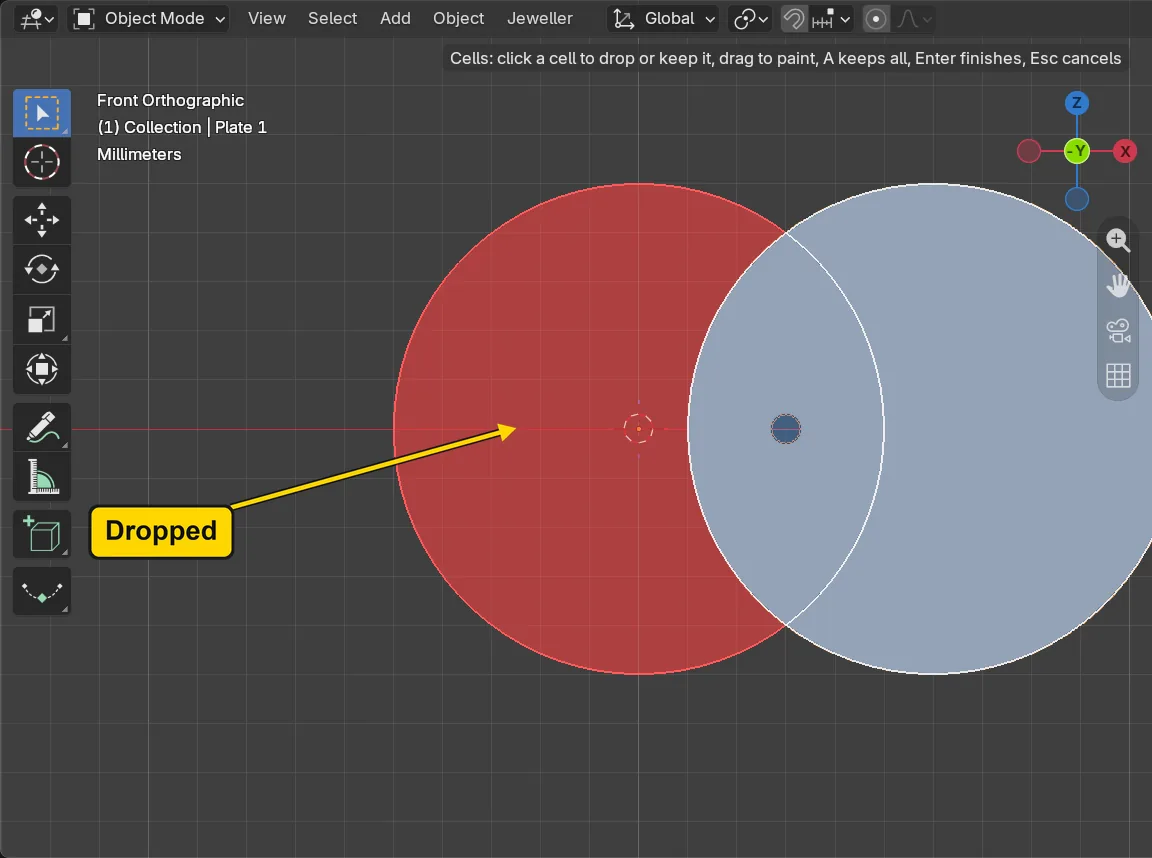
You should seeThe left cell changes colour: it is dropped, and will be left out of the metal. The editor is still running.
It worked whenThe left cell has changed colour.
Step 7. Click it again to keep it
WhereThe 3D view. Click inside the same cell.
DoClick once more inside the left cell.
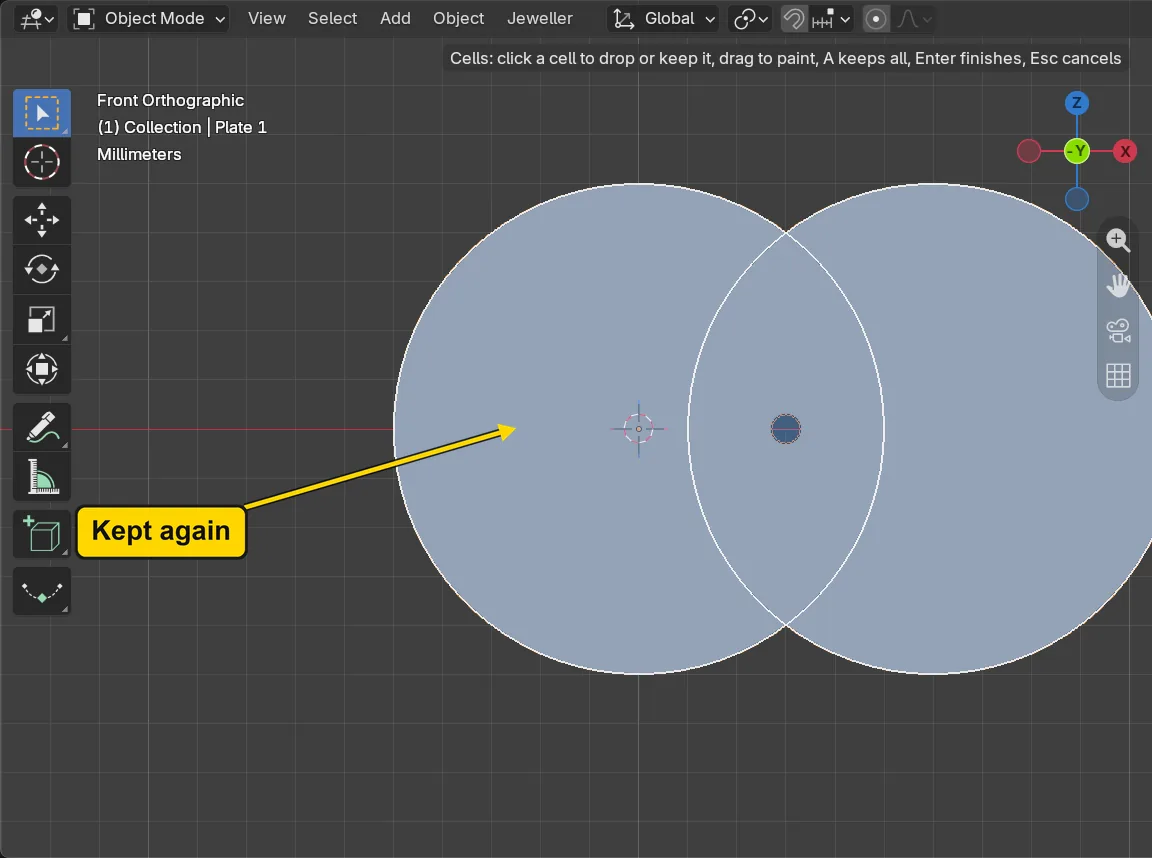
You should seeThe cell has its first colour back: it is kept. One click drops a cell and the next puts it back.
It worked whenThe left cell has its first colour again.
Step 8. Click the right cell to drop it
WhereThe 3D view. Click inside the right cell, away from its edge.
DoClick once inside the right cell, at the place marked.
You should seeThe right cell changes colour: it is dropped.
It worked whenThe right cell has changed colour.
Step 9. Press Enter to finish
WhereThe 3D view. The pointer stays over it.
DoPress Enter.
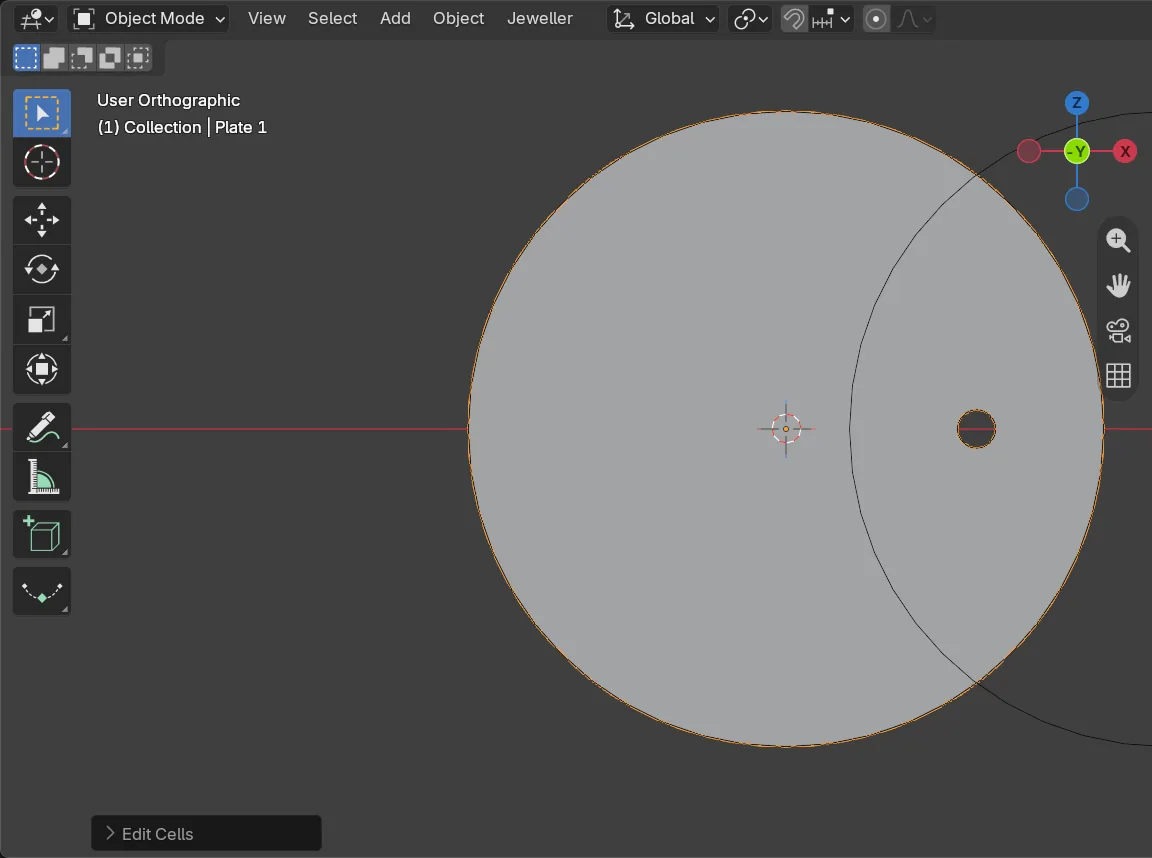
You should seeThe editor ends and the right cell is left out of the plate, and what is left is the left circle, with the small hole in it. The Cells panel reads “3 cells, 1 dropped”. The thin line where the right circle stood is its drawing: it is not metal. The small box at the bottom left, headed Edit Cells, is Blender’s Adjust Last Operation box: leave it alone.
It worked whenThe Cells panel reads “3 cells, 1 dropped”.
Step 10. Press Check Minimums
WhereThe Metal panel: the last of its four buttons.
DoPress Check Minimums.
You should seeThe status bar, the line along the very bottom of the window, reads “0 to fix, 1 to watch” and then the finding, and fades. The add-on has run its minimums again on every live form. The worst thing it finds stands under the weight line, and it stood there before you pressed: a live plate checks itself each time it is built. It reads “Hole 0.59 mm is under the house default 0.80 mm.”. The weight line itself follows the dropped cell: it reads 1.45 g, where the whole plate weighed 2.50 g. The Findings box of the Live Forms panel lists the same finding. It asks a question: does this hole need to be so small? A hole under 0.80 may not print or cast clean, so a jeweller opens it up, leaves it out to drill after casting, or asks the caster. The hole is drawn 0.6 mm across, and the check measures the plate’s own mesh, which is a little less. A finding is not a refusal: nothing has stopped, and the plate is unchanged.
It worked whenThe Metal panel shows a finding under the weight line.
Step 11. Save your work
WhereThe 3D view: move the pointer over it.
DoPress Ctrl+S.
You should seeBlender writes your copy at once, with no question, because the file already has a name. An asterisk, *, in the title bar marks changes that are not saved, and it goes now. Save your work and get it back (P0-12) says more about saving.
It worked whenThe title bar begins my-cells and carries no asterisk.
No picture: the only change is a message on the status bar, and it fades.
Check your result
| What to read | Where | What it should say |
|---|---|---|
| The cells and the plate | The Cells panel, and the 3D view looking at the front | The panel’s first line reads “3 cells, 1 dropped”. Only the left circle is left, with its small hole; the thin line where the right circle was is its drawing, not metal |
| The hole’s finding | The Metal panel, under the weight line, and the Findings box of the Live Forms panel, This Form | “Hole 0.59 mm is under the house default 0.80 mm.” |
| The weight line | The Metal panel, above the finding | A line that begins “Weight 1.45 g” |
Try it yourself
Open your copy again and press Edit Cells. Click each cell in turn, then press Enter, and read the line in the Cells panel each time: it counts the cells that are dropped.
What you learned
- Set Combine to Cells and a plate made from overlapping shapes is cut into cells. Edit Cells lets you click a cell to drop it and click it again to keep it, and
Enterfinishes. - A dropped cell is left out of the metal, and Keep All brings every cell back.
- Check Minimums names what is under the add-on’s minimums. A finding is a question: read it, decide, and carry on.
Next: Run a file of live forms