
What you will make
A plain flat band, 5 mm wide and 2.6 mm thick, with a Round 2.50 set flush at the top of the ring, at 12 o’clock. A Round 2.50 is a round stone 2.50 mm across. The panel’s Size reads UK M, 16.70 mm inside; sizing charts differ by about half a size, so check against your own ring sizer. In a flush setting, also called gypsy, the stone sinks into the metal until its table, its flat top, is level with the surface, and the setter pushes a little metal over the girdle, the stone’s widest edge, to hold it. The add-on sinks the stone along its own axis, cuts the seat, and measures the burnish walls, the metal the setter pushes over the girdle, and the floor of metal under the culet, the point at the bottom of the stone: here 1.06 mm, never under 0.40. The add-on’s own read calls the burnish wall on this band FAIL. Do nothing about it: it is a limit of the reading and not your mistake. Step 5 says why, and gives the sum a setter would use in its place: the band’s own metal each side of the seat, about 1.20 mm.
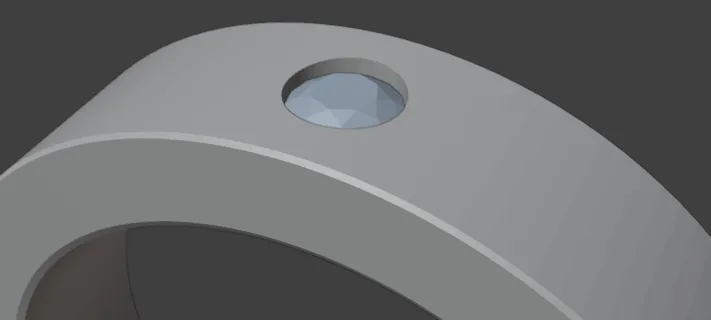
About 15 minutes.
Files
- p5-09-start.blend (167 KB): open this one to begin.
- p5-09-finished.blend (201 KB): the result, to compare with yours.
Both were made in Blender 5.2.0.
Before you start
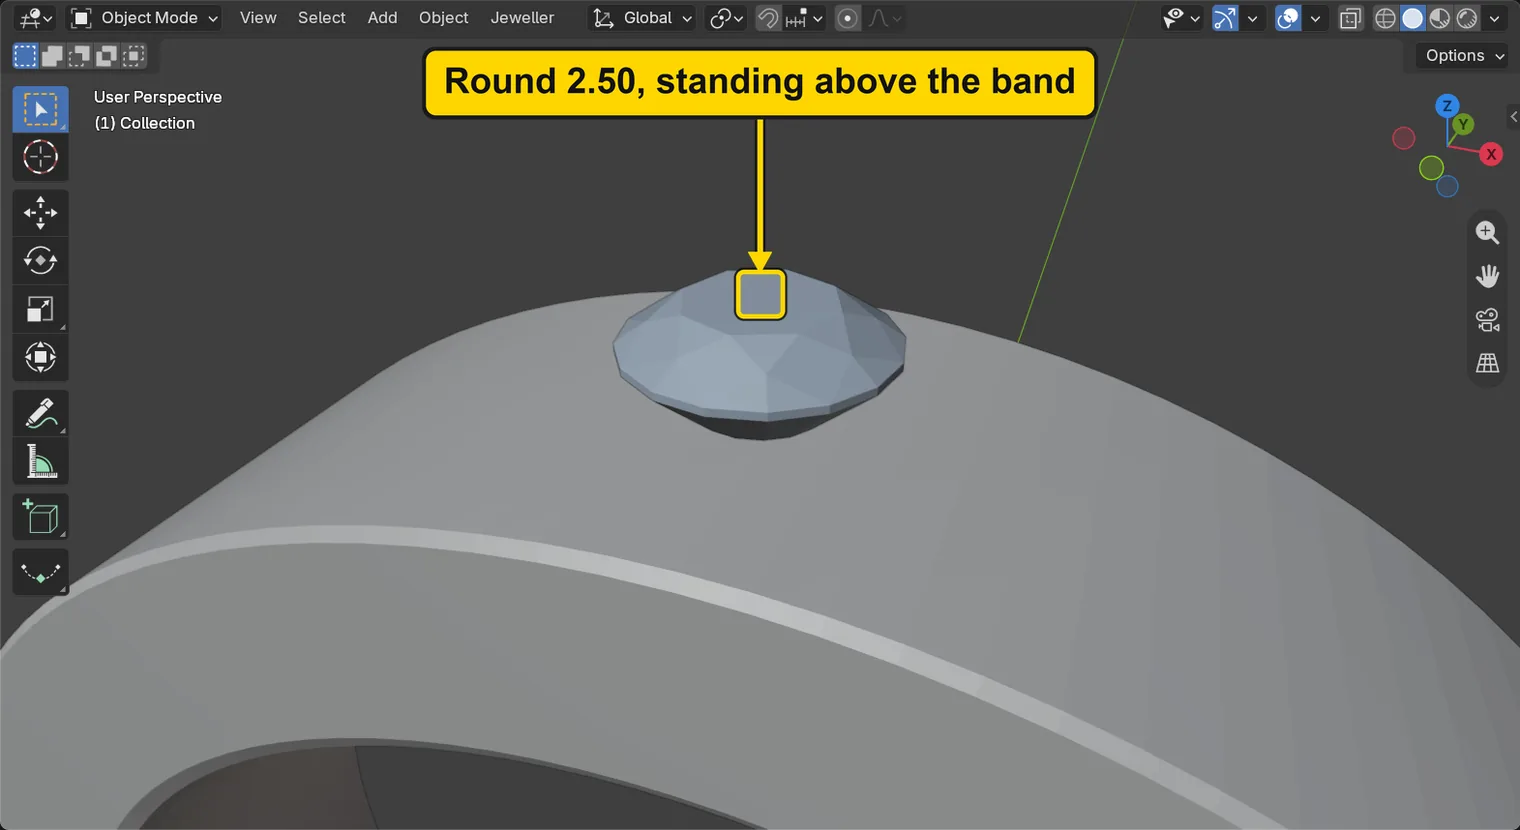
- You have done Part 0, Blender from nothing, and Choose what lies under a seat: a divot or a hole through (P5-06): Make Cutters and Cut Metal. The start file holds a plain flat band and a Round 2.50 standing above its top, in millimetres.
- CAD/CAM Jeweller 2.22.0 or later (Preferences > Add-ons shows the version).
Build it
Step 1. Open the start file and save your copy
WhereThe top bar: the row of words that begins File, Edit.
DoDownload p5-09-start.blend from Files above and open it. Then choose File > Save As and save it under the name below, in a folder of yours. Open an exercise file and keep the start file safe (P0-07) shows how.
Typemy-flush-band.blend
You should seeThe 3D view shows a plain band seen from a little above, with a small pale round stone standing above its top. Nothing is selected. The title bar, the strip above File and Edit, begins my-flush-band.
It worked whenThe title bar, the strip above File and Edit, begins my-flush-band.
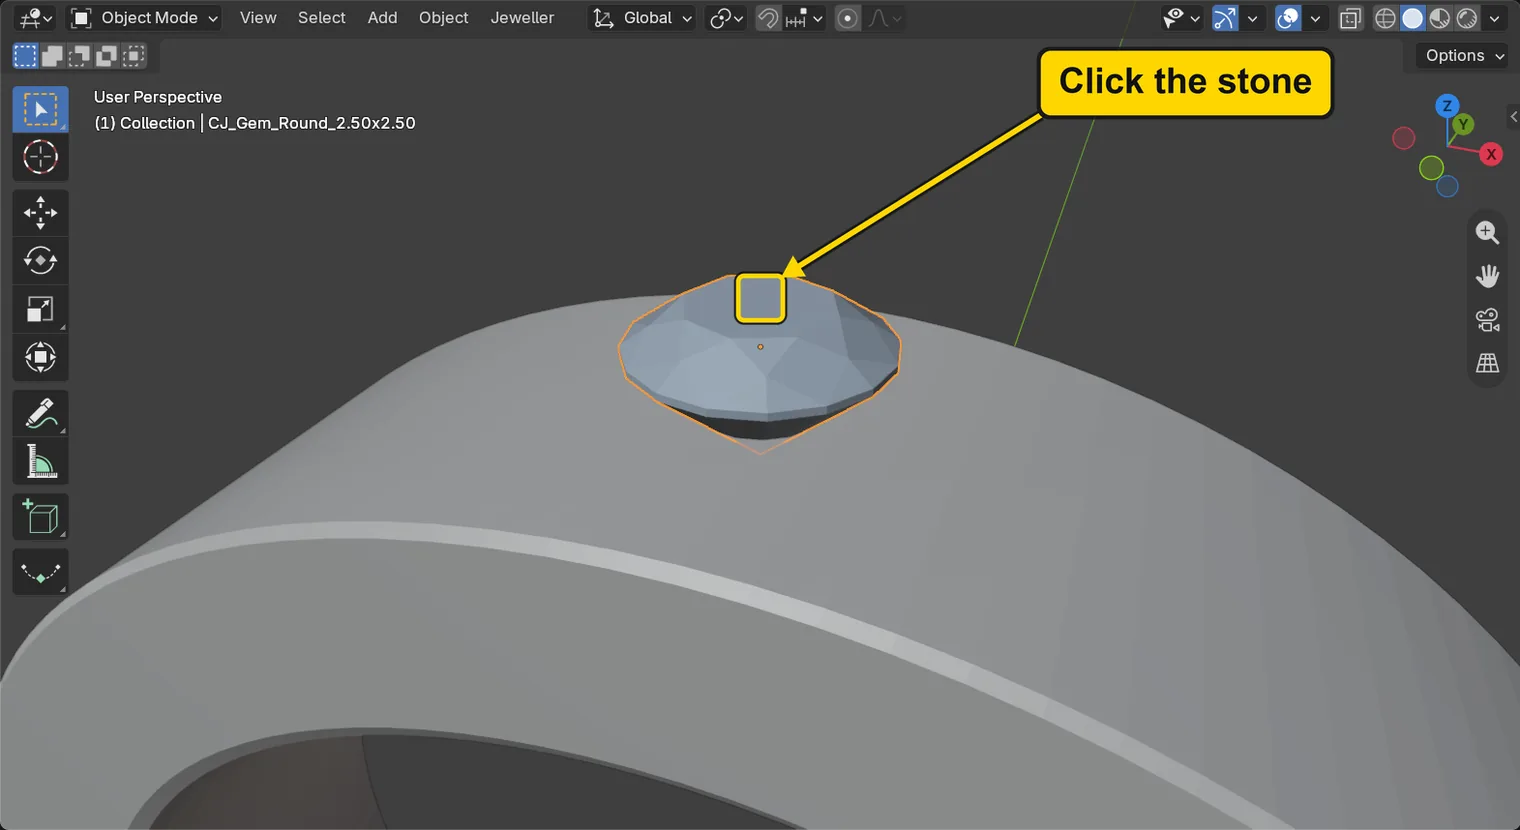
Step 2. Click the stone
WhereThe 3D view: click the stone.
DoClick the stone.
You should seeThe stone has an orange outline and the band does not. The words at the top left of the 3D view end CJ_Gem_Round_2.50x2.50, the stone’s name. Make Flush Seats acts on the stones you have selected, and finds the metal under them by itself: the band.
It worked whenThe words at the top left of the 3D view end CJ_Gem_Round_2.50x2.50, and the stone is outlined.
Step 3. Open More Settings and read the Flush box
WhereThe sidebar. If it is shut, press N with the pointer over the 3D view. In the section bar, click Setting, fold Stone Settings by clicking its title once, then scroll down and click the title of More Settings.
DoOpen More Settings and look at the box Flush.
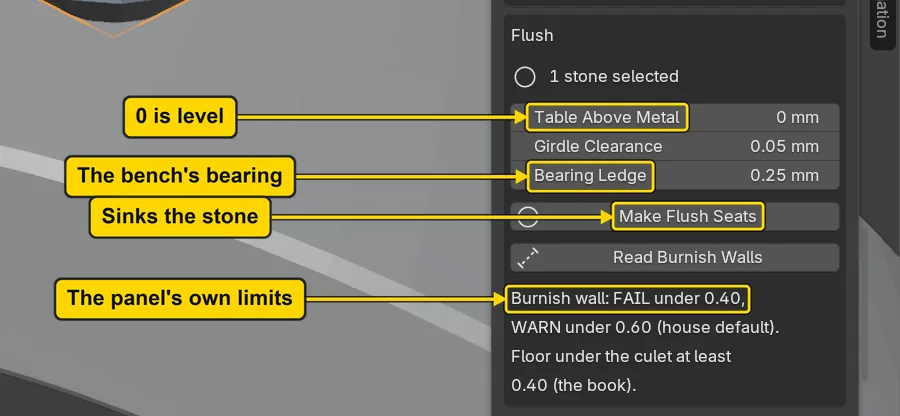
You should seeThe box Flush reads “1 stone selected” and holds three fields, Table Above Metal 0 mm, Girdle Clearance 0.05 mm and Bearing Ledge 0.25 mm, then the buttons Make Flush Seats and Read Burnish Walls. The box is the add-on’s starting numbers (the panel calls them house default). Table Above Metal is how far the table stands over the metal: 0 is level. The girdle is the stone’s widest edge. Girdle Clearance is the gap round it. Bearing Ledge is the add-on’s name for what the bench calls the bearing: the short straight ledge under the girdle where the stone rests. Under the buttons the panel prints its own limits: burnish wall FAIL under 0.40 and WARN under 0.60, and a floor under the culet of at least 0.40.
It worked whenYou can read “1 stone selected” and Make Flush Seats in the box Flush.
Step 4. Press Make Flush Seats
WhereThe box Flush: the button Make Flush Seats.
DoPress Make Flush Seats.
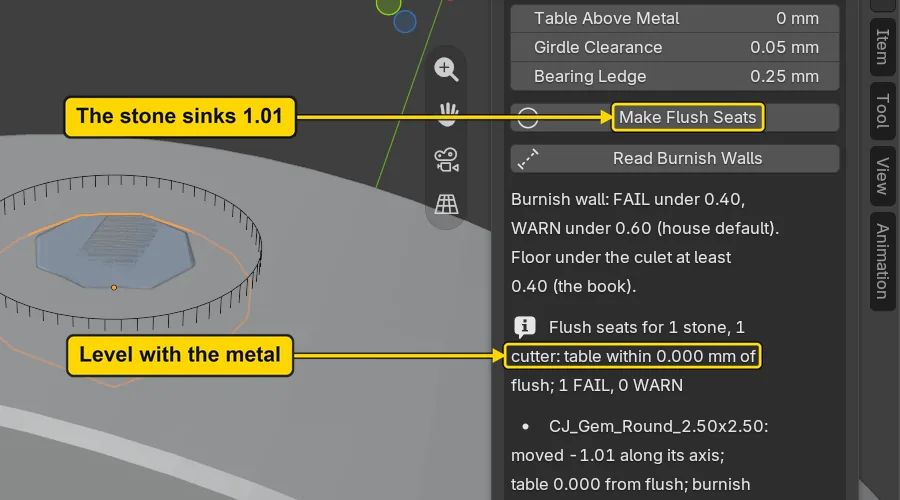
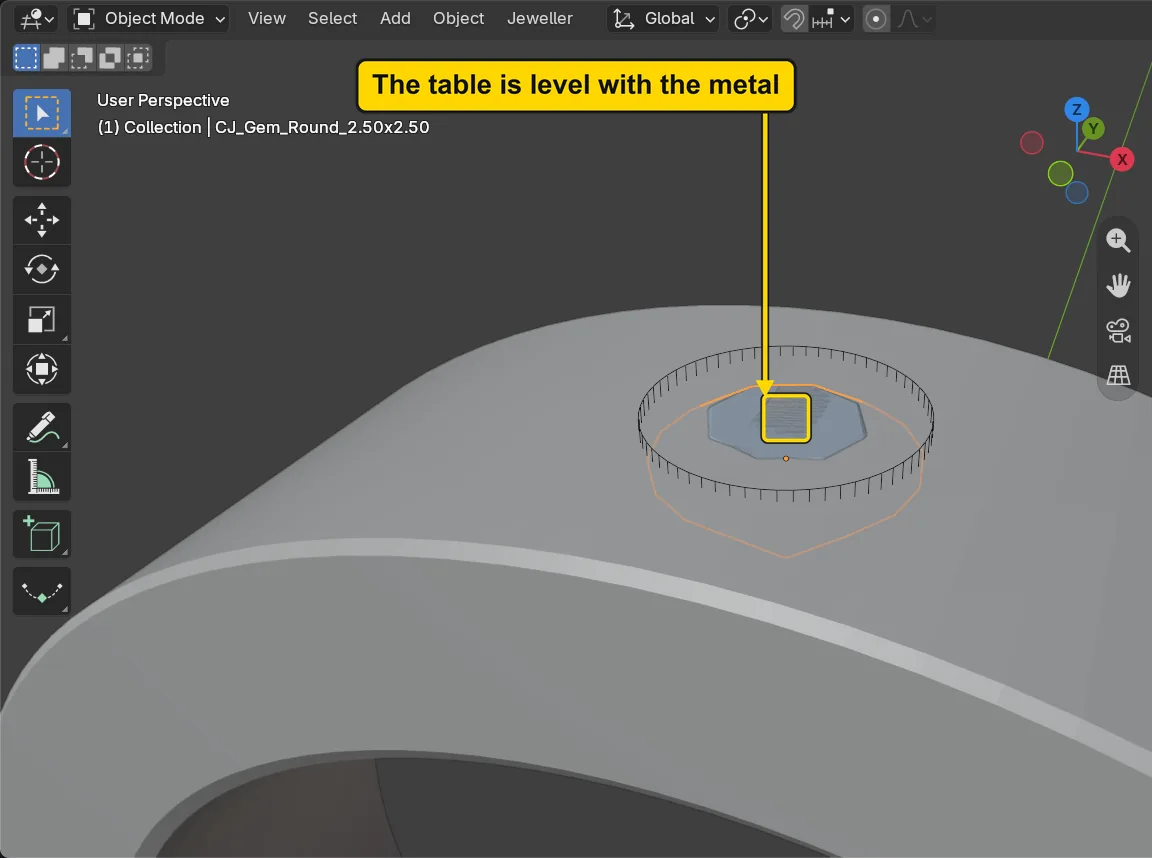
You should seeThe stone drops into the band: it moves 1.01 mm along its own axis, and its table now lies level with the top of the metal. A wire cage round it is the seat cutter, which stands 0.10 above the table so that the cut leaves no skin on the surface. The seat is the cut the stone sits in, and at the top it is 2.60 wide. The box reads “Flush seats for 1 stone, 1 cutter: table within 0.000 mm of flush; 1 FAIL, 0 WARN”. Nothing is cut yet.
It worked whenThe box Flush reads “table within 0.000 mm of flush”.
If it goes wrongThe box reads “Select the stones to set flush”: no stone is selected. Click the stone, then press Make Flush Seats again.
Step 5. Press Read Burnish Walls
WhereThe box Flush: the button Read Burnish Walls, under Make Flush Seats.
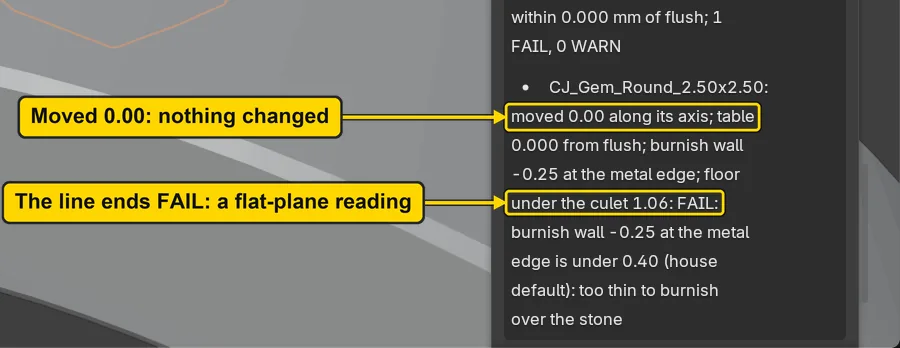
DoPress Read Burnish Walls. The line for the stone ends FAIL. Do nothing about it: it is the add-on’s reading of a flat plane, not your mistake (the Limit note below says why).
You should seeThe box keeps the first line, “table within 0.000 mm of flush”, and a line under it for the stone: “moved 0.00 along its axis”, so the button moved nothing, then “burnish wall -0.25 at the metal edge”, “floor under the culet 1.06” and the word FAIL. A burnish wall is the metal beside the seat that the setter pushes over the girdle. The floor is the metal under the culet. The floor is well over the 0.40 least, and it is the one figure here that this page asks you to trust. For the walls, do the setter’s sum: the band is 5 wide and the seat 2.60 across at the top, so 1.20 of metal stands each side of the seat, over the panel’s 0.60 for a wall that needs no warning. The pendant page (P5-14) reads the same line on a flat plate and gets OK.
It worked whenThe box reads “floor under the culet 1.06”.
Step 6. Click the band, open Cutters & Seats and press Cut Metal
WhereThe 3D view: click the band, on its flat top beside the stone. Then the sidebar: open Cutters & Seats and find the button Cut Metal.
DoClick the band, open Cutters & Seats and press Cut Metal. Then choose View > Frame Selected to bring the band up large.
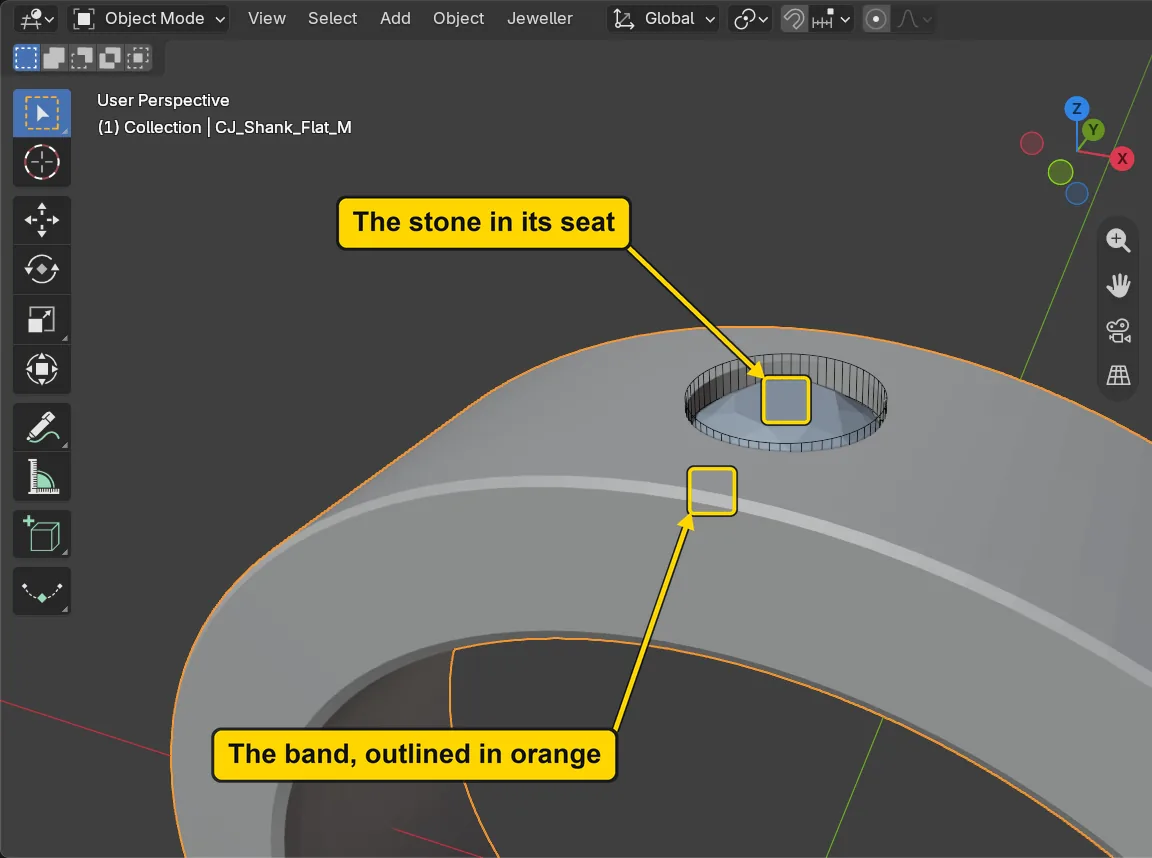
You should seeThe band has an orange outline (two fingers up over the 3D view also brings it nearer, and View > Frame All puts the whole band back), and the status bar says “Cut 1 seats” and ends “result manifold”: the band is cut and is still one closed solid. Cut Metal cuts the active object, so the band must be the one you clicked last. The seat is now a pit in the top of the band, and the stone stands in it with its table level with the metal. Measured on the cut band at the top, 1.15 of metal stands on one side of the seat and 1.15 on the other: the sum of step 5 and the measure agree to 0.05.
It worked whenThe band has an orange outline and the stone stands in its seat.

If it goes wrongThe status bar says “Make the metal object active first”: the band is not the active object. Click it in the 3D view, then press Cut Metal again.
If it goes wrongThe orange outline is round the stone and not the band: you clicked the stone. Click the band’s flat top again, beside the stone, then press Cut Metal.
Step 7. Look at a section across the band
WhereThe 3D view.
DoLook at the picture, which is the band cut through the stone, across its width, and seen from the right.
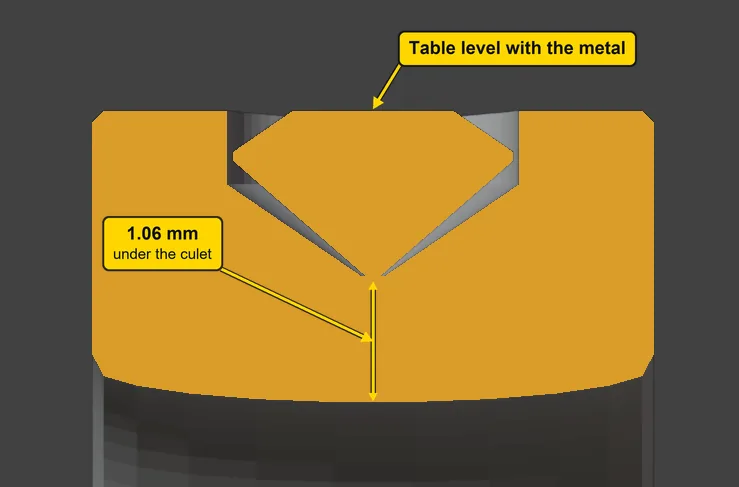
You should seeThe band’s section, 5 mm wide and 2.6 mm thick, with the stone sunk into the middle of its top, its table level with the metal, and the floor of metal under its culet marked: 1.06 mm down to the bore, the inside of the ring. The seat has the bearing ledge, a short straight step under the girdle, and under it a cone for the pavilion, the cone below the girdle.
It worked whenThe Flush box still reads “floor under the culet 1.06”, at least 0.40.
Step 8. Save your work
WhereThe 3D view: move the pointer over it.
DoPress Ctrl+S.
You should seeBlender writes your copy at once, with no question, because the file already has a name. An asterisk, *, in the title bar marks changes that are not saved, and it goes now. Save your work and get it back (P0-12) says more about saving.
It worked whenThe title bar begins my-flush-band and carries no asterisk.
No picture: the only change is a message on the status bar, and it fades.
Check your result
| What to read | Where | What it should say |
|---|---|---|
| The table | The CAD/CAM tab, Setting section, More Settings panel, the box Flush: its first line | “table within 0.000 mm of flush” |
| The floor under the culet | The same box, the line under it that names the stone | “floor under the culet 1.06”, at least 0.40 |
| The burnish wall | The same line | “burnish wall -0.25 at the metal edge” and the word FAIL: the Limit note of step 5 says why |
| The setter’s sum | Step 6’s words: the band cut, the metal each side of the seat at the top | 1.20 by the sum, 1.15 and 1.15 measured on the cut band: over the panel’s 0.60 |
| The three numbers of the box | The same box, its three fields | Table Above Metal 0 mm, Girdle Clearance 0.05 mm, Bearing Ledge 0.25 mm |
| The metal under the culet | Step 7’s picture: your band cut across its width, for the picture only | 1.06 mm from the culet to the bore |
Try it yourself
Open the start file again and do steps 1 to 3. Click the stone, type 0.10 in Table Above Metal and press Make Flush Seats: the stone rises 0.10 mm, so its table now stands that far above the metal, and the first line of the box still reads 0.000 mm of flush, because 0.10 is what you asked for. Put the number back to 0 and press the button again before you cut.
What you learned
- Make Flush Seats sinks each selected stone along its own axis until its table is level with the metal under it, and makes the seat. Cut Metal cuts it. Read Burnish Walls measures and changes nothing.
- The floor of metal under the culet must be at least 0.40: this band leaves 1.06 mm. A flush stone on a ring needs a band thick enough under it.
- The add-on reads the burnish wall in a flat plane just under the top, so on a ring’s curved top it reads low for a stone this size and says FAIL. Do the setter’s sum instead: the band’s width less the seat, halved, is the metal each side (1.20 mm here by the sum, 1.15 measured). The setter judges the wall at the bench. Hold a stone by the band’s spring (P5-10) is next.