
What you will make
An oval plate 30 x 18 x 1.2 mm, pierced with 70 holes, with a plain round, a patch of metal with no holes, left in the middle for a round stone 5.00 mm across, a Round 5.00. A jeweller keeps the pattern clear of a stone’s place from the start: here the nearest hole stands 1.91 mm from the stone’s edge. The stone here is not set: it is deeper than this plate is thick, so it will not sit in the plate. Its seat, the cut a stone sits in, comes later: a hole through the plain round, or a setting standing on it. The plain round is the room for that.
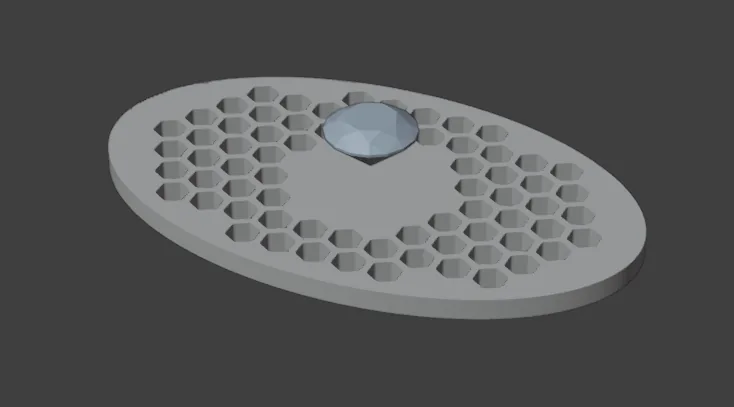
About 15 minutes.
Files
- p10-03-start.blend (110 KB): open this one to begin.
- p10-03-finished.blend (210 KB): the result, to compare with yours.
Both were made in Blender 5.2.0.
Before you start
- You have done Part 0, Blender from nothing.
- You have done Pierce a plate from an outline (P10-01): you know Make Pattern.
- The add-on is installed, and its CAD/CAM tab is in the sidebar. The start file is already in millimetres.
- Steps marked Meet the refusal break something on purpose: the refusal is safe and the piece is not harmed.
Build it
Step 1. Open the start file and save your copy
WhereBlender’s top menu bar, File > Open, then File > Save As.
DoOpen p10-03-start.blend. Then choose File > Save As and give the file a name of your own, so that the start file stays clean.
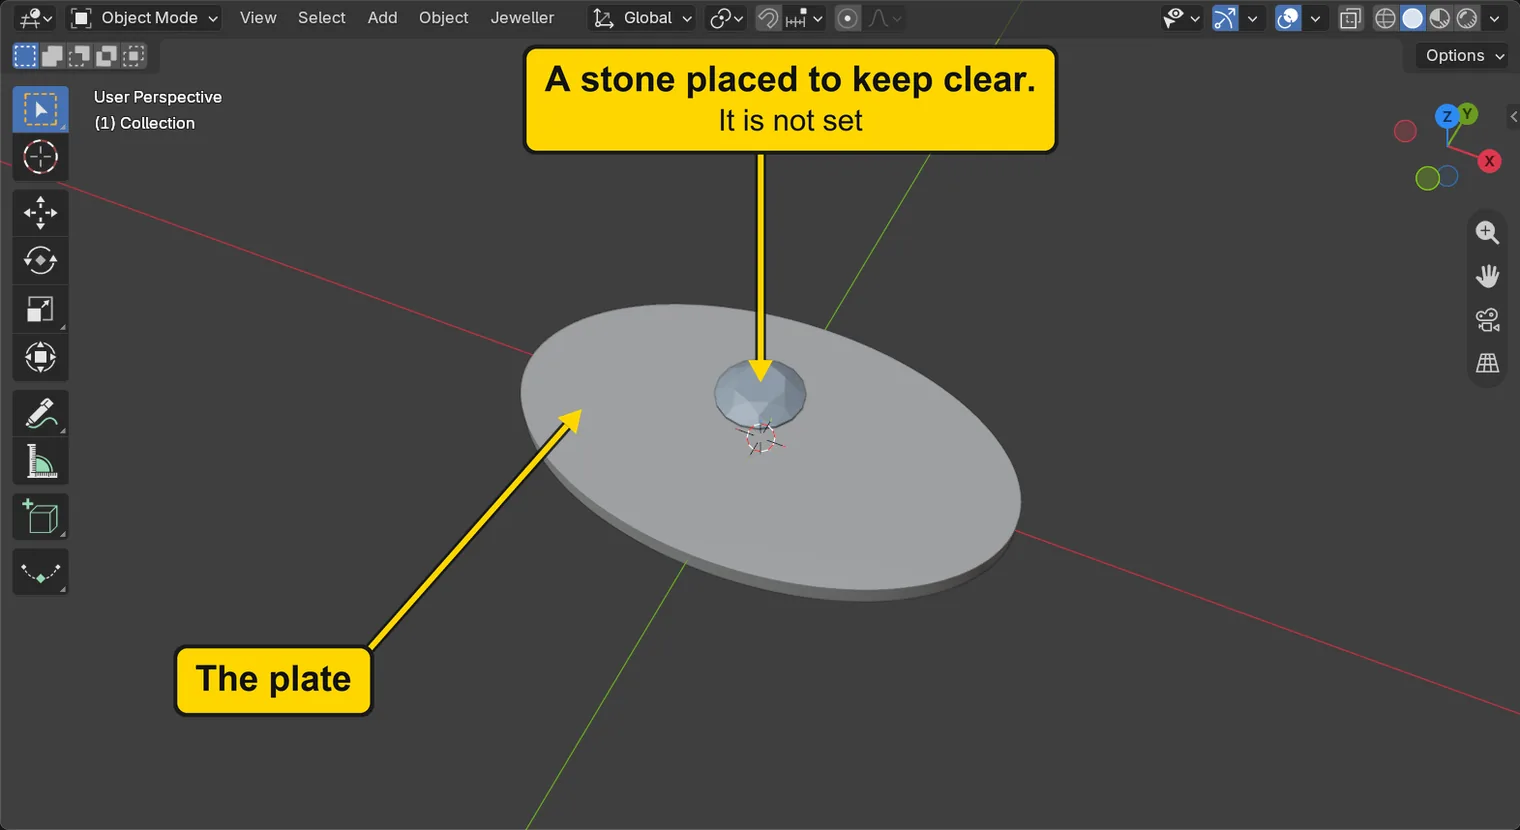
You should seeOne plain oval plate on the grid and, just above its middle, a round stone in its own pale colour, touching nothing. The stone is not set: it only marks where the metal must stay clear.
It worked whenThe plate and the stone are the only things in the 3D view.
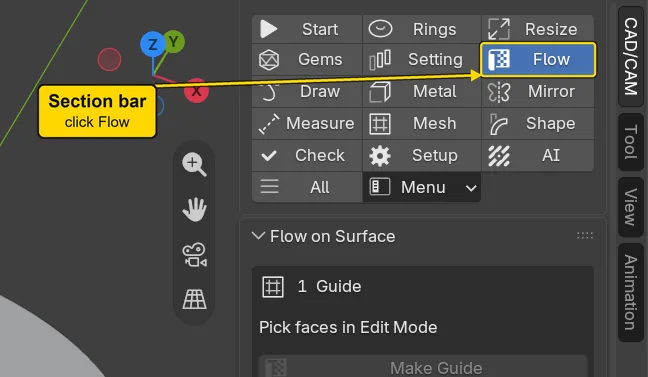
Step 2. Click Flow in the section bar
WhereThe sidebar at the right of the 3D view (press N with the pointer over the 3D view if it is shut), the CAD/CAM tab.
DoClick Flow in the section bar, the small word buttons at the top of the tab.
You should seeThe panels of that section: Flow on Surface, and under it Pattern Builder.
It worked whenFlow is lit.
Step 3. Meet the refusal: Make Pattern with no face picked
WhereThe 3D view, then the sidebar. Scroll down to the Pattern Builder panel.
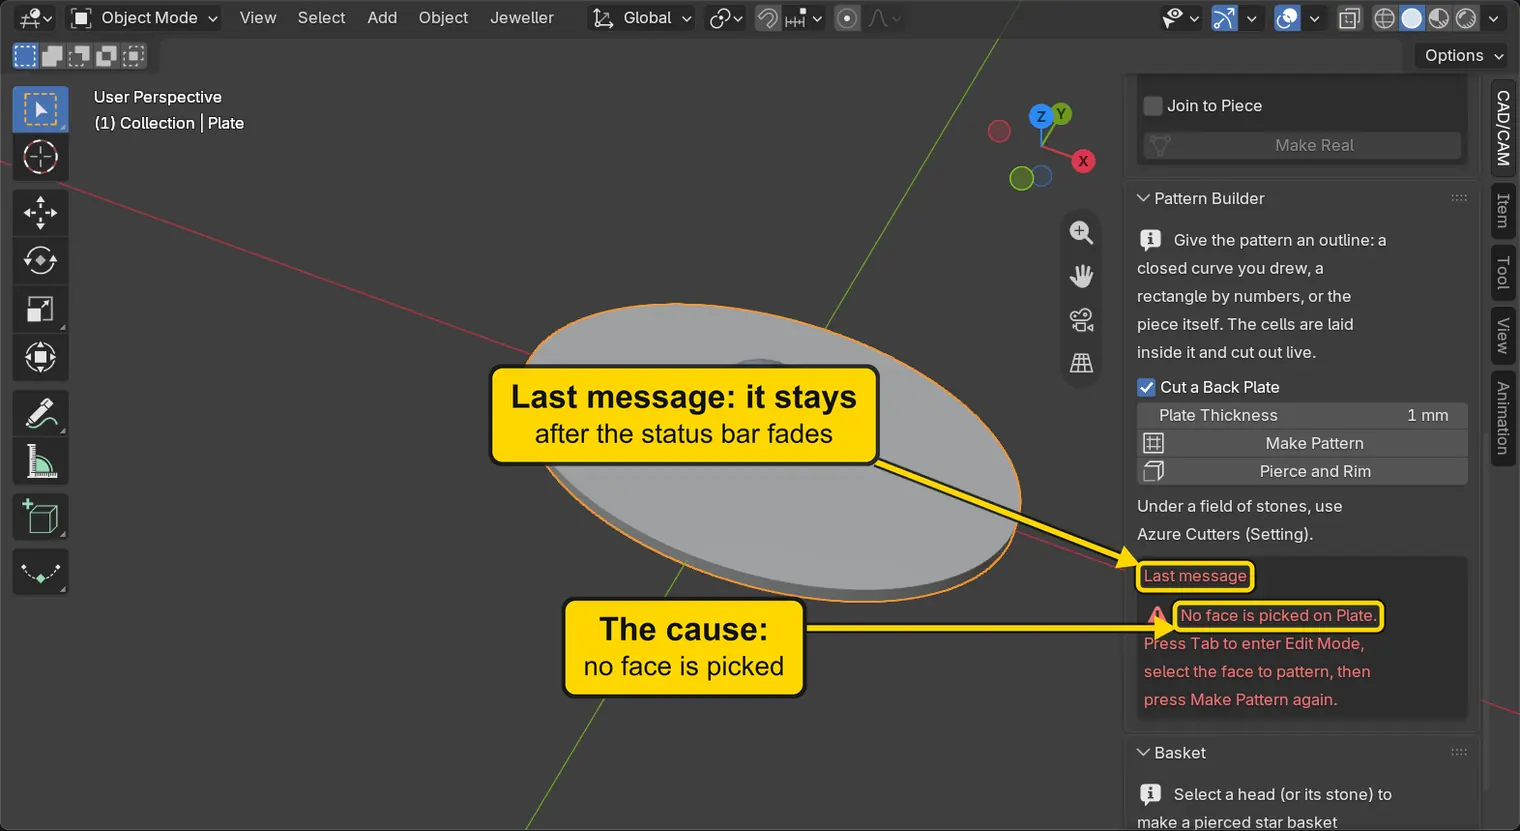
DoAlmost everyone does this once, so meet it now. Click once on the plate, away from the stone, then press Make Pattern. Then scroll the sidebar down to the words Last message.
You should seeRed words on the panel and the same on the status bar. They begin: “No face is picked on Plate.” and go on: “Press Tab to enter Edit Mode, select the face to pattern, then press Make Pattern again.” The status bar’s message fades: Last message stays on the panel until your next press works. Nothing was made, and the plate is not harmed.
It worked whenLast message begins “No face is picked on Plate”, and the 3D view holds only the plate and the stone.
Step 4. Go into Edit Mode
WhereThe 3D view, with the pointer over it.
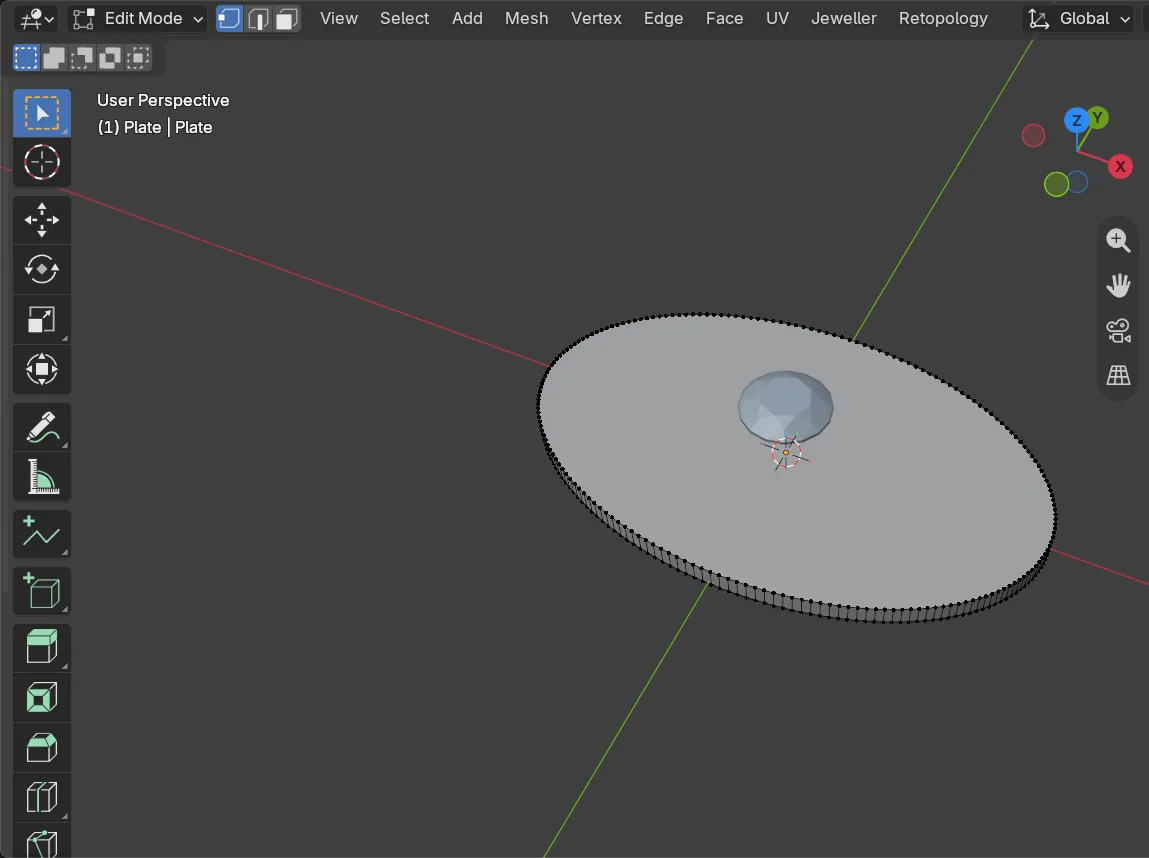
DoClick once on the plate, away from the stone, then press Tab.
You should seeThe plate’s edges show. Edit Mode is where you work on one piece’s own faces, edges and points. Object Mode, where you were, is where you work on whole pieces.
It worked whenThe menu at the top left of the 3D view reads “Edit Mode”.
Step 5. Pick the plate’s top face
WhereThe 3D view, with the pointer over it.
DoPress 3 on the number row, the keys above the letters. Then click once on the top of the plate.
You should see3 turns on face select: the right-hand of the three small boxes at the top left of the 3D view lights up. The whole top face lights up in pale orange. A face is one flat facet of a piece, and this is one.
It worked whenOne face is lit, and the menu at the top left still reads “Edit Mode”.
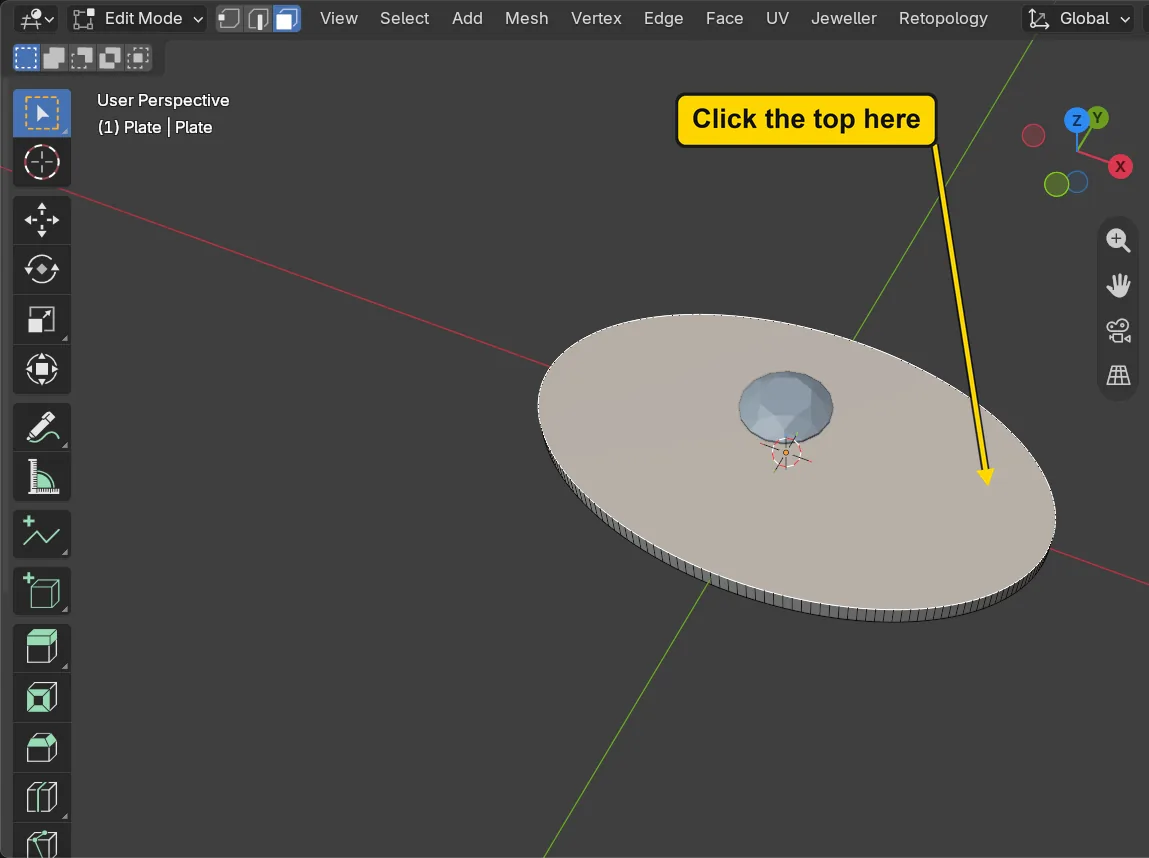
If it goes wrongA thin strip of the plate’s side lights up, not the top: your click landed on the side. Click again, further in on the top.
Step 6. Press Make Pattern, still in Edit Mode
WhereThe sidebar. Scroll down to the Pattern Builder panel.
DoPress Make Pattern.
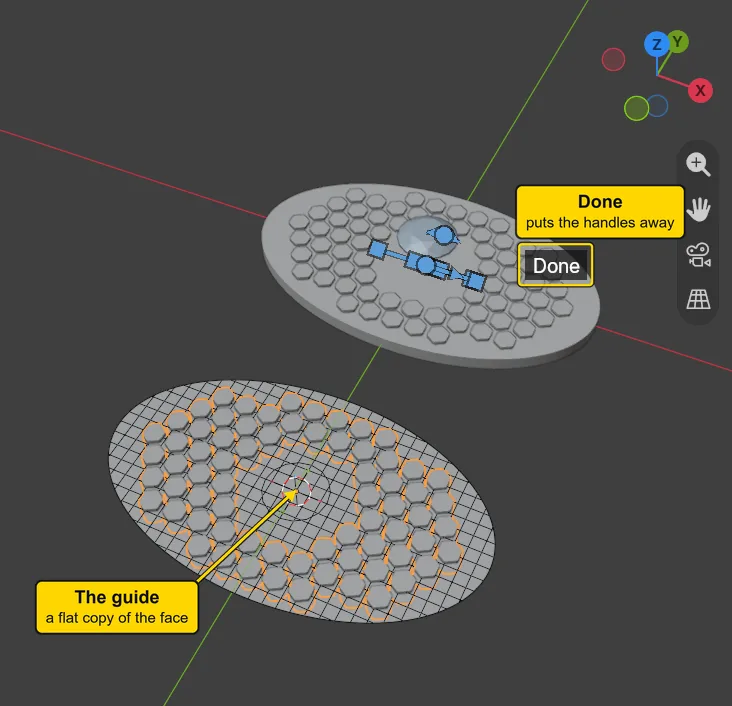
You should seeThe cells land on the top face as small solid posts, and leave a clear round under the stone. They become holes at Make Real. In front of the plate lies the guide, with the same cells on it. The blue marks and the word Done on the plate are handles, for changing a number by dragging: leave them alone for now. Make Pattern has taken you out of Edit Mode by itself, so do not press Tab.
It worked whenThe panel’s first line, under the words “Pattern 1”, begins “70 cells”, and the menu at the top left reads “Object Mode”.
If it goes wrongLast message says “No faces to lay flat: pick some in Edit Mode”: no face was lit when you pressed, and you are still in Edit Mode. Click the top of the plate so that it lights up, then press again. Do not press Tab.
If it goes wrongYou pressed Tab anyway: the menu reads “Edit Mode” and the handles go: that Tab put the pattern itself into Edit Mode. Press Tab once more to come out.
Step 7. Put the handles away and read the panel
WhereThe 3D view, the button Done on the model.
DoClick Done.
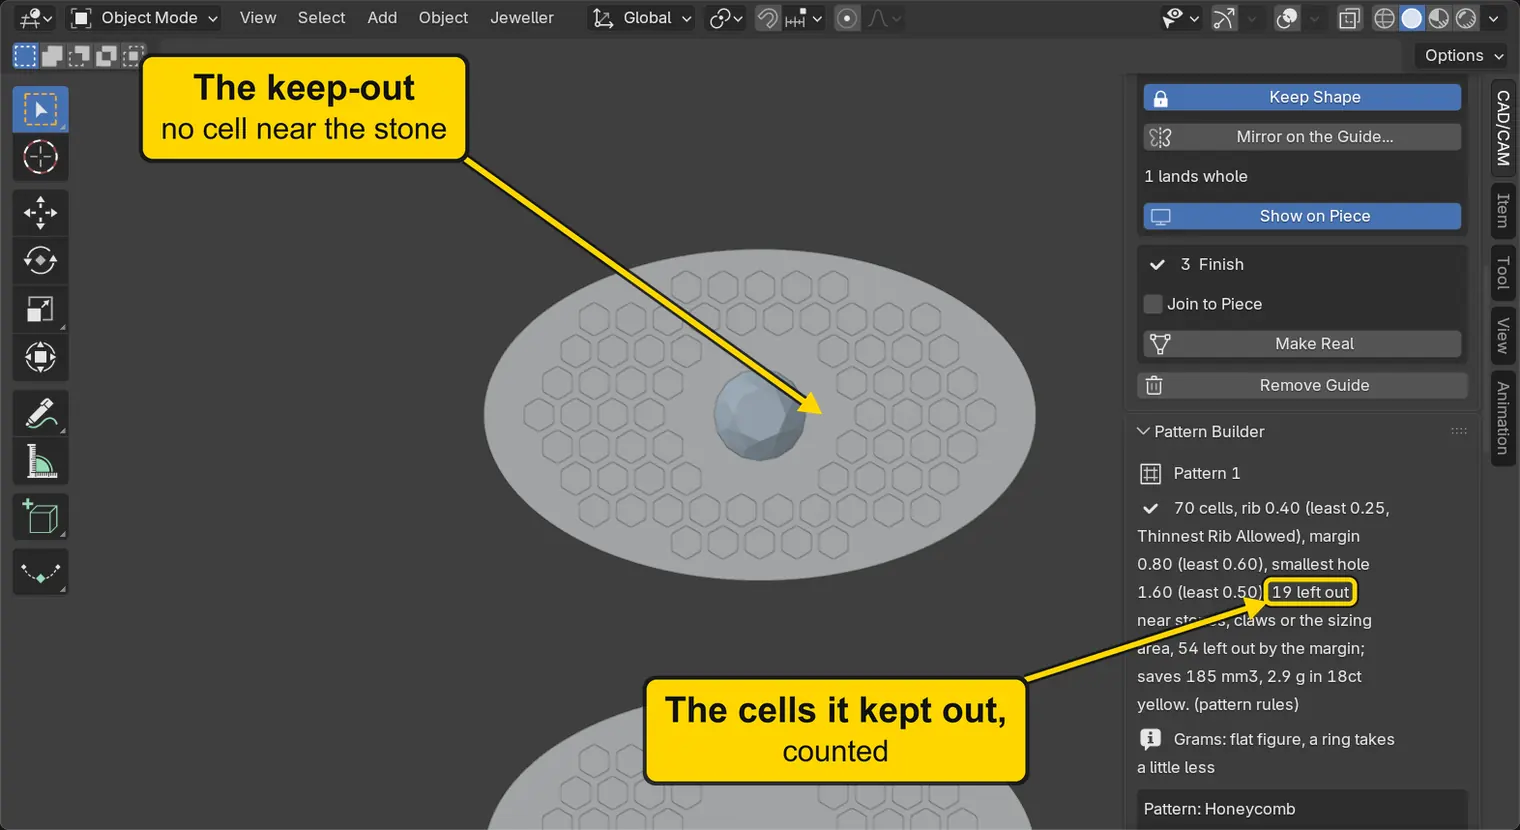
You should seeThe handles go. A keep-out is a place the cells stay out of. The panel’s first line counts 70 cells and says “19 left out near stones”: the cells this keep-out has kept off the stone’s place.
It worked whenThe first line says “19 left out near stones”.
Step 8. Move the stone
WhereThe 3D view.
DoClick the stone. With the pointer over the 3D view press G, X, type 3 and press Enter.
You should seeThe stone moves 3 mm along the red line (G starts a move, X holds it to that line, and the typed number is the distance). The cells stay where they were. Scroll the sidebar if you need to: a line under the panel’s first line warns “Stones have moved: Refresh Keep-outs”.
It worked whenThe panel shows that warning.
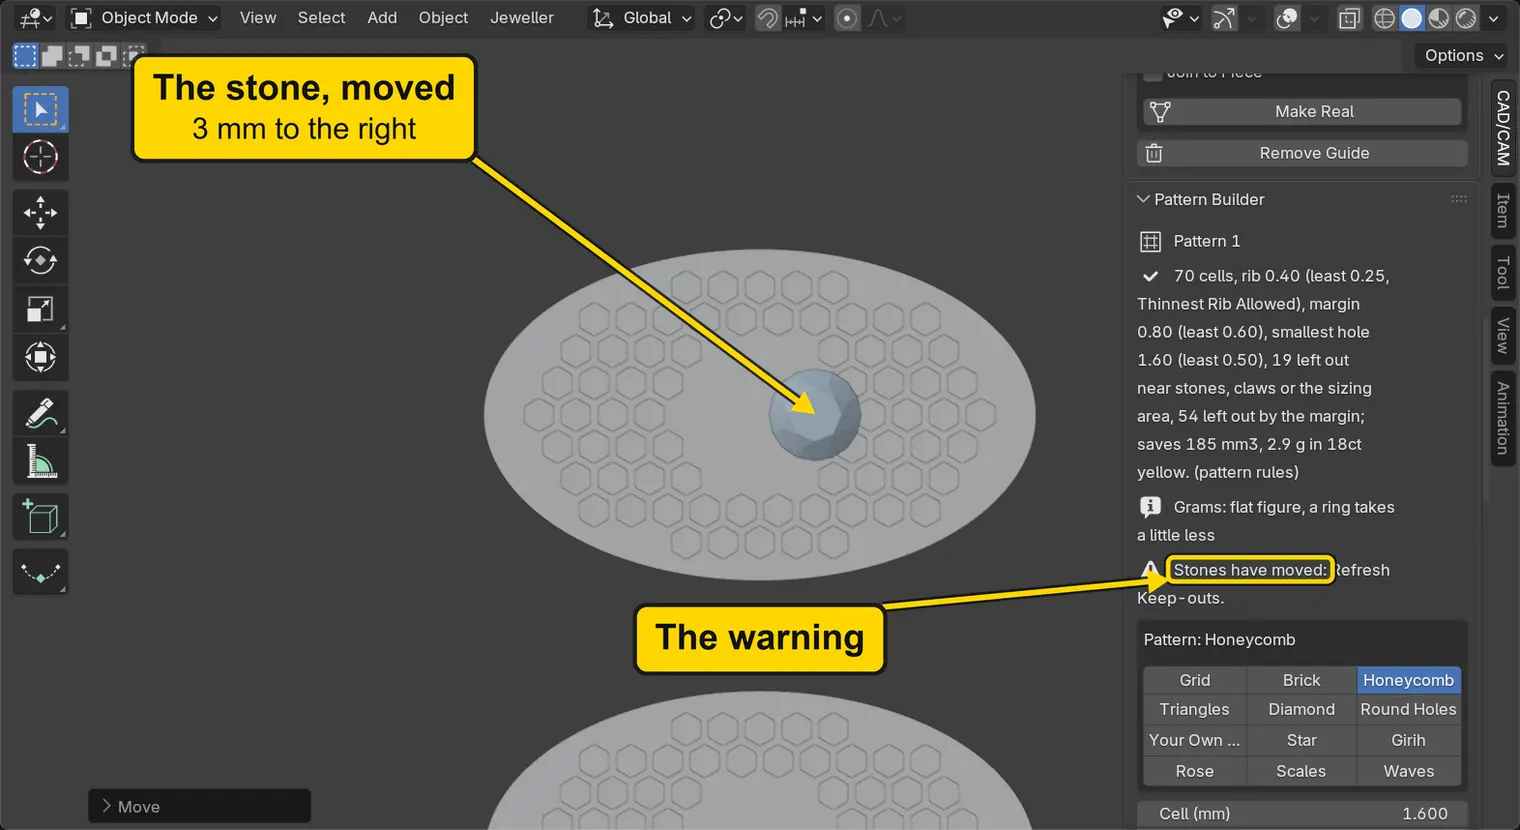
Step 9. Press Refresh Keep-outs
WhereThe Pattern Builder panel, near its foot.
DoPress Refresh Keep-outs.
You should seeThe plain round moves under the stone, and the warning goes.
It worked whenThe plain round stands under the stone, and the warning has gone from the top of the panel.
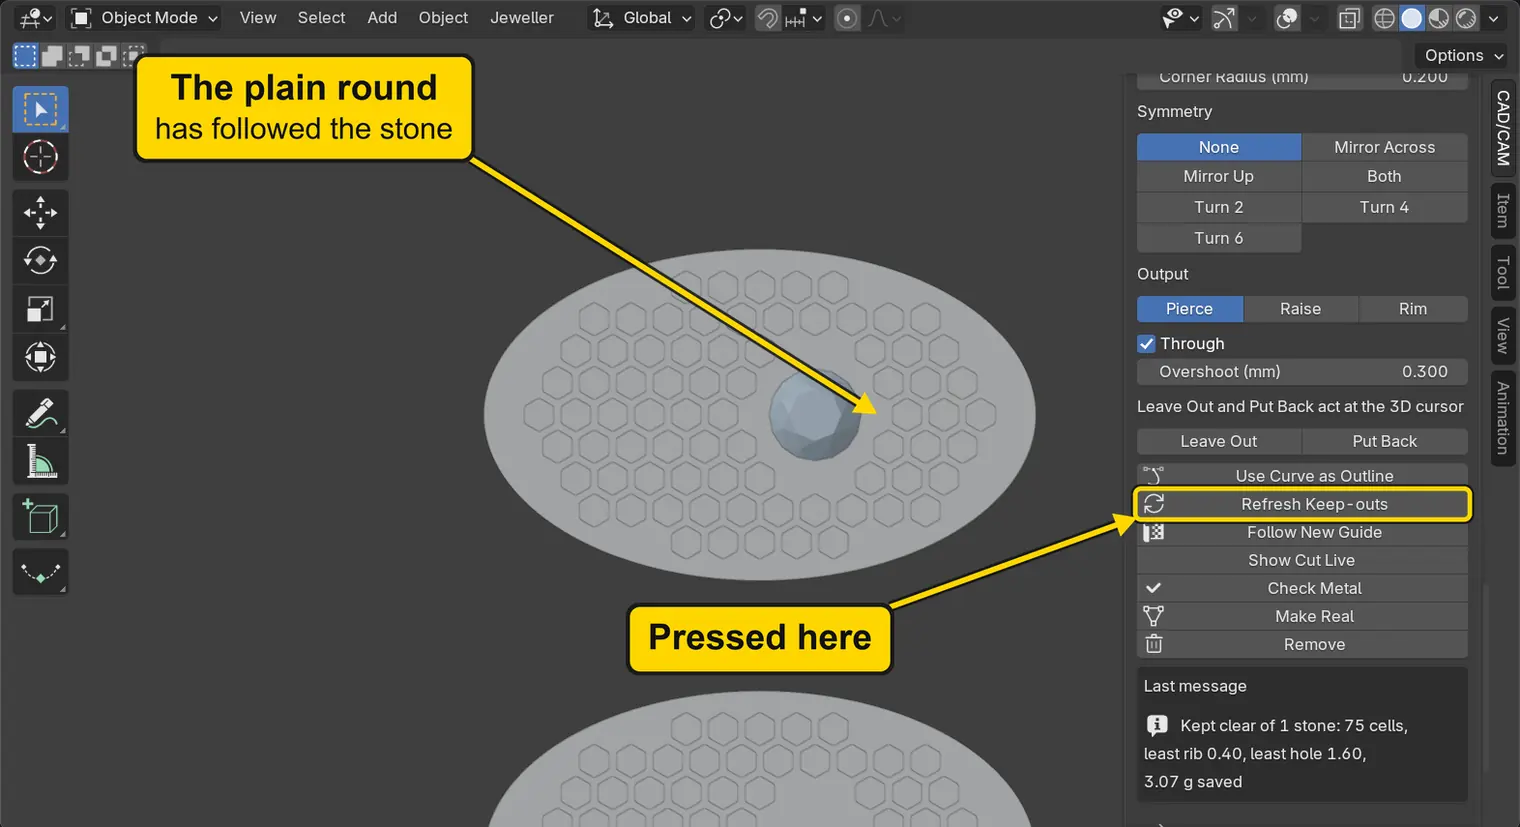
Step 10. Take it back with Ctrl+Z
WhereThe 3D view, with the pointer over it.
DoPress Ctrl+Z twice: once for Refresh Keep-outs, once for the move.
You should seeThe stone goes back to the middle, and the cells with it.
It worked whenThe panel’s first line begins “70 cells” again.
No picture: the plate looks as it did in the picture of step 7.
Step 11. Make it real
WhereThe Pattern Builder panel, near its foot.
DoPress Make Real, and wait a few seconds.
You should seeThe posts become holes, cut right through the plate. The status bar’s message says what was cut: it fades, and it cuts a long sentence with three dots, so read its first words. If the message has gone, the holes are proof enough.
It worked whenHoles go through the plate where the posts stood, and the status bar’s message begins “Cut 185.0 mm3 from Plate”.
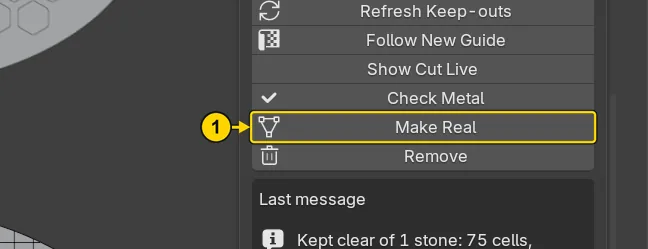
Step 12. Clear up: Remove Pattern and Guide
WhereThe foot of the Pattern Builder panel.
DoPress Remove Pattern and Guide.
You should seeThe guide and the cells on it all go. The holes stay: what is already real is not touched.
It worked whenOnly the plate and the stone are left in the 3D view.
Step 13. Look round your plate and save your copy
WhereThe 3D view, with the pointer over it.
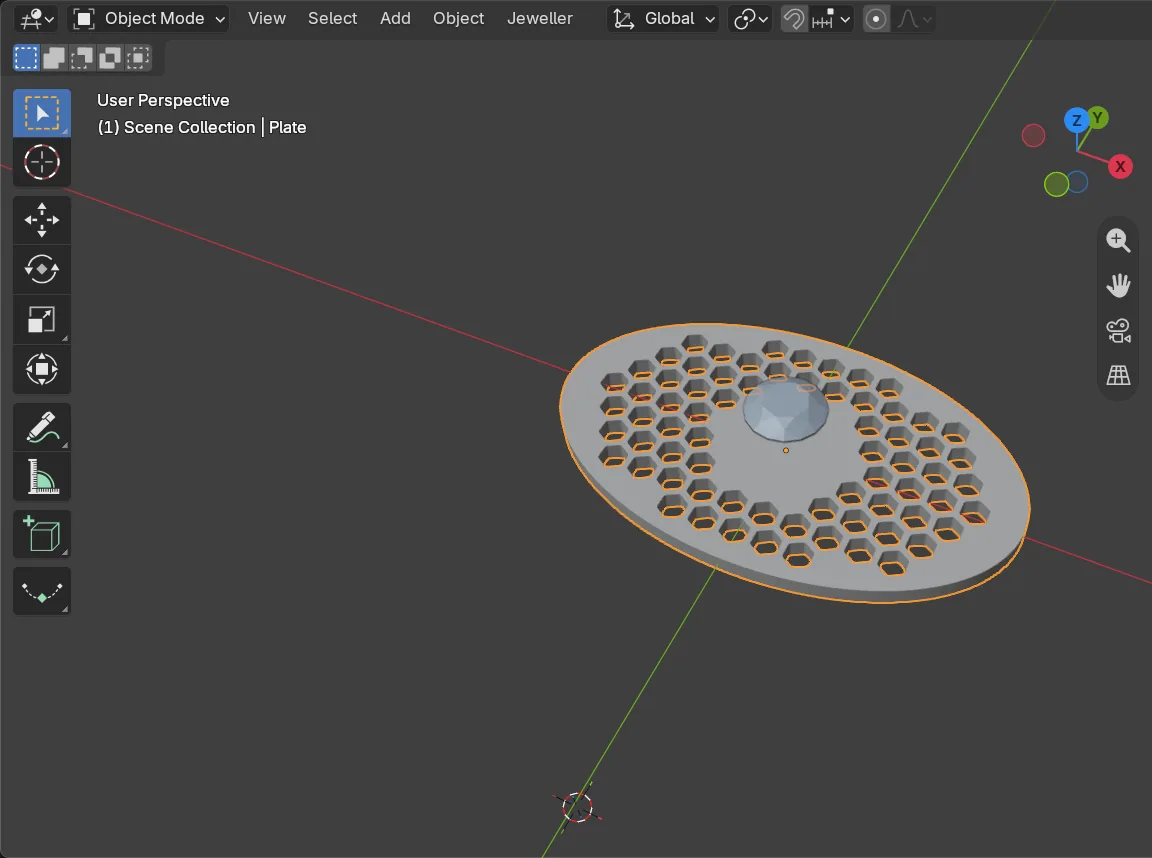
DoOrbit the view until you look across the plate as in the picture. Then press Ctrl+S to save your copy.
You should seeThe holes going right through, the plain round in the middle, and the stone standing clear above it. It is not set.
It worked whenYour own copy is saved.
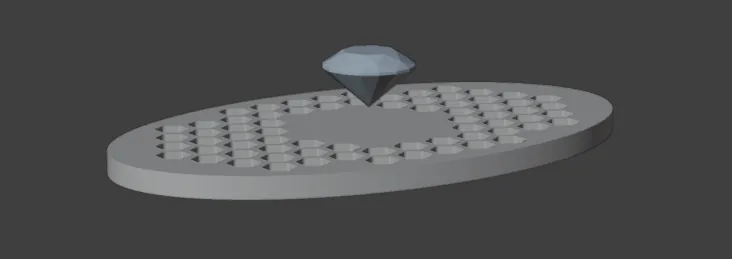
Check your result
| What to read | Where | What it should say |
|---|---|---|
| The plate’s size | With the plate selected, the Item tab, on the sidebar’s edge just below CAD/CAM: Dimensions | X 30 mm, Y 18 mm, Z 1.2 mm |
| The stone’s size | The same place, with the stone selected | X 5 mm: a Round 5.00 |
| The plain round | The 3D view from straight above: click the blue Z ball on the small coloured axes at the top right of the 3D view | Solid metal under the stone, with whole holes all round it |
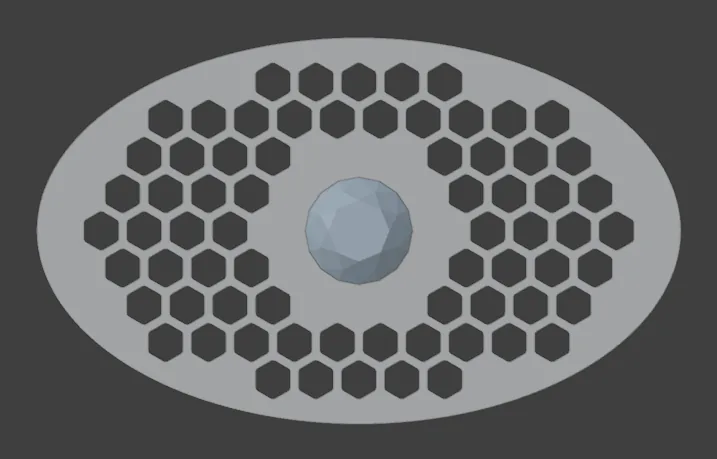
Try it yourself
Open the start file again (Blender may ask whether to save the changes to your copy: choose Don’t Save) and do steps 2 and 4 to 7, so that the pattern is live, not yet cut. Then click the stone, press G, X, type 9, press Enter, then press Refresh Keep-outs. The stone stands close to the rim, the plain round goes with it, and the panel counts 75 cells. Ctrl+Z twice brings it back.
What you learned
- A pattern on a piece starts from a face picked in Edit Mode. With no face picked, Last message says so and tells you to press
Tab. - Make Pattern leaves Edit Mode by itself, and it keeps cells clear of a stone already in place.
- When a stone moves, the panel says so, and Refresh Keep-outs makes the pattern again.