
What you will make
The head of a Round 6.50 after a visit to the head’s second level of handles: the numbers that shape the claws and the two rails, each dragged once and put back. The head has three levels. Level 1 holds the main controls. Level 2 adds the lean of the claws, how far the claws stand proud of the second rail, how far the rails stand inside the stone’s edge, and the width and height of each rail. Level 3 is each claw on its own. The rails are structural metal, because they tie the claws and carry the stone’s seat: the bench keeps structural metal at 0.80, and 0.60 at the least, and step 9 says where the add-on’s own rail sizes stand against that. At the end you change the stone with its button on the model, from a Round 6.50 to a Round 5.00, and the head follows it: its claws take the thickness the add-on gives a Round 5.00.
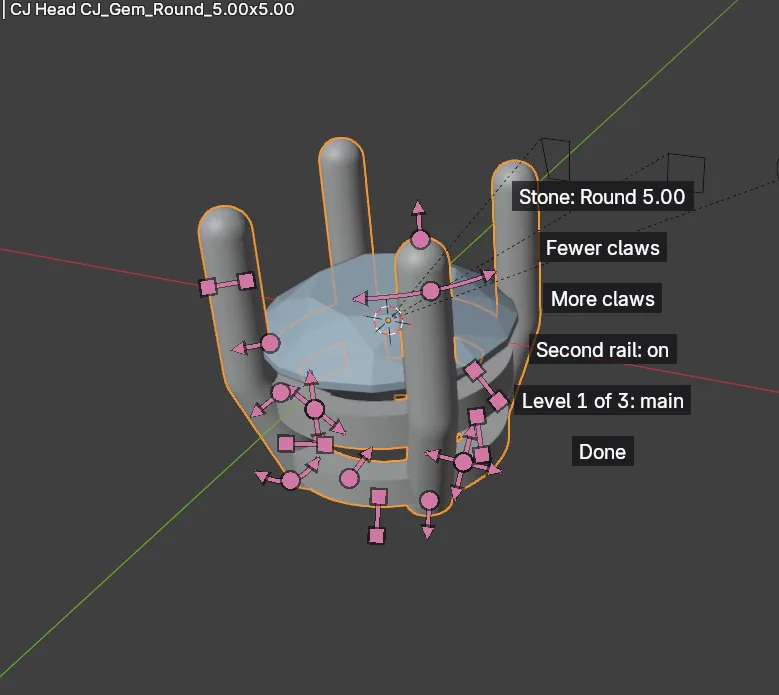
About 20 minutes.
Files
- p4-04-start.blend (228 KB): open this one to begin.
- p4-04-finished.blend (233 KB): the result, to compare with yours.
Both were made in Blender 5.2.0.
Before you start
- You have done Part 0, Blender from nothing, and Drag a number on the model (P4-02) and Move the rails by their cross (P4-03): handles,
Ctrl+Z, the cross, the label that shows when the pointer rests on a handle, how to select the head (click a claw) and how to press and drag are not explained again here. - The add-on is installed: CAD/CAM Jeweller 2.22.0 or later (Preferences > Add-ons shows the version). Its CAD/CAM tab is in the sidebar. The start file holds a Round 6.50 in a head of four claws, in millimetres. Ignore the Basket block under the head’s numbers in the sidebar: it is another tool, and nothing here uses it.
- A drag’s size depends on your zoom: your numbers will differ from these. What must match is that the panel reads what the handle reads, and that each number moves the way the step says.
Build it
Step 1. Open the start file and save your copy
WhereThe top bar: the row of words that begins File, Edit.
DoDownload p4-04-start.blend from Files above and open it. Then choose File > Save As and save it under the name below, in a folder of yours. Open an exercise file and keep the start file safe (P0-07) shows how.
Typemy-levels.blend
You should seeThe 3D view shows a round stone standing in four claws, with nothing selected. The title bar, the strip above File and Edit, begins my-levels. The first picture is the 3D view and the second is the title bar.
It worked whenThe title bar, the strip above File and Edit, begins my-levels.
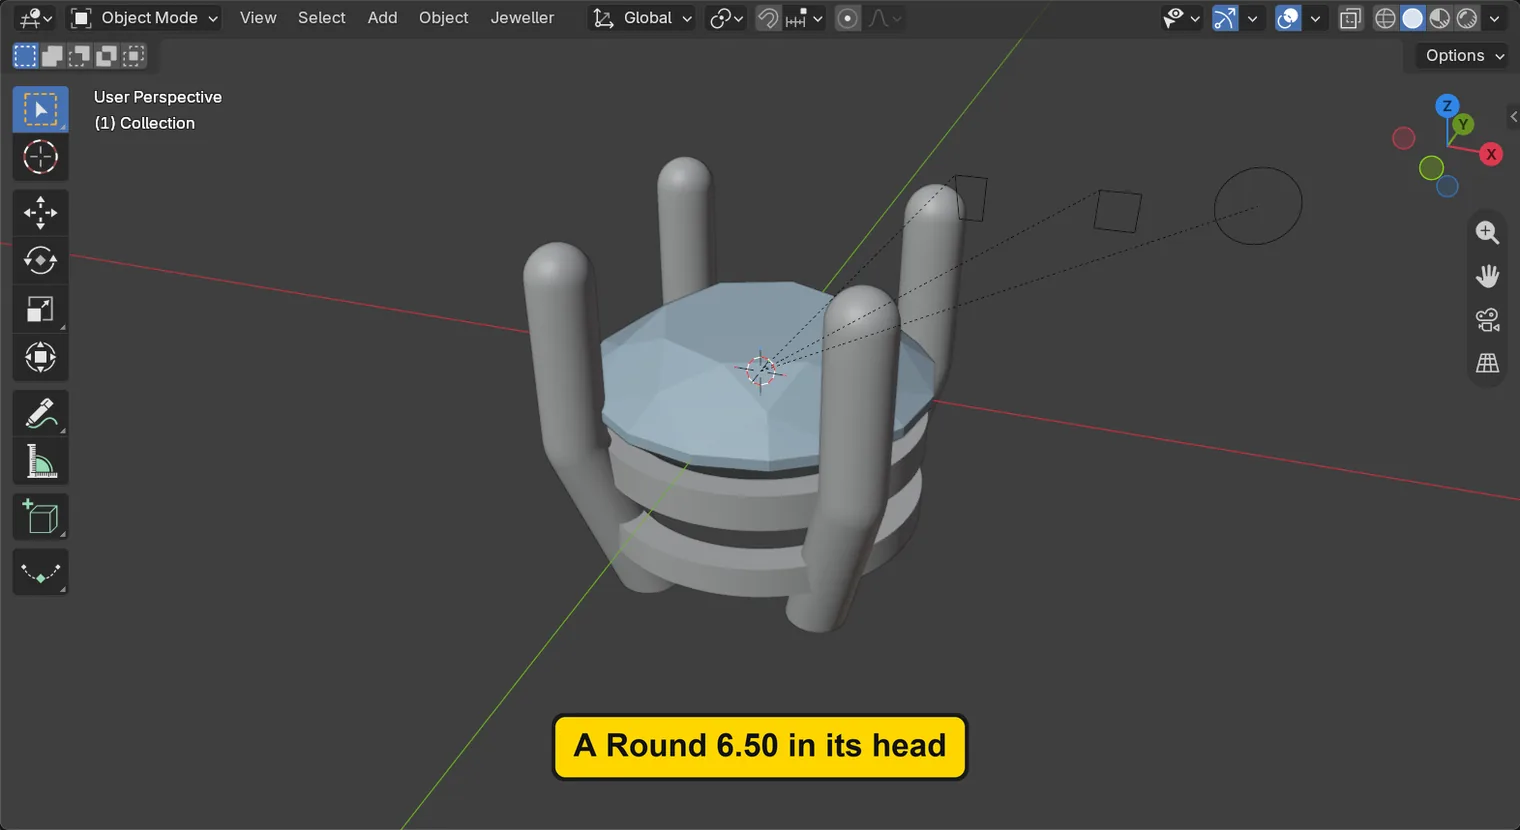

Step 2. Select the head and press the Level button
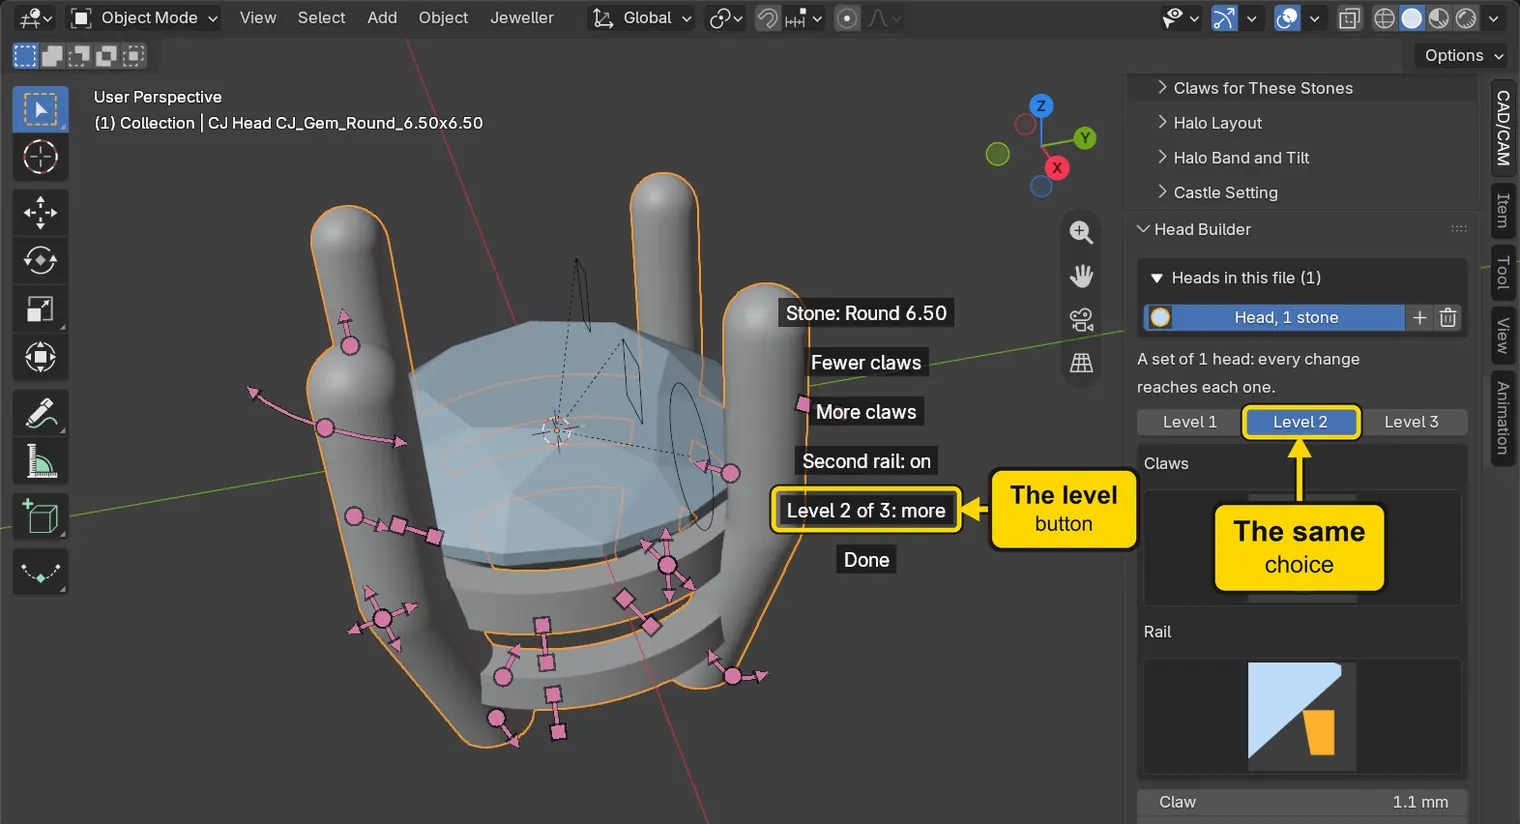
WhereThe sidebar: press N with the pointer over the 3D view if it is shut, click the CAD/CAM tab, then Setting. Then the 3D view, and the button on the model Level 1 of 3: main, one of the words to the right of the head.
DoSelect the head (click a claw, as in Drag a number on the model (P4-02), step 2), then click the button Level 1 of 3: main once.
You should seeThe button now reads “Level 2 of 3: more”, and Level 2 is lit in the row of three at the top of the Head Builder panel: the button and the row are one choice. More handles stand on the head. The button cycles: Level 1, then 2, then 3, then 1 again.
It worked whenThe button reads “Level 2 of 3: more”.
Step 3. Rest the pointer on the new handles
WhereThe 3D view: rest the pointer on a handle, without pressing, and wait a moment.
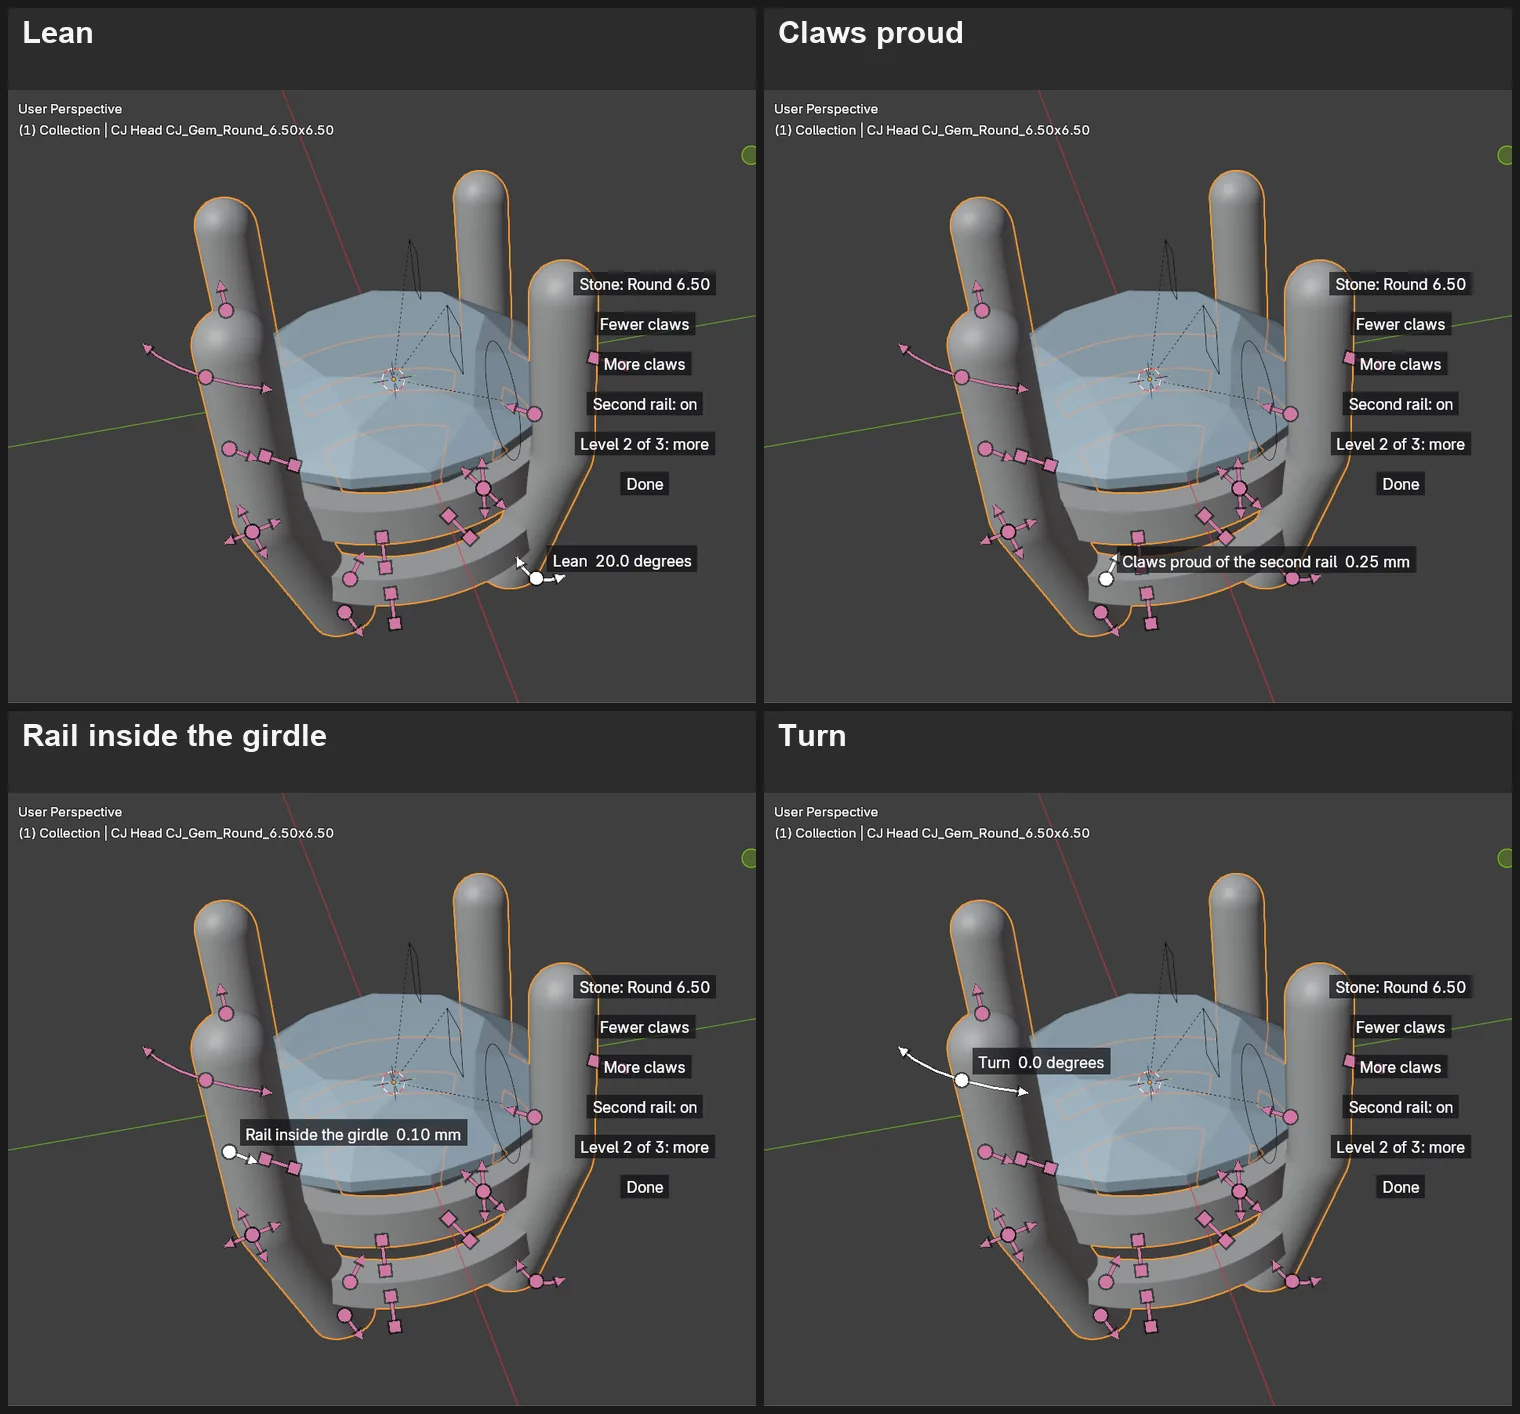
DoRest the pointer on a new handle until its label shows. The four pictures show four of them.
You should seeLean is a curve with a head at each end: it tilts the claws. Claws proud of the second rail is an arrow: how far each claw stands out past the second rail. Rail inside the girdle is an arrow: how far the rails stand inside the stone’s edge, the number that keeps them hidden. Turn is a ring round the stone: it turns the set of claws. The four pictures give the four labels.
It worked whenA label shows beside a handle.
Step 4. Drag Lean
WhereThe 3D view, the curve with a head at each end, at the foot of a claw: Lean. Press More at the foot of the panel first, so that Lean (degrees) shows.
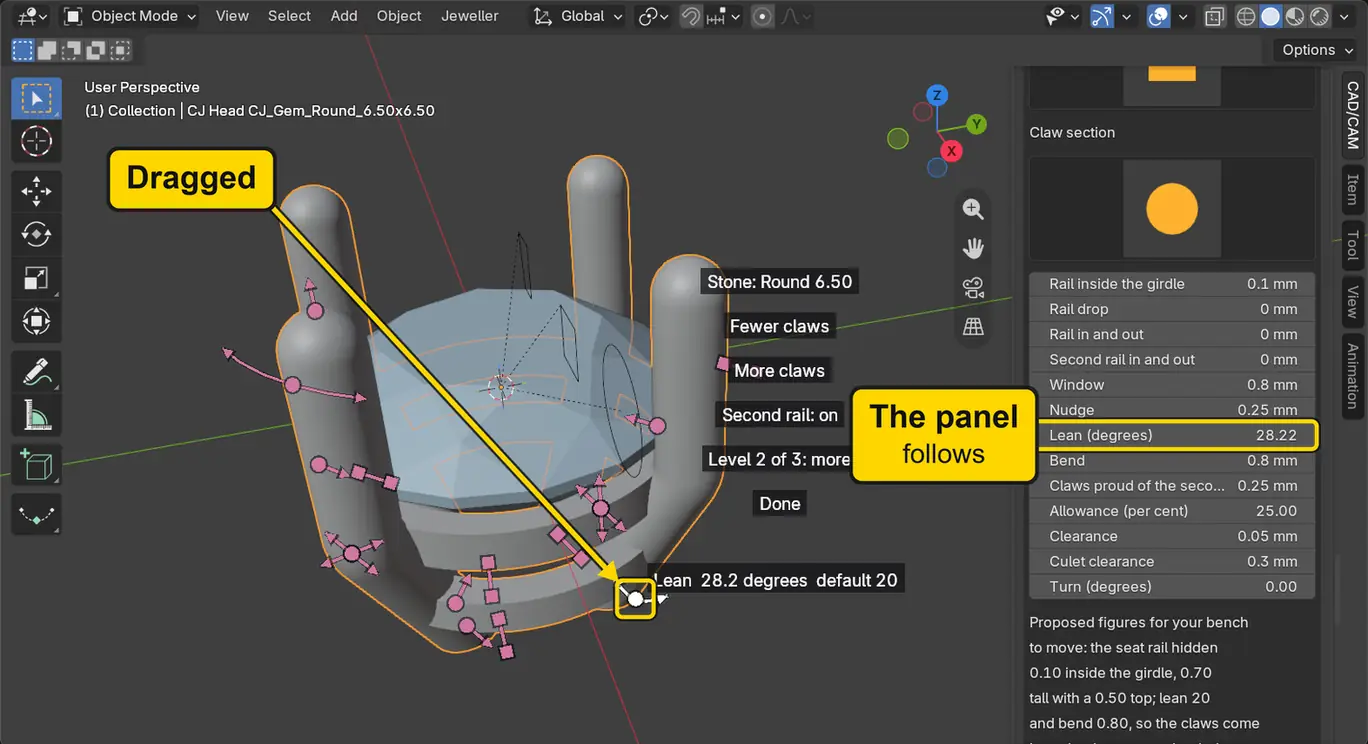
DoPress and drag as in Drag a number on the model (P4-02), step 4: press on the curve, drag along it, and let go. Then press Ctrl+Z once.
You should seeThe claws tilt further in under the stone. The label reads “Lean 28.2 degrees default 20”, and the panel’s Lean (degrees) reads the same. The picture shows the head just before the Ctrl+Z.
It worked whenLean (degrees) is no longer 20: it reads another number (here 28.2; yours will differ), and after Ctrl+Z it reads 20 again.
Step 5. Type a smaller Lean: it is at least
WhereThe Head Builder panel, the field Lean (degrees) under More. Click the middle of the field once.
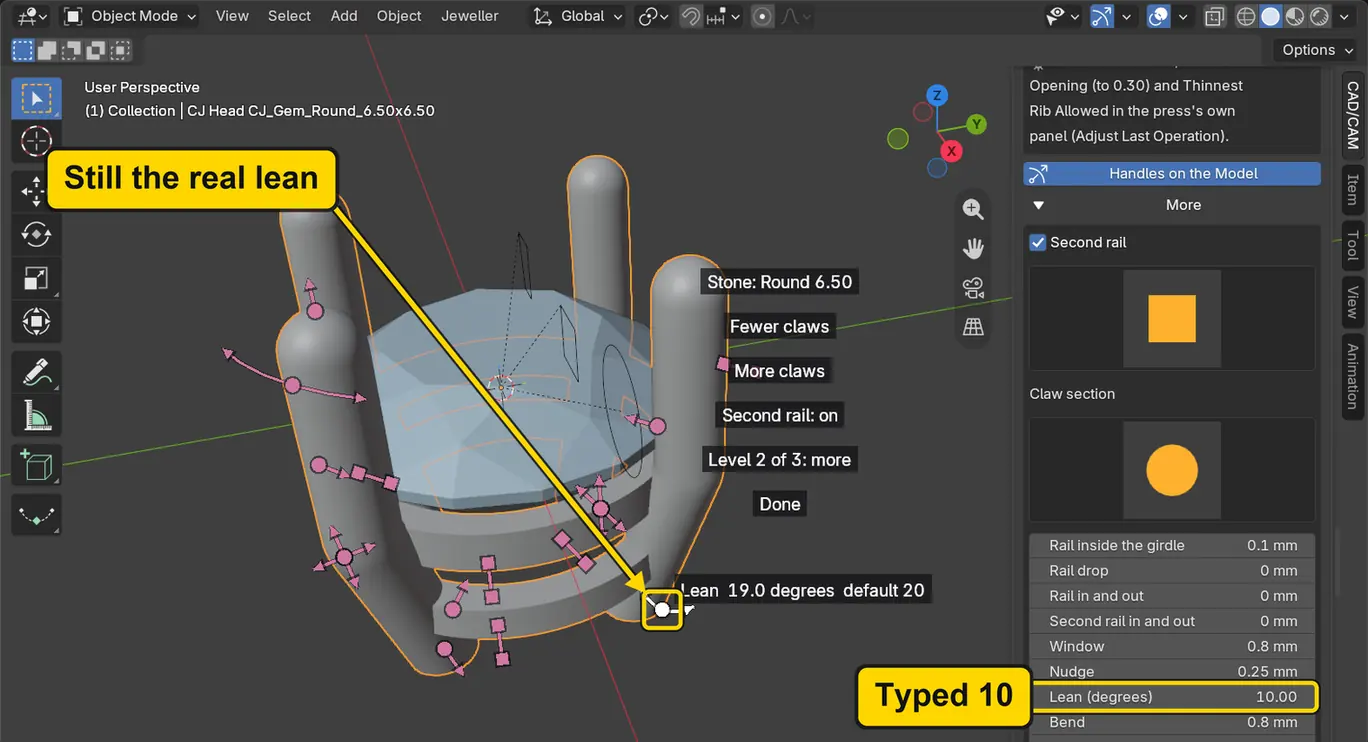
DoClick the middle of Lean (degrees) once, type 10 and press Enter.
You should seeThe field reads 10, and the claws do not change. Lean is “at least”: the claws lean as far as the rails need, and the field can add lean but never take it away. The handle still reads “Lean 19.0 degrees default 20”: 19.0 degrees is the least lean this head’s rails allow, so that is what the claws lean, and it is not 10. At 20, the add-on’s number, they lean 20. Type 20 and press Enter to put the number back.
It worked whenThe label of Lean still reads the lean the claws have, not 10, and Lean (degrees) reads 20 again after you type it back.
Step 6. Type Bend: it has no handle
WhereThe Head Builder panel, the field Bend under More. Click the middle of the field once.
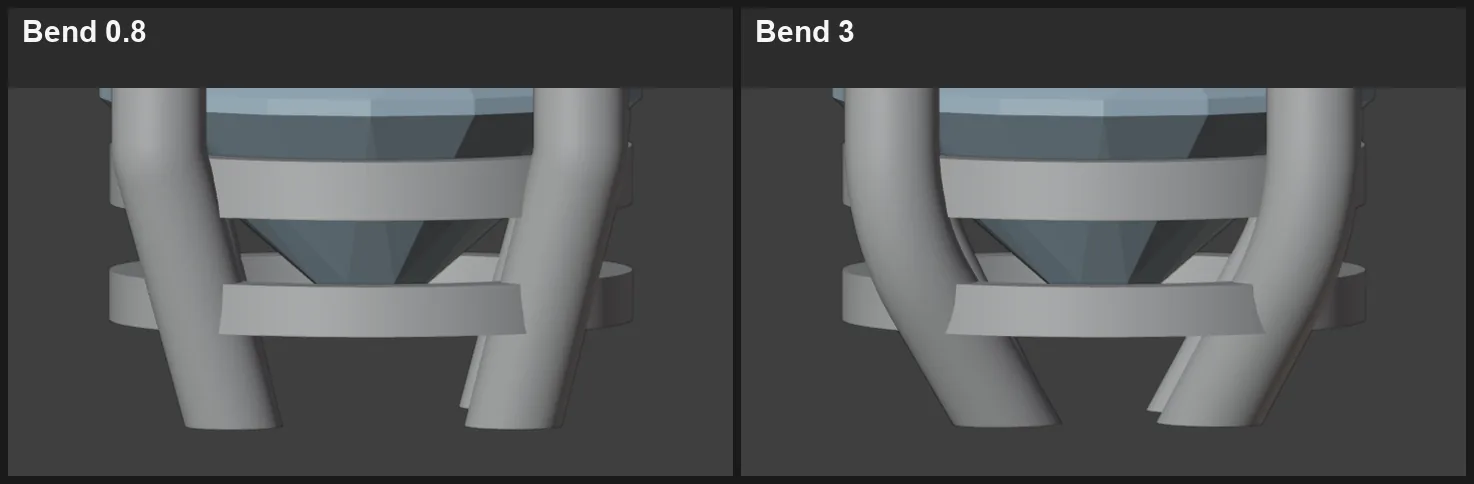
DoClick the middle of Bend once, type 3 and press Enter. Then type 0.8 and press Enter.
You should seeThe claws’ curve changes: Bend is the radius of the bend where a claw leans in under the setter’s notch, and a larger radius makes a gentler curve. It is a typed number: no handle shows for it. It starts at 0.8, the add-on’s number for a head. The two pictures show the lower half of the claws at 0.8 and at 3, a drill number chosen so that the change shows; the second Enter puts the first number back.
It worked whenBend reads 0.8 again after you type it back.
Step 7. Drag Claws proud of the second rail
WhereThe 3D view, the arrow on the second rail: Claws proud of the second rail.
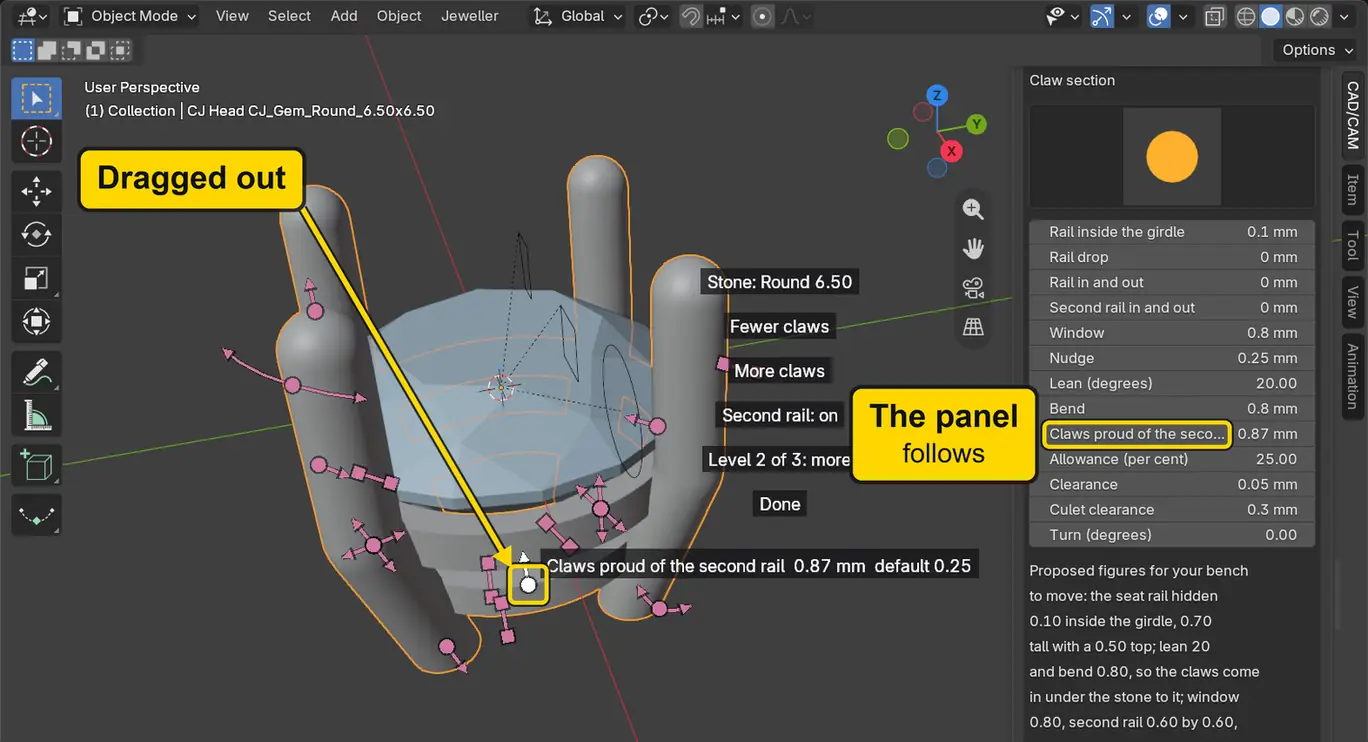
DoPress and drag as in P4-02, step 4: press on the arrow, drag it outward, and let go. Then press Ctrl+Z once.
You should seeThe claws stand out further past the second rail. The label reads “Claws proud of the second rail 0.87 mm default 0.25”. The handle starts at the number, and the number moves nothing until it passes a limit, so the drag may start a little way along. The picture shows the head just before the Ctrl+Z.
It worked whenClaws proud of the second rail has changed from 0.25 mm: it reads a bigger number (here 0.87 mm), and after Ctrl+Z it reads 0.25 mm.
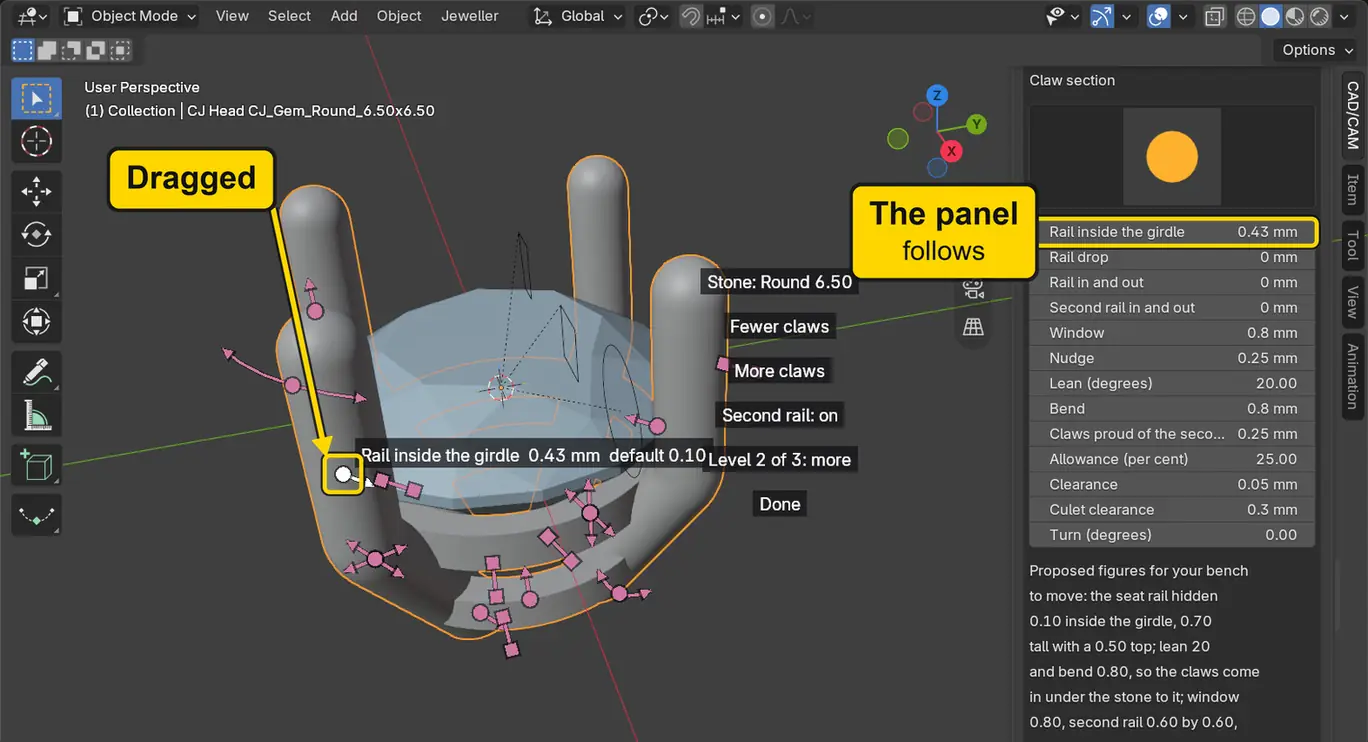
Step 8. Drag Rail inside the girdle
WhereThe 3D view, the arrow on the seat rail: Rail inside the girdle.
DoPress and drag as in P4-02, step 4: press on the arrow, drag it a little, and let go. Then press Ctrl+Z once.
You should seeThe rails move in or out by a fraction of a millimetre. The label reads “Rail inside the girdle 0.43 mm default 0.10”. This is how far every rail stands inside the stone’s edge, seen from above: it is what keeps the rails hidden. The panel’s line then says “Seen from the top only the stone and the claws show: every rail stands 0.45 mm or more inside the girdle line, the seat rail’s top 0.86 mm under the girdle’s lower edge, the stone resting on its inner edge.”. The picture shows the head just before the Ctrl+Z.
It worked whenRail inside the girdle has changed from 0.1 mm: it reads another number (here 0.43 mm), and after Ctrl+Z it reads 0.1 mm.
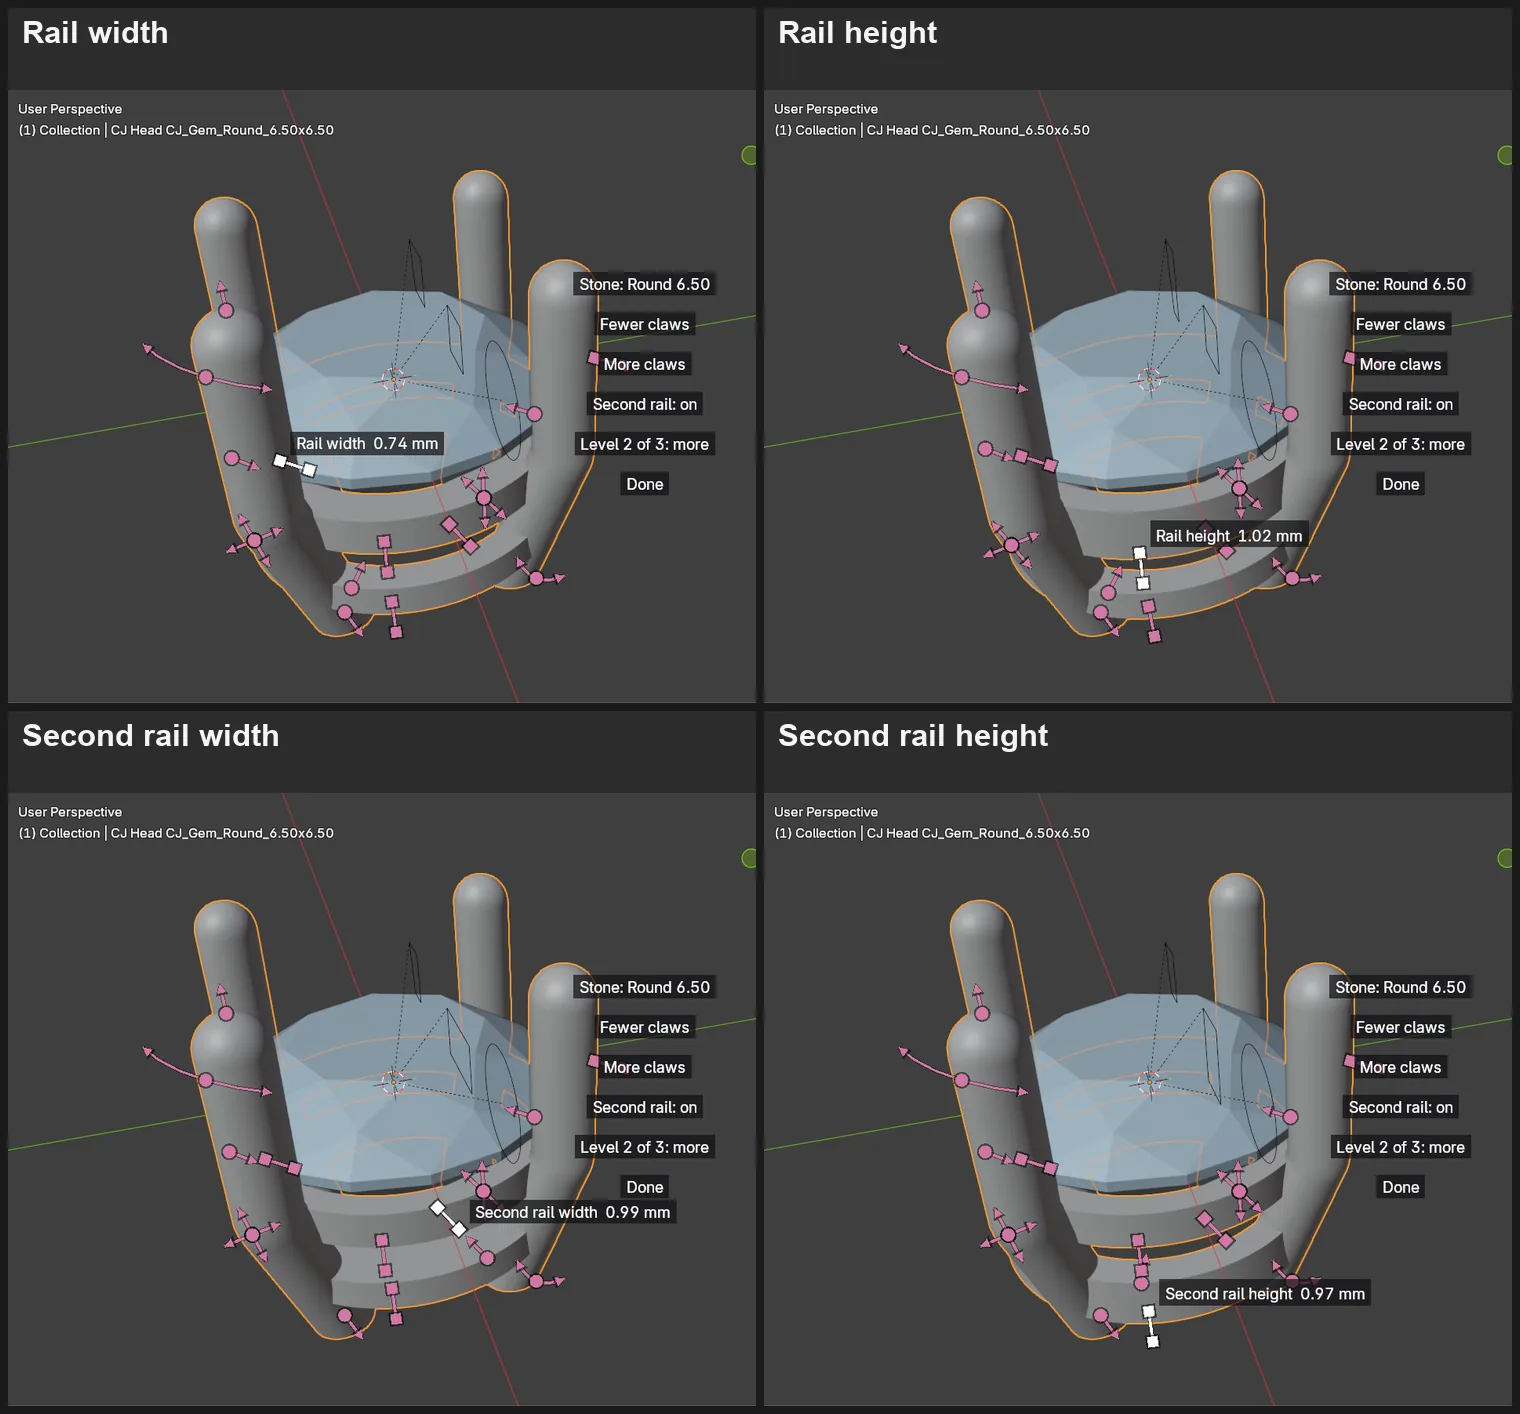
Step 9. Drag the four rail sizes
WhereThe 3D view: four bars, each with a square at each end, on the two rails: Rail width, Rail height, Second rail width and Second rail height.
DoPress and drag as in P4-02, step 4: press on a bar, drag it a little, and let go. Do each of the four, and press Ctrl+Z once after each. The four pictures show all four.
You should seeEach rail grows a little wider or taller, and its label reads the new size: “Rail width 0.74 mm” for the first. These four have no field in the panel: the label is where you read them. The seat rail starts 0.5 wide and 0.7 high, the second rail 0.6 by 0.6. Both rails are structural: they tie the claws together and carry the stone’s seat, so the bench’s 0.80 and its least, 0.60, apply to them. The seat rail’s 0.5 is under that least, and the add-on does not flag it; the second rail’s 0.6 stands on the least. These are the add-on’s own sizes for a rail hidden under a stone, a head to read here and not to send to a caster: for a rail you would cast, make it at least 0.60 wide.
It worked whenEach label reads a new size while you drag, and after the last Ctrl+Z every rail is as it was.
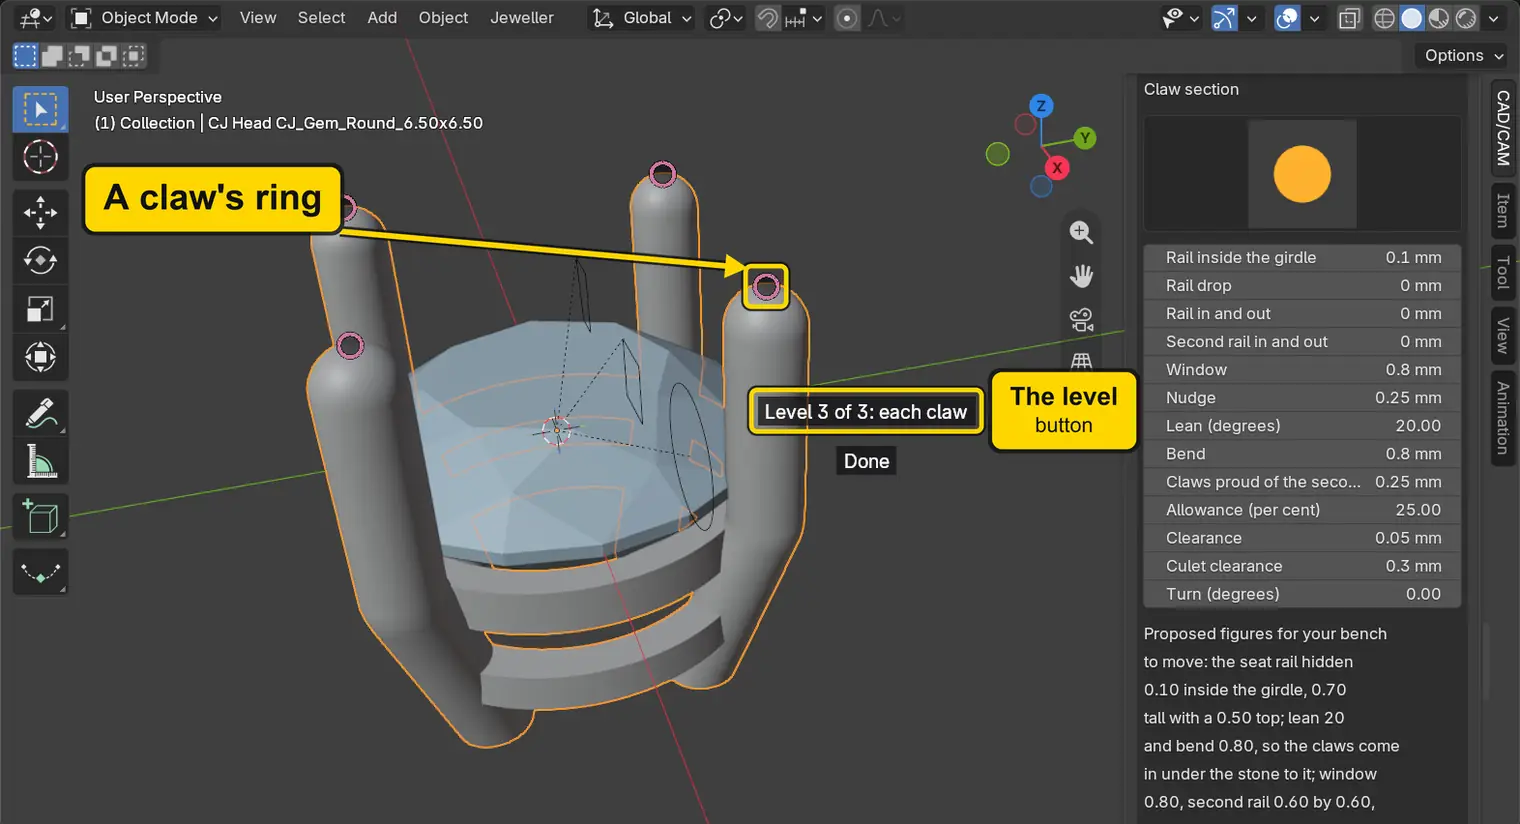
Step 10. Meet Level 3, then come back
WhereThe 3D view, the button on the model that reads Level 2 of 3: more.
DoClick the button once, look at the head, then click it again.
You should seeAt Level 3 each claw has a ring on its tip, and a click on a ring picks that claw so that it can be shaped on its own: Give one claw its own shape (P4-06) uses it. The second click brings Level 1 back, with the button reading “Level 1 of 3: main” and Level 1 lit in the panel’s row.
It worked whenThe button reads “Level 1 of 3: main”.
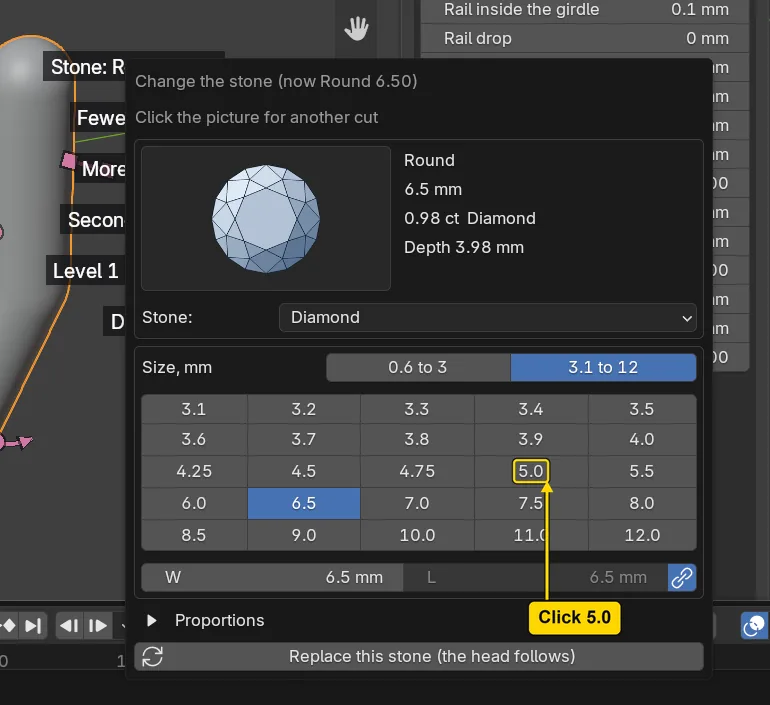
Step 11. Change the stone with its button
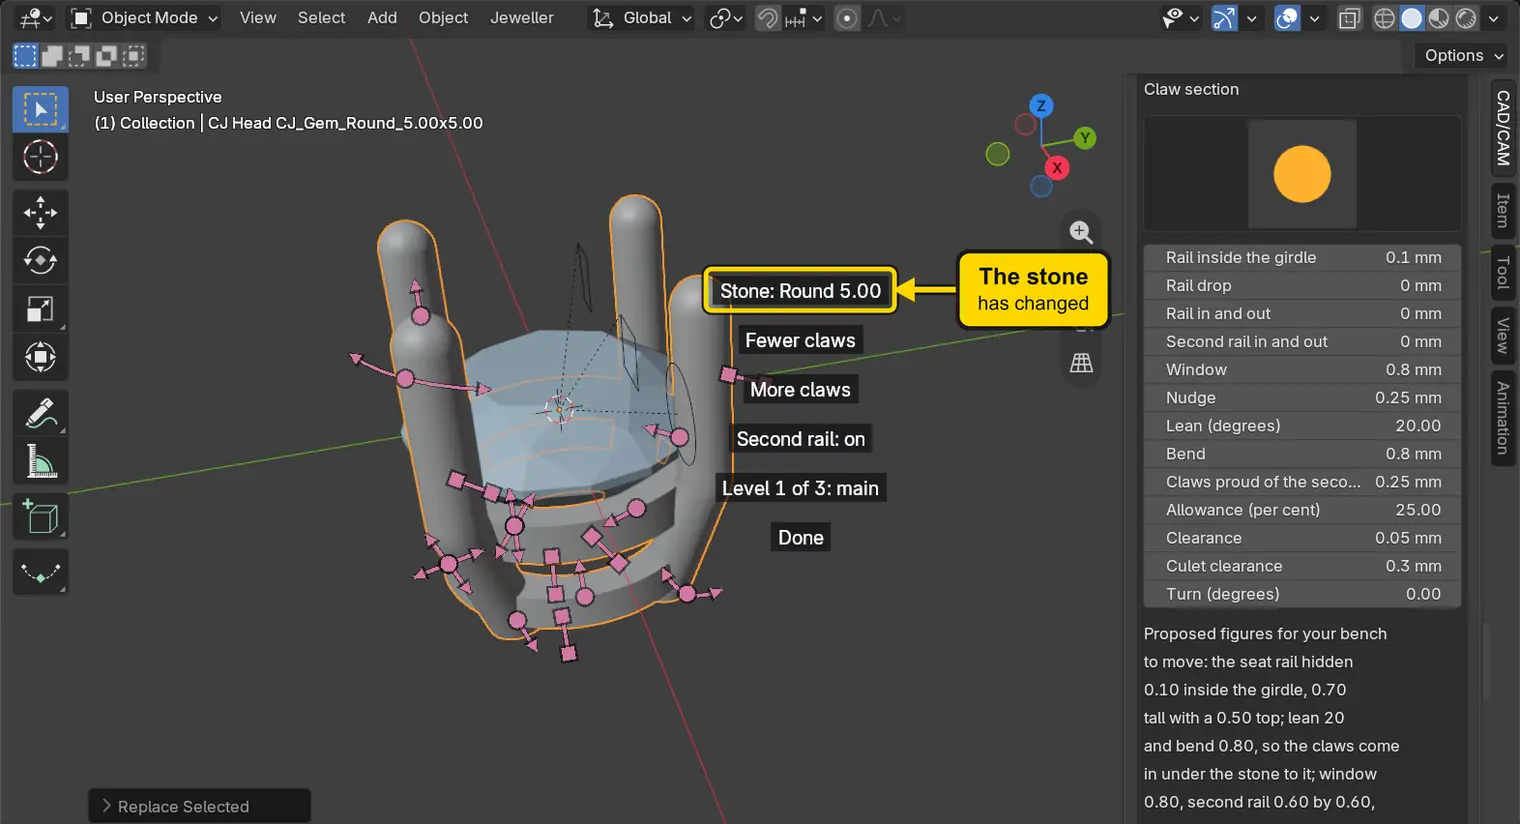
WhereThe 3D view, the button on the model Stone: Round 6.50, one of the words to the right of the head. Read Claw in the panel first: it reads 1.15 for the Round 6.50 (the panel may show one decimal less than the handle’s label). The box opens on the tab 3.1 to 12, which holds the chip. Do not click the picture of the stone in the box: that changes the cut.
DoClick the button Stone: Round 6.50, click the chip 5.0 in the box that opens, then press Replace this stone (the head follows).
You should seeThe box that opens holds the same chips as the Gems panel. The button reads “Stone: Round 5.00” afterwards, the stone is a Round 5.00, and its head has followed: the claws are the thickness for a Round 5.00, Claw 0.9 mm, where they were 1.15 mm. A number you set by hand stays, and a number on the add-on’s rule follows the stone: Claw and the foot plane follow the stone’s size, and a number you dragged or typed, such as Over the table, stays.
It worked whenThe button reads “Stone: Round 5.00” and Claw reads 0.9 mm.
Step 12. Read the line under the numbers
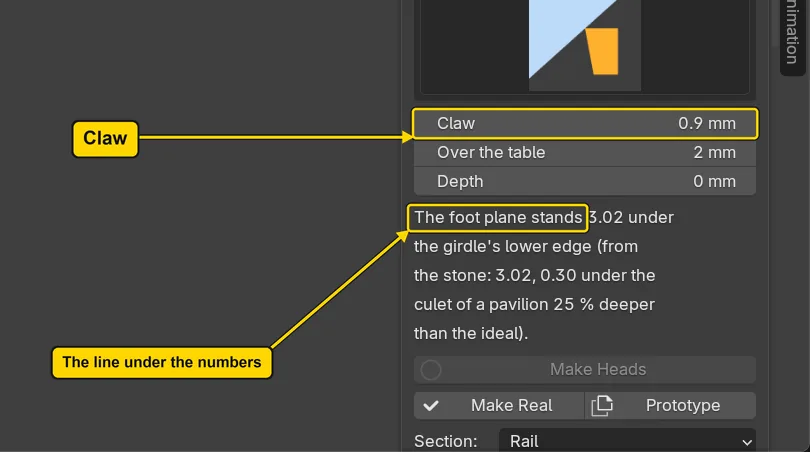
WhereThe Head Builder panel, the sentence under Claw, Over the table and Depth. Scroll the sidebar up if it is out of view.
DoRead the sentence, and Claw.
You should seeThe sentence begins “The foot plane stands 3.02 under the girdle’s lower edge”: the head rebuilt for the new stone, the foot plane lower or higher with the pavilion. Claw reads 0.9 mm, the thickness for a Round 5.00. The sentence still reads as in Build a head and read what it is (P4-01), step 7, and the head’s own sentence under the buttons still begins “Seen from the top only the stone and the claws show”.
It worked whenThe sentence begins “The foot plane stands 3.02”.
Step 13. Save your work
WhereThe 3D view: move the pointer over it.
DoPress Ctrl+S.
You should seeBlender writes your copy at once, with no question, because the file already has a name. An asterisk, *, in the title bar marks changes that are not saved, and it goes now. Save your work and get it back (P0-12) says more about saving.
It worked whenThe title bar begins my-levels and carries no asterisk.
No picture: the only change is a message on the status bar, and it fades.
Check your result
| What to read | Where | What it should say |
|---|---|---|
| The level | The 3D view: the button on the model, and the CAD/CAM tab, Setting section, Head Builder panel: the row Level 1, Level 2, Level 3 | The button on the model reads “Level 1 of 3: main” and Level 1 is lit in the row |
| The stone | The 3D view: the button on the model | It reads “Stone: Round 5.00” and the words at the top left of the 3D view end CJ_Gem_Round_5.00x5.00 |
| The claws followed the stone | The Head Builder panel: Claw | It reads 0.9 mm for the Round 5.00. For the Round 6.50 it read 1.15 mm |
| The line under the numbers | The same panel, under Claw, Over the table and Depth | It begins “The foot plane stands 3.02 under the girdle’s lower edge” |
Try it yourself
Open your copy and click a claw, then click the button Level 1 of 3: main to reach Level 2. Drag Lean a long way and read its label, then drag it back toward the claws’ first lean: the handle stops at the lean the claws really have, so a smaller number moves nothing. Press Ctrl+Z once to take the drag back.
What you learned
- The Level button on the model, and the row of three at the top of the Head Builder panel, are one choice. Level 2 adds the lean, how far the claws stand proud of the second rail, how far the rails stand inside the stone’s edge, and the four rail sizes.
- Lean is “at least”: the claws lean as far as the rail needs, so a smaller number moves nothing. Bend has no handle: it is a typed number under More. The four rail sizes have handles and no field in the panel: their label is where you read them.
- The button Stone: Round 6.50 on the model changes the stone and the head follows it. The next page, Change the claw count and turn the set (P4-05), changes the number of claws.