
What you will do
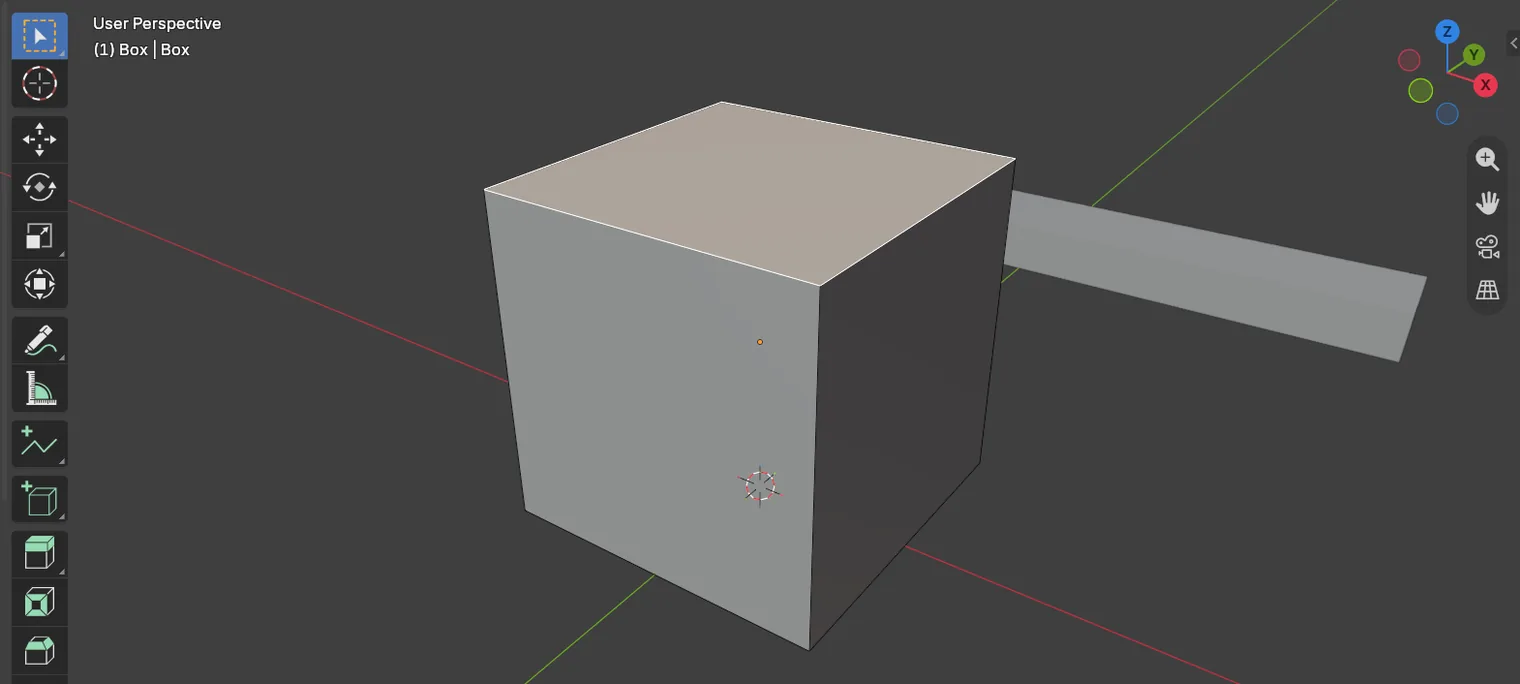
You will go inside the Box, pick one face of it, and come out again. Object Mode moves whole forms. Edit Mode reaches into one form’s points, edges and faces, which is where a jeweller shapes a piece.
About 8 minutes.
Files
- p0-14-start.blend (102 KB): open this one to begin.
- p0-14-finished.blend (104 KB): the result, to compare with yours.
Both were made in Blender 5.2.0.
Before you start
- You can open a file and save a copy of it: Open an exercise file and keep the start file safe (P0-07).
- You can select a form with a click: Select, add to the selection, clear it, spot the active one (P0-08).
Build it
Step 1. Open the start file and save your own copy
WhereThe top bar: the row of words that begins File, Edit.
DoDownload p0-14-start.blend from Files above and open it. Then choose File > Save As and save it under the name below, in a folder of yours. Open an exercise file and keep the start file safe (P0-07) shows how.
Typemy-edit.blend
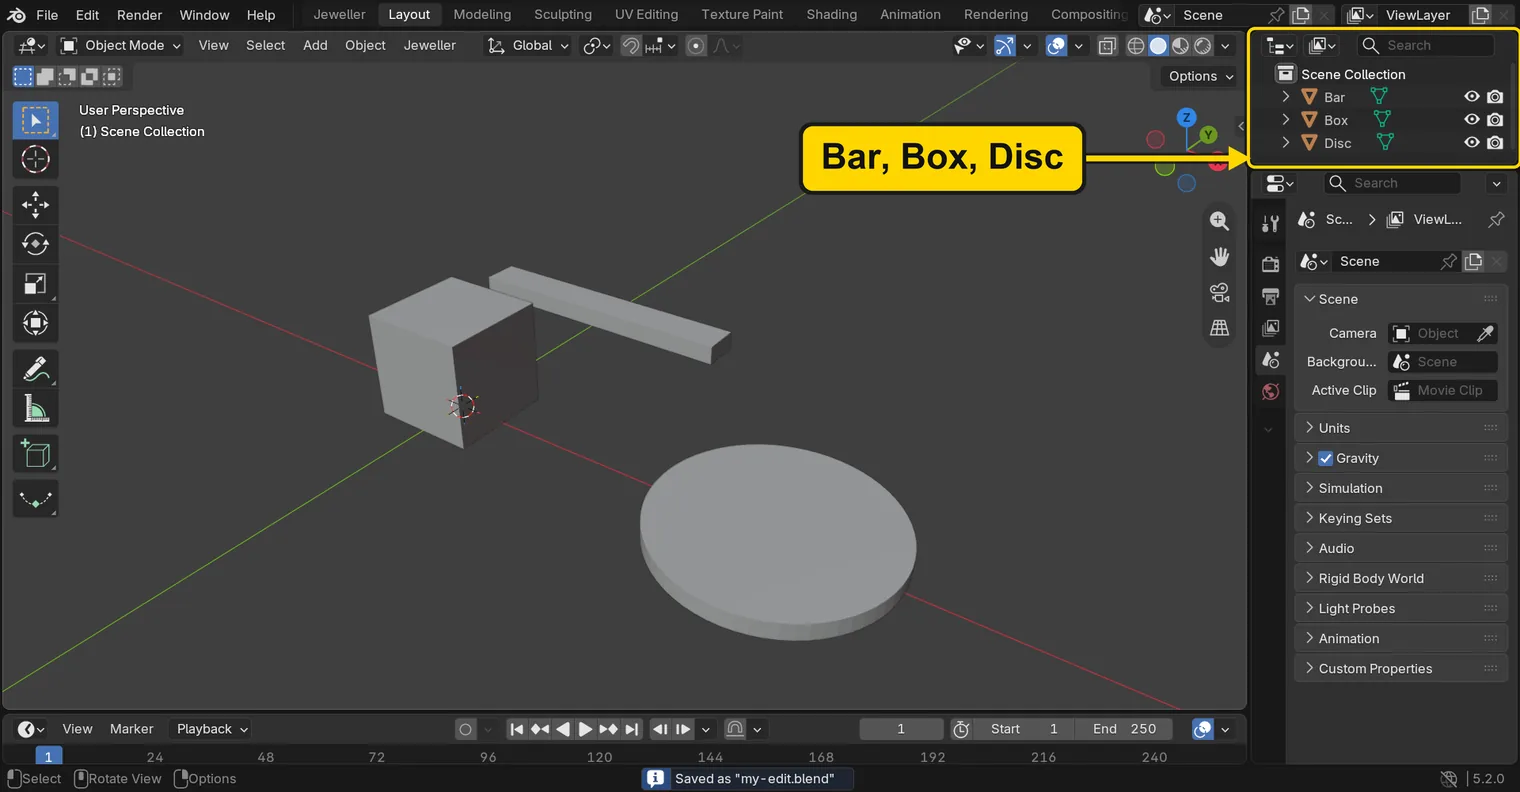
You should seeThe 3D view shows a box, a bar and a disc. The Outliner, the list at the top right of the window, lists Bar, Box and Disc, and the title bar, the strip above File and Edit, begins my-edit.
It worked whenThe title bar begins my-edit.
Step 2. Select the Box
WhereThe 3D view: the box in the middle of it.
DoClick the box once.
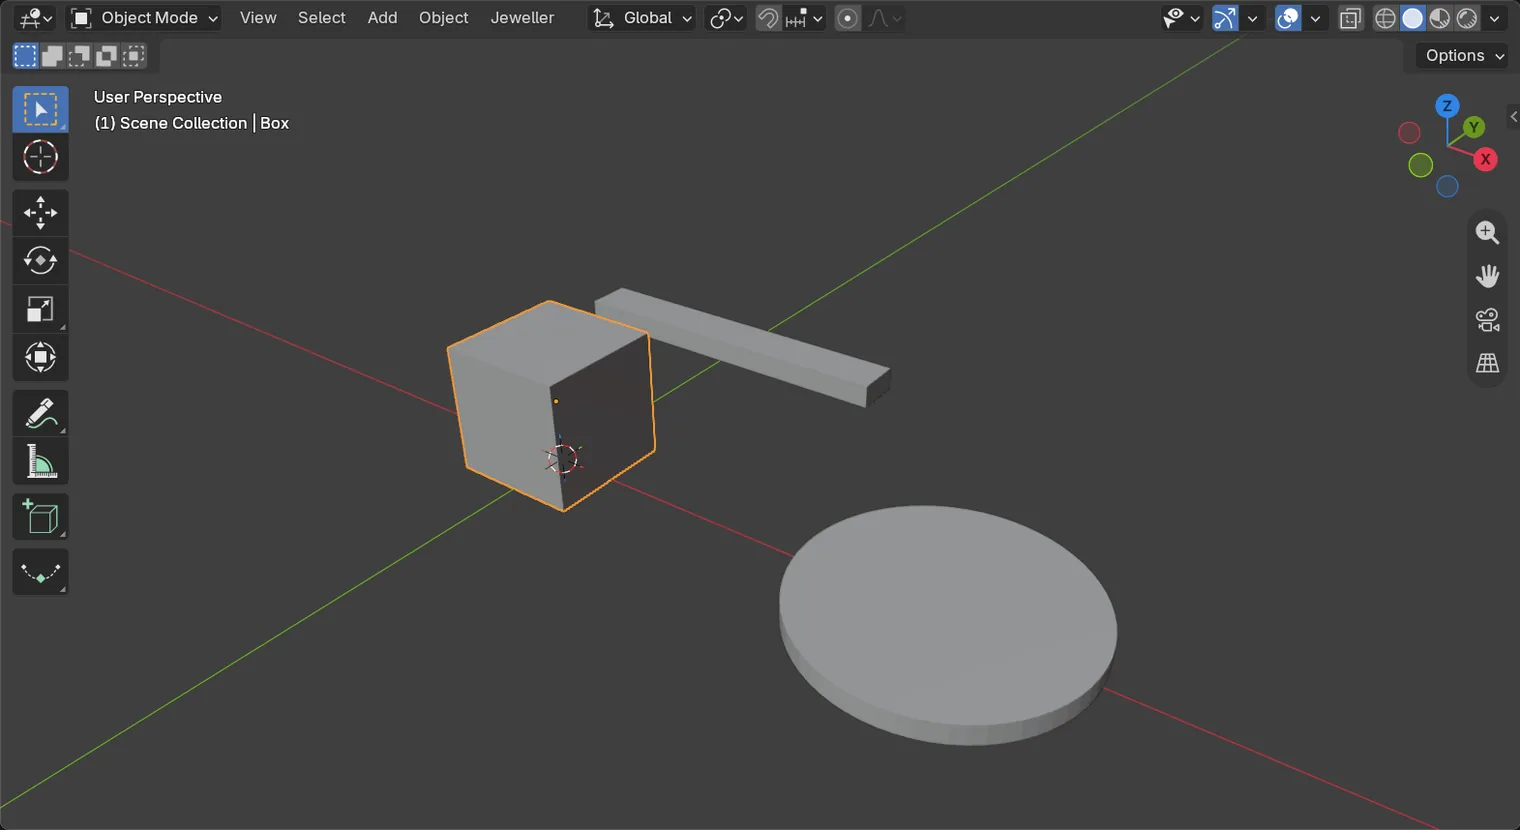
You should seeThe box has an orange outline. Edit Mode works on the active form, so the box must be the one.
It worked whenThe box is outlined and the words at the top left of the 3D view name the Box.
Step 3. Go into Edit Mode with the mode switch
WhereThe header: the box reading Object Mode, at the left of it.
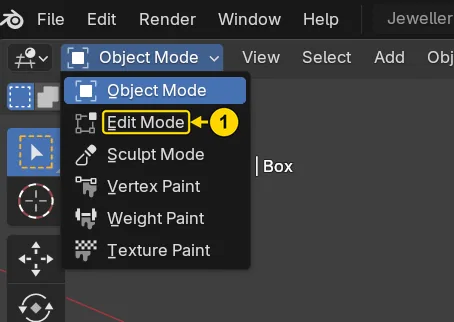
DoClick the box reading Object Mode, then click Edit Mode (marked 1) in the list that opens.
You should seeThe list holds the modes a form can be in. After your click the box reads Edit Mode, the 3D view shows the box’s edges and corner points, and the header has new words and three small buttons beside the box.
It worked whenThe box at the left of the header reads Edit Mode.
Step 4. Meet the three small buttons
WhereThe 3D view. Move the pointer off the header and into the dark area.
DoPress 1, 2 and 3 on the number row, one after the other.
You should seeEach key changes what a click will pick: 1 a corner point, 2 an edge, 3 a face. The mode switch (marked 1) now reads Edit Mode, and the three small buttons beside it (marked 2) show which pick is on. After 3 the third is lit.
It worked whenAfter 3, the third of the three small buttons is lit.
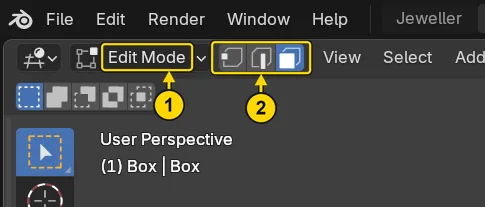
3: the three small buttons, marked 2, and the third is litStep 5. Pick a point, an edge and a face
WhereThe 3D view: the pointer stays over it.
DoPress each key in the table, then click the place beside it.
You should seeA click now picks what the key chose: one corner point, one edge, one face. The sheet shows each pick. The top face stays orange at the end, and the next step adds to it.
It worked whenOne face of the box, the top one, is orange.
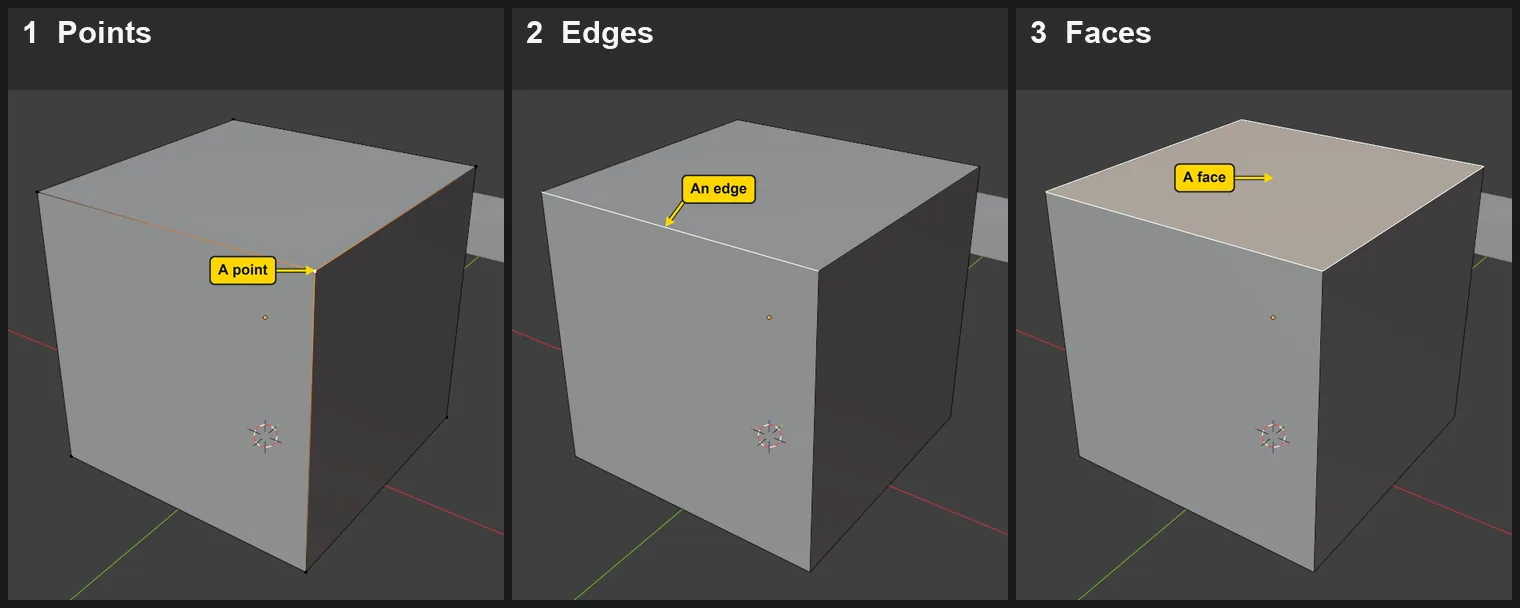
1, 2 and 3: a click picks a point, an edge or a face| Press | Then click |
|---|---|
1 | a corner of the top of the box |
2 | the middle of an edge of the top |
3 | the top face |
Step 6. Add a second face with Shift
WhereThe 3D view: the right-hand side of the box.
DoHold Shift, click the side of the box that faces right, then let go of Shift.
You should seeThat side turns orange too. The top stays orange: Shift adds to what you picked.
It worked whenTwo faces of the box are orange, the top and the right-hand side.
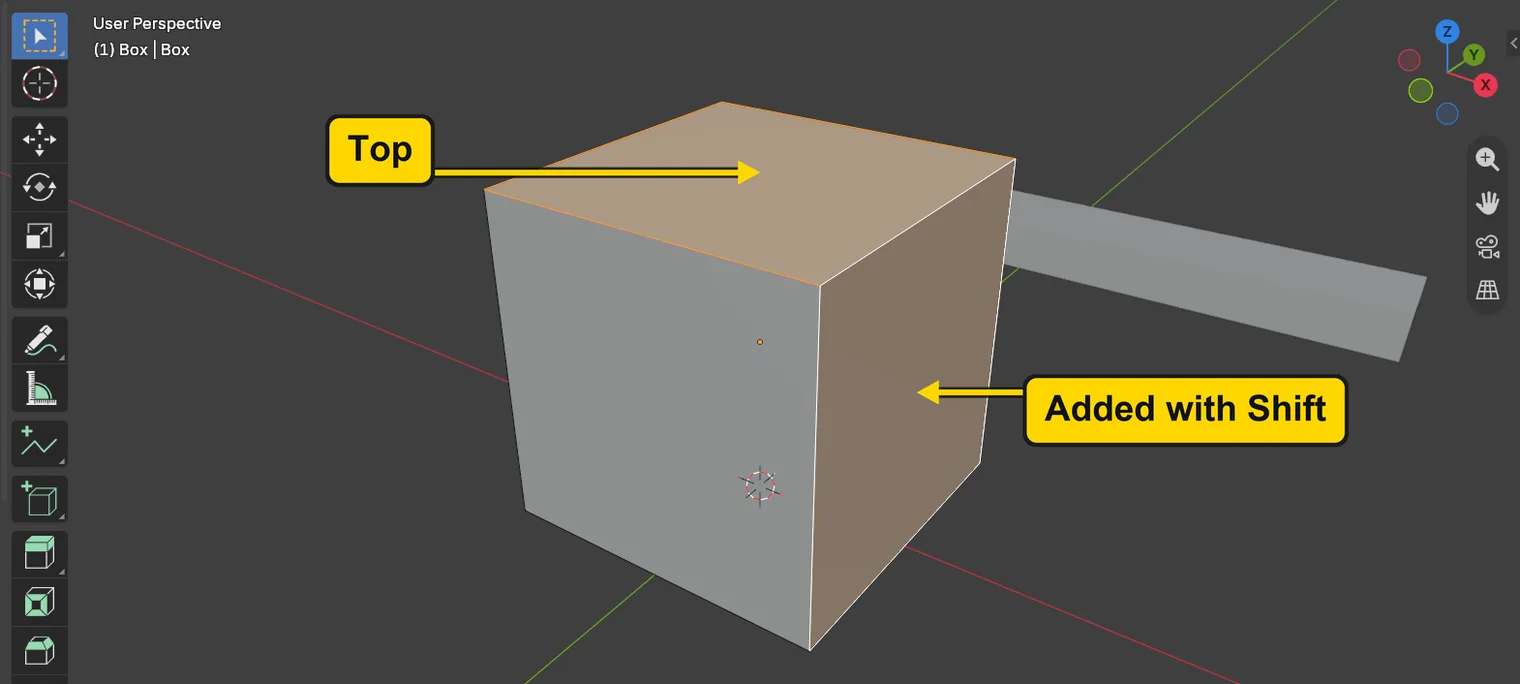
Step 7. Start again with a plain click
WhereThe 3D view: the top of the box.
DoClick the top face again, with no Shift.
You should seeThe side goes grey again and only the top face stays orange. A click without Shift picks only what you click.
It worked whenOne face of the box, the top one, is orange.
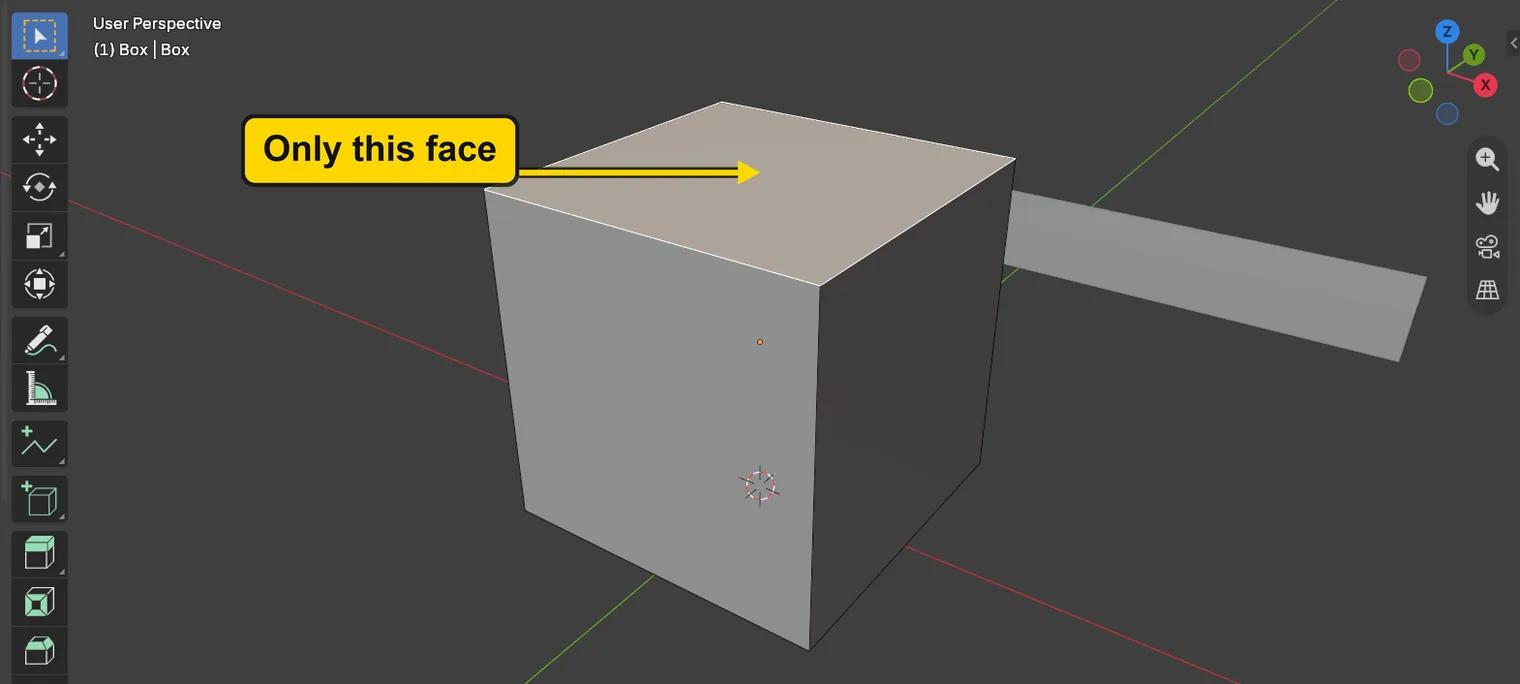
Step 8. Leave Edit Mode with Tab
WhereThe 3D view: the pointer stays over it.
DoPress Tab.
You should seeThe box at the left of the header reads Object Mode again, and the corner points and edges are gone. The box is outlined as a whole.
It worked whenThe box at the left of the header reads Object Mode.
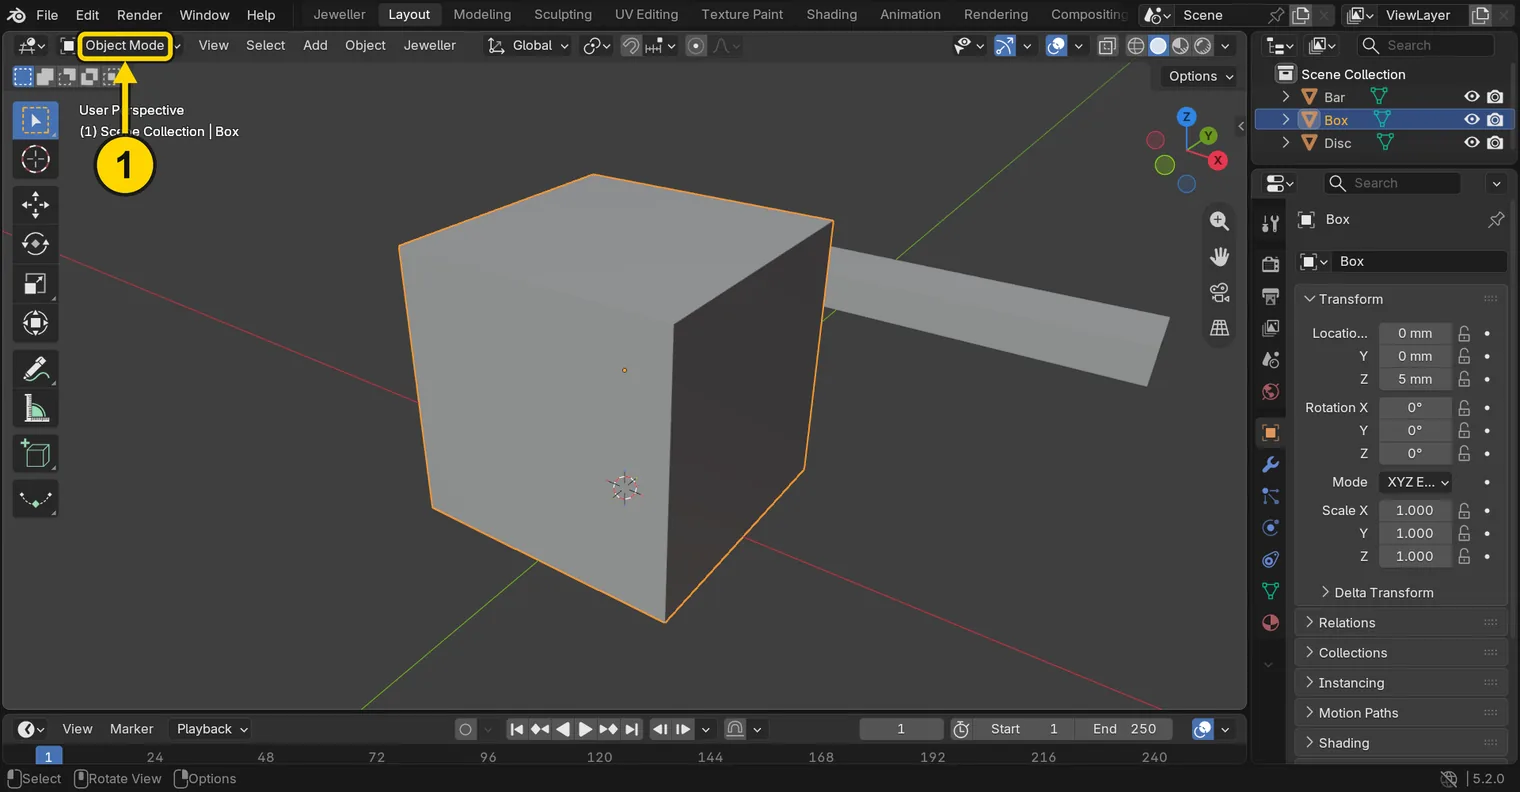
Tab again: the switch, marked 1, reads Object ModeIf it goes wrongTab does nothing: the pointer was over the Outliner, and a key goes to the area under the pointer. Move it over the 3D view and press Tab again.
Step 9. Go back in with Tab
WhereThe 3D view: the pointer stays over it.
DoPress Tab once more.
You should seeYou are back in Edit Mode, and the top face is still orange: Blender remembers what you picked.
It worked whenThe box at the left of the header reads Edit Mode, and the top face is orange.
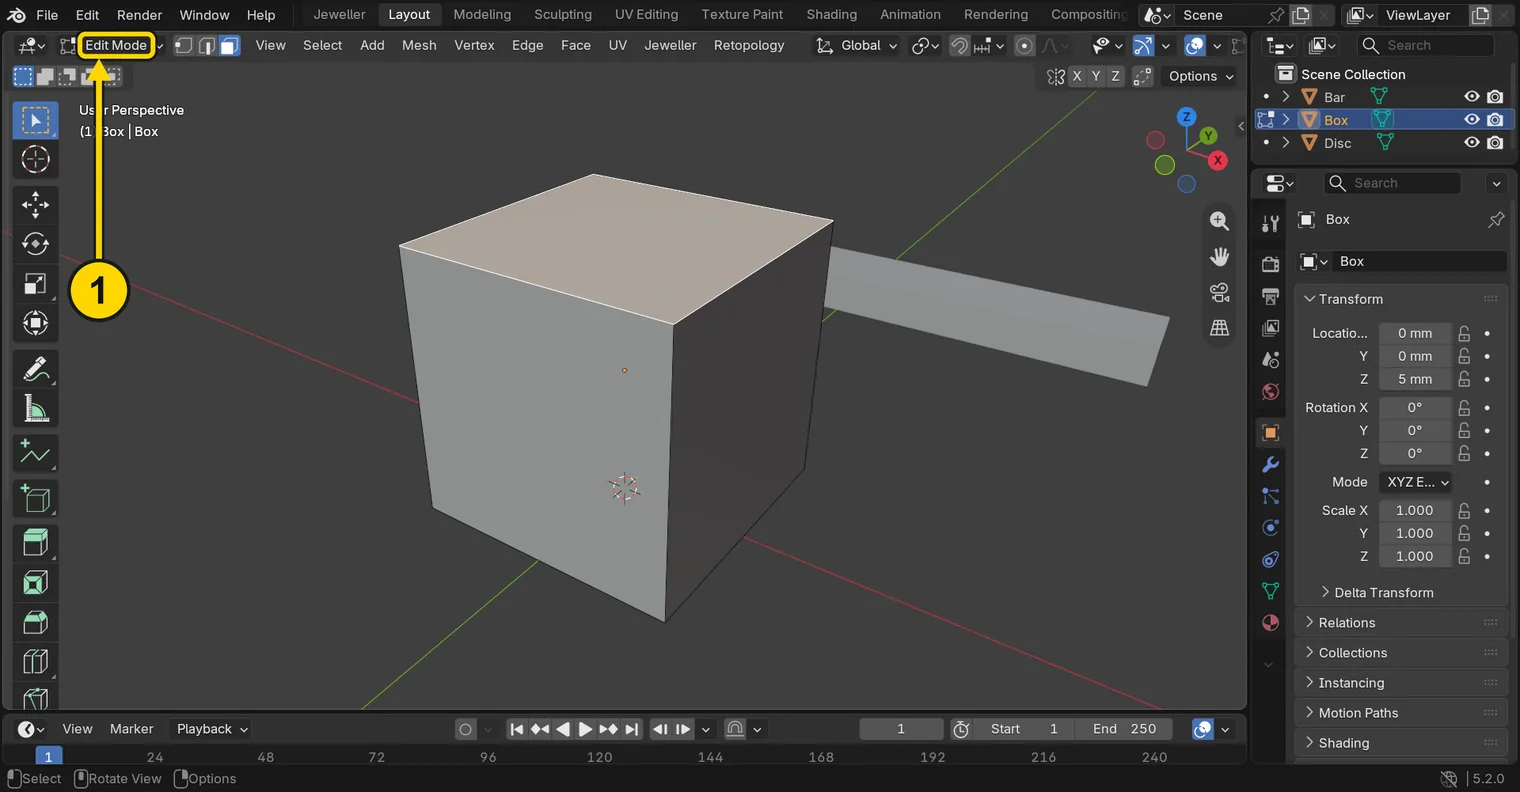
Tab once more: Edit Mode, and the top face is still pickedStep 10. Save your work
WhereThe 3D view: move the pointer over it.
DoPress Ctrl+S.
You should seeBlender writes your copy at once, with no question, because the file already has a name. An asterisk, *, in the title bar marks changes that are not saved, and it goes now. Save your work and get it back (P0-12) says more about saving.
It worked whenThe title bar begins my-edit, and no asterisk stands in it.
No picture: the only change is a message on the status bar, and it fades.
Check your result
| What to read | Where | What it should say |
|---|---|---|
| The mode | The box at the left of the header, on the 3D view | It reads Edit Mode |
| The picked face | The 3D view | The top face of the box is lit orange and the other faces are grey |
Try it yourself
Open your copy again. Press Tab to leave Edit Mode, then click the Bar and press Tab: now the Bar is the form you are inside. Press 3, click one end of the bar, and pick its end face the same way.
What you learned
Tabwith the pointer over the 3D view goes into Edit Mode and back out. The mode switch in the header does the same.1picks points,2edges and3faces. Those are the number row keys, not the number pad.- A click picks one; Shift+click adds another. Blender remembers what you picked when you leave and come back.