
What you will make
Two Round 5.00 stones, round stones 5.00 mm across, in two heads that share one seat rail. The seat rail is the ring of metal under each stone that it rests on. Its section is a small curve, the shape of the rail cut through: a four-sided figure. You move one point of that curve, the outer foot, 0.2 mm toward the stone, and both heads make their rails again: the rail leans in toward its foot, which the bench calls a tapered rail. Then you save the section by a name, put it back with Reset, and take the name off the list again. The change is drilled on the curve, not cast: the seat rail starts 0.50 wide, which is already under the 0.60 least for structural metal, and this drill makes its foot narrower still. Put it back with Reset, as step 10 does. A jeweller edits the section when the rail’s shape, and not only its numbers, must change.
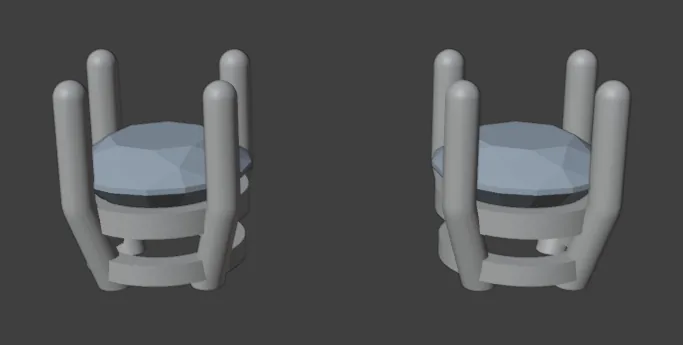
About 15 minutes.
Files
- p4-08-start.blend (230 KB): open this one to begin.
- p4-08-finished.blend (235 KB): the result, to compare with yours.
Both were made in Blender 5.2.0.
Before you start
- You have done Part 0, Blender from nothing, and Build a head and read what it is (P4-01): a head’s claws and its two rails, one seat rail under the stone and a second rail lower down, hidden from the top.
- CAD/CAM Jeweller 2.22.0 or later (Preferences > Add-ons shows the version). The start file holds two Round 5.00 stones, each in a head of four claws, in millimetres. Both heads belong to one set: a change to the set reaches both.
Build it
Step 1. Open the start file and save your copy
WhereThe top bar: the row of words that begins File, Edit.
DoDownload p4-08-start.blend from Files above and open it. Then choose File > Save As and save it under the name below, in a folder of yours. Open an exercise file and keep the start file safe (P0-07) shows how.
Typemy-section.blend
You should seeThe 3D view shows two pale round stones side by side, each held by four claws, seen from the front and a little above. Both stones have an orange outline: they are selected. The title bar, the strip above File and Edit, begins my-section. The first picture is the 3D view and the second is the title bar.
It worked whenThe title bar, the strip above File and Edit, begins my-section.
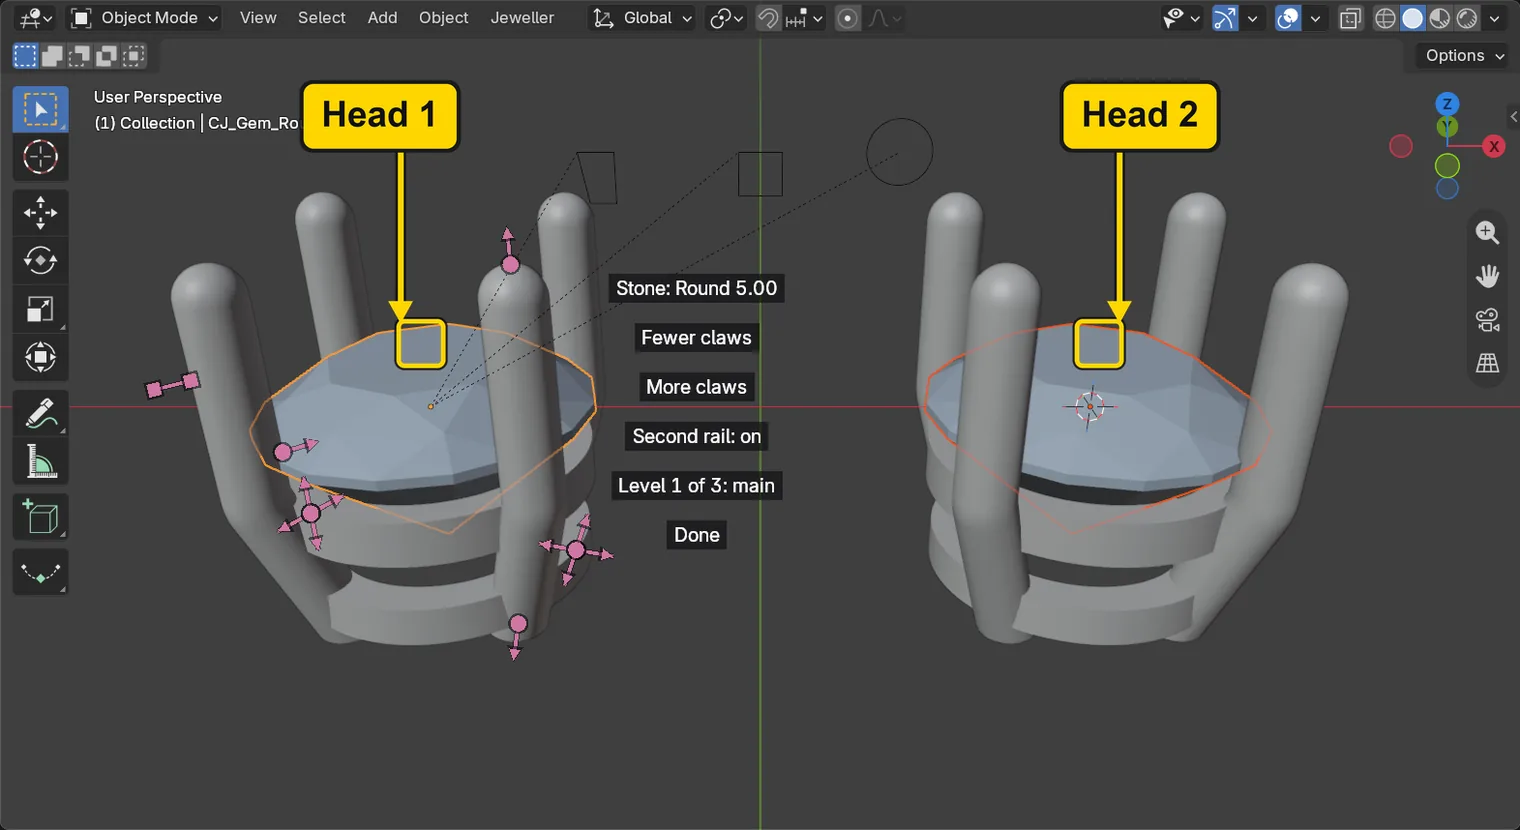

Step 2. Find the section row
WhereThe sidebar: the CAD/CAM tab, the Setting section, the Head Builder panel. Press N with the pointer over the 3D view if the sidebar is shut. Scroll the sidebar down until the row Section: shows.
DoClick Setting in the section bar, open Head Builder if it is shut, and scroll to the row Section:.
You should seeThe row Section:, which reads Rail, and under it the buttons Edit Section, Show, Save, Reset, Make Default and Remove Saved, and the Name: field. The Section: menu holds three: Rail, Second rail and Claw. This page uses Rail, the seat rail. Do not press Make Default or Make 2 Heads on this page. Show puts the section curve on view if it was hidden: here it is on view already, so you will not need it.
It worked whenThe row Section: reads Rail, and the buttons stand under it.
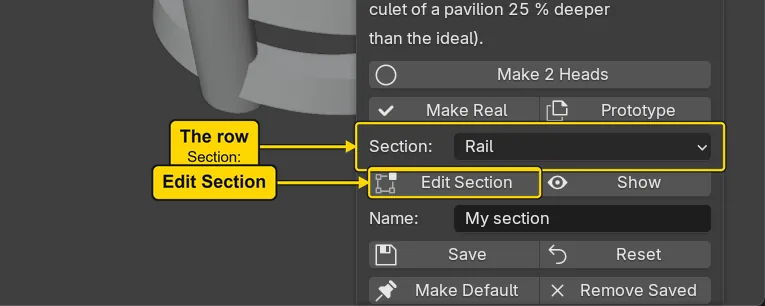
Step 3. Press Edit Section
WhereThe Head Builder panel, the button Edit Section.
DoPress Edit Section.
You should seeThe section curve alone is selected and Blender is in Edit Mode on it, where you work on one piece’s own points. The words at the top left of the 3D view read Edit Mode and name the curve. The heads and stones are not selected. The curve is a speck, about half a millimetre across, above the left stone’s right-hand edge: the next two steps bring it close.
It worked whenThe words at the top left of the 3D view name the curve, and the header reads Edit Mode.
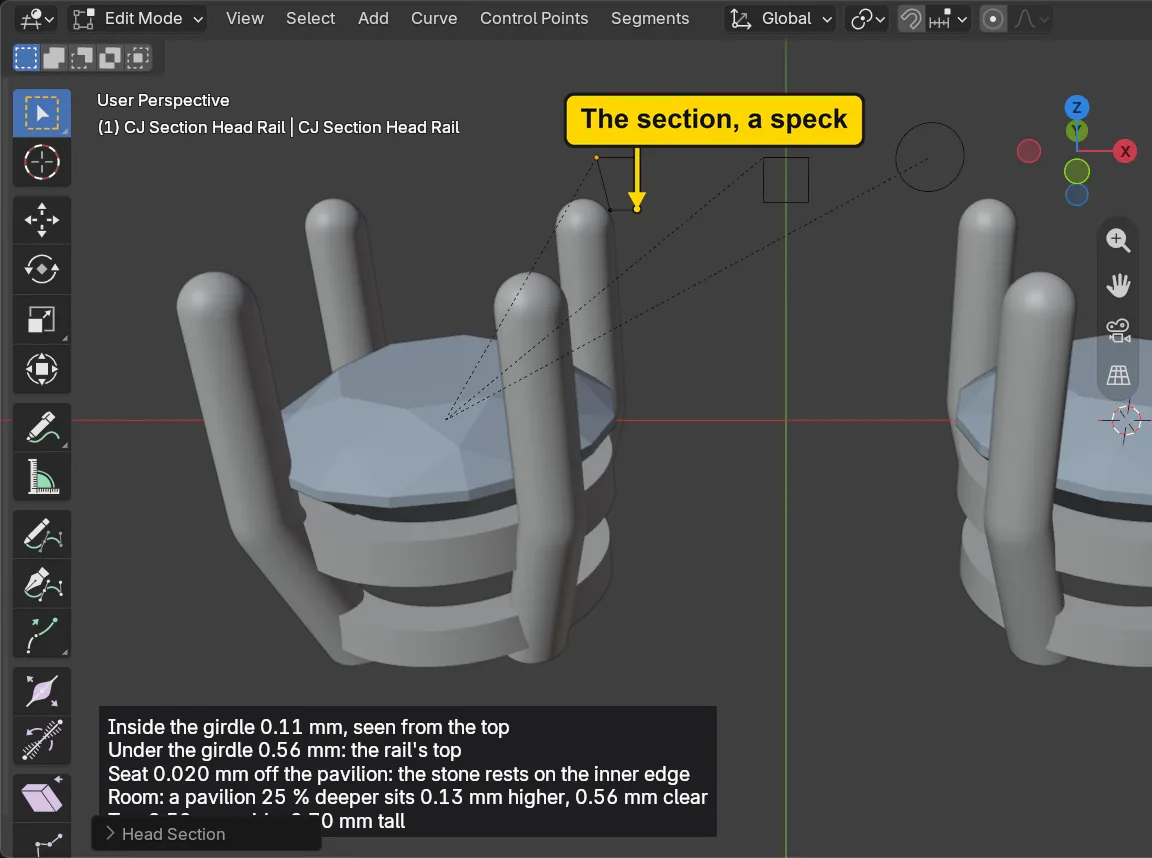
Step 4. Look at the curve from the front
WhereThe 3D view. The small coloured axes are at its top right.
DoClick the -Y ball of the small coloured axes, the one at the front.
You should seeThe 3D view now looks at the curve from the front. The curve is still a speck, and the next two steps bring it close. The add-on’s own block of words at the bottom left, and Blender’s bar at the foot of the 3D view, are notes about the rail: this page does not use them.
It worked whenThe words at the top left of the 3D view read Front Orthographic.
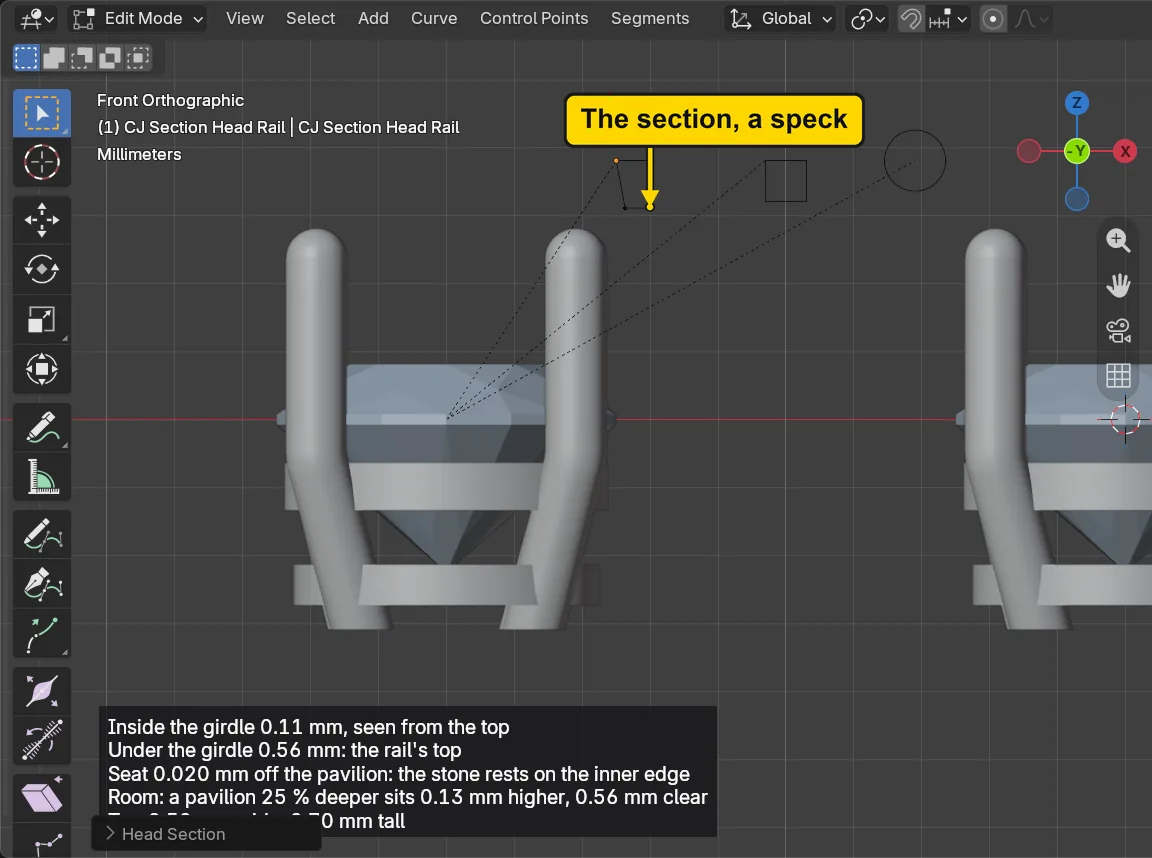
Step 5. Bring the curve close
WhereThe 3D view: the pointer over it, off the sidebar. View is in the header, the row of words along the top of the 3D view. This needs no mouse wheel, so it works on a touchpad too.
DoPress A, so that every point is picked, then choose View > Frame Selected.
You should seeThe curve fills the 3D view as a four-sided figure seen from the front, with points at its corners and along its sides, all orange. The Item tab, in the next step, is the one to read.
It worked whenA four-sided figure fills the 3D view, with orange points on it.
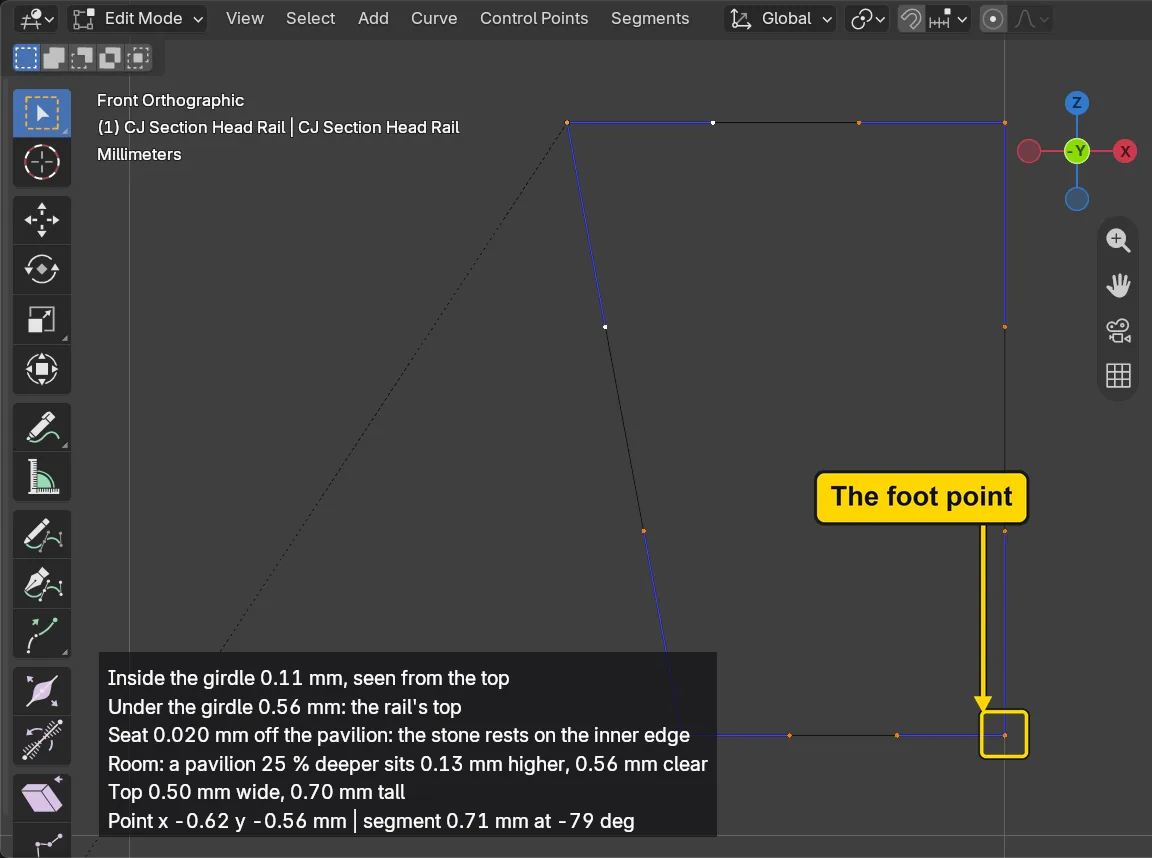
If it goes wrongThe curve is a speck, or not in the view: the points were not all picked when you chose Frame Selected. Press A with the pointer over the 3D view, and choose View > Frame Selected again.
Step 6. Click the outer foot point
WhereThe 3D view, the section curve: its lowest point on the outside, the right-hand end of the bottom edge. The sidebar’s tabs stand in a column at its right edge.
DoClick that point. Then click the Item tab at the right edge of the sidebar.
You should seeThe point turns orange: it is the only one picked. In the sidebar, the Item tab shows it under Control Point:, with its X and Y in the curve’s own measures, in millimetres. X reads 0.5 here, and is the number to read.
It worked whenOne point is orange, and the Item tab names a Control Point: with X at 0.5.
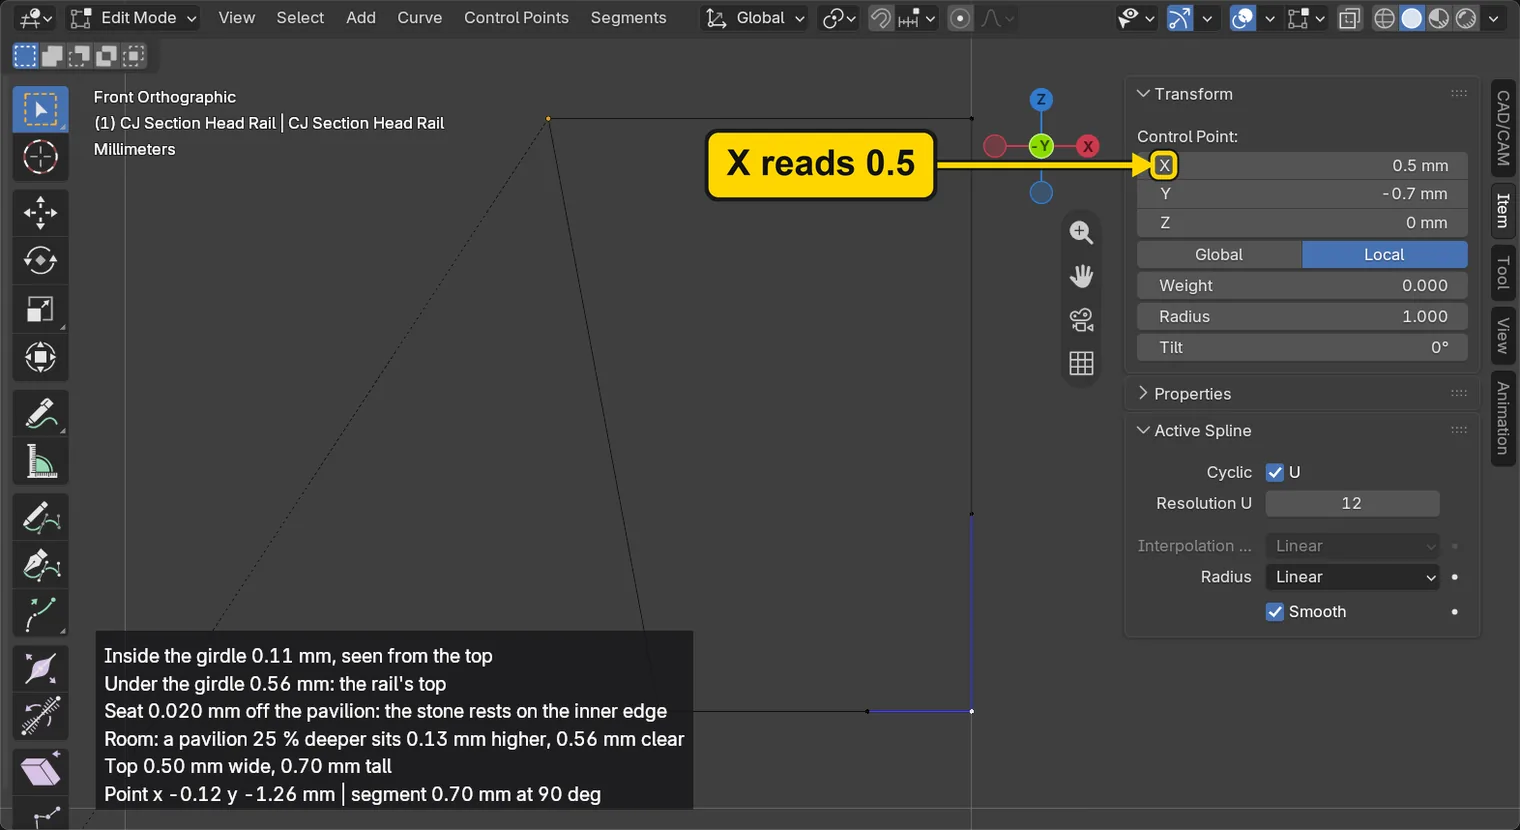
If it goes wrongNothing turns orange, or two points do: the click was between points. Click again, right on the point you want.
Step 7. Move the point toward the stone
WhereThe 3D view: move the pointer over it, off the sidebar.
DoPress G to start a move (Grab), press X to hold it to left and right, type the distance, and press Enter.
Type-0.2
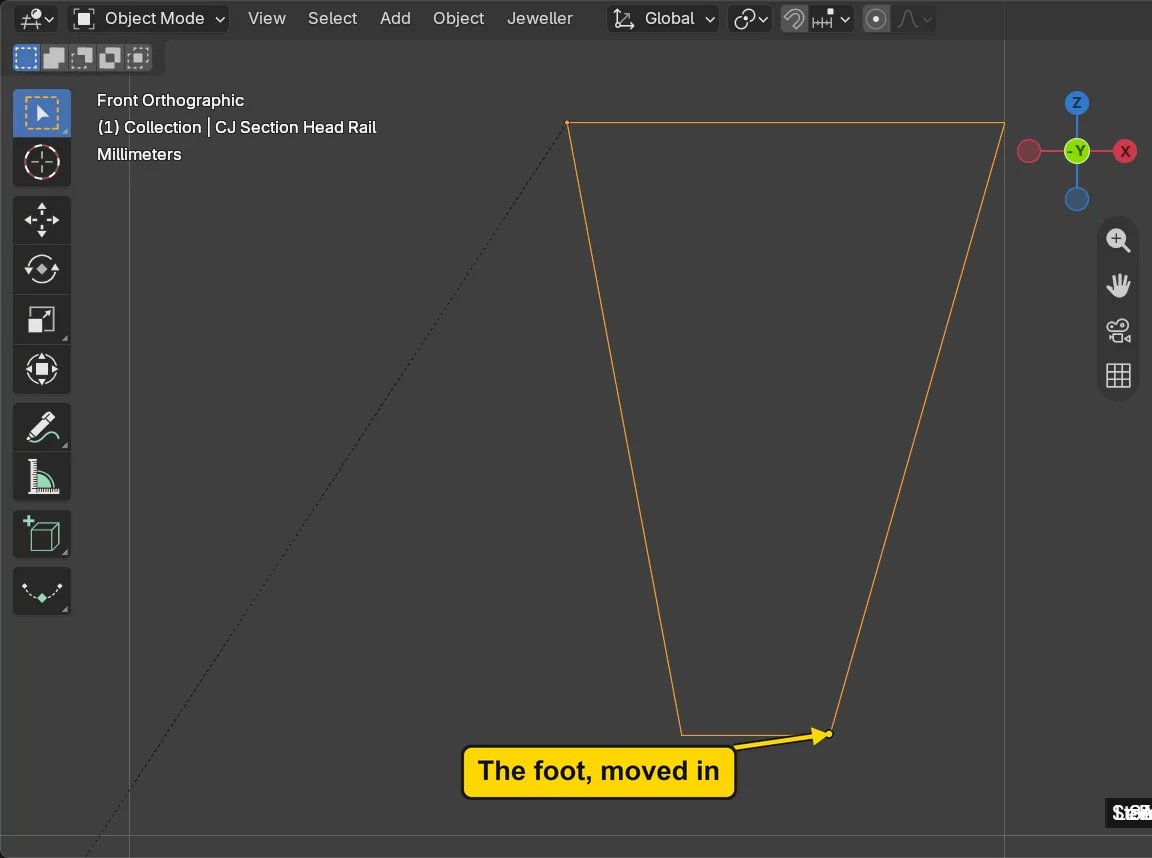
You should seeThe minus sign moves the point to the left, toward the stone’s side, and the rail’s outer face now leans in toward its foot. The Item tab’s X reads 0.3 mm, from 0.5. The curve is in millimetres, like the rest of the file. The foot is now a good deal narrower than the 0.60 least for structural metal: this is a drill in moving a point, not a rail to cast, and Reset puts it back in step 10.
It worked whenThe Item tab’s X reads 0.3.
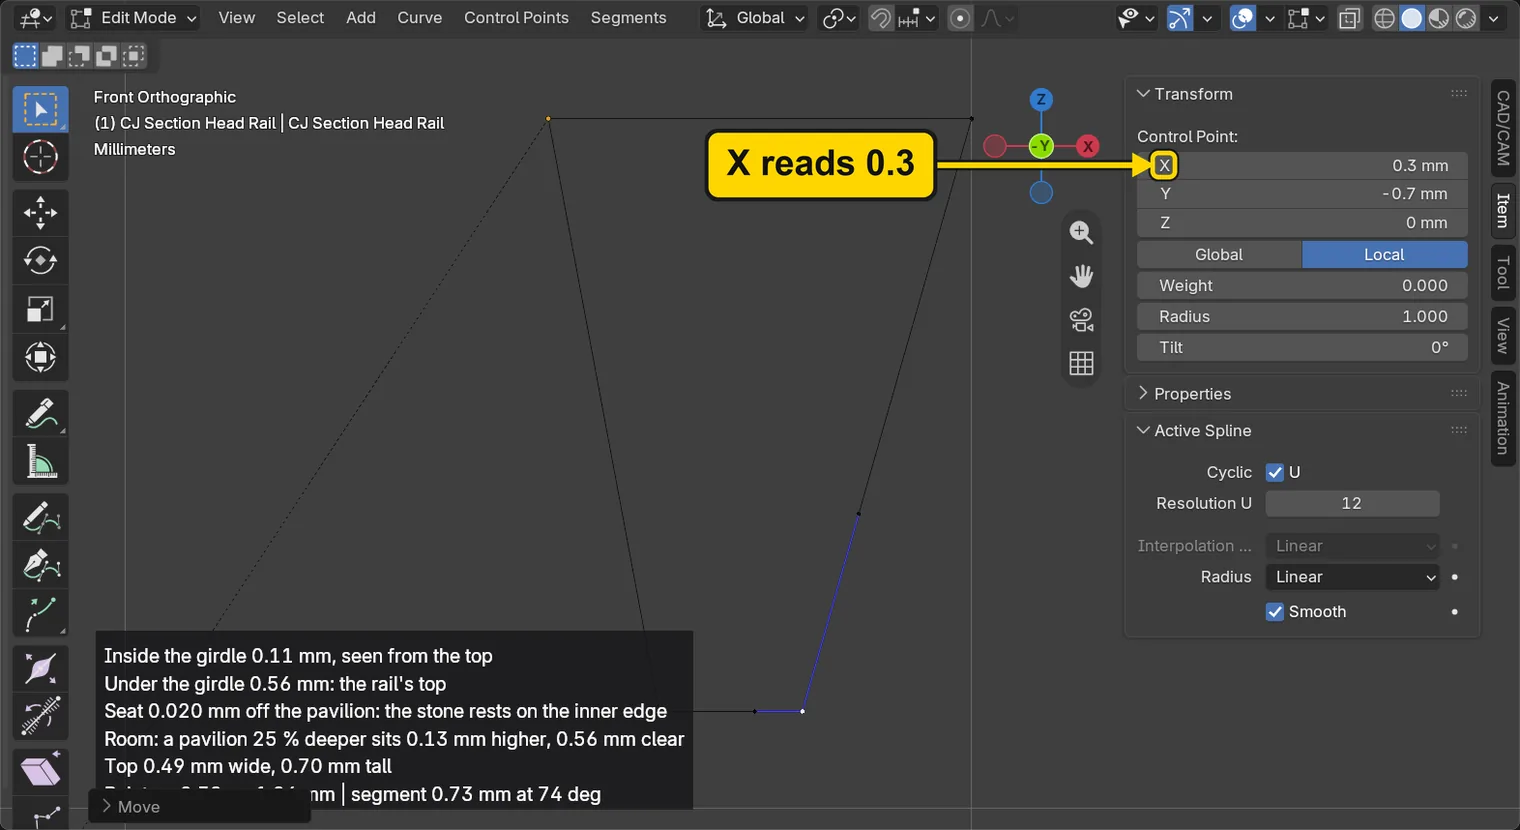
If it goes wrongThe point moved up or down, or nowhere: X was not pressed before the number, or the pointer was over the sidebar. Press Esc to stop the move, and start again with G.
Step 8. Leave Edit Mode and let both heads follow
WhereThe 3D view: the pointer is over it.
DoPress Tab.
You should seeEdit Mode ends and both heads make their rails again, the left one and the right one: they share the one section. The curve stays on view with its moved shape, narrower at the foot. The heads themselves show no change from outside: the change is 0.20 mm at the foot of a rail that hides under its stone. The run read each head’s rail from its own model, and both feet moved in by the same amount.
It worked whenThe words at the top left of the 3D view no longer say Edit Mode, and the curve keeps its moved shape.
Step 9. Save the section by a name
WhereThe Head Builder panel: the Name: field, then the button Save.
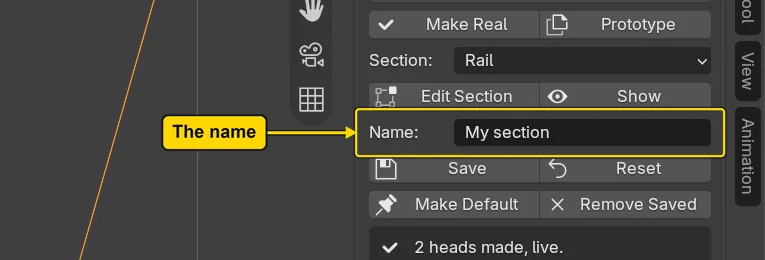
DoRead the Name: field and leave it as it is, then press Save.
You should seeThe Name: field reads My section: the name the section is saved under. The section is kept by that name for every file you open on this computer, and the Rail picture offers it after the starts. Step 11 takes the name off again: do not skip step 11.
It worked whenThe Name: field reads My section.
Step 10. Press Reset
WhereThe Head Builder panel, the button Reset.
DoPress Reset.
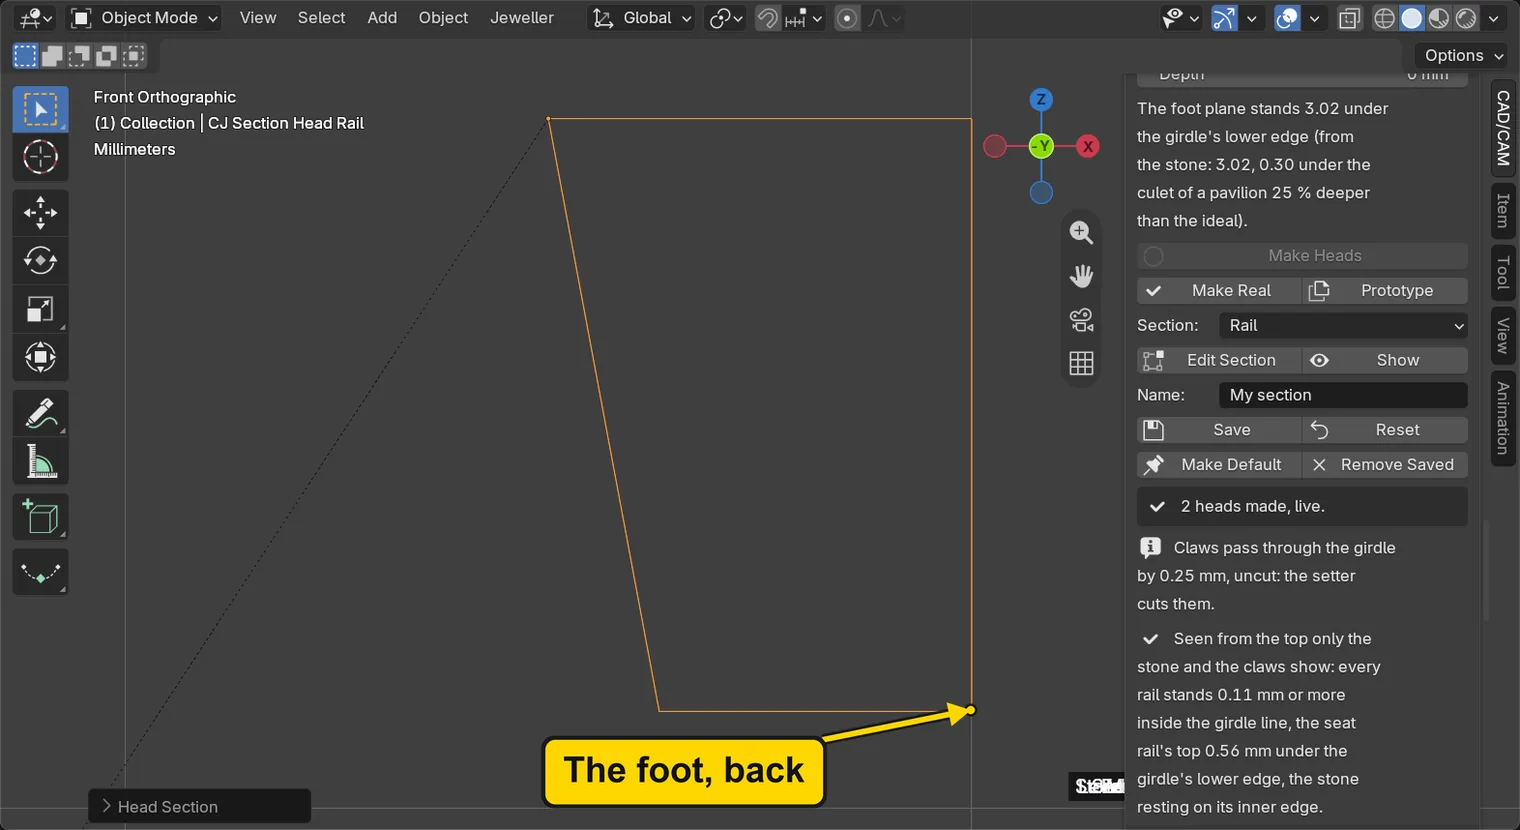
You should seeThe curve is the four-point start again, wider at the foot than at step 8, and both heads make their rails again at once. The saved name stays on the list.
It worked whenThe curve in the 3D view is the start shape again, wider at the foot.
Step 11. Remove the saved name
WhereThe Head Builder panel, the button Remove Saved.
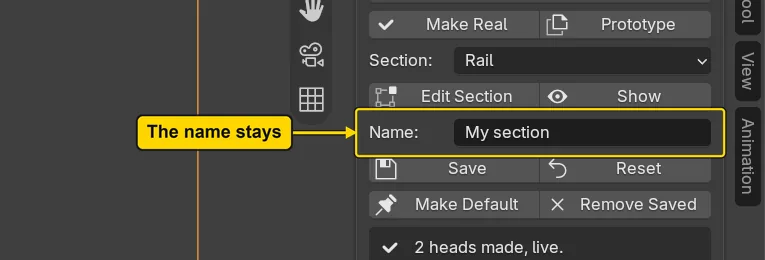
DoPress Remove Saved: the Name: field still holds the name.
You should seeThe name leaves the list. Remove Saved takes a saved section off the list and touches nothing else: both heads stay as they are.
It worked whenThe saved section is off the list.
Step 12. Save your work
WhereThe 3D view: move the pointer over it.
DoPress Ctrl+S.
You should seeBlender writes your copy at once, with no question, because the file already has a name. An asterisk, *, in the title bar marks changes that are not saved, and it goes now. Save your work and get it back (P0-12) says more about saving.
It worked whenThe title bar begins my-section and carries no asterisk.
No picture: the only change is a message on the status bar, and it fades.
Check your result
| What to read | Where | What it should say |
|---|---|---|
| The point’s place | The Item tab of the sidebar, in Edit Mode on the section, Control Point: X | It reads 0.3 mm at step 7, from 0.5 at step 6 |
| The curve after the move | The 3D view, after step 8 | The curve keeps the moved shape after you leave Edit Mode: its foot is narrower than at step 6. The heads’ own rails cannot be seen from outside: the change is 0.20 mm at the foot of a rail hidden under its stone |
| The saved name | The Head Builder panel, the Name: field, after step 9 | It reads My section |
| The section after Reset | The 3D view, after step 10 | The curve is the start shape again, wider at the foot than it was at step 8 |
Try it yourself
Open your copy again, press Edit Section, and move a different point of the curve, the top of the rail’s outer face: the rail grows wider at the top. Look from above afterwards: a rail that grows outward past the stone’s girdle will show round it, and the head is no longer as the bench makes it. Press Reset to put the section back before you go on.
What you learned
- Each head has three sections, Rail, Second rail and Claw. Edit Section opens the chosen one as a small curve, and one change reaches every head of the set.
- Save keeps the section by a name for every file you open on this computer. Reset puts the start back, and Remove Saved takes the name off the list.
- A section is a shape. Rail width and height are numbers on the model’s marks (P4-04), and a section edit changes the shape itself.