
What you will make
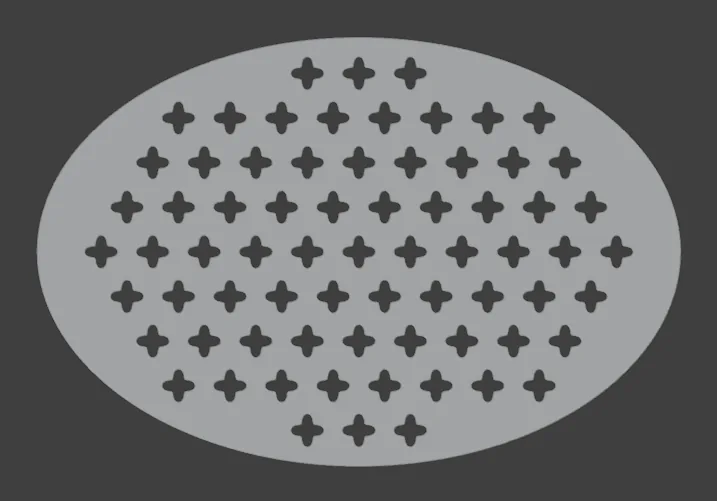
An oval plate 30 x 20 mm and 1.00 mm thick, pierced with 71 holes in a shape no family button holds: a four-petal cell, a quatrefoil, drawn as a small closed curve. This is how a jeweller puts a shape of their own into a pierced plate.
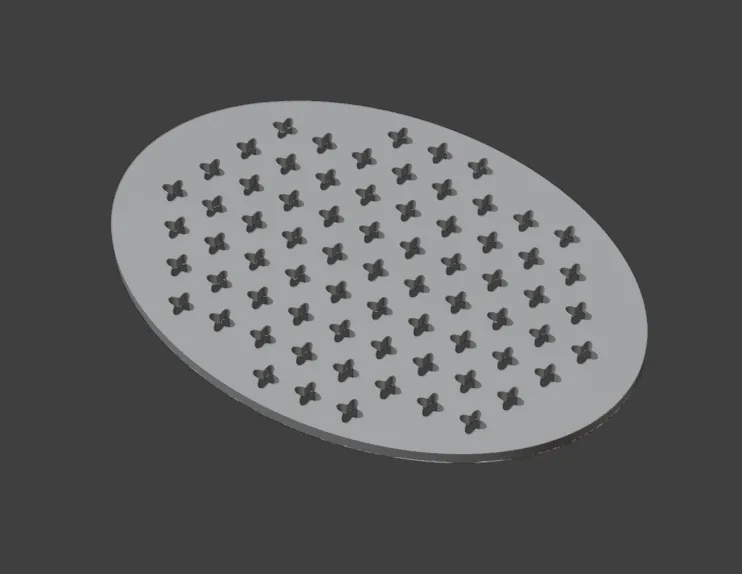
About 15 minutes.
Files
- p10-12-start.blend (101 KB): open this one to begin.
- p10-12-finished.blend (577 KB): the result, to compare with yours.
Both were made in Blender 5.2.0.
Before you start
- You have done Part 0, Blender from nothing.
- You have done Pierce a plate from an outline: you know Make Pattern and the family buttons.
- The add-on is installed, and its CAD/CAM tab is in the sidebar.
- Nothing else: the start file is already in millimetres, with both curves drawn.
Build it
Step 1. Open the start file and save your copy
WhereBlender’s top menu bar, File > Open, then File > Save As.
DoOpen p10-12-start.blend. Then choose File > Save As and give the file a name of your own, so that the start file stays clean.
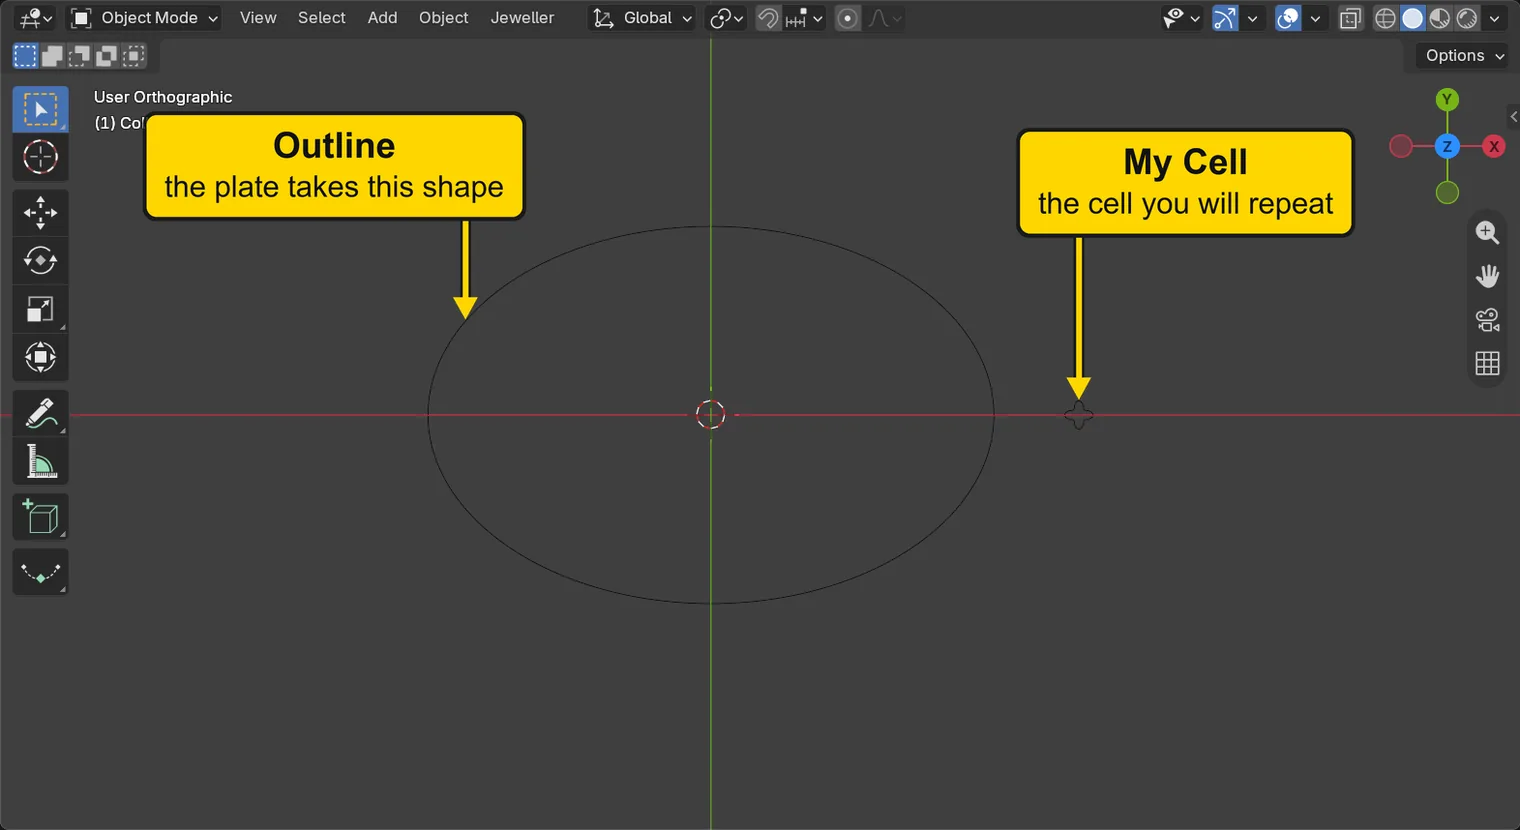
You should seeTwo closed curves on the grid, seen from above. The large oval is your outline. The small curve to its right, “My Cell”, is a four-petal shape, a quatrefoil, 1.50 mm across: this is the cell you will repeat. It is small: zoom in on it to see its petals.
It worked whenBoth curves are in the 3D view.
Step 2. Find the Pattern Builder panel
WhereThe sidebar at the right of the 3D view (press N with the pointer over the 3D view if it is shut), the CAD/CAM tab.
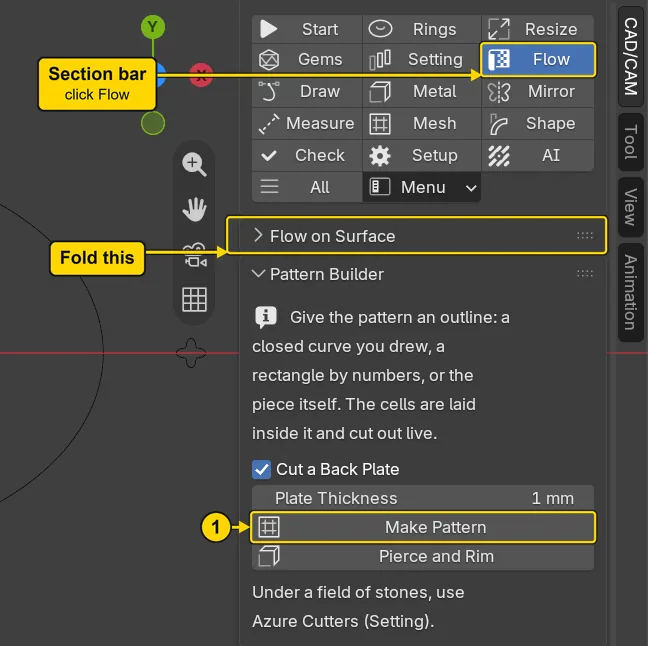
DoClick Flow in the section bar, the small word buttons at the top of the tab. Then click the words Flow on Surface once, to fold that panel.
You should seeThat panel shuts up to its title, and the Pattern Builder panel moves up, with Make Pattern in it.
It worked whenYou can read Make Pattern without scrolling.
Step 3. Make a plate from the oval
WhereThe 3D view, then the Pattern Builder panel.
DoClick once on the oval’s line, at its right-hand end, then press Make Pattern.
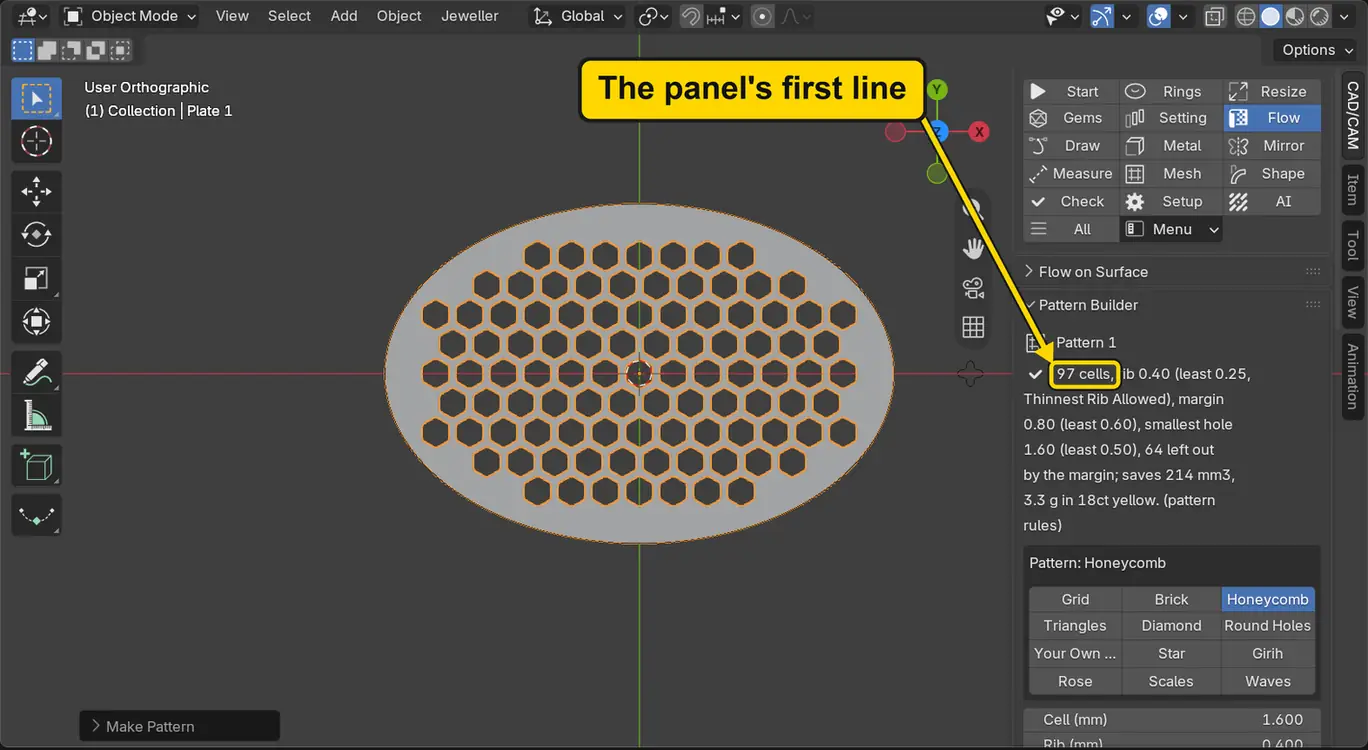
You should seeThe oval fills with metal and rows of hexagon holes. The panel’s first line, which wraps over several rows, stands under the words “Pattern 1” and gives the count of cells. Where the line says “house default”, it means the add-on’s starting number. The status bar at the very bottom says the count too, but its message fades, and the panel keeps the same figure.
It worked whenThe panel’s first line begins “97 cells”.
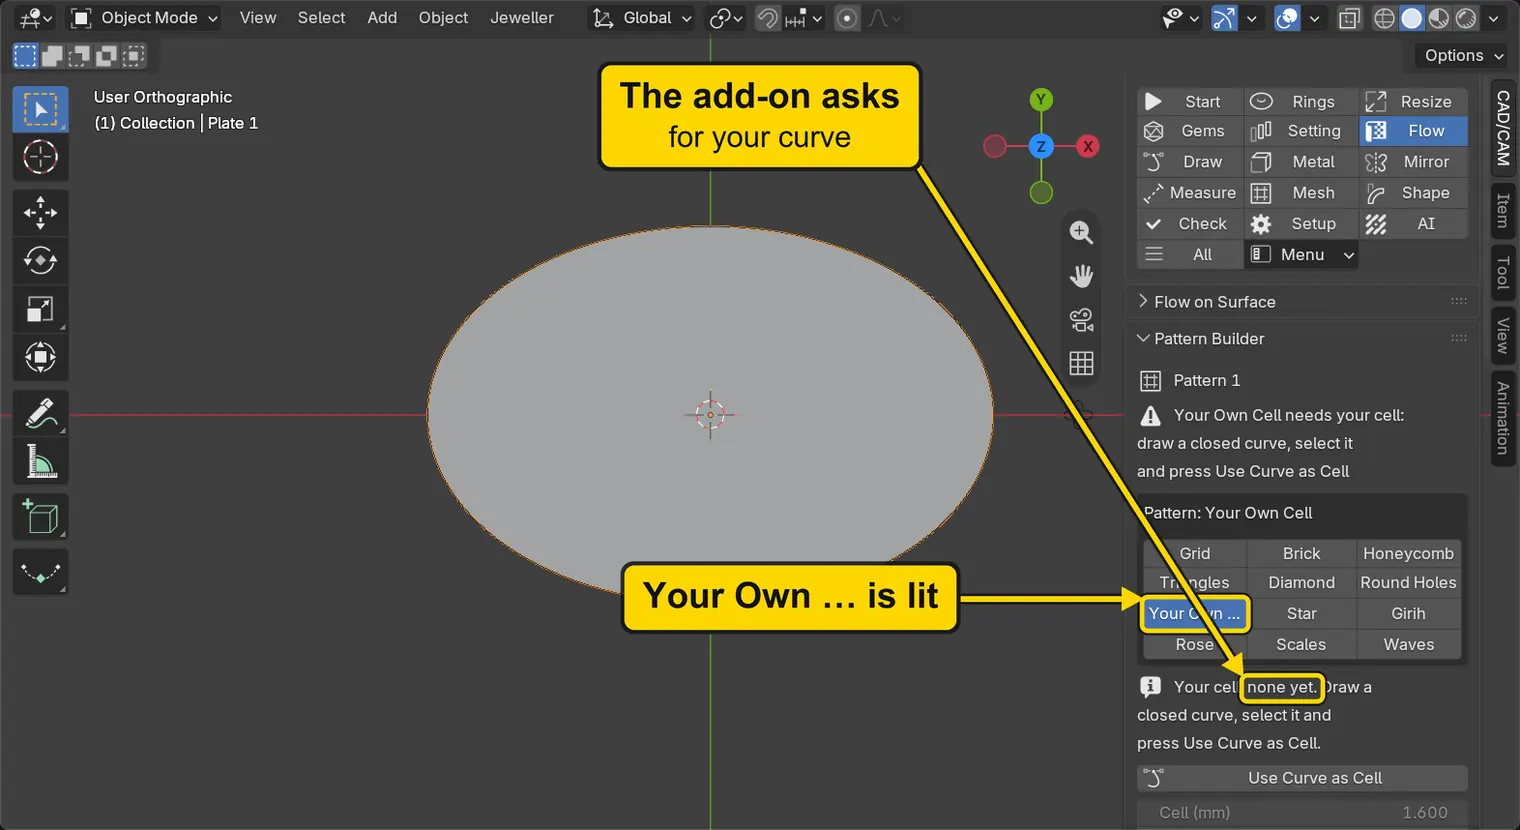
Step 4. Press Your Own …, and read what it asks
WhereThe Pattern Builder panel, the family buttons: the first button of the third row.
DoPress Your Own …. If the panel has moved, scroll the sidebar up with the mouse wheel, or slide two fingers on the touchpad.
You should seeThe holes go and the plate turns solid. Nothing is wrong: the add-on does not know yet which curve you mean, and the panel says so under the family buttons: “Your cell: none yet. Draw a closed curve, select it and press Use Curve as Cell.” The button Use Curve as Cell stands under that line. Three new rows stand under Margin (mm): Pitch Across (mm), Pitch Up (mm) and Lattice Angle (deg).
It worked whenYour Own … is lit, and the panel says “Your cell: none yet”.
Step 5. Select your curve
WhereThe 3D view. The small curve to the right of the plate is My Cell: zoom in on it with the mouse wheel if you need to.
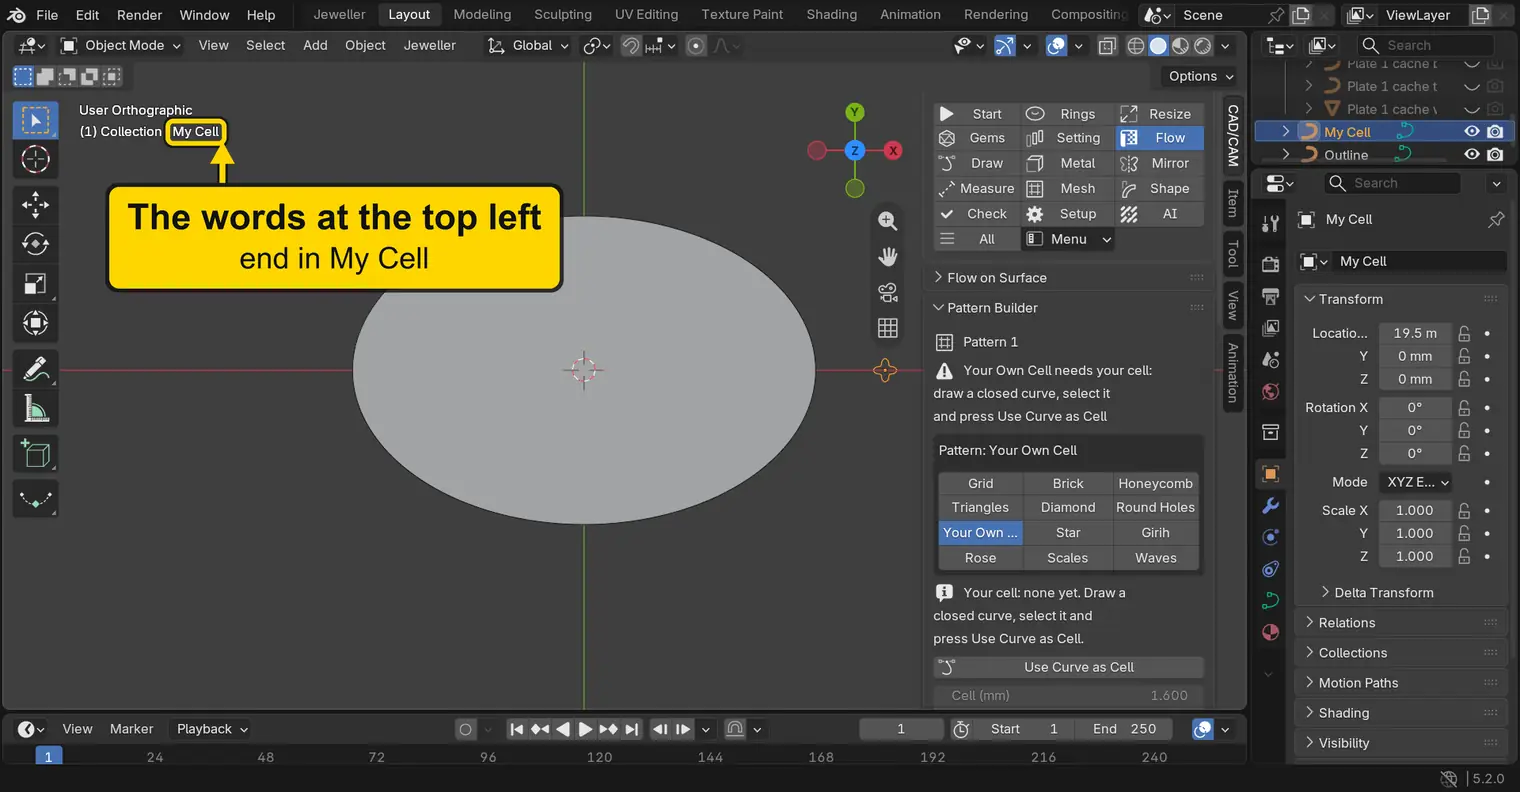
DoClick once on the line of My Cell.
You should seeAn orange line round the small curve. The panel keeps its buttons, because the file holds just one pattern: the buttons still act on it.
It worked whenThe words at the top left of the 3D view end in “My Cell”.
Step 6. Press Use Curve as Cell
WhereThe Pattern Builder panel, the button under the line “Your cell”.
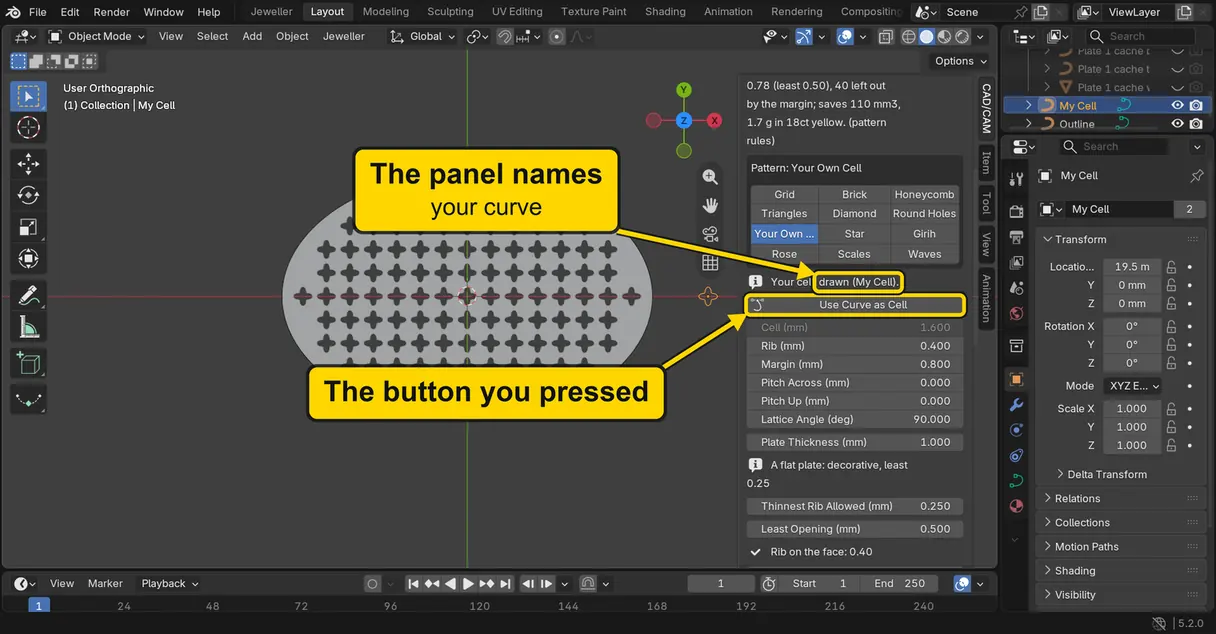
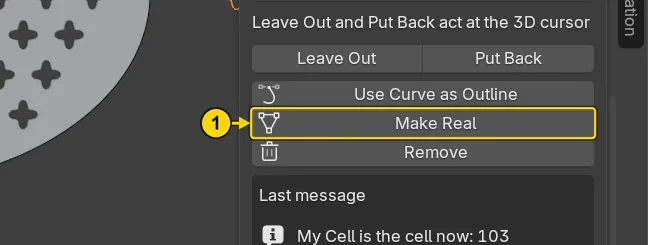
DoPress Use Curve as Cell (marked 1).
You should seeThe holes come back, in your shape, and the line now reads “Your cell: drawn (My Cell).” The cell’s size is your curve’s own, so these cells are 1.50 mm across at their tips, with the panel’s Rib (mm) of 0.400 between them: a rib is the bar of metal between two holes. Scroll the sidebar up: the panel’s first line, above the family buttons, counts the cells.
It worked whenThe panel’s first line begins “103 cells”, and the plate’s holes have four petals.
Step 7. See what the two Pitches do
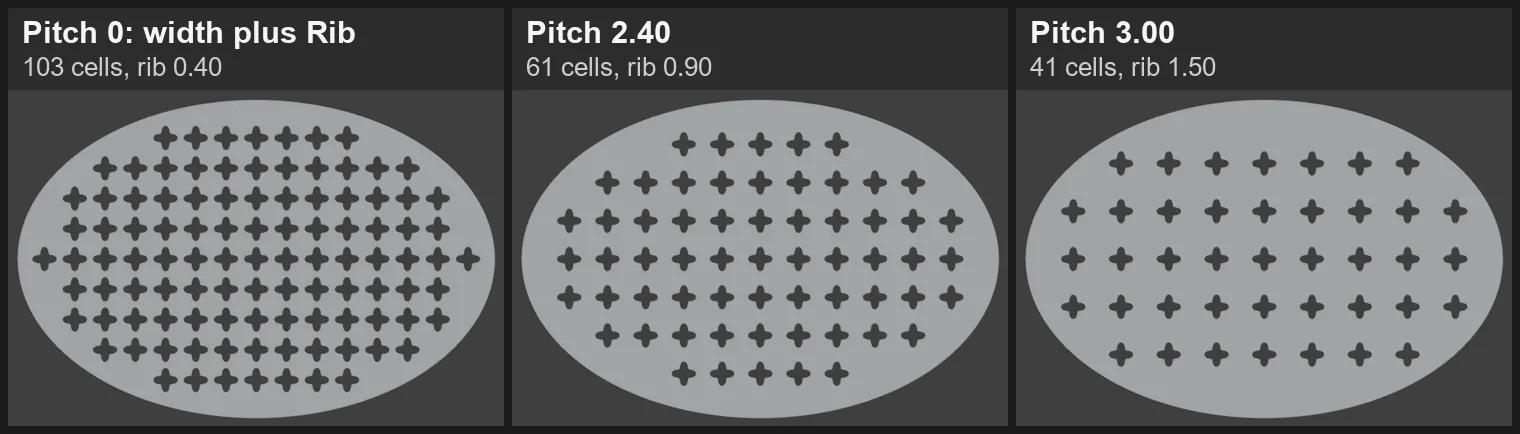
WhereThe Pattern Builder panel, the fields Pitch Across (mm) and Pitch Up (mm). Scroll the sidebar with the mouse wheel if you cannot see them. A pitch is the distance from the middle of one cell to the middle of the next: Across along a row, Up to the next row.
DoClick the middle of each number once, type the new one, press Enter, and look at the plate. Go down the table.
You should seeBoth fields read 0.000 at first: at 0 the add-on takes the curve’s width plus Rib (mm). As you type, the holes stay one size and stand further apart.
| Type in both fields | The panel’s first line begins |
|---|---|
2.40 | 61 cells |
3.00 | 41 cells |
2.40 | 61 cells |
It worked whenBoth fields read 2.400, and the panel counts 61 cells.
Step 8. See what Lattice Angle does
WhereThe Pattern Builder panel, the field Lattice Angle (deg): the angle between the two directions the cells repeat in.
DoClick the middle of the number once, type the new one, press Enter, and look at the plate. Go down the table.
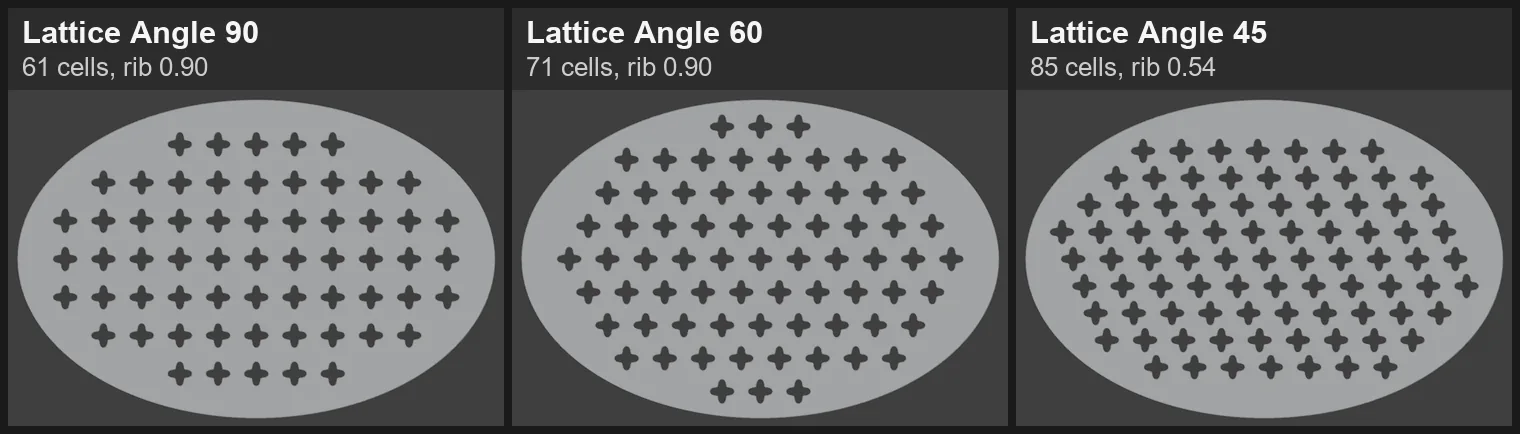
You should seeAt 90 the rows stand square. Lower it and each row slides along the one before.
| Type in Lattice Angle (deg) | The panel’s first line begins |
|---|---|
60 | 71 cells |
45 | 85 cells |
60 | 71 cells |
It worked whenLattice Angle (deg) reads 60.000, and the panel counts 71 cells.
Step 9. Meet the warning: cells too close
WhereThe Pattern Builder panel, the field Pitch Across (mm).
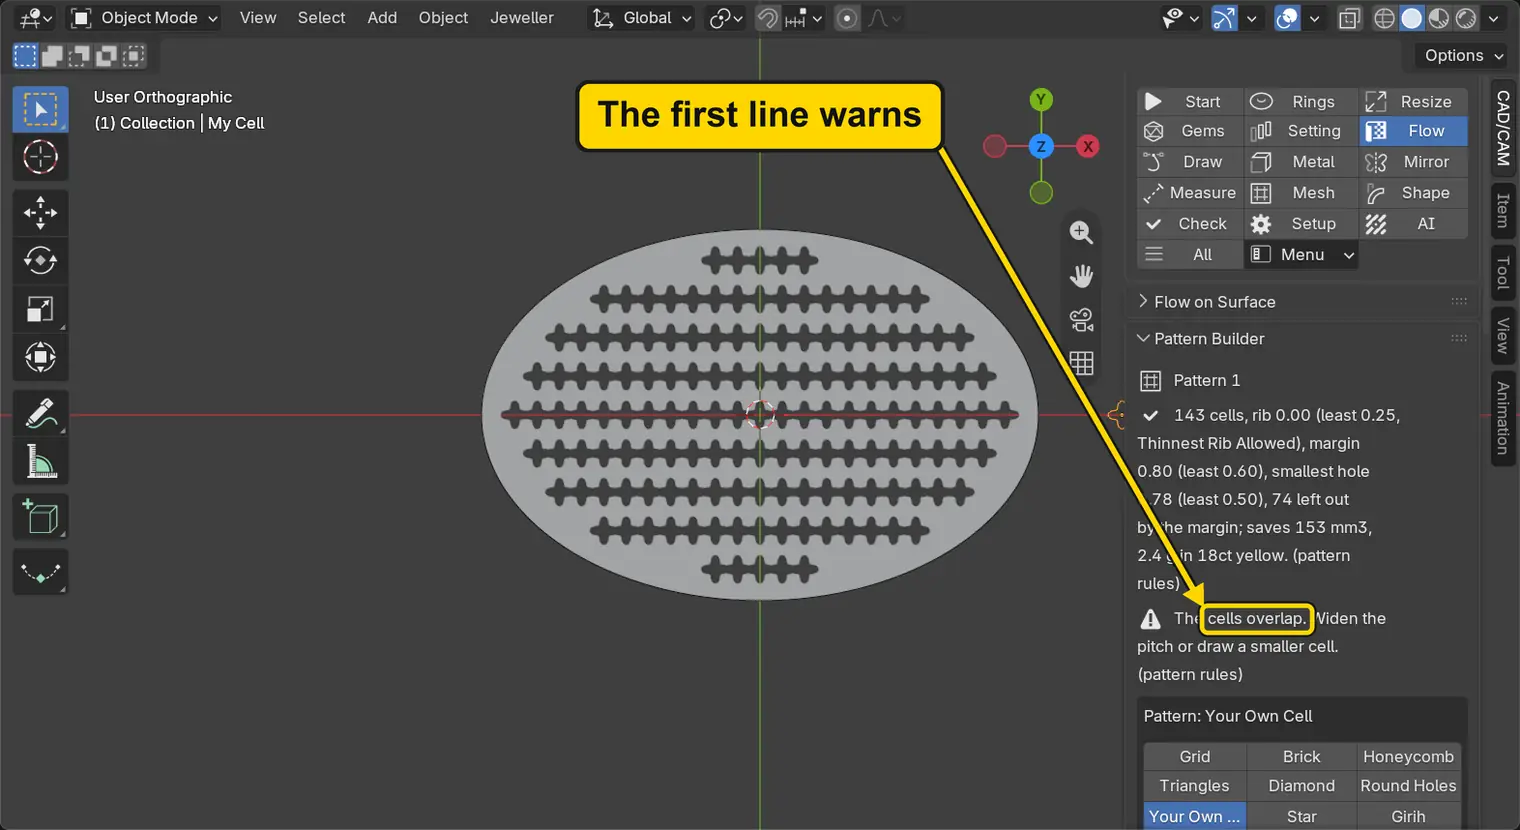
DoThis step brings the cells too close on purpose, to show you the panel’s words. Type each number, press Enter, and read the panel’s first line. The plate is not harmed.
You should seeThe plate follows each number, and the first line changes.
| Type in Pitch Across (mm) | The panel’s first line |
|---|---|
1.60 | The rib between cells is 0.10, under Thinnest Rib Allowed 0.25. |
1.20 | The cells overlap. Widen the pitch or draw a smaller cell. |
2.40 | It begins 71 cells again |
It worked whenPitch Across (mm) reads 2.400, and the panel’s first line begins 71 cells.
Step 10. Make it real
WhereThe Pattern Builder panel, near its foot. Scroll the sidebar with the mouse wheel if you cannot see it.
DoPress Make Real.
You should seeThe plate looks the same. Make Real cuts the cells into an ordinary object, “Plate 1 real”. The live plate that made it, the one whose numbers could still change, stays in the file, hidden. Leave it. The panel changes to the words “Made real: Plate 1 real” and a Remove Pattern button: leave that alone too.
It worked whenThe words at the top left of the 3D view end in “Plate 1 real”.
Step 11. Look round your plate and save your copy
WhereThe 3D view, with the pointer over it.
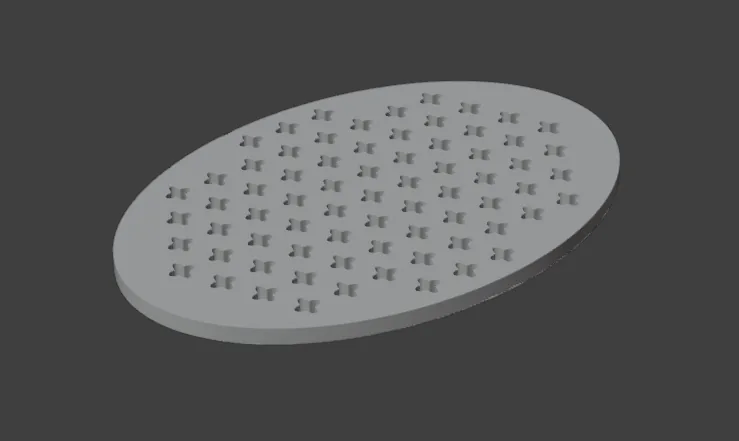
DoOrbit the view lower, until you look across the plate as in the picture. Then press Ctrl+S to save your copy.
You should seeFlat, even metal, with your four-petal holes going right through.
It worked whenYou can see the wall of each hole, and your copy is saved.
Check your result
| What to read | Where | What it should say |
|---|---|---|
| The cells | The Flow section, the Pattern Builder panel, the panel’s first line, read at the end of step 9, before Make Real | It begins “71 cells” |
| The numbers | Pattern Builder panel, under the family buttons | Pitch Across (mm) 2.400, Pitch Up (mm) 2.400, Lattice Angle (deg) 60.000 |
| The size | The Item tab, on the sidebar’s edge just below CAD/CAM: Dimensions | X 30 mm, Y 20 mm, Z 1 mm |
| The finished object | The words at the top left of the 3D view, and the Pattern Builder panel | They end in “Plate 1 real”, and the panel reads “Made real: Plate 1 real” |
Try it yourself
Open the start file again (Blender may ask whether to save the changes to your copy: choose Don’t Save) and do steps 2 to 6, so that Your Own … repeats your curve at 103 cells. Then click the line of My Cell, press S, type 2 and press Enter: your curve doubles, and the pattern follows it, at 27 cells. Press S, type 0.5 and press Enter to go back. Or press Honeycomb, then Your Own … again: the add-on has kept your curve.
What you learned
- Your Own … repeats a closed curve, and its size is the curve’s own: Cell (mm) does nothing here.
- You name the curve with Use Curve as Cell: select the closed curve, then press the button.
- Pitch Across (mm), Pitch Up (mm) and Lattice Angle (deg) set how it repeats. The panel warns when cells stand too close, and Make Real does not stop for that.
Next: If you came here from Pierce a plate from an outline (P10-01), go on with Swap a pattern’s outline and leave one cell out.