
What you will do
You will put the 3D cursor on top of the box, add a small cube that lands exactly there, and then send the cursor home. New things in Blender appear where the cursor stands, so this is how you choose where a new thing starts.
About 5 minutes.
Files
- p0-17-start.blend (102 KB): open this one to begin.
- p0-17-finished.blend (107 KB): the result, to compare with yours.
Both were made in Blender 5.2.0.
Before you start
- You can move a thing by a typed number: Move, turn and scale by a typed number (P0-10).
- You know the box at the bottom left of the 3D view: Change a tool’s numbers just after pressing it (P0-16).
- The file is in millimetres, as the start file is.
Build it
Step 1. Open the start file and save your copy
WhereThe top bar: the row of words that begins File, Edit.
DoDownload p0-17-start.blend from Files above and open it. Then choose File > Save As and save it under the name below, in a folder of yours. Open an exercise file and keep the start file safe (P0-07) shows how.
Typemy-cursor.blend
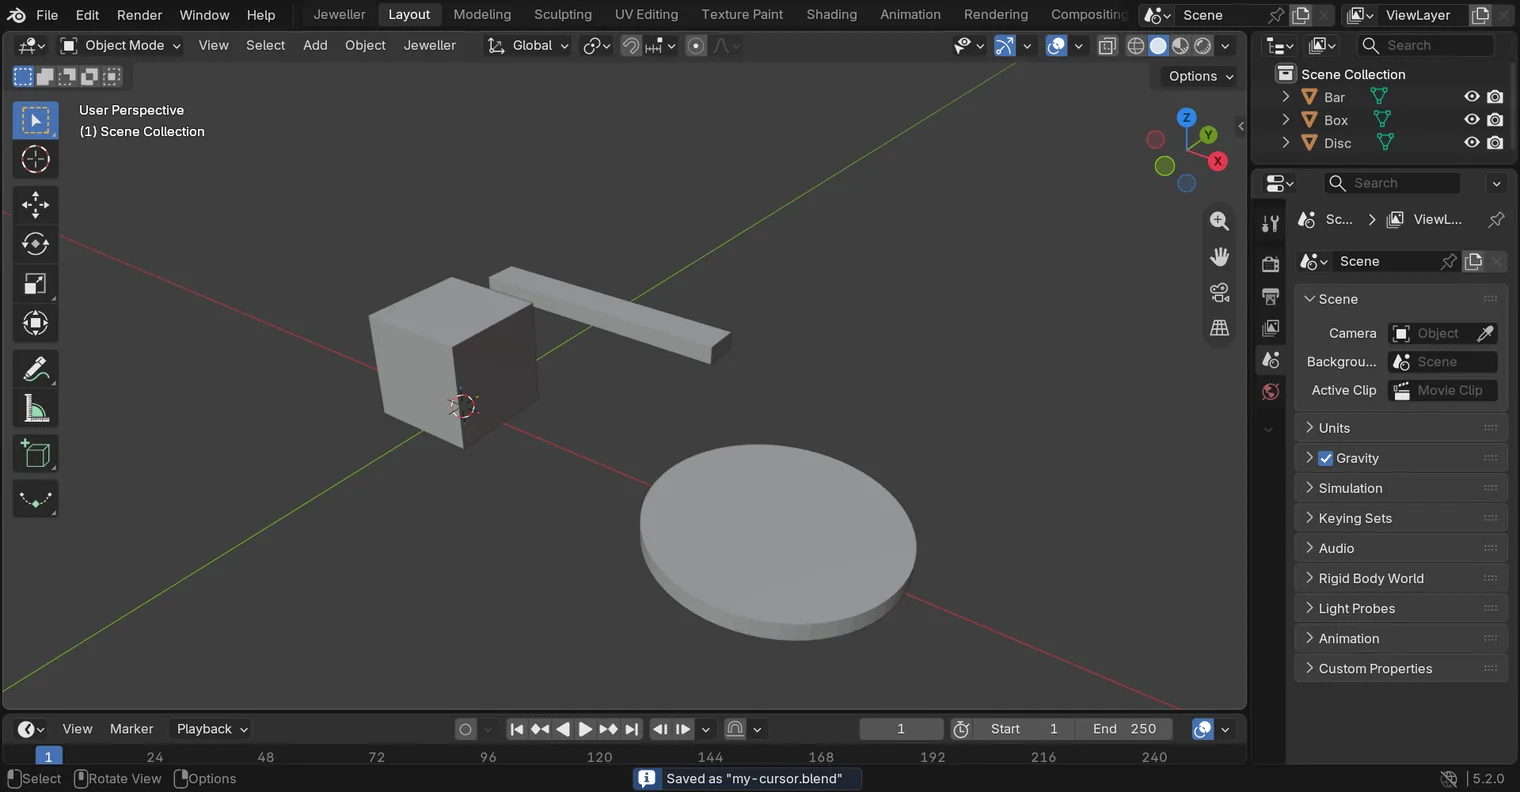
You should seeA box, a bar and a disc stand apart in the 3D view. Nothing is selected. Your copy is open, and the start file is left as it came.
It worked whenThe Outliner, at the top right of the window, lists Bar, Box and Disc.
Step 2. Find the 3D cursor
WhereThe sidebar, at the right of the 3D view: press N with the pointer over the 3D view if it is shut.
DoClick the View tab on the sidebar’s edge. If the panel 3D Cursor is shut, click its title.
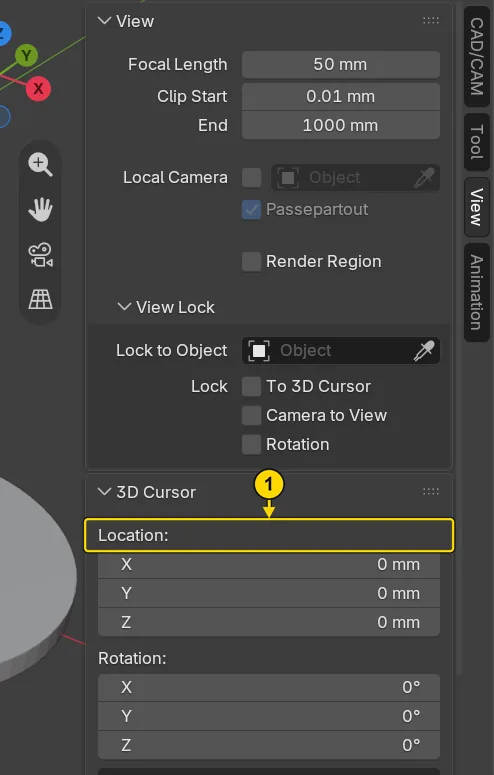
You should seeThe panel lists Location X, Y and Z, all 0 mm. The red and white ring at the middle of the grid, where the three coloured lines cross, is the 3D cursor. The point where they cross is called the world origin.
It worked whenThe panel 3D Cursor shows Location with X, Y and Z at 0 mm.
Step 3. Place it on the box
WhereThe 3D view: the top of the box, the flat face you look down onto.
DoHold Shift and click the right mouse button on the top of the box. Then let go of Shift. On a touchpad, a right click is a tap with two fingers.
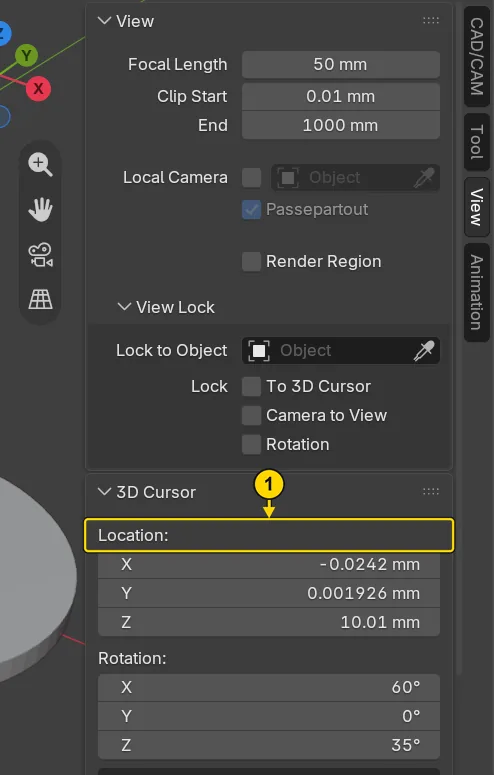
You should seeThe ring jumps to where you clicked, on the box’s top face. The 3D Cursor panel now reads a Z of about 10 mm, the height of the box. Your X and Y will differ from the picture: only Z matters. Nothing is selected or moved.
It worked whenThe ring stands on the top of the box and the panel’s Z reads about 10 mm.
If it goes wrongA menu opens and the ring does not move: you pressed the right button without Shift. Press Esc, then hold Shift first.
Step 4. Add a cube: it lands on the cursor
WhereThe header, along the top of the 3D view, then the box at the bottom left.
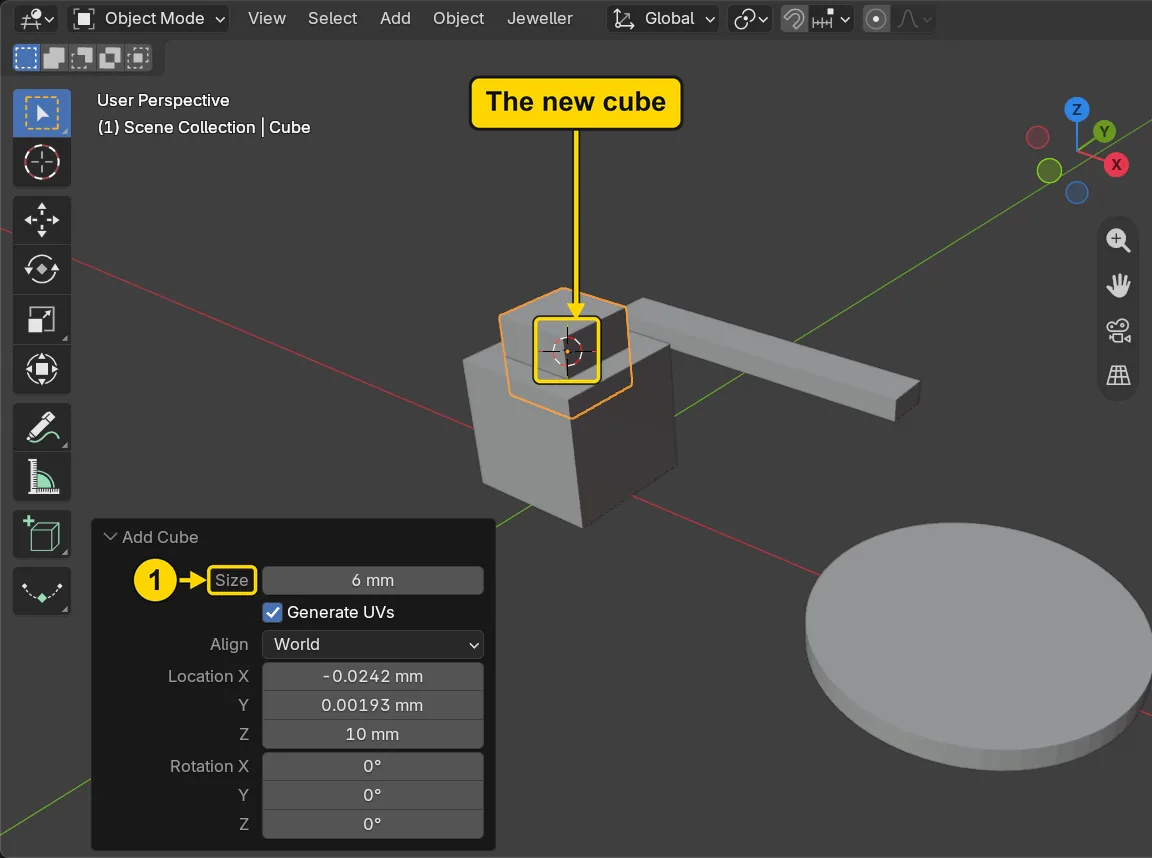
DoClick Add, then Mesh, then Cube. In the box at the bottom left (Blender’s Adjust Last Operation box: if only its title shows, click the title), click the number beside Size, type 6 and press Enter.
Type6
You should seeA cube 6 mm across sits on the top of the box, its middle on the ring. Blender’s Add menu works in metres (P0-16), so it makes a cube 2000 mm across until you change it. That is why you type the size you want.
It worked whenThe cube stands on the box, half sunk in it, and the box reads Size 6 mm.
Step 5. Send the cursor home
WhereThe 3D view.
DoPress Shift+S with the pointer over the 3D view. A pie is a ring of buttons that opens round your pointer. Click Cursor to World Origin in it (marked 1).
You should seeThe ring goes back to the middle of the grid. The cube stays where it is: only the cursor moved. The panel reads 0 mm again.
It worked whenThe panel 3D Cursor reads X, Y and Z at 0 mm, and the cube still stands on the box.
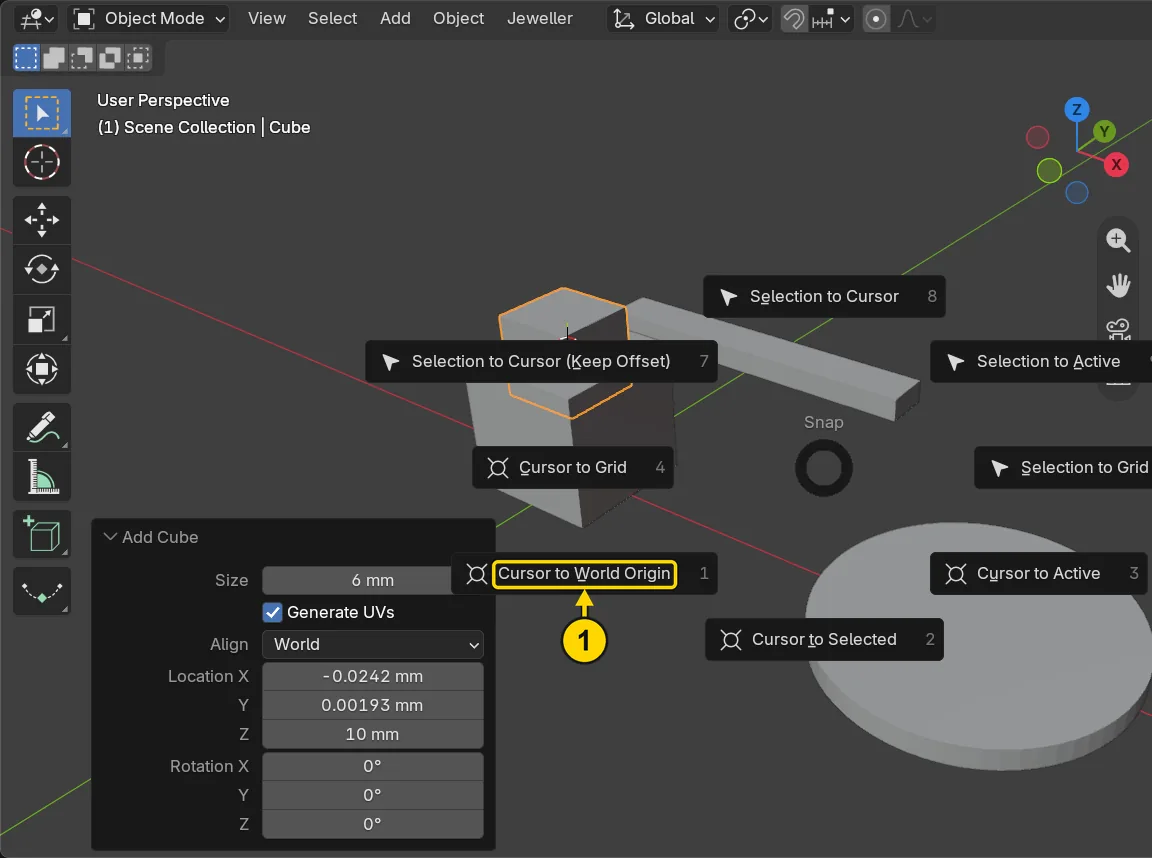
Shift+S pie: Cursor to World Origin is marked 1Step 6. Save your work
WhereThe 3D view: move the pointer over it.
DoPress Ctrl+S.
You should seeBlender saves your copy over itself, with no question, and the start file is untouched. An asterisk, *, in the title bar marks changes that are not saved, and it goes now.
It worked whenThe title bar, the strip above File and Edit, begins with the name of your copy, and no asterisk stands by it.

Check your result
| What to read | Where | What it should say |
|---|---|---|
| The cursor | The sidebar, View tab, panel 3D Cursor, the row Location | X 0 mm, Y 0 mm, Z 0 mm |
| The cube you added | Click Cube in the Outliner, then the sidebar’s Item tab, the row Location | Z reads about 10 mm: the cube stayed where the cursor put it |
| The cube’s size | The same tab, the row Dimensions: | 6 mm in each |
Try it yourself
Open your copy again. Click the disc, press Shift+S and click Cursor to Selected: the cursor jumps to the middle of the disc. Then add a cube with Add > Mesh > Cube: it lands there.
What you learned
- The 3D cursor is the red and white ring. New things land on it.
Shiftand a right click on the model puts the cursor there. A right click alone opens a menu instead.Shift+Sand Cursor to World Origin send it home, to 0, 0, 0.