
What you will make
A head on a Round 6.50 stone in which one claw is not like the others: for the picture it is turned 8 degrees about the stone, 1.75 mm wide where its neighbours are 1.15 mm, and has an oval section. You pick the claw by the ring on its tip, change it with three marks, and then put it back. Turning one claw is what a jeweller does to clear a neighbour, a stone or a join. A wider or an oval claw is rarer: it is made only where a drawing asks for it, and the setter is told. This exercise gives one claw all three to show the tools, as a drill and not as a head to cast, and ends by putting every claw back. The head ends as it began, with every claw the set’s own, and nothing in it has moved from the bench’s 2 mm over the table.
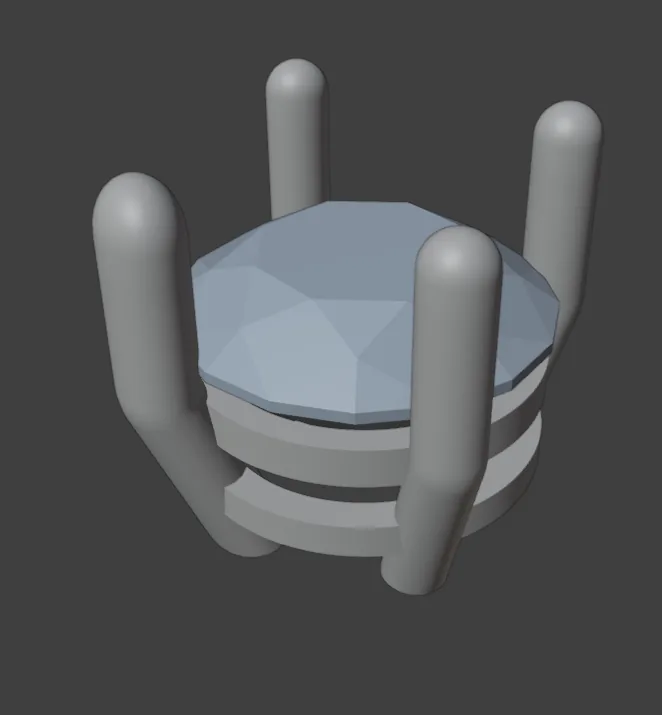
About 15 minutes.
Files
- p4-06-start.blend (228 KB): open this one to begin.
- p4-06-finished.blend (234 KB): the result, to compare with yours.
Both were made in Blender 5.2.0.
Before you start
- You have done Part 0, Blender from nothing, Drag a number on the model (P4-02) and Go down a level: lean, bend, rail sizes (P4-04): a head’s pink marks, its handles, change a number when you drag them, and the level button on the model chooses which marks show.
- CAD/CAM Jeweller 2.22.0 or later (Preferences > Add-ons shows the version). The start file holds a Round 6.50 stone, a round stone 6.50 mm across, in a head of four claws, in millimetres.
Build it
Step 1. Open the start file and save your copy
WhereThe top bar: the row of words that begins File, Edit.
DoDownload p4-06-start.blend from Files above and open it. Then choose File > Save As and save it under the name below, in a folder of yours. Open an exercise file and keep the start file safe (P0-07) shows how.
Typemy-one-claw.blend
You should seeThe 3D view shows a pale round stone held by four tall claws, seen from a little above. The head has small pink marks on it, its handles, and to its right the buttons on the model, words you can click. The title bar, the strip above File and Edit, begins my-one-claw. The first picture is the 3D view and the second is the title bar.
It worked whenThe title bar, the strip above File and Edit, begins my-one-claw.

Step 2. Go to Level 3: each claw
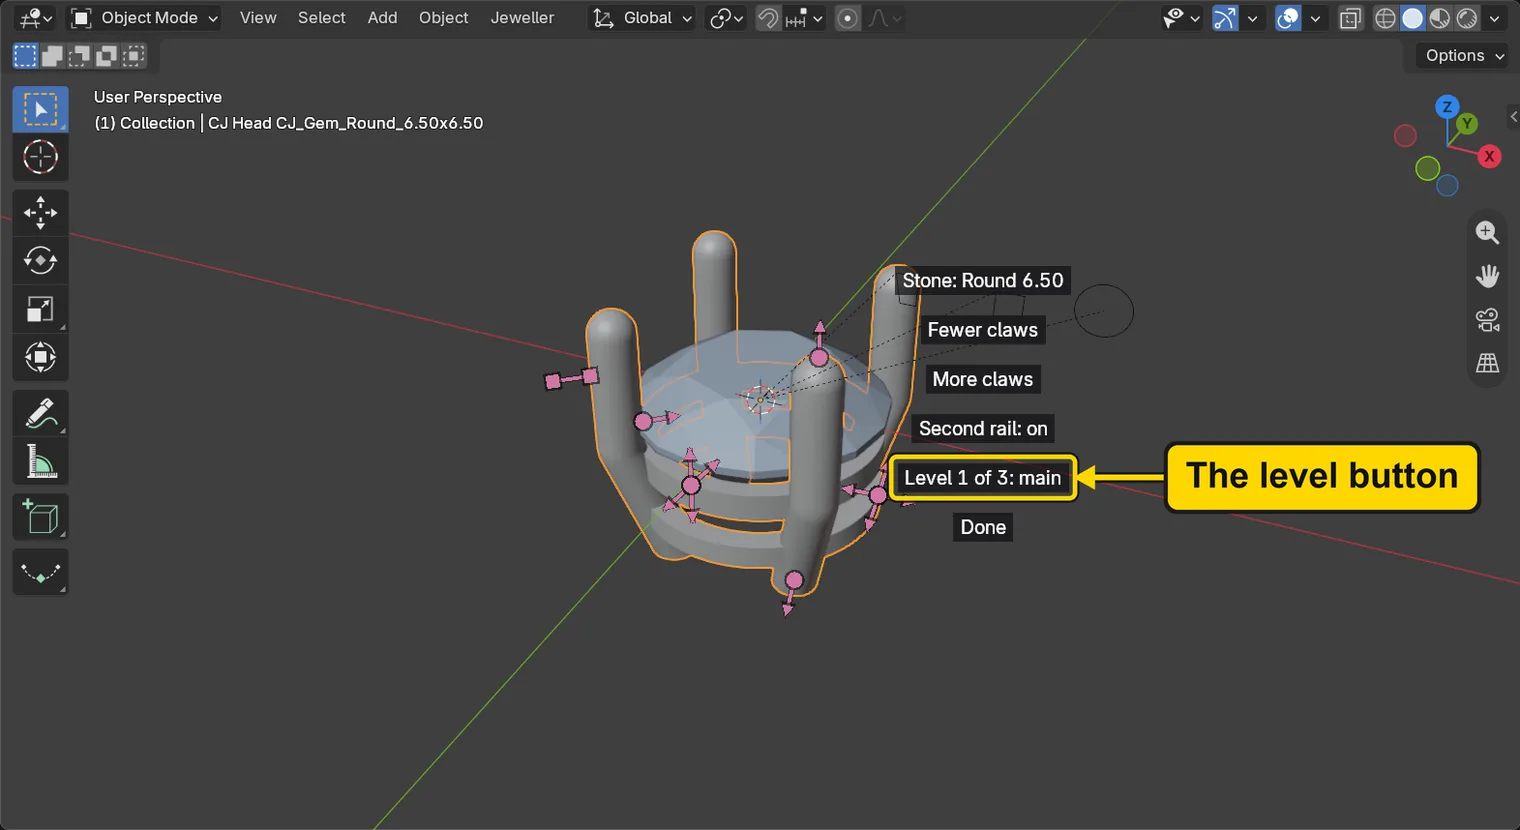
WhereThe 3D view, the button that reads Level 1 of 3: main.
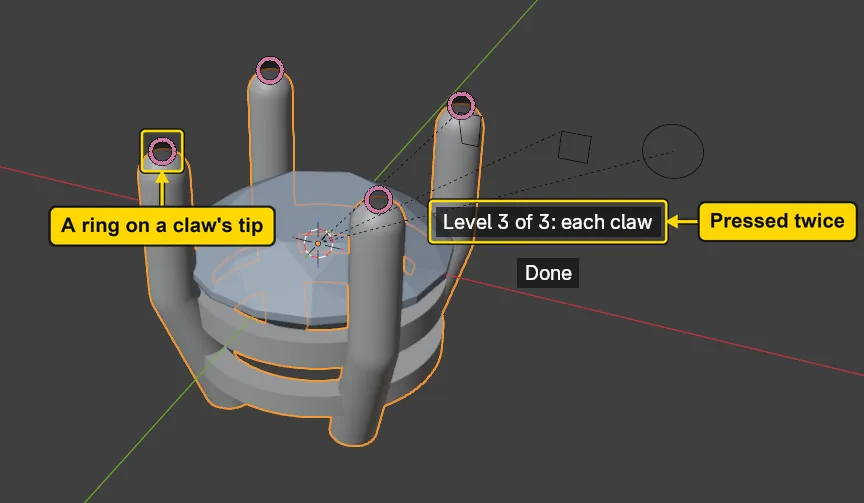
DoClick Level 1 of 3: main twice. After the first click it reads Level 2 of 3: more, and after the second Level 3 of 3: each claw.
You should seeThe pink marks of the head go, and a small ring stands on the tip of each of the four claws. The button reads “Level 3 of 3: each claw”. Level 1 holds the main marks, Level 2 every number of the head, and Level 3 each claw on its own.
It worked whenThe button reads “Level 3 of 3: each claw”, and a ring stands on each claw’s tip.
If it goes wrongThe marks you used before, Over the table and the rest, are gone: Level 3 shows only each claw’s own marks. Click the level button once more: it goes back to Level 1.
Step 3. Pick a claw by its ring
WhereThe 3D view, a ring on the tip of a claw.
DoClick the ring itself, the small circle on the tip of one claw.
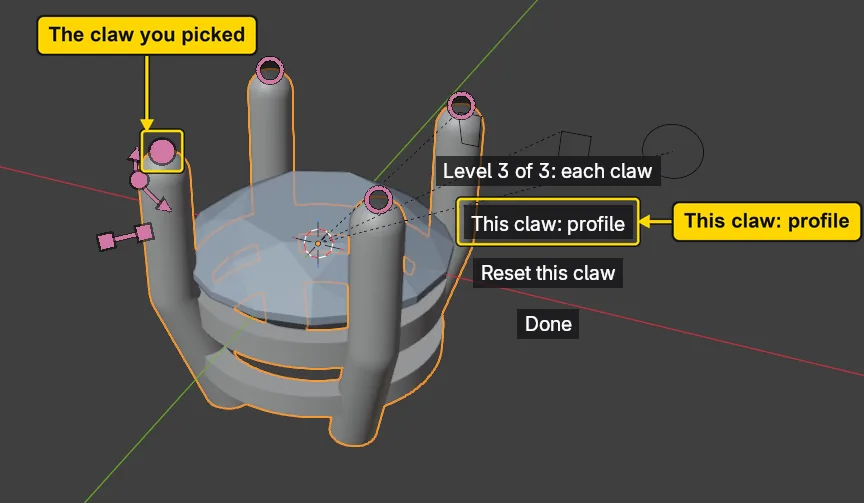
You should seeThree things appear for that claw alone, beside it: a curved mark, This claw: turn, and a short bar, This claw: width. Two new buttons stand on the model, This claw: profile and Reset this claw.
It worked whenThe buttons on the model include This claw: profile and Reset this claw.
Step 4. Drag This claw: turn
WhereThe 3D view, the curved mark on the picked claw. Press and drag as in Drag a number on the model (P4-02), step 4.
DoRest the pointer on the curved mark until its label reads “This claw: turn”. Press on it, drag a little way round the stone, and let go.
You should seeThe claw turns about the stone’s axis, and only that claw. The label gives your number of degrees (the picture’s reads “This claw: turn 8.0 degrees default 0”). A drag gives your own number, not the picture’s.
It worked whenThe picked claw has moved off its place, and its three neighbours have not.
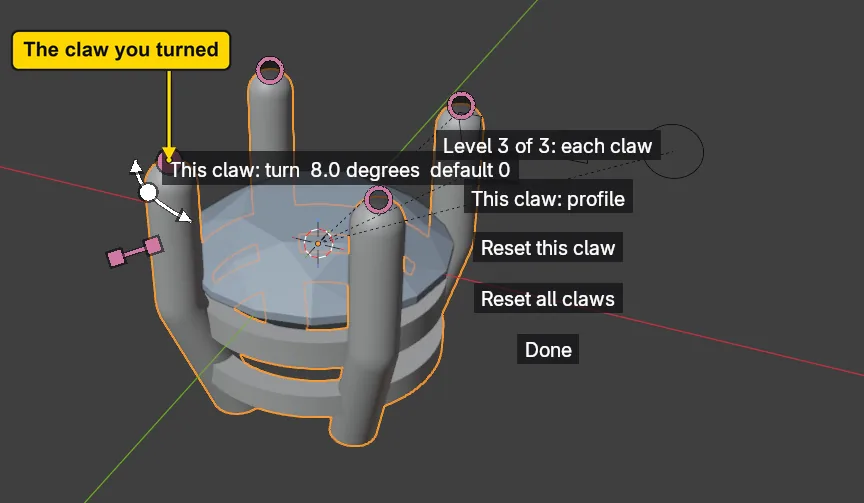
If it goes wrongAnother number changed: you pressed on another handle: press Ctrl+Z once, as in P4-02, step 5, rest the pointer first, read the label, and try again.
Step 5. Read the change in the panel
WhereThe sidebar: the CAD/CAM tab, the Setting section, the Head Builder panel. Press N with the pointer over the 3D view if the sidebar is shut. Scroll the sidebar so that the top of the panel shows, under its list of heads.
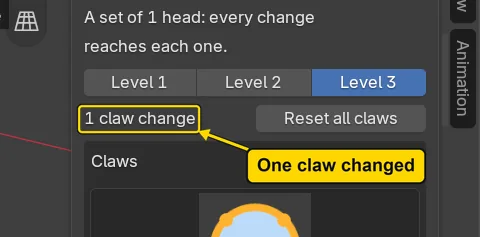
DoLook for the line that counts the changed claws, under the three level buttons.
You should seeA line “1 claw change”, with the button Reset all claws beside it. The panel counts how many claws have a number of their own: the claw you turned is one. The line above, “A set of 1 head”, counts heads and not claws: this panel is changing one head.
It worked whenThe panel reads “1 claw change”.
Step 6. Drag This claw: width
WhereThe 3D view, the short bar on the picked claw. Press and drag as in Drag a number on the model (P4-02), step 4.
DoRest the pointer on the bar until its label reads “This claw: width”. Press on it, drag a little way, and let go.
You should seeThe claw is wider than its neighbours, and they are as they were. The label gives your width (the picture’s reads “This claw: width 1.75 mm default 1.15”). A drag gives your own number, not the picture’s.
It worked whenThe picked claw is wider than its neighbours, which stay at 1.15 mm. Yours will differ from the picture’s 1.75 mm. A claw this wide is a drill, not a head to cast.
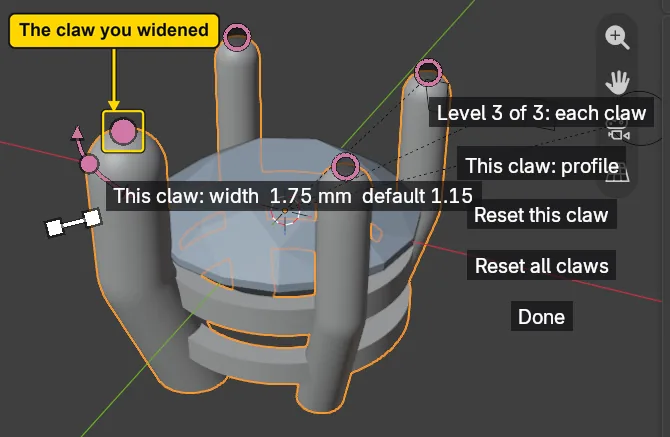
If it goes wrongAnother number changed: you pressed on another handle: press Ctrl+Z once, as in P4-02, step 5, rest the pointer first, read the label, and try again.
Step 7. Open the menu of This claw: profile
WhereThe 3D view, the button This claw: profile, one of the buttons on the model.
DoClick This claw: profile.
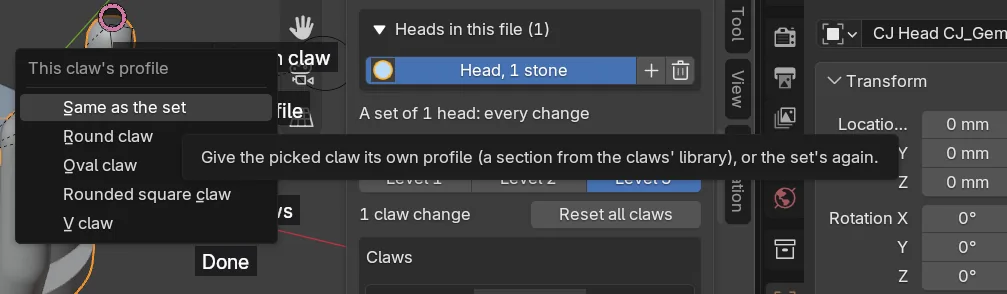
You should seeA small menu opens, headed “This claw’s profile”, and lists the claws’ profiles: Same as the set, Round claw, Oval claw, Rounded square claw and V claw. A profile is the shape of a claw cut through.
It worked whenA menu headed “This claw’s profile” stands open.
Step 8. Choose Oval claw
WhereThe menu that stands open.
DoClick Oval claw. Then, to see the claw from above, click the blue Z ball on the small coloured axes at the top right of the 3D view.
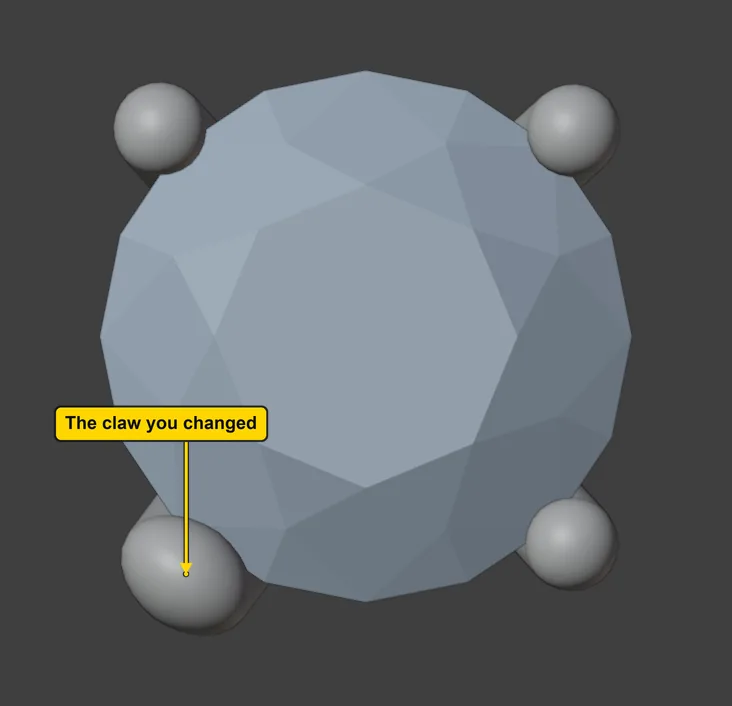
You should seeThe picked claw has an oval section, wider than it is deep, where the others are round. Seen from above, one claw is turned, wider and oval; the other three are round and stand as they were. The picture marks the claw you changed.
It worked whenThe picked claw is oval from above, and the others are round.
Step 9. Pick a second claw and turn it
WhereThe 3D view: the rings are back on the tips. Click the ring of another claw. Press and drag as in Drag a number on the model (P4-02), step 4.
DoClick the ring of a second claw, then drag its This claw: turn mark a little way.
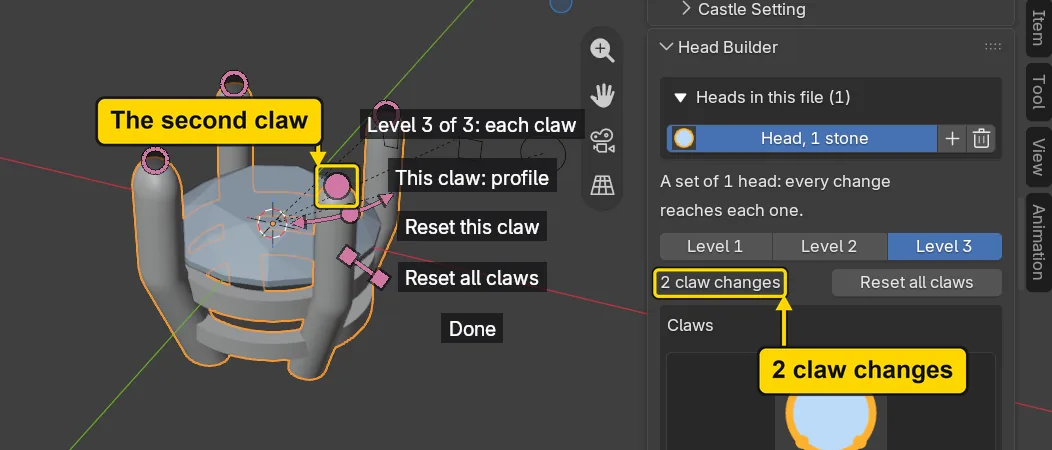
You should seeTwo claws now differ from the set’s, and the panel’s line reads “2 claw changes”. Each claw keeps its own numbers.
It worked whenThe panel’s line reads “2 claw changes”.
Step 10. Reset this claw
WhereThe 3D view, the buttons on the model, the button Reset this claw.
DoClick Reset this claw while the second claw is still picked.
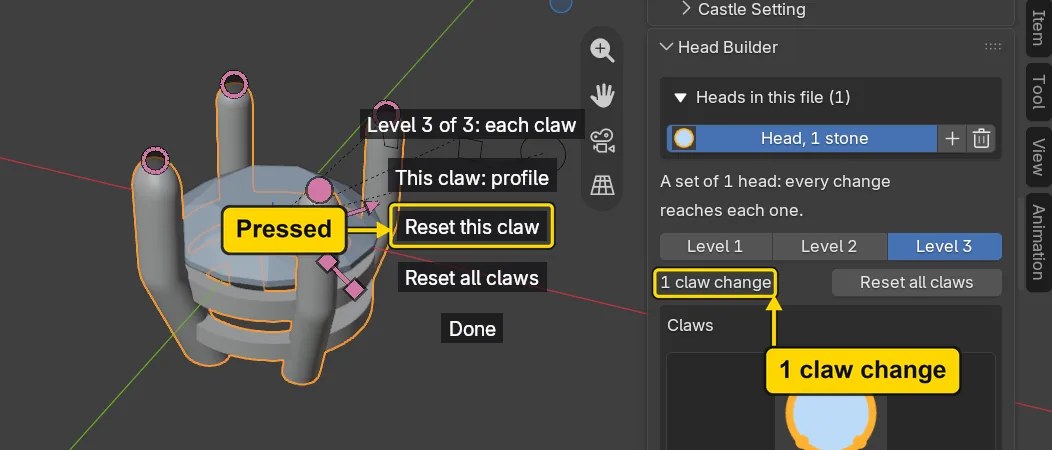
You should seeThe second claw goes back to its place at once, and the first claw keeps its three changes. The panel’s line reads “1 claw change” again.
It worked whenThe panel reads “1 claw change”, and the first claw is still different.
Step 11. Reset all claws
WhereThe sidebar, the Head Builder panel, the button Reset all claws beside the count of changes.
DoClick Reset all claws.
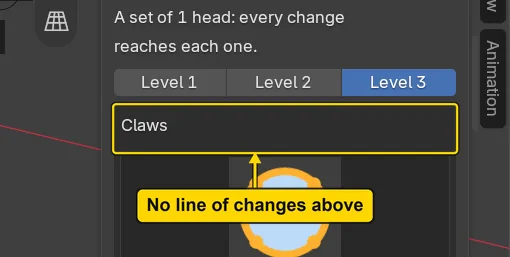
You should seeEvery claw is the set’s again. The line “1 claw change” and its button are gone from the panel, and the buttons on the model have lost Reset this claw. The same button, Reset all claws, also stands among the buttons on the model while a claw has a change.
It worked whenThe line “1 claw change” is gone from the panel.
Step 12. Save your work
WhereThe 3D view: move the pointer over it.
DoPress Ctrl+S.
You should seeBlender writes your copy at once, with no question, because the file already has a name. An asterisk, *, in the title bar marks changes that are not saved, and it goes now. Save your work and get it back (P0-12) says more about saving.
It worked whenThe title bar begins my-one-claw and carries no asterisk.
No picture: the only change is a message on the status bar, and it fades.
Check your result
| What to read | Where | What it should say |
|---|---|---|
| The count of changes | The CAD/CAM tab, Setting section, Head Builder panel, the rows under the three level buttons | At step 5 it reads “1 claw change”, with the button Reset all claws beside it |
| The first claw’s own width | Rest the pointer on its This claw: width mark at Level 3, after step 6 | The label reads “This claw: width 1.75 mm default 1.15” |
| The level button | The buttons on the model, above Done | It reads “Level 3 of 3: each claw” |
| Every claw is the set’s | The Head Builder panel after step 11, where “1 claw change” stood | The line and its button Reset all claws are gone, and no curved mark or bar stands on any claw |
Try it yourself
Open your copy again and go to Level 3. Pick a claw, and drag its This claw: turn mark as far as it will go, both ways: it stops, and the label says where. Then give two claws different profiles from the menu of This claw: profile, and look from above.
What you learned
- Level 3 shows a ring on the tip of every plain claw. A click on a ring picks that claw, and its own marks appear: This claw: turn, This claw: width and the button This claw: profile.
- A claw you change belongs to that claw. Reset this claw puts the picked claw back to the set’s numbers, and Reset all claws puts every claw back.
- The head is live: every drag makes it again, and the set’s numbers, 2 mm over the table and a claw 1.15 mm across, stay the set’s.