
What you will make
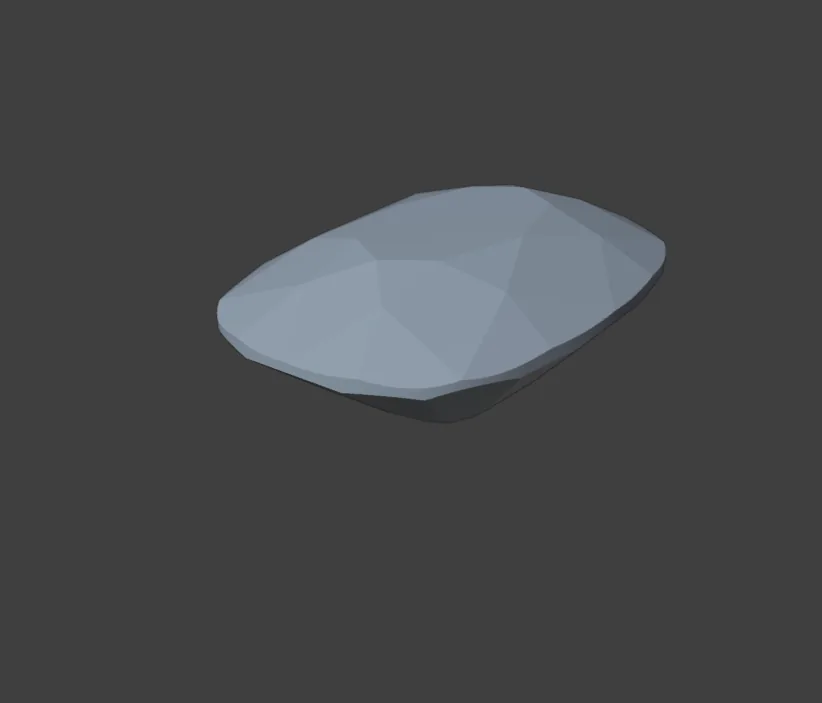
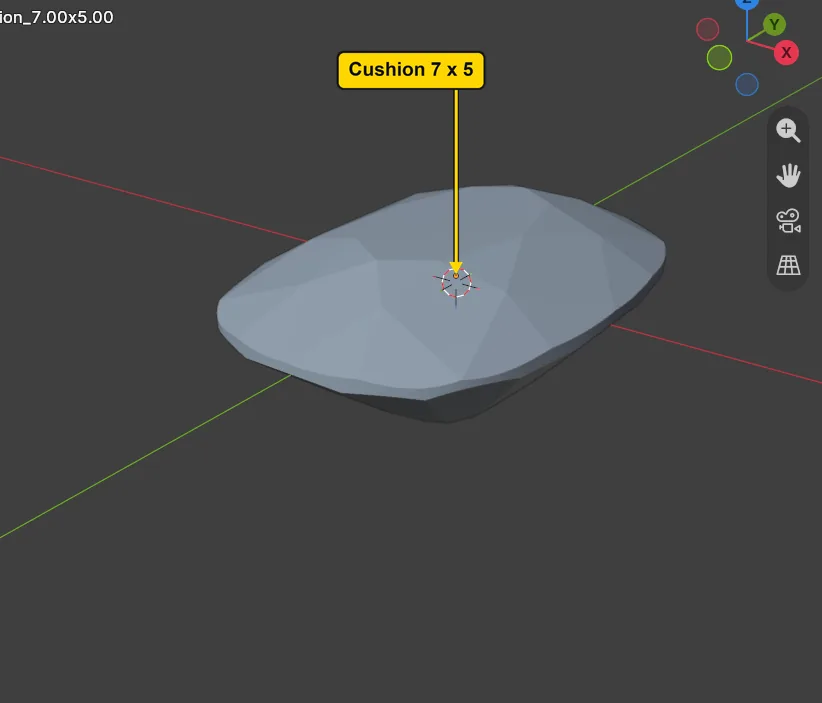
A loose stone: a cushion 7 by 5 mm, which began as an oval of the same size and was changed in the same place. A jeweller chooses the stone first, because every seat, claw and head that comes after reads the stone’s own outline. A seat is the cut a stone sits in, a claw is a small metal prong that holds it, and a head is the small frame of claws and rails that carries it. The sizes on the chips are stocked, calibrated sizes, the ones a dealer sells, so a stone made from a chip can be bought. Nothing is set yet: the stone floats at the middle of the file.
About 15 minutes.
Files
- p3-01-start.blend (99 KB): open this one to begin.
- p3-01-finished.blend (119 KB): the result, to compare with yours.
Both were made in Blender 5.2.0.
Before you start
- You have done Part 0, Blender from nothing, and you have met the stone and its words in Name the parts of a stone and a ring (P0-22): the table, the girdle and the culet.
- The add-on is installed: CAD/CAM Jeweller 2.22.0 or later (Preferences > Add-ons shows the version). Its CAD/CAM tab is in the sidebar. The start file is empty and is already in millimetres, so every number on this page is millimetres.
Build it
Step 1. Open the start file and save your copy
WhereThe top bar: the row of words that begins File, Edit.
DoDownload p3-01-start.blend from Files above and open it. Then choose File > Save As and save it under the name below, in a folder of yours. Open an exercise file and keep the start file safe (P0-07) shows how.
Typemy-stone.blend
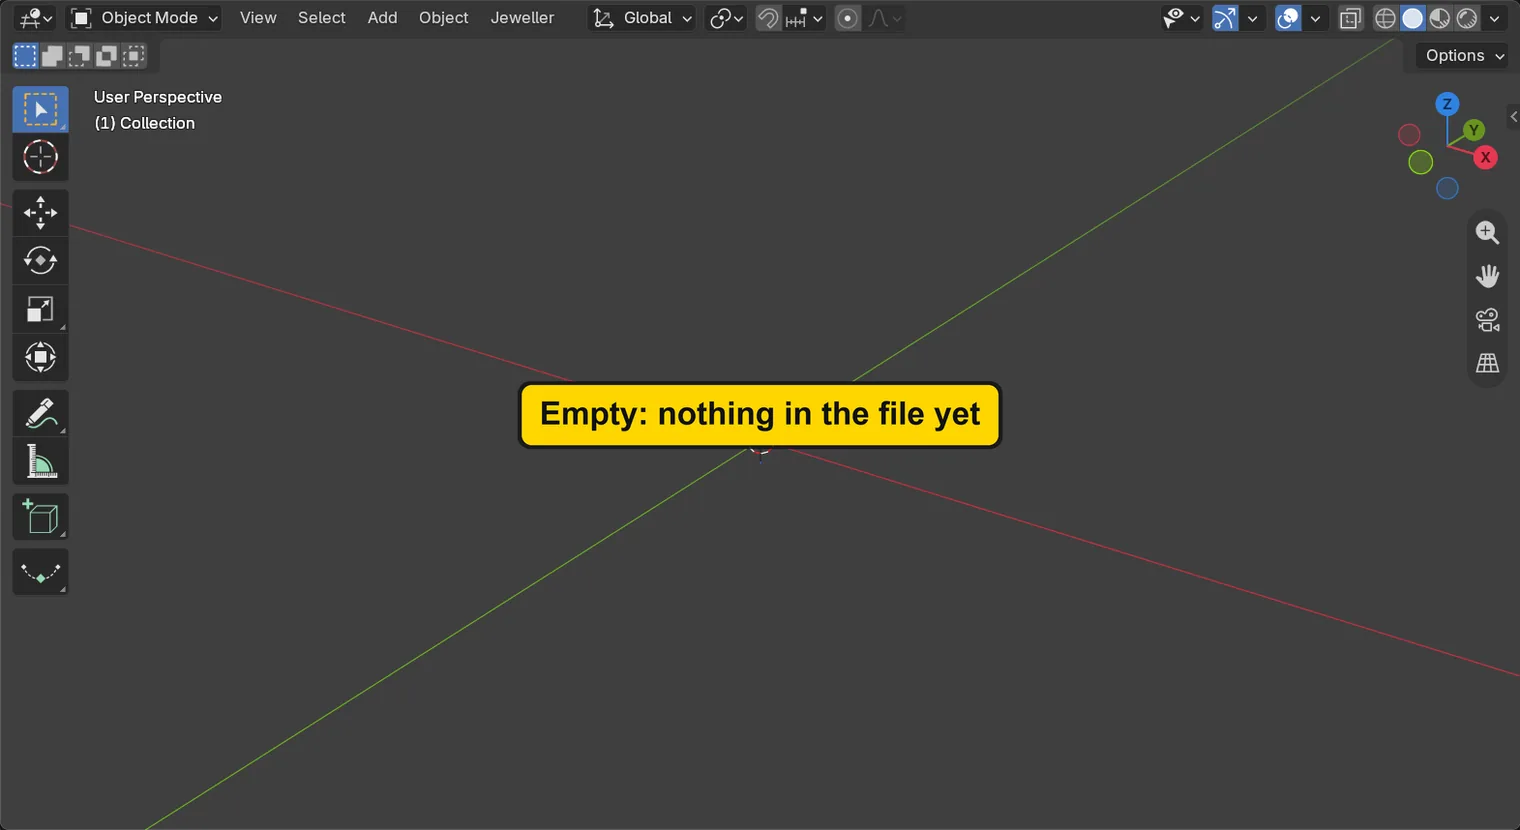
You should seeThe 3D view is empty: a dark grid with no object in it. The Outliner, the list at the top right of the window, is empty too, and the title bar, the strip above File and Edit, begins my-stone. The first picture is the 3D view and the second is the title bar.
It worked whenThe title bar, the strip above File and Edit, begins my-stone.

Step 2. Open the Gems section
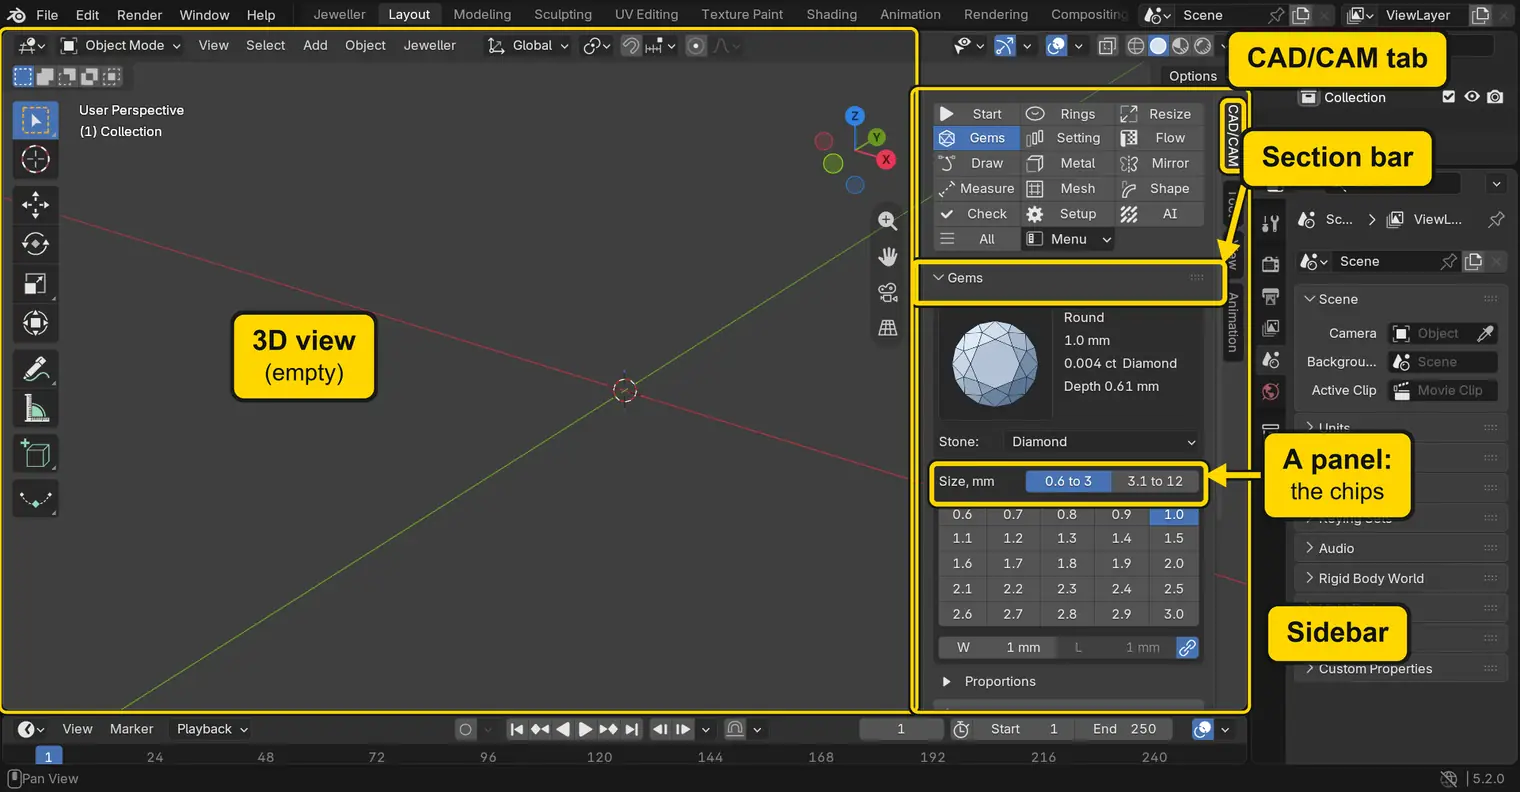
WhereThe sidebar, at the right of the 3D view. Press N with the pointer over the 3D view if it is shut. The strip of tabs at the right edge of the sidebar holds the CAD/CAM tab. The section bar is the small word buttons at the top of that tab.
DoClick the CAD/CAM tab, then click Gems in the section bar.
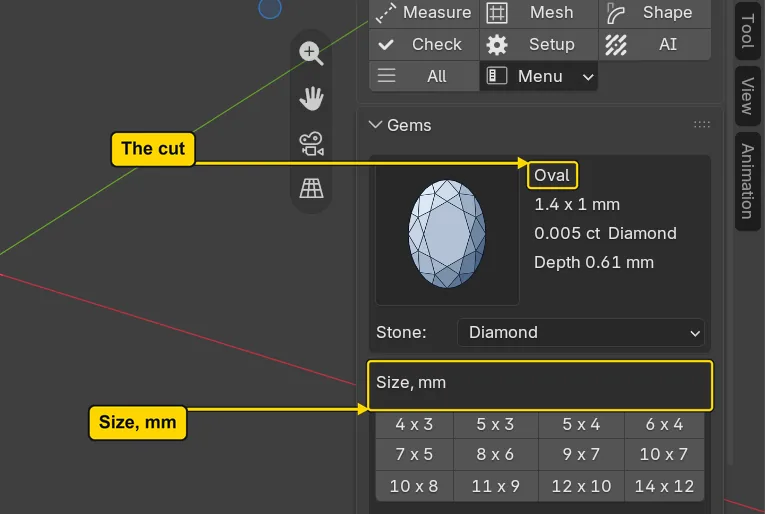
You should seeThe Gems panel. At its top is a picture of a stone and four lines beside it: the cut, its size, its weight in carats with the stone it is made of, and its depth. Under them the Size, mm box holds the chips, small buttons that each hold one stocked size. These are the settings of the next stone you make: nothing is made yet. The picture names the parts of the window this page uses.
It worked whenThe Gems panel shows a picture of a stone and, under it, Size, mm.
Step 3. Choose the cut from its picture
WhereThe Gems panel, the picture of the stone at its top.
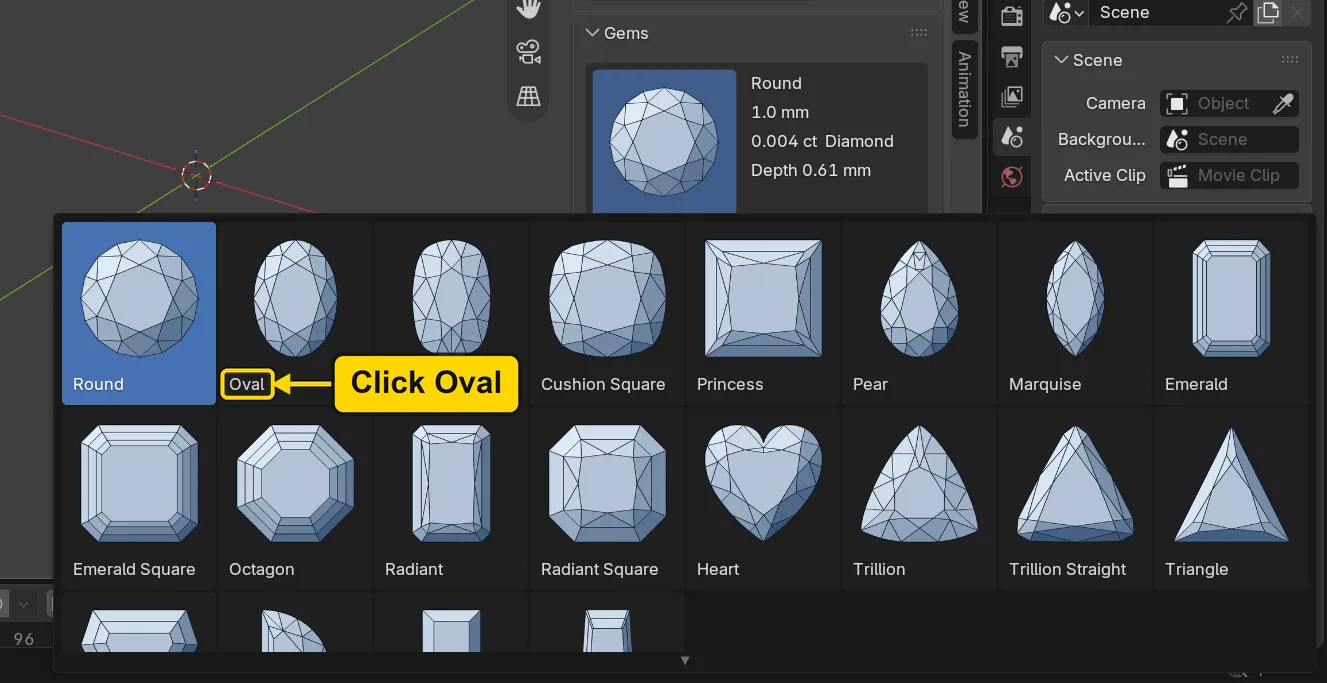
DoClick the picture, then click Oval in the grid that opens.
You should seeA grid of cuts opens over the window, each with its name, and the first picture shows it. On a small screen its last row may lie partly below the window’s edge: Oval is in the first row, so it does not matter. After you click Oval it shuts, the second picture shows the panel: the picture is an oval and the first line beside it reads Oval. The cut decides the outline that seats and claws will follow.
It worked whenThe first line beside the picture reads Oval.
Step 4. Choose a stocked size from a chip
WhereThe Size, mm box, under the picture.
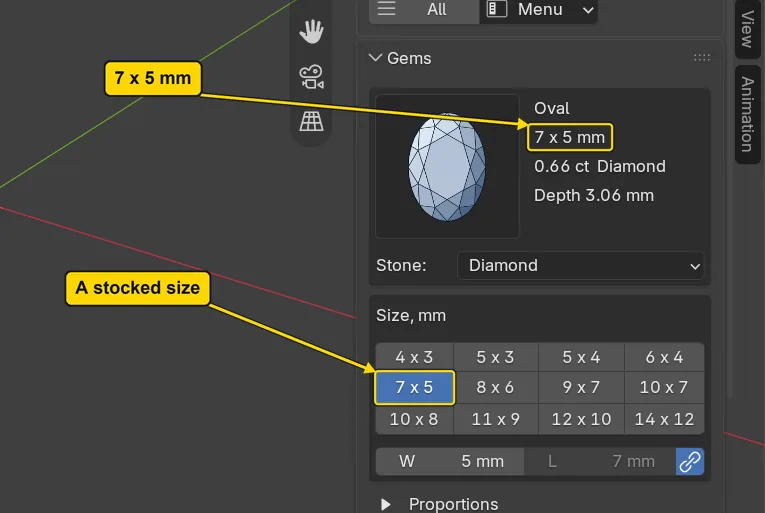
DoClick the chip 7 x 5.
You should seeThe chip is lit, and the lines beside the picture now read Oval, 7 x 5 mm, a weight in carats and Depth. A chip is a stocked size, a size a dealer sells as a calibrated stone: an oval is 7 long and 5 wide. The weight is worked out for a diamond: a close guide, not a dealer’s weight. Nothing is made yet.
It worked whenThe chip 7 x 5 is lit and the second line reads 7 x 5 mm.
Step 5. Make the stone at the 3D cursor
WhereThe Gems panel, the large button Create at Cursor, under the chips.
DoPress Create at Cursor.
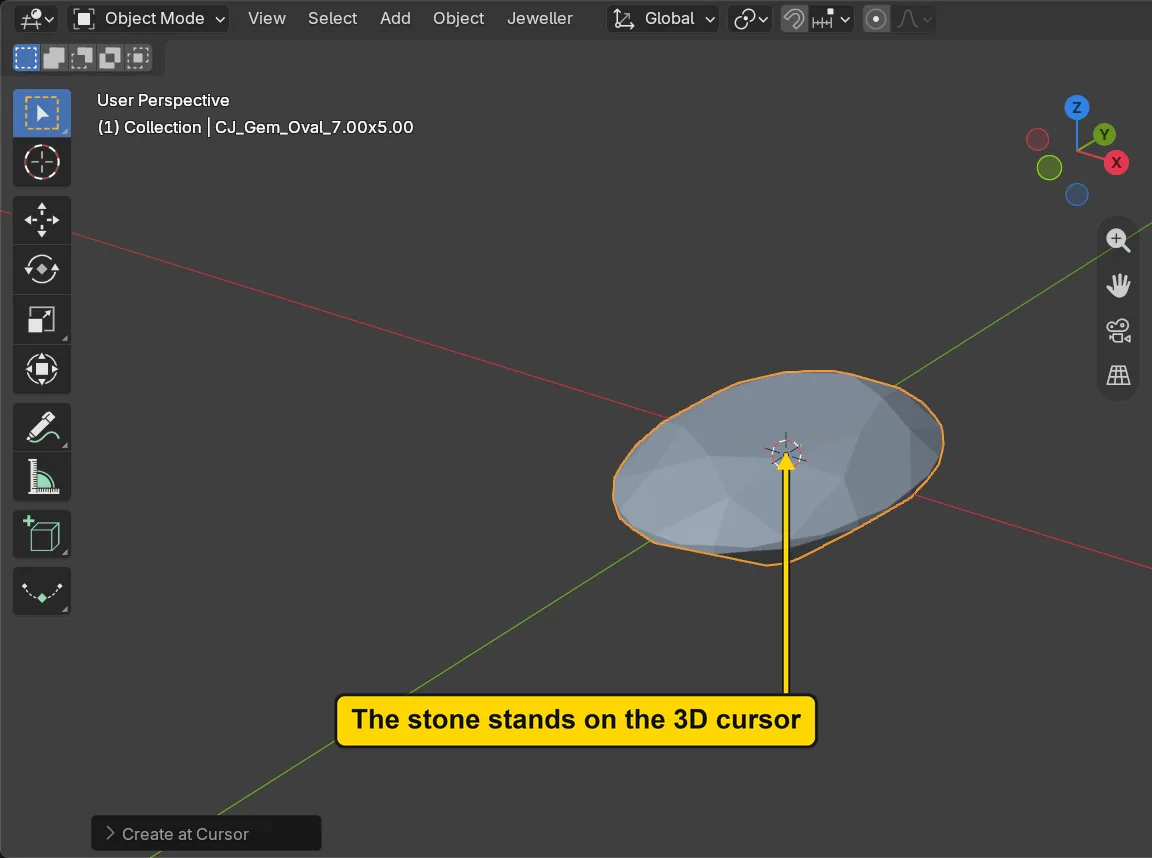
You should seeAn oval stone where the red and green lines cross, which is where the 3D cursor stands. It is selected, so it has an orange outline, and its name at the top left of the 3D view is CJ_Gem_Oval_7.00x5.00. The status bar, the line along the very bottom of the window, describes it, but its message fades: the second picture shows it.
It worked whenThe name at the top left of the 3D view ends CJ_Gem_Oval_7.00x5.00.

Step 6. Read the stone’s own figures
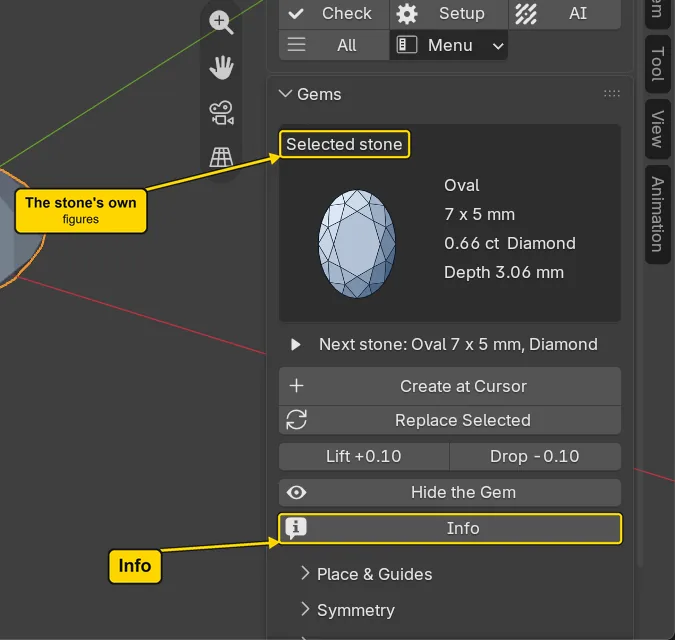
WhereThe top of the Gems panel: the box headed Selected stone. Scroll the sidebar up if it is out of view.
DoRead the four lines, then press Info, the button at the foot of the panel.
You should seeWith a stone selected, the panel leads with that stone: its picture and four lines, the cut, its size, its weight in carats and its depth. These are the stone’s own record. Info measures the stone’s mesh and says it on the status bar, shown in the second picture, a line that begins “Oval”: the size, the depth as a share of the width, the table, the volume and the weight. The status bar’s message fades, so press Info again to read it again.
It worked whenThe box Selected stone reads Oval and 7 x 5 mm.

Step 7. Choose the next cut and its stocked size
WhereThe Gems panel: click the line that begins Next stone under the box Selected stone. It opens the settings of the next stone, the same picture and chips as before.
DoClick the picture, click Cushion in the grid, then click the chip 7 x 5.
You should seeThe lines beside the picture read Cushion and 7 x 5 mm, and the chip is lit in blue: scroll the sidebar down a little if the chip row is cut off at its foot. The oval in the 3D view has not changed: these are the settings of the next stone. Right after you click Cushion the size reads 7.5 x 5 mm, because a new cut keeps the width and works out its own length, and 7.5 x 5 is not a stocked size. The chip puts it right.
It worked whenThe lines beside the picture read Cushion and 7 x 5 mm.
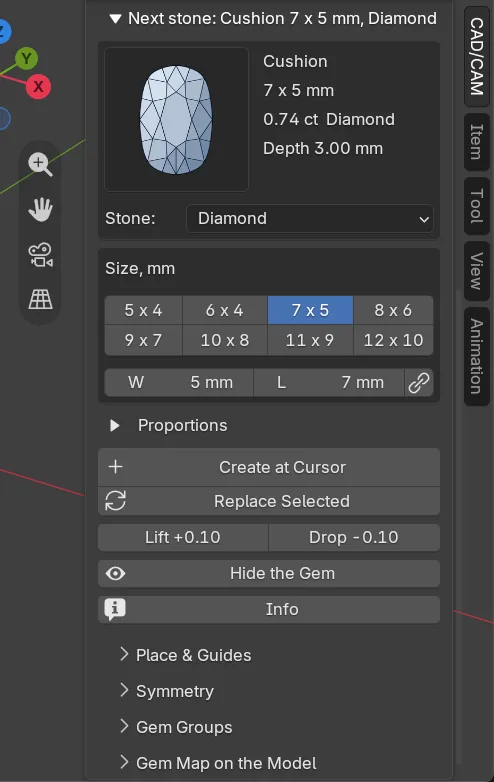
If it goes wrongThe size reads 7.5 x 5 mm: you did not click the chip. Click 7 x 5 in the Size, mm box.
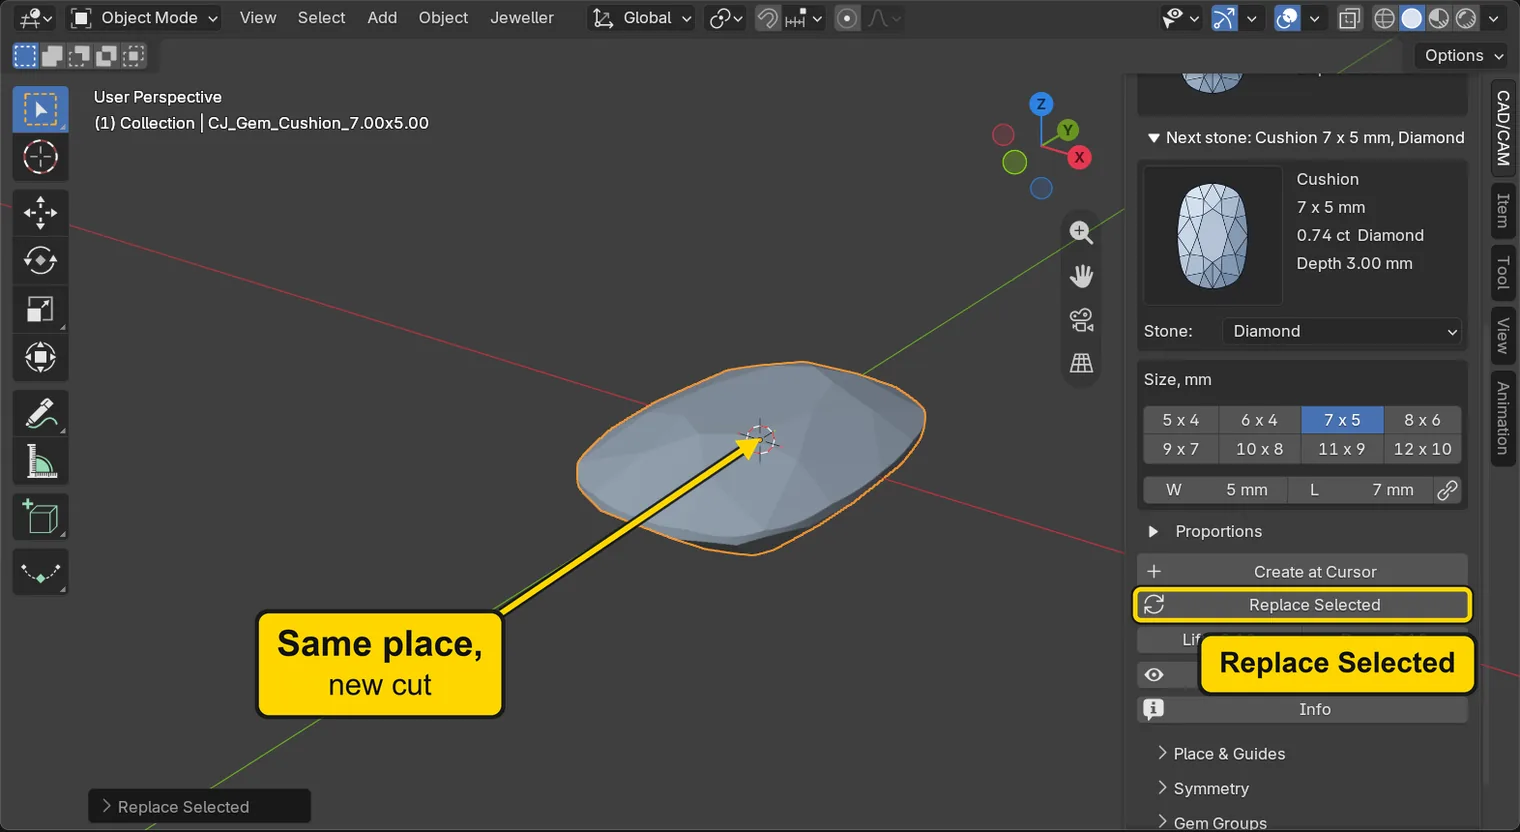
Step 8. Change the stone in place with Replace Selected
WhereThe Gems panel, the button Replace Selected, under Create at Cursor.
DoPress Replace Selected.
You should seeThe oval is replaced by a cushion, a stone with a squarer outline and softer corners, at the same place and turned the same way. The name at the top left of the 3D view now ends CJ_Gem_Cushion_7.00x5.00. The stone at the top of the panel now reads Cushion and 7 x 5 mm.
It worked whenThe name at the top left of the 3D view ends CJ_Gem_Cushion_7.00x5.00.
Step 9. Lift the stone by 0.10
WhereThe Gems panel, the row of two buttons under Replace Selected.
DoPress Lift +0.10 once.
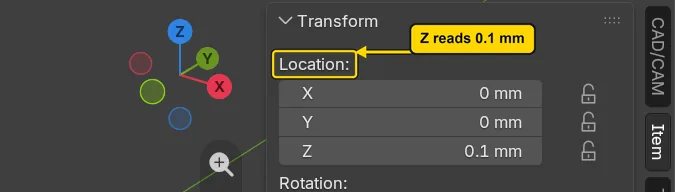
You should seeThe stone moves up by 0.10 mm, straight up from its table. You will not see 0.10 mm, and 0.10 is only a small step to show how Lift works: it is not a seating depth. The Item tab of the sidebar reads it: click the Item tab, and Location: reads Z 0.1 mm. Then click the CAD/CAM tab to come back.
It worked whenLocation: reads Z 0.1 mm.
Step 10. Hide the stone and show it again
WhereThe Gems panel, the wide button with an eye under the two Lift buttons. It reads Hide the Gem while one stone is shown.
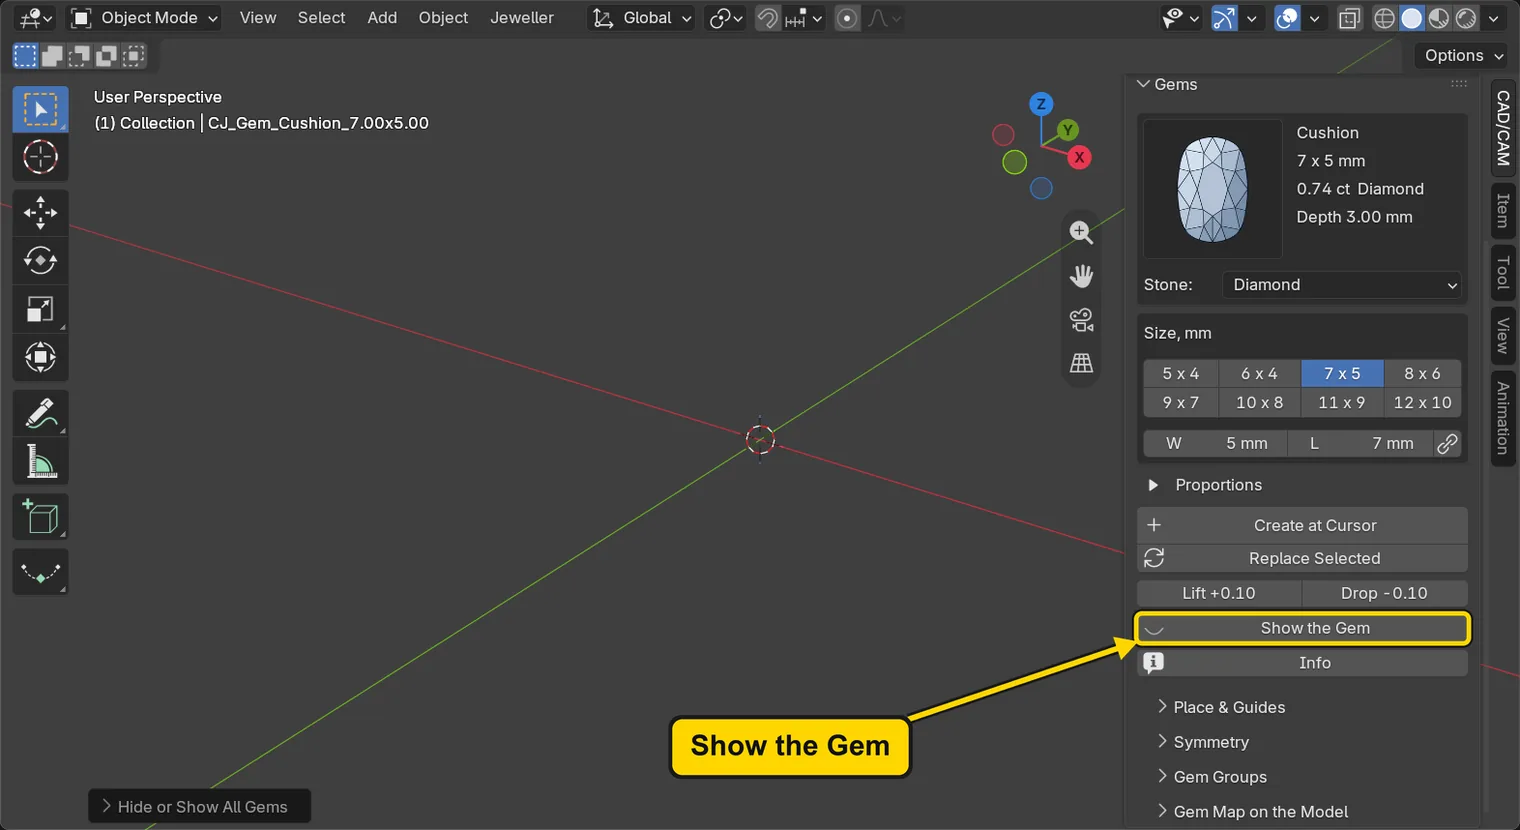
DoPress Hide the Gem, then press Show the Gem.
You should seeThe first press hides the stone, and the button then reads Show the Gem. The second shows it, and the button reads Hide the Gem again. With many stones the button reads Hide All 12 Gems and does the same to all of them: it hides every stone, whatever its size.
It worked whenThe button reads Hide the Gem and the stone shows.
Step 11. Look at the finished stone
WhereThe 3D view.
DoLook at the picture. To see your stone like this, click it, then choose View > Frame Selected.
You should seeA cushion-cut stone with a flat table on top and facets round it. This is the stone a head, a seat or claws will be made for in later exercises: nothing holds it yet.
It worked whenYou see a cushion stone, flat on top, with a squarer outline than the oval.
Step 12. Save your work
WhereThe 3D view: move the pointer over it.
DoPress Ctrl+S.
You should seeBlender writes your copy at once, with no question, because the file already has a name. An asterisk, *, in the title bar marks changes that are not saved, and it goes now. Save your work and get it back (P0-12) says more about saving.
It worked whenThe title bar begins my-stone and carries no asterisk.
No picture: the only change is a message on the status bar, and it fades.
Check your result
| What to read | Where | What it should say |
|---|---|---|
| The stone’s name | The words at the top left of the 3D view | It ends CJ_Gem_Cushion_7.00x5.00 |
| The stone’s own figures | The CAD/CAM tab, Gems section, the box headed Selected stone at the top of the Gems panel | The lines read Cushion, 7 x 5 mm, 0.74 ct Diamond and Depth 3.00 mm |
| Where it stands | The Item tab of the sidebar, Location: | Z reads 0.1 mm, the 0.10 you lifted it. X and Y read 0 |
| The eye button | The Gems panel, the last wide button | It reads “Hide the Gem” again: the stone is shown |
Try it yourself
Open your copy again and click the stone. On the Gems panel open Next stone, choose Pear from the picture grid and a chip, then press Replace Selected. The stone changes cut and stays where it stands. Press Ctrl+Z once to take it back.
What you learned
- The cut is chosen from its picture, and the chips are stocked sizes. Create at Cursor makes the stone where the 3D cursor stands.
- Replace Selected changes a stone’s cut or size and keeps its place. Lift +0.10 moves it 0.10 mm along its own up.
- The eye button hides every stone and shows them again, and Info gives the measured figures.