
What you will make
A smooth carved dome, 14 x 10 mm, standing in a wall of metal that follows its outline. A cabochon is a stone cut as a smooth dome with no facets, and a carving is the same idea with a pattern cut in. Neither is a stock Round, so the add-on has no girdle to read: it finds the outline from the shape of the mesh alone, from above. You trace it, set the wall, give the wall the height the stone’s edge needs, and make it real. A jeweller reaches for this tool for any stone that Gems cannot make. This wall has no floor: nothing holds the stone from below. A bezel is cast or soldered onto a plate, or gets a ledge inside it; here the wall stands loose, for practice. The small dark ring on the dome’s top in the pictures is a shading mark where the dome’s surface closes at its top, and the red and white circle is Blender’s 3D cursor: neither is part of the stone, so ignore both.
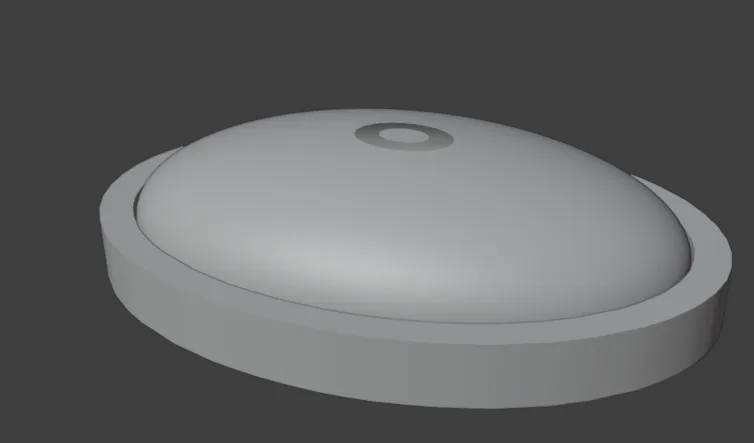
About 15 minutes.
Files
- p5-05-start.blend (133 KB): open this one to begin.
- p5-05-finished.blend (157 KB): the result, to compare with yours.
Both were made in Blender 5.2.0.
Before you start
- You have done Part 0, Blender from nothing, and Shape a bezel’s section and make it real (P5-02): a set, a section and Make Real are not explained again here.
- CAD/CAM Jeweller 2.22.0 or later (Preferences > Add-ons shows the version). The start file holds one smooth dome, an oval 14 x 10 mm and 3.60 mm tall, with a straight edge 0.70 mm high and a flat back, in millimetres. It is an ordinary mesh: the add-on did not make it.
- Small pink dots, arrows and squares, and the word Done, may show on a stone once it is selected. They are handles: marks that change a number when you press and drag them. Leave them alone for now: click the stone’s grey top, between the marks. If a number changes after a click, a mark was pressed: press
Esc, thenCtrl+Z.
Build it
Step 1. Open the start file and save your copy
WhereThe top bar: the row of words that begins File, Edit.
DoDownload p5-05-start.blend from Files above and open it. Then choose File > Save As and save it under the name below, in a folder of yours. Open an exercise file and keep the start file safe (P0-07) shows how.
Typemy-carved-stone.blend
You should seeThe 3D view shows one smooth grey dome, an oval, standing on the grid, and nothing is selected. The title bar, the strip above File and Edit, begins my-carved-stone. The first picture is the 3D view and the second is the title bar.
It worked whenThe title bar, the strip above File and Edit, begins my-carved-stone.
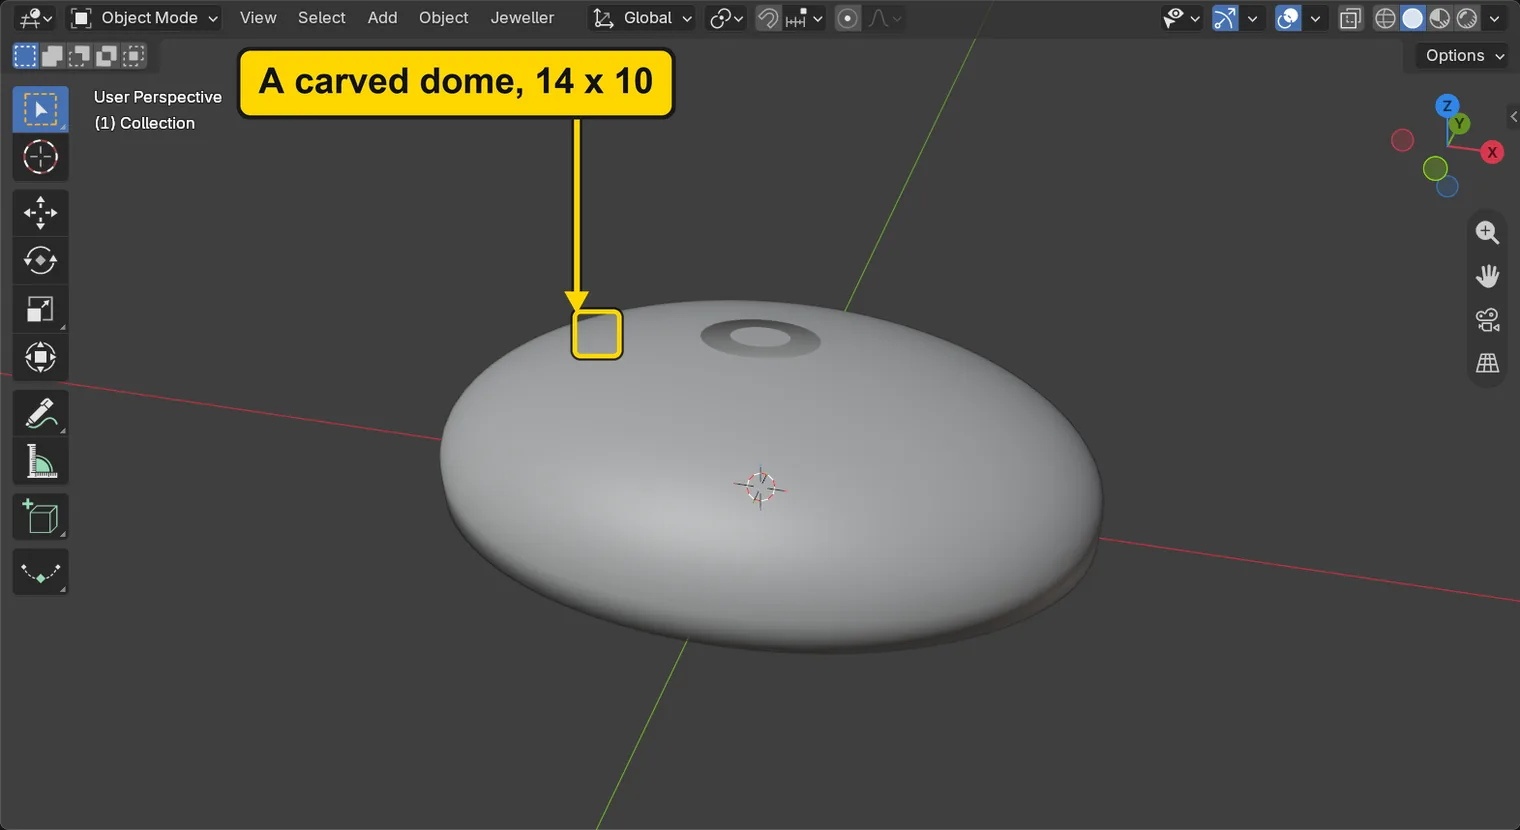

Step 2. Click the dome and find Stone Settings
WhereThe sidebar: press N with the pointer over the 3D view if it is shut. Click the CAD/CAM tab, then Setting in the section bar. The panel is Stone Settings. Then the 3D view.
DoClick the dome, on its top.
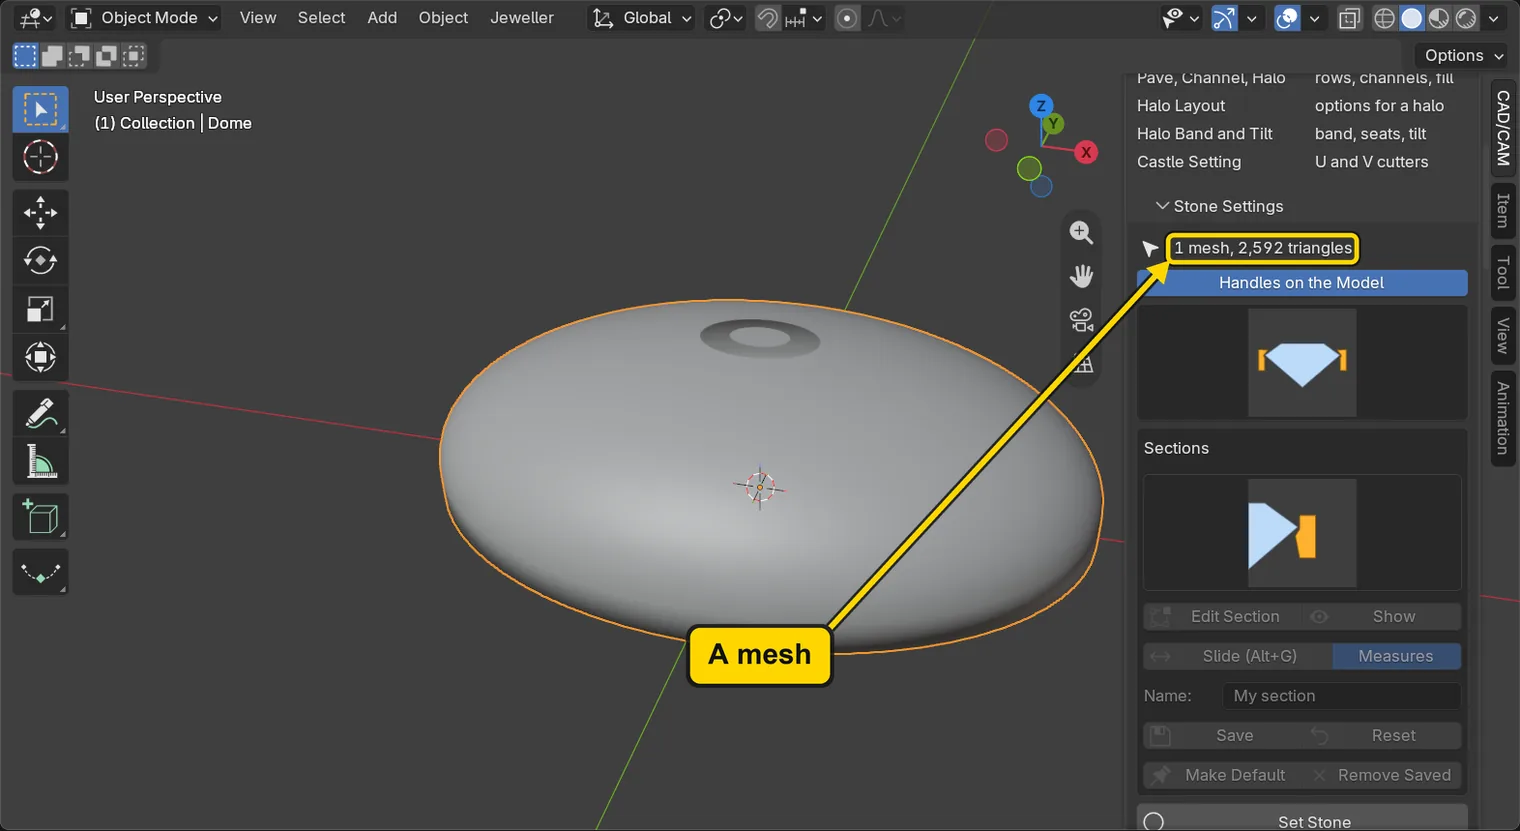
You should seeThe dome has an orange outline, and the first line of the panel reads “1 mesh, 2,592 triangles”: the add-on sees an ordinary mesh, not one of its own stones. A triangle is the flat three-sided piece a mesh is made of.
It worked whenThe panel’s first line reads “1 mesh, 2,592 triangles”.
Step 3. Choose Bezel for Any Stone
WhereThe Stone Settings panel: the picture under the button Handles on the Model, the tool now chosen.
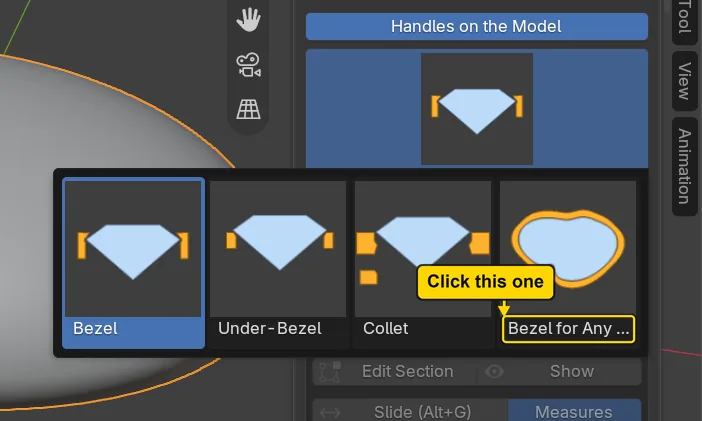
DoClick that picture to open the grid of tools, then click Bezel for Any (its label is cut short in the grid).
You should seeThe picture changes to a wall round a free outline, and a button Trace Outline stands above the big button.
It worked whenA button Trace Outline stands above the big button.
Step 4. Press Trace Outline
WhereThe Stone Settings panel, the button Trace Outline, above the big button.
DoPress Trace Outline, then look straight down: click the blue ball marked Z on the small coloured axes at the top right of the 3D view.
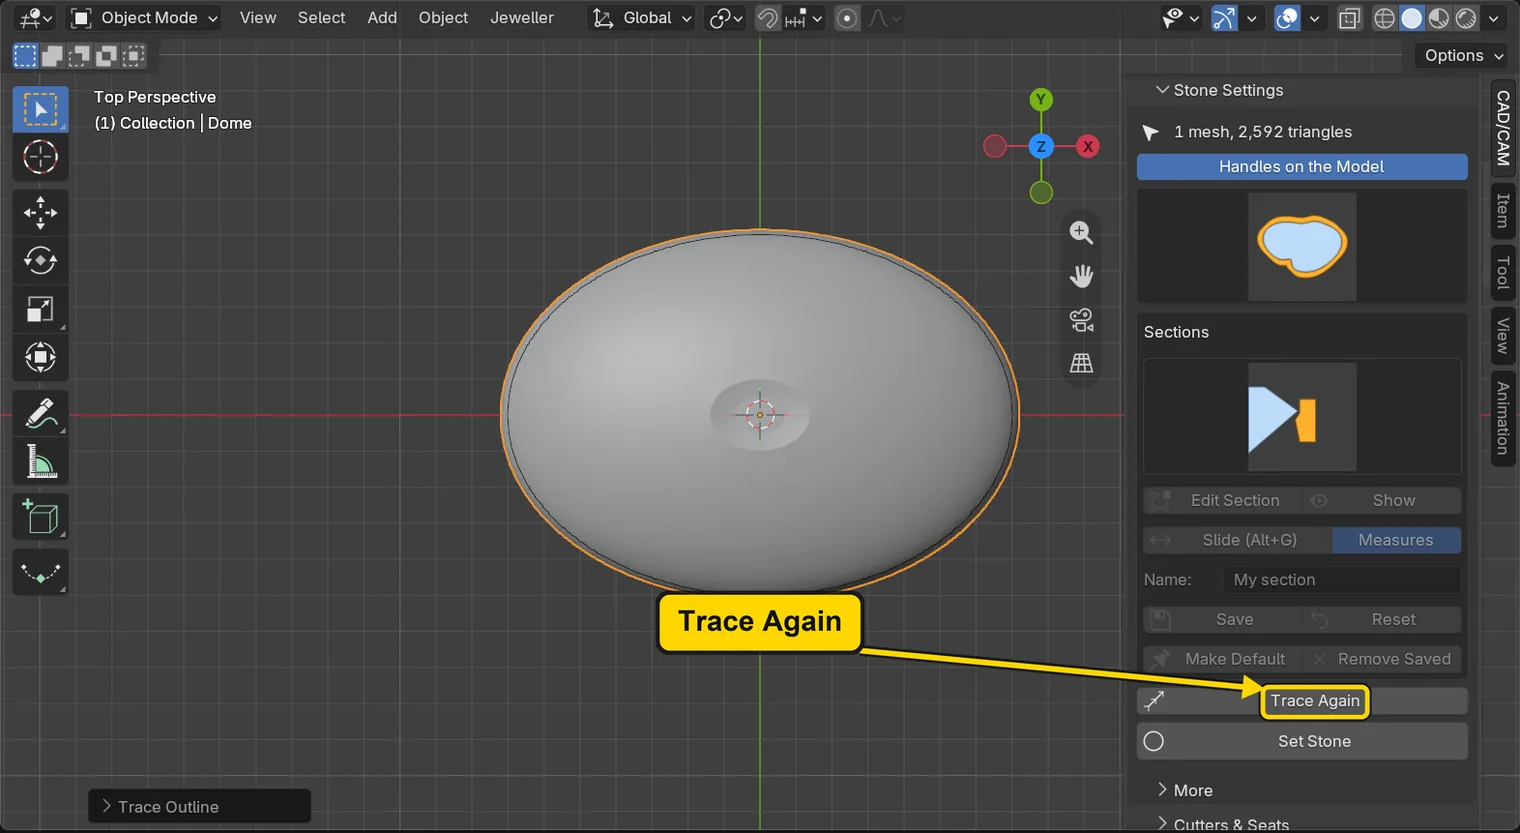
You should seeA curve stands round the dome’s foot, seen from above: the outline. The add-on looked down at the dome and found everything it covers, notches and all. The button now reads Trace Again. The picture looks straight down, as yours does after the click on the Z ball. Choose View > Frame All to bring the whole dome back into the view.
It worked whenThe button now reads Trace Again, and a curve stands round the dome.
Step 5. Press Set Stone
WhereThe Stone Settings panel, the big button under Trace Again.
DoPress Set Stone, then look from the front and low down: click the green ball marked -Y on the small coloured axes.
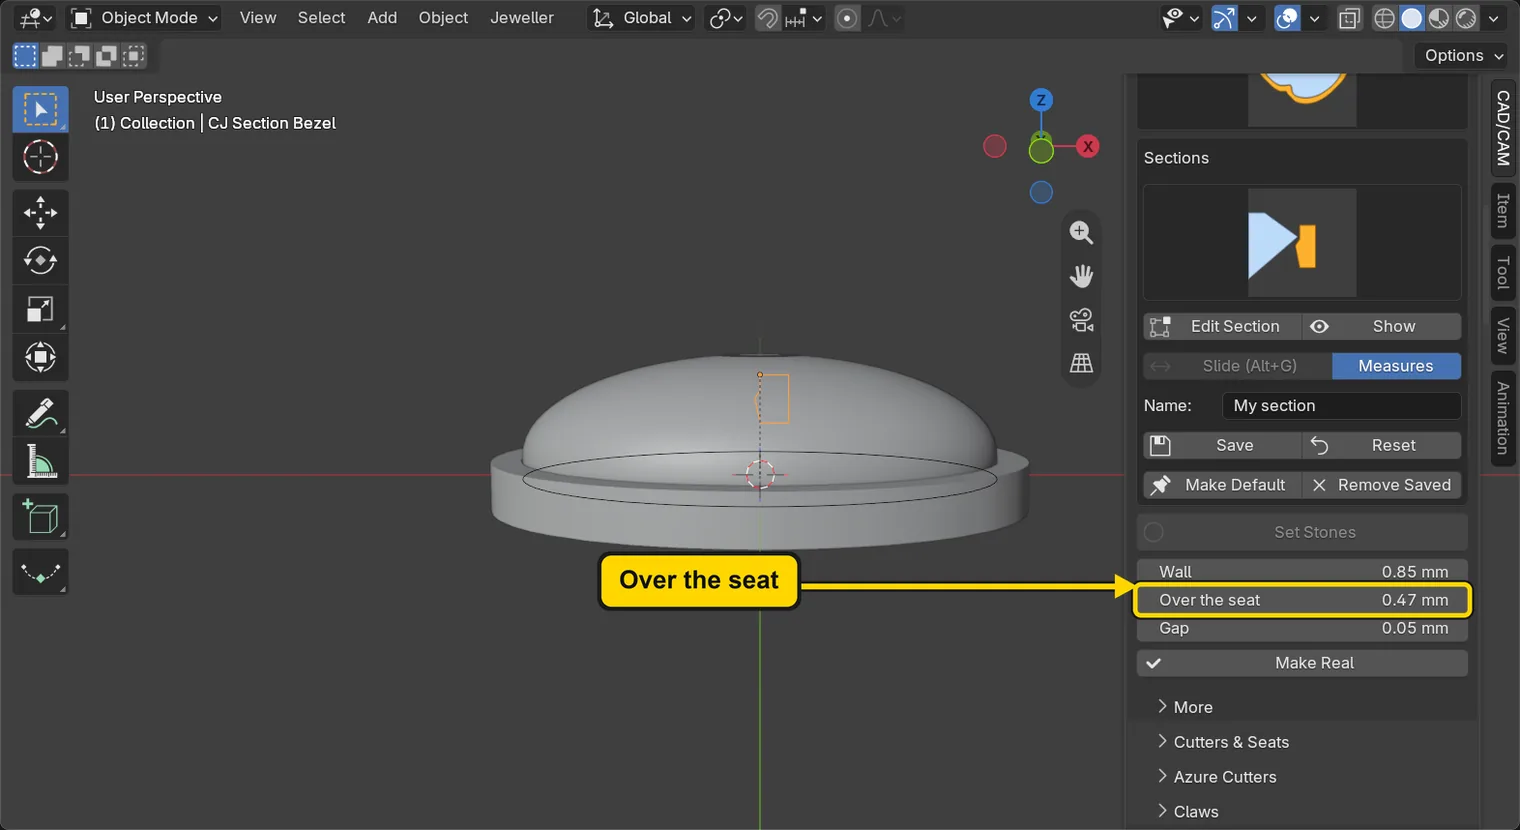
You should seeA wall stands round the dome’s outline and reaches down below its flat back. This wall has no floor: it is a ring, and nothing holds the stone from below. Three numbers show under the button: Wall 0.85 mm (the add-on’s starting wall for this tool: a practice figure), Over the seat 0.47 mm and Gap 0.05 mm. There is no girdle on a carved stone, so the wall’s top is measured from the seat, the level the stone rests on: Over the seat is how far the top stands over it. Here the seat stands 0.07 mm above the dome’s flat back. Gap is the clear space between the wall and the stone.
It worked whenA wall stands round the dome and Wall reads 0.85 mm.
Step 6. Raise the wall over the stone’s edge
WhereThe Stone Settings panel: the field Over the seat.
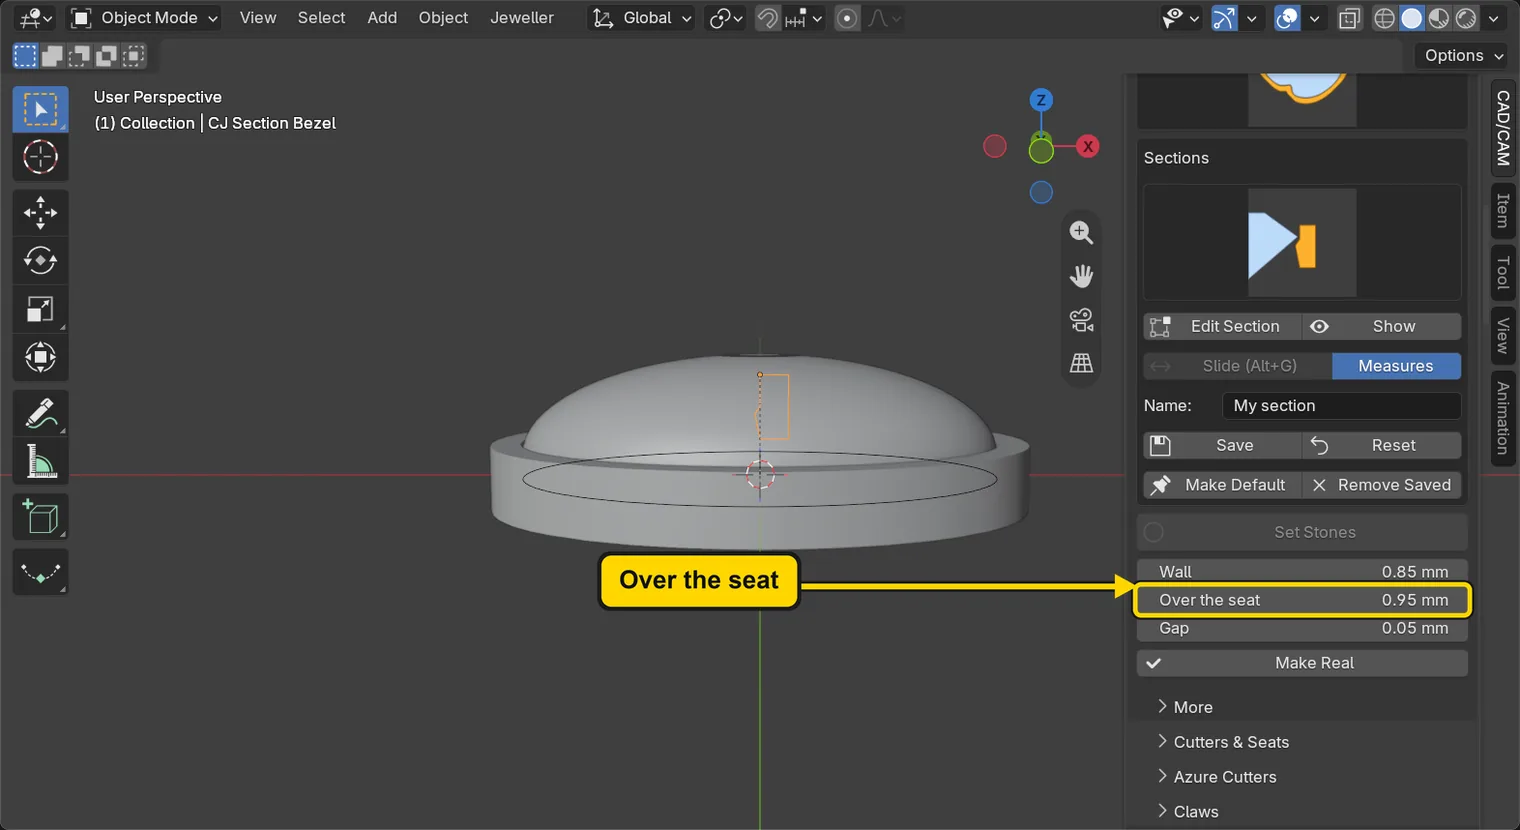
DoClick the middle of Over the seat once, type 0.95 and press Enter.
Type0.95
You should seeThe wall grows taller. Its top now stands 0.32 mm over the dome’s straight edge, which is 0.7 mm high: the wall’s top is at 1.02 and the edge at 0.7, read from the wall’s own mesh, and 0.95 over the seat is 0.25 over the edge plus the 0.07 the seat stands above the flat back. At the start the wall was lower than the edge, so it held nothing: the add-on has no girdle to measure on a carved stone, so the wall’s height is yours to give. A setter pushes the wall’s top in over the crown, and for that it must stand above the stone’s edge. The wall stays straight.
It worked whenOver the seat reads 0.95 mm and the wall stands over the dome’s edge.
Step 7. Widen the dome
WhereThe 3D view: click the dome, then keep the pointer over the 3D view.
DoPress S, then X, then type 1.15, then Enter. S starts a scale, X keeps it to the X direction (along the red line), the number is the scale and Enter ends it; Esc backs out.
Type1.15
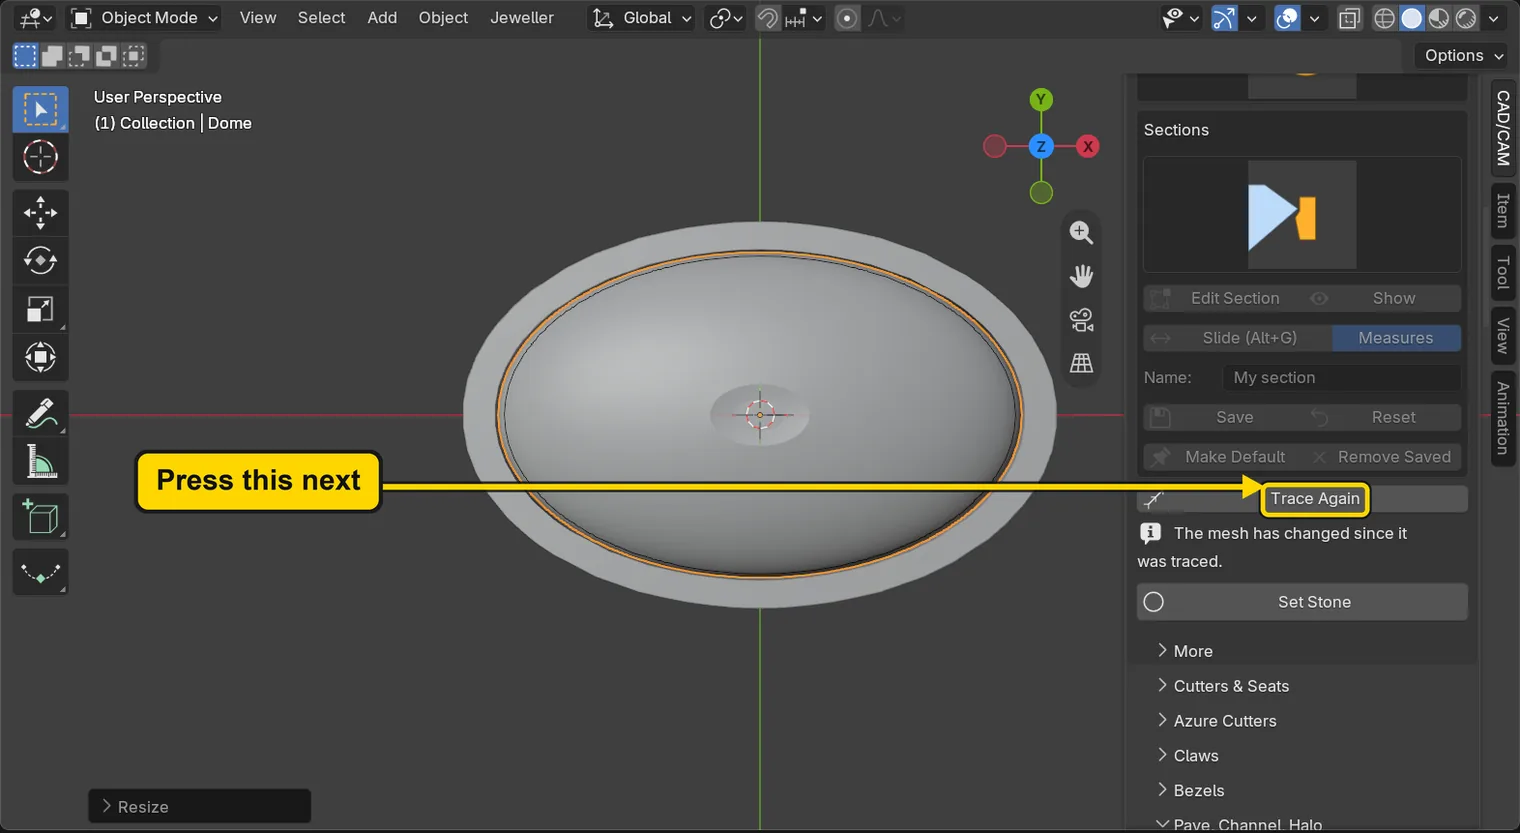
You should seeThe dome grows 15 percent wider along the red line. Under the Stone Settings buttons a line says “The mesh has changed since it was traced.” The outline was traced from the dome as it was, so the line is the add-on’s cue to press Trace Again. The status bar may say “Active object has non uniform scale” for a moment: the dome is stretched along one direction only, which is just what this step does, so it is a note and not a fault.
It worked whenThe panel says the mesh has changed since it was traced.
Step 8. Press Trace Again
WhereThe Stone Settings panel, the button Trace Again.
DoPress Trace Again.
You should seeThe outline is traced afresh, 16.1 mm wide now, and the wall is made from the new outline. The line about the changed mesh goes. Choose View > Frame All to see the whole dome and its new wall.
It worked whenThe line about the changed mesh is gone.
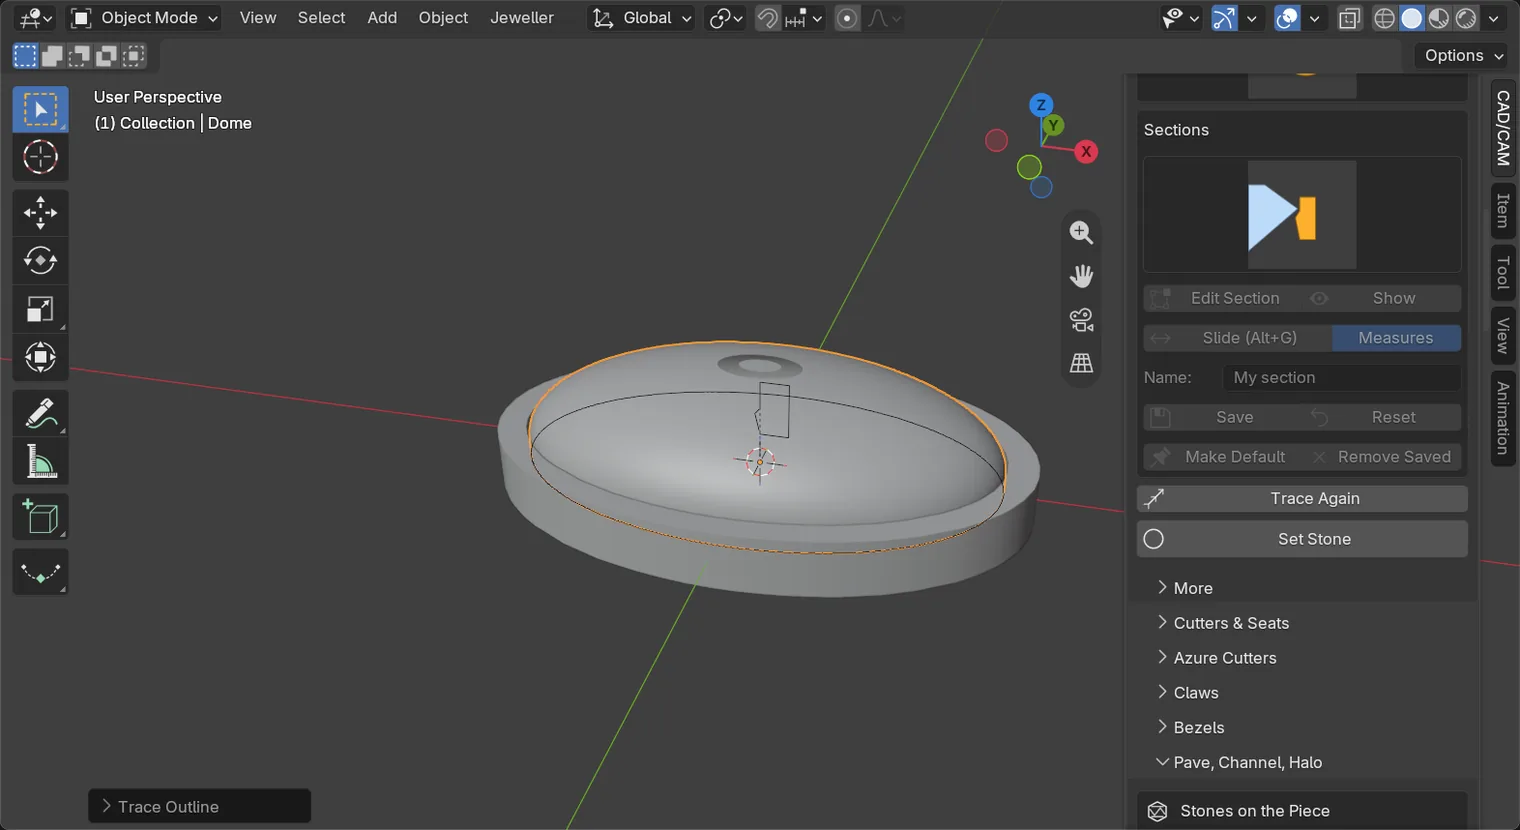
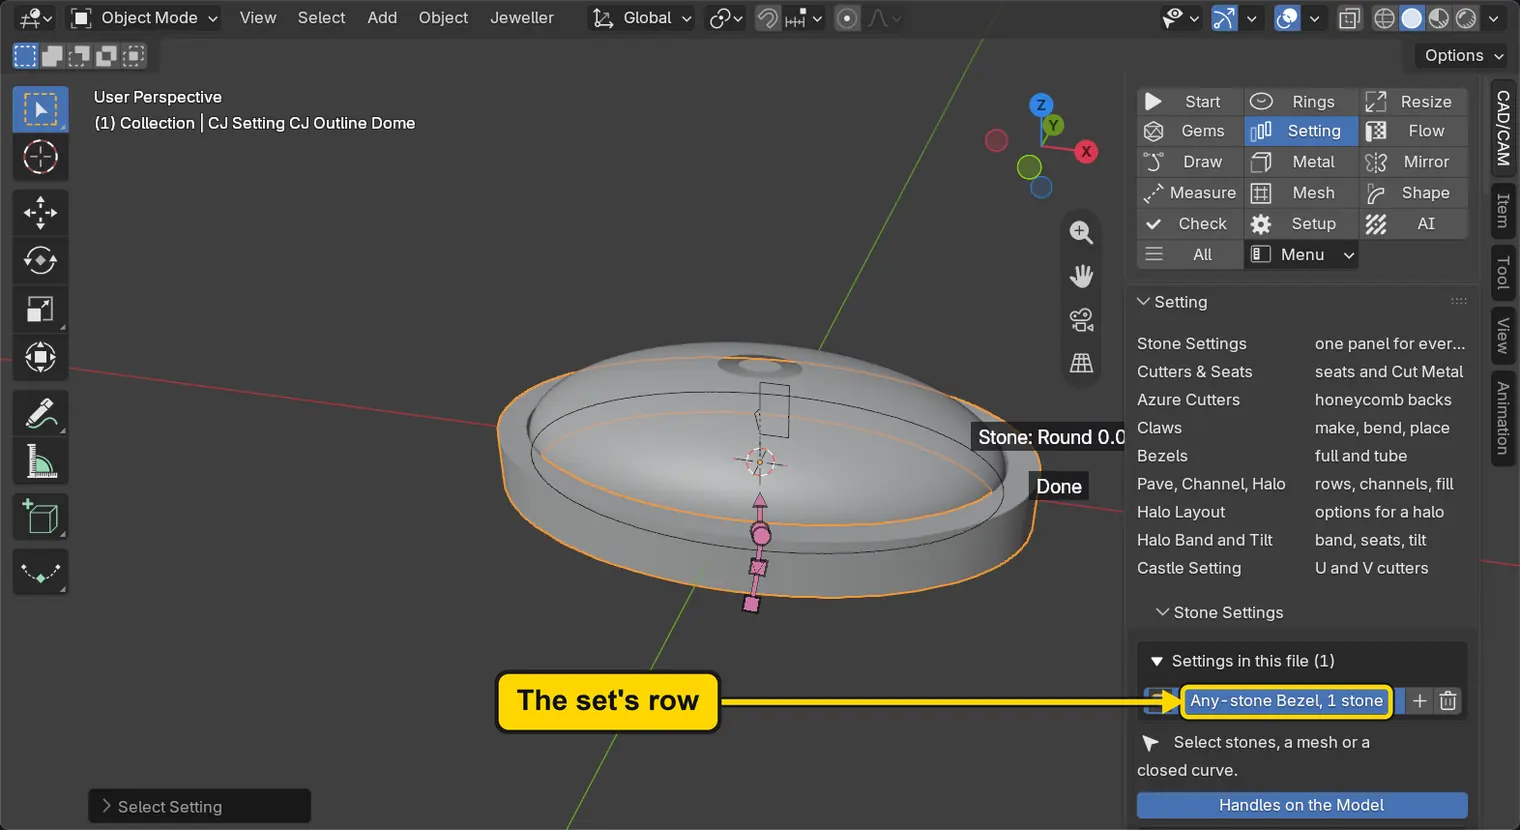
Step 9. Pick the set from its row
WhereThe row at the top of the Stone Settings panel, under Settings in this file.
DoScroll the sidebar up to the top of the panel (two fingers up on a touchpad), then click the row “Any-stone Bezel, 1 stone”, under Settings in this file.
You should seeThe wall is selected and the panel shows its numbers again, with the button Make Real under them. The row is the quick way back to the set. A button on the model may read “Stone: Round 0.0”: the dome is not a Round, so ignore it.
It worked whenThe panel shows Wall and the button Make Real.
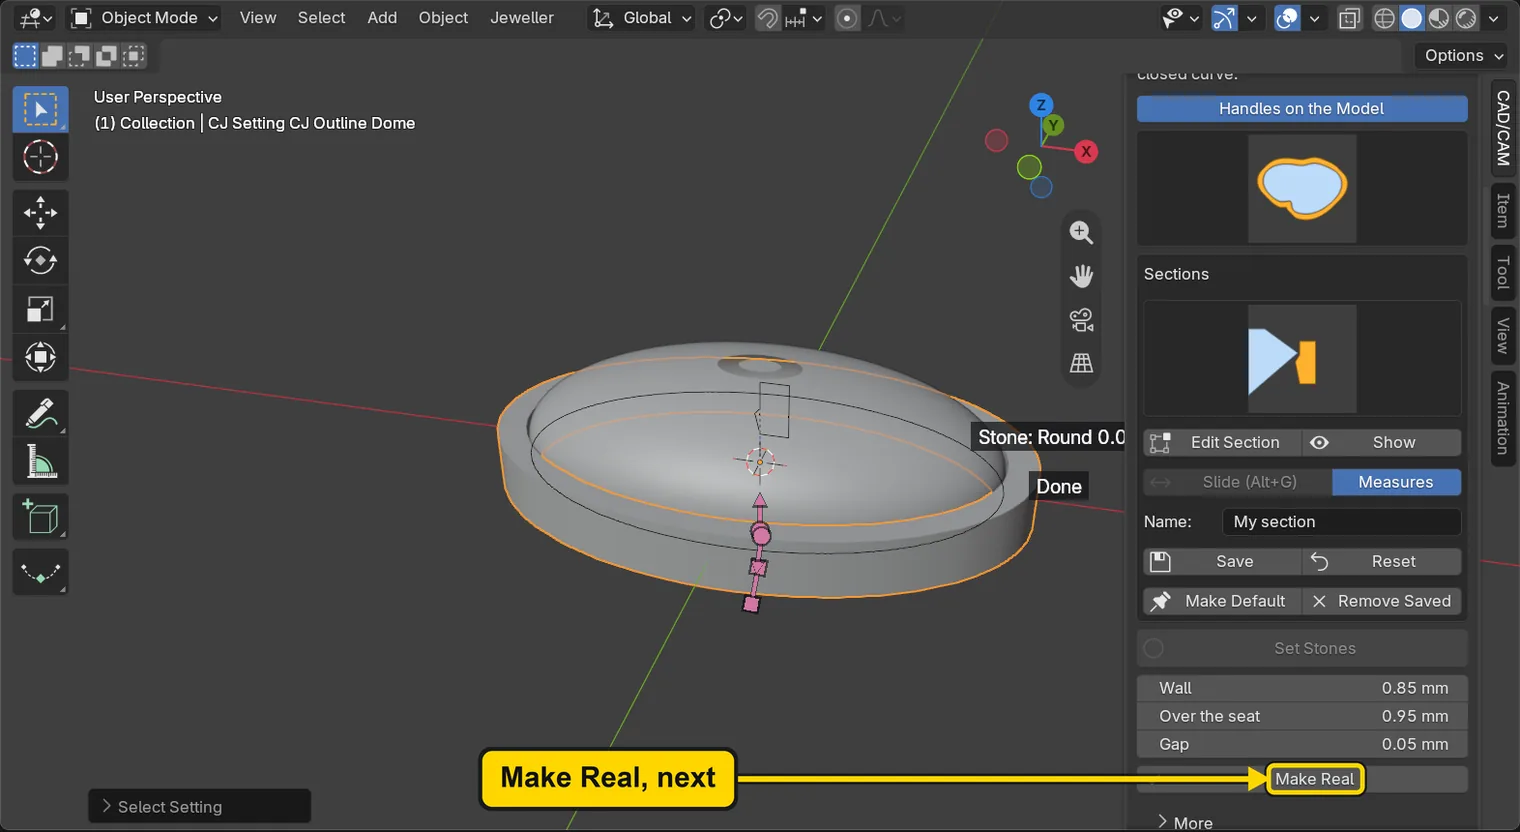
Step 10. Make the wall real
WhereThe Stone Settings panel, the button Make Real.
DoPress Make Real.
You should seeThe status bar says “1 solid made.” for a moment, as the second picture shows. The wall becomes a solid of its own, named for the outline and ending in real: CJ Setting CJ Outline Dome real. The live wall and the outline stay in the file so that the wall can be made again. A solid is a closed shape of metal that a caster can use.
It worked whenThe Outliner, the list at the top right of the window, has a new row ending in real (the list is narrow, so the name is cut short: widen it by dragging the line under it to see the end).

Step 11. Save your work
WhereThe 3D view: move the pointer over it.
DoPress Ctrl+S.
You should seeBlender writes your copy at once, with no question, because the file already has a name. An asterisk, *, in the title bar marks changes that are not saved, and it goes now. Save your work and get it back (P0-12) says more about saving.
It worked whenThe title bar begins my-carved-stone and carries no asterisk.
No picture: the only change is a message on the status bar, and it fades.
Check your result
| What to read | Where | What it should say |
|---|---|---|
| The mesh | The first line of the Stone Settings panel, after step 2 | It reads “1 mesh, 2,592 triangles” |
| The wall’s top | The Stone Settings panel, Over the seat, after step 6 | It reads 0.95 mm, and the wall’s top stands 0.32 mm over the stone’s straight edge, which is 0.7 mm high. (The run read the wall’s top at 1.02 and the straight edge at 0.7: the seat stands 0.07 above the flat back, so 0.95 over the seat is 0.25 over the edge plus that 0.07) |
| The outline follows | Steps 7 and 8, the 3D view from above | The old wall sits inside the wider dome after step 7; after step 8 the wall stands round the new outline. (The run read the outline curve 14.0 mm wide, then 16.1 mm) |
| A solid | The Outliner, the list at the top right of the window, after step 10 | One new row, CJ Setting CJ Outline Dome real (its name is cut short in the narrow list) |
Try it yourself
Open your copy, click the dome, and press S, Y and 0.8 to make it narrower. Press Trace Again and look at the wall: it follows the new outline.
What you learned
- Bezel for Any Stone traces the outline of any mesh seen from above and sets a wall round it. Trace Outline the first time, Trace Again after the mesh has changed.
- A carved stone has no girdle, so the wall’s height is measured from the seat, the level the stone rests on, and comes from Over the seat: give the top enough height to stand over the stone’s edge. The wall has no floor, so it is for practice until it is joined to a plate.
- Make Real gives one solid for the stone. The next page, Choose what lies under a seat: a divot or a hole through (P5-06), cuts a seat in metal.
Next: Choose what lies under a seat: a divot or a hole through