
Back Plate takes a closed solid, such as a pendant, a drop or a brooch made from a scanned or AI mesh, and makes it lighter without changing its front. It opens the back, hollows the piece to an even wall and fits a pierced plate that closes the back again. The plate can be part of the same casting (Fused) or be cast apart and fitted (Separate). The outer face of the plate is the model’s own back, so it sits flush.
Where to find it
CAD/CAM tab > Shape section > Back Plate panel, beside Hollow Out. Menu: Jeweller, under Back Plate.
Use it
Step 1. Select the part
Wherethe 3D view.
Doclick the piece so it is the one selected object. It must be one closed mesh. After an AI model, run Mesh Cleanup first.
You should seethe piece outlined in orange.
If it goes wrongan open mesh is refused with the number of open edges and a Mesh Cleanup button beside the sentence.
Step 2. Check the back
Wherethe Back Plate panel.
Doread which side Back Plate chose as the back. If it is the wrong side, click Flip Back.
You should seethe back is the side away from the piece’s stones, or else the flatter side across its thinnest direction. The panel says whether it reads the back as Flat (within 0.05 mm of a plane) or Follow the Back (the plate is the model’s own back, thickened inward).
Step 3. Set the thickness and the form
Wherethe Back Plate panel.
Doleave Plate at 0.70 and Wall at 1.00 for a first try. Choose Fused or Separate.
You should seethe numbers in millimetres. Under a wall of 0.60 mm the panel says the piece must carry no load and asks you to check with your caster first.
If it goes wronga fused plate cannot be thicker than its wall. Raise the wall or thin the plate.
Step 4. Press Make Back Plate
Wherethe Back Plate panel.
Doclick Make Back Plate. A fine piece can take a few minutes.
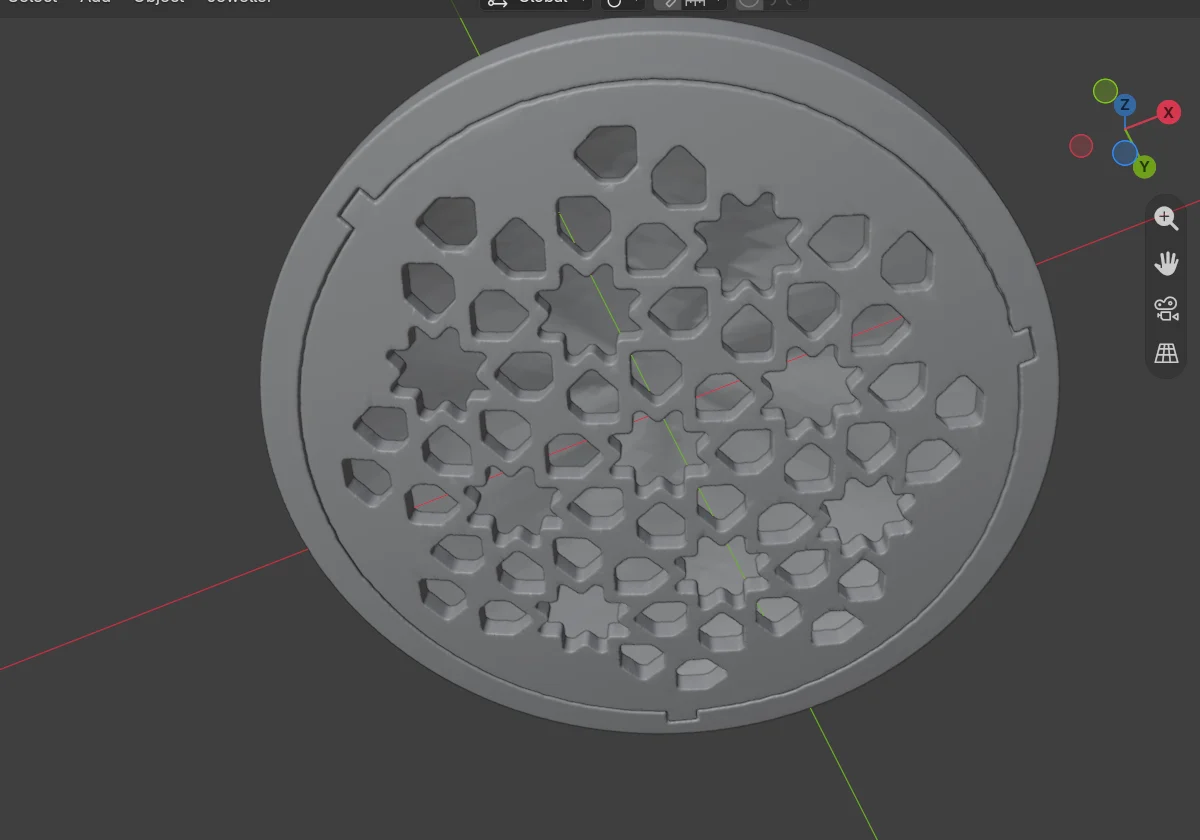
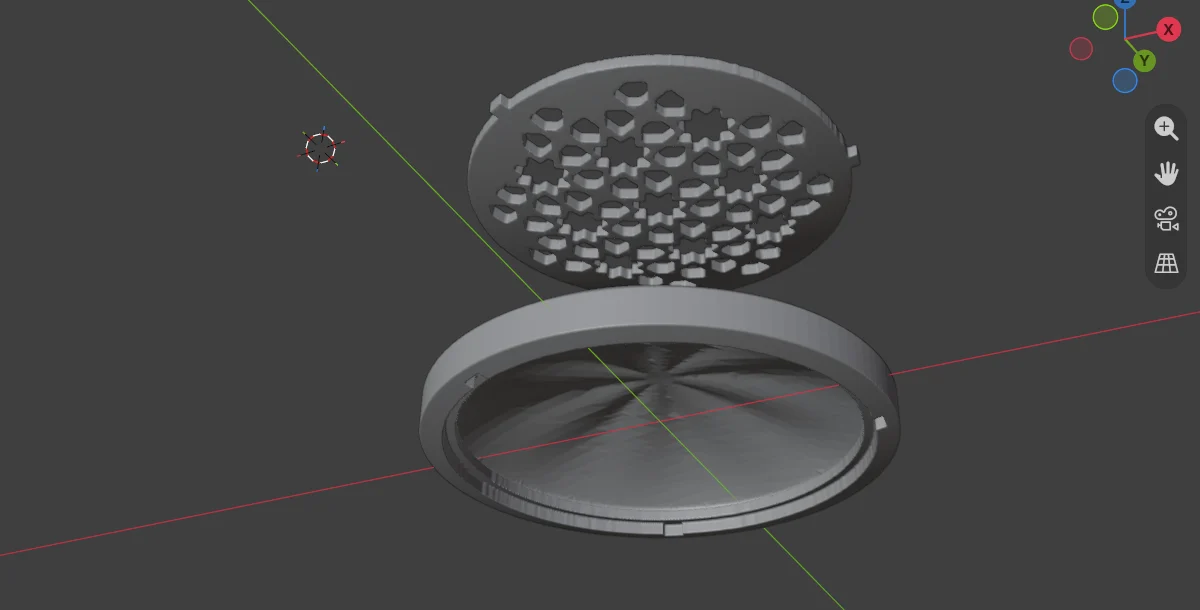
You should seethe back opened inside a rim and hollowed, and a plate pierced with Pattern Builder’s Girih pattern. For Separate you get two objects: the body and the plate, with a ledge under the plate and three tongues that fit three notches.
It worked whena sentence under the buttons reads like “Back plate 0.70, wall 1.00. Metal 29.76 g to 11.95 g in 18ct yellow (59.9 % saved).”
Step 5. Read the checks
Wherethe sentence under the buttons.
Doread it through before you export.
You should seethe metal before and after in grams and the share saved, the thinnest plate, how close the finished parts lie to the cut (“Flush within”), the clearance a side for a Separate plate, the direction the plate lifts straight off, that it fits one way round, how many windows are open through, and that each part is one closed body.
If it goes wronga refusal says how thin the metal is, where, and the wall that would fit, for example “Wall 0.40 or less fits this piece”. A refused press puts the piece back as it was.
Step 6. Export both forms
Wherethe Back Plate panel.
Doclick Export Both Forms and pick a folder.
You should seeone STL for a one-piece prototype print, and for production a body and a plate, named by use.
Redo takes the plate back and makes it again with the numbers now in the panel. Restore Solid gives back the very same mesh the part had before. Make Back Plate, Redo and Restore Solid are each one undo step.
Settings
| Setting | Default | What it changes |
|---|---|---|
| Plate | 0.70 mm | The thickness of the plate. |
| Wall | 1.00 mm | The wall of the hollow. Down to 0.25 mm for a piece that carries no load. |
| Form | Separate | Fused is one casting. Separate is two parts that fit with a clearance. |
| Rim | 1.20 mm | The frame left round the opening. Down to 0.40 mm on a decorative piece with a wall under 0.60 mm. |
| Ledge | 0.60 mm | The width the plate rests on, all round. |
| Clearance | 0.05 mm a side | Separate only. Change it after a first cast. |
| Joint | Tongues | Three tongues, spaced unevenly so the plate fits one way round, or None (the ledge alone, for solder). |
| Cell | 1.60 mm | The size of a pattern cell. |
| Rib | 0.40 mm | The bar between cells. |
| From Edge | 0.80 mm | The distance from the pattern to the plate’s edge. Least 0.60 mm, or 0.25 mm on a thin decorative frame. |
The seldom-used numbers sit under More in the panel: the plane depth for Flat, the clearance, the joint, the tongue places, the pattern’s numbers and a slide and a turn for the pattern.
Good to know
- Stones, seats and claws selected with the part, or shown and lying close to the back, stay solid, and the opening keeps its rim clear of them.
- Thin places behind the back are left out of the opening by themselves, and the sentence says how much smaller the opening is.
- On a small opening the tongues are left out and the plate rests on its ledge alone. The sentence says so.
- A slender, strongly curved relief, or a small pendant whose centred pattern would break the From Edge, is refused with its reason.
- A very dense mesh is heavy in time and memory.
- Weights count the Back Plate correctly: the plate and body are weighed once, and the cutter form is left out.