
Row of Stones lays a row of the add-on’s own stones along a line on the piece and keeps it live. Move the line or the piece and the stones are laid again. Reach for it for a shoulder row, a bead-set edge or a halo drawn round a stone.
Where to find it
CAD/CAM tab > Setting section > Pave, Channel, Halo panel > Row of Stones, the first button of the panel. Menu: the quick menu, under Stones. It takes the place of the Gems Along Curve button in the panel; Gems Along Curve itself stays for scripts and old files.
Use it
Step 1. Choose how the line is made
Wherethe 3D view, in Object Mode or Edit Mode.
Dopick one of three ways in. A curve (alone or with the piece selected). Or, in Edit Mode, a path or a loop of edges selected on the piece. Or select only the piece and use Draw.
You should seenothing yet. What is selected decides which way runs.
If it goes wrongedges that branch, or that are in separate pieces, are refused in words.
Step 2. Press Row of Stones
Wherethe Pave, Channel, Halo panel, Row of Stones.
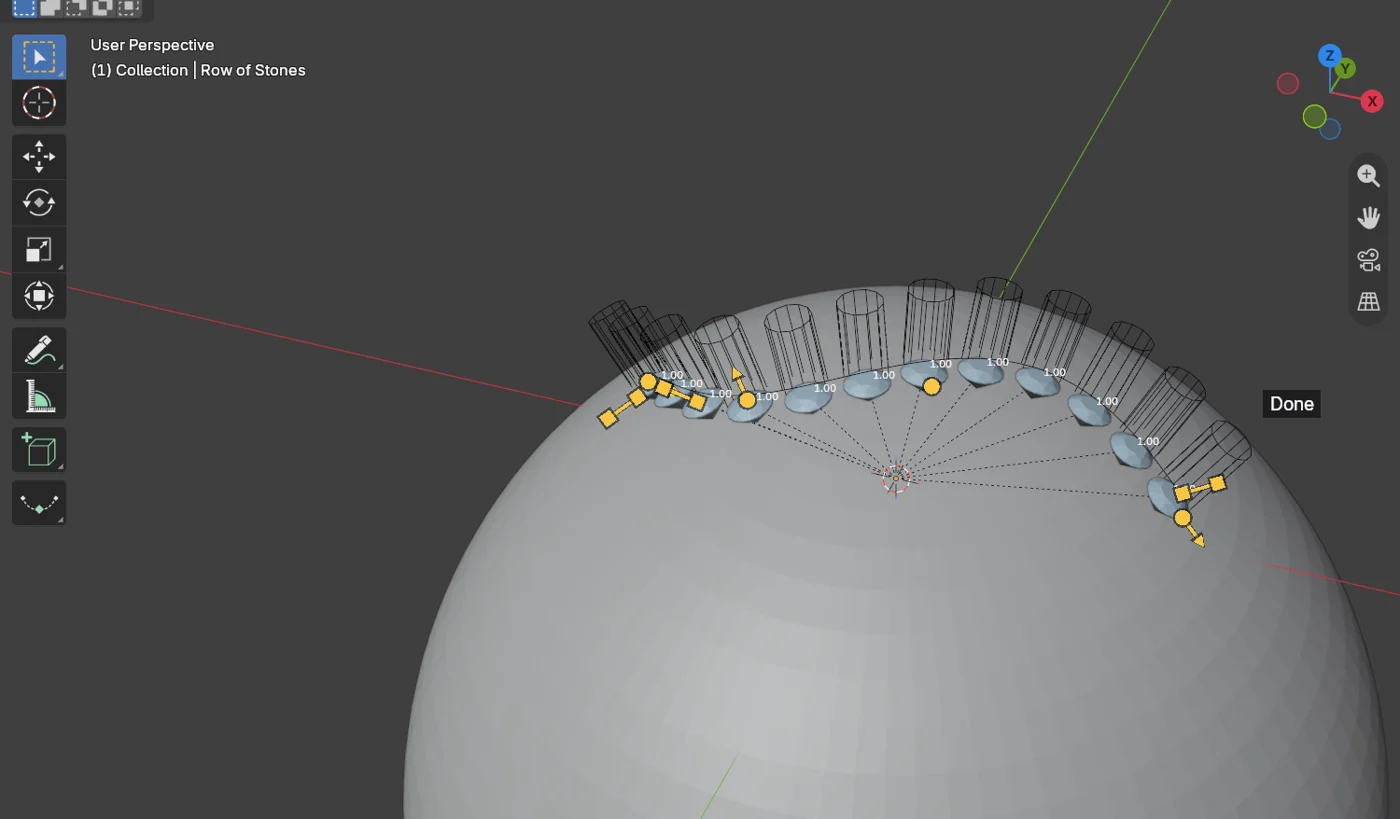
Doclick Row of Stones. With only the piece selected, click on the piece to drop points, then press Enter or right-click to lay the row.
You should seea row of stones on the piece, in one group, counted, weighed and on the gem map. The panel reads each run back, for example “8 stones, each 1.00”.
If it goes wronga row that cannot be laid is refused with the figure and the fix, for example “From corner 1 to corner 2 is 0.90 mm: it holds no 1.00 stone. Lower the size to 0.75, or drop corner 2.” The refusal also says where Size is: in the panel Numbers the Buttons Start From, under Pave, Channel, Halo. That panel opens shut. Open it, change Size, then press Row of Stones again.
In Draw, Backspace or Ctrl+Z takes the last point back and Esc leaves with nothing made.
Step 3. Drag the handles
Wherethe 3D view, with the row (or one of its stones) selected.
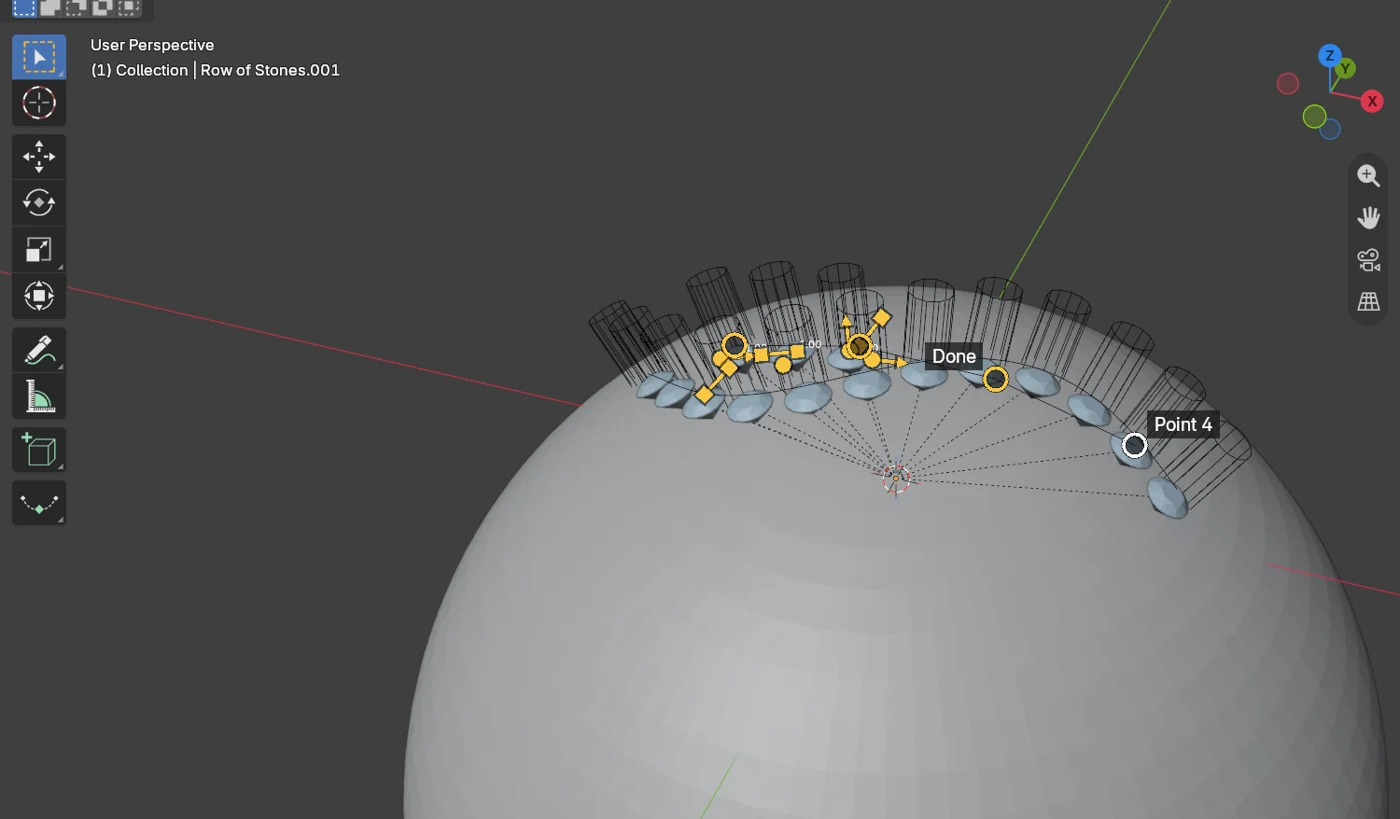
Dodrag a handle. Start and End slide the ends of an open row. First size and Last size graduate the row. Gap sets the gap between every two stones. Tilt turns every stone about the path. Height lifts the stones. Offset (under More) sets the row beside the path.
You should seediscs showing where the stones will go, with their sizes. On the release the stones are laid again.
If it goes wrongEsc puts the number back. One Ctrl+Z undoes a whole drag. A refused number goes back to the last one that worked, with the reason on the status bar.
Ctrl snaps a size to 0.05 mm.
Step 4. Lay it again by hand
Wherethe Row of Stones panel.
Doclick Lay Row Again after you edit the line.
You should seethe stones laid again at once. Left alone, the row is laid again when the mouse rests.
How the stones are laid
- Gaps are measured straight across, girdle to girdle, never along the curve. A tight bend never brings two stones closer than the gap.
- A stone sits on every corner (a turn sharper than the corner angle, 30 degrees) and on both ends of an open row.
- Each stretch between two such stones closes exactly. The default, Library sizes, even gaps, uses only sizes the stone library holds and makes the gaps in a stretch equal.
- No two stones touch, round a sharp corner included.
- A path in the air, with no metal within a stone’s size of it (a halo drawn round a stone), keeps its stones on the path itself. The panel says “In the air”.
- Keep clear of the stones and claws already there (on, under More) leaves a place free where a stone would come within the gap of another stone, a claw, a prong or a bead, and closes the stones either side exactly.
Settings
The numbers a first press starts from, Size and Gap among them, are in the panel Numbers the Buttons Start From, under Pave, Channel, Halo. It opens shut, so open it first. Once a row exists, its own panel holds the same numbers, and the entries marked “Under More” below are in that panel, under its More.
| Setting | Default | What it changes |
|---|---|---|
| Size | 1.00 mm | The stone’s size. The row flexes it by the least amount to close each stretch. |
| Gap | 0.15 mm | The least gap between stones, girdle to girdle. |
| Close by | Library sizes, even gaps | Library sizes, even gaps, Exact gaps, sizes flex (for graduated shoulders) or Sizes as set, even gaps. Under More. |
| Count | 0 | 0 lays as many as fit. Under More. |
| Corner angle | 30 degrees | How sharp a turn must be to take a stone of its own. Under More. |
| Tilt, Height, Offset | 0 | Turn about the path, lift above the house seat (girdle 0.30 mm below the metal) and shift beside the path. |
| Flip | Off | The stones face the other side. Under More. |
| Cut | Round | Any cut in the library. Under More. |
| Cutters, Claws, Beads | As the Pave panel | Seat cutters, claws and beads made with the row. Under More. |
Good to know
- A run whose stones differ more than 10 % from the set size gets a warning line with the fix.
- Limit: for cuts other than round, the gap is measured along the row between the stones’ tips.
- Two claws or beads closer than their width become one, and the read-back says how many.
- With seat cutters on, flexing every stone of a long row remakes every cutter, so a long row takes a moment.