
What you will make
A Round 5.00, a round stone 5.00 mm across, held by four claws. A claw is a small post of metal that stands at the edge of a stone and holds it. At the bench the setter cuts a small bearing in each claw and closes it over the stone: the claws here are the posts before that. Each claw is 0.90 mm thick, stands 2.00 mm above the stone’s table, the flat top of the stone, and keeps the same thickness from its foot to its tip. The setter, who fixes the stone at the bench, trims that length. The stone stands in a plate with its girdle, its widest edge, level with the plate’s top. No seat is cut, so the lower part of the stone and the feet of the claws lie hidden inside the plate. A bench cuts the seat first, as the next exercise does (P3-08): this page leaves it out so that you see the claws alone.
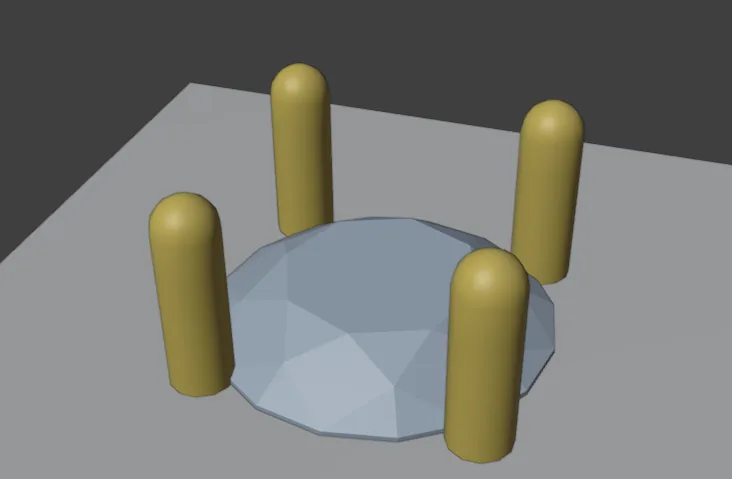
About 10 minutes.
Files
- p3-07-start.blend (103 KB): open this one to begin.
- p3-07-finished.blend (118 KB): the result, to compare with yours.
Both were made in Blender 5.2.0.
Before you start
- You have done Part 0, Blender from nothing, and Pick a cut and a stocked size, then change it (P3-01). The start file holds a Round 5.00 in a plate, in millimetres.
- The add-on is installed: CAD/CAM Jeweller 2.22.0 or later (Preferences > Add-ons shows the version). Its CAD/CAM tab is in the sidebar.
Build it
Step 1. Open the start file and save your copy
WhereThe top bar: the row of words that begins File, Edit.
DoDownload p3-07-start.blend from Files above and open it. Then choose File > Save As and save it under the name below, in a folder of yours. Open an exercise file and keep the start file safe (P0-07) shows how.
Typemy-claws.blend
You should seeThe 3D view shows a square grey plate seen from a little above and in front, with a pale round stone in its top. Nothing is selected. The Outliner, the list at the top right of the window, holds the plate and the stone, and the title bar, the strip above File and Edit, begins my-claws. The first picture is the 3D view and the second is the title bar.
It worked whenThe title bar, the strip above File and Edit, begins my-claws.
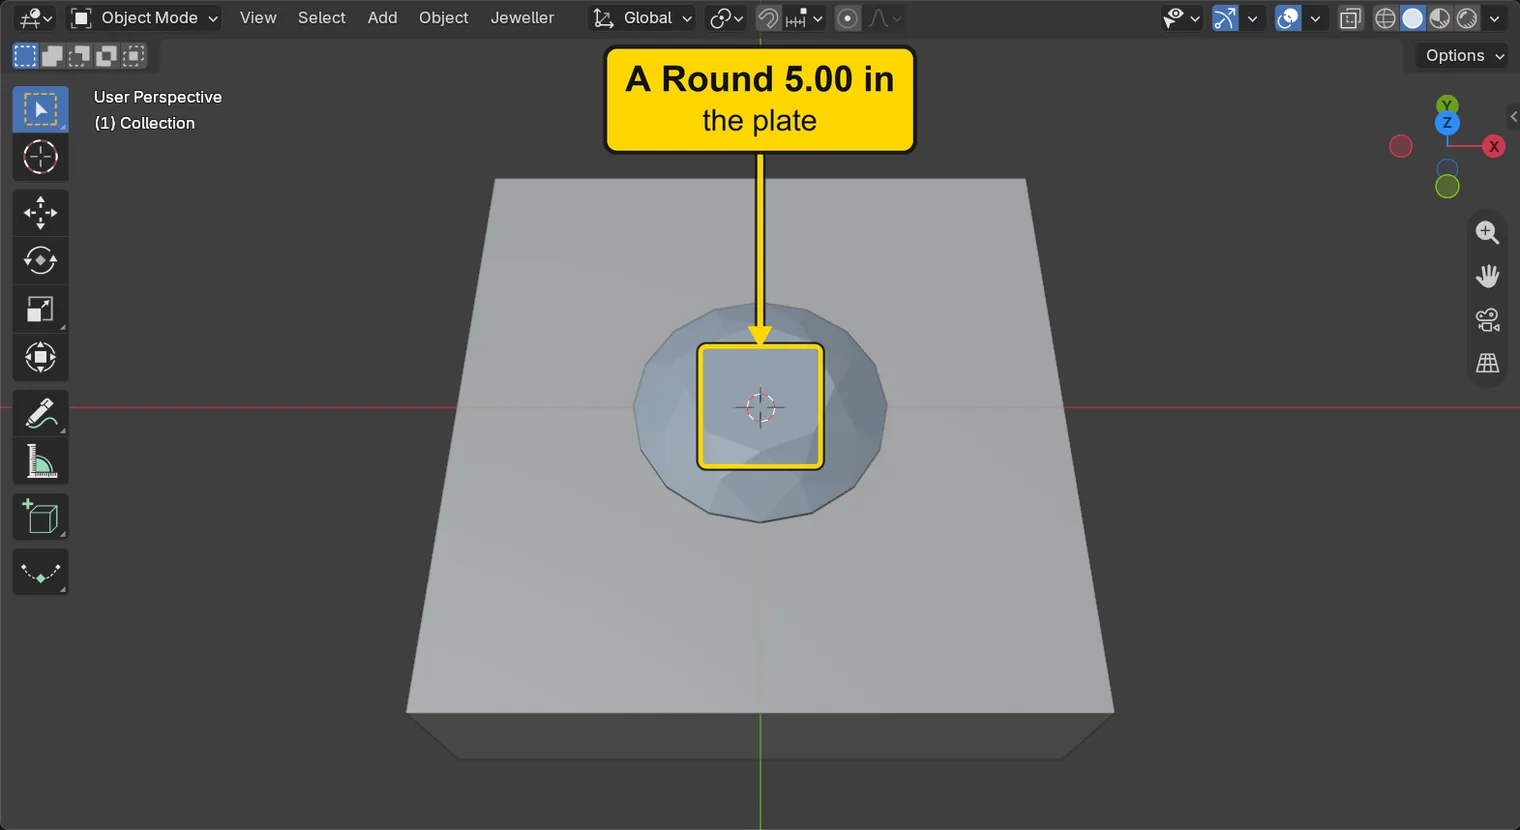

Step 2. Click the stone
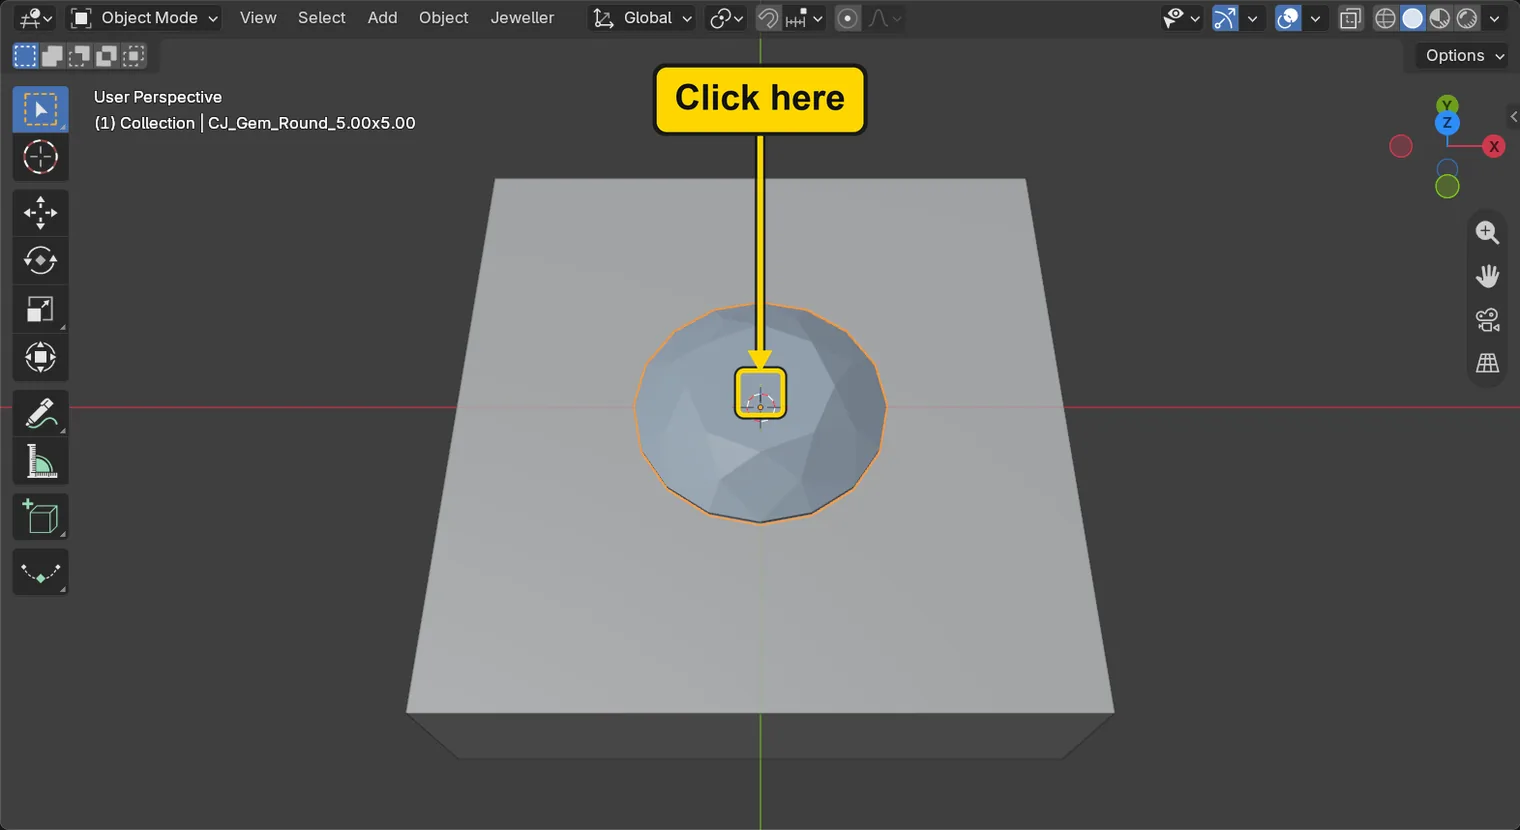
WhereThe 3D view: click the stone, at the place marked in the picture.
DoClick once on the stone.
You should seeThe stone has an orange outline, and its name stands at the top left of the 3D view. Make Claws acts on the stone you have selected. Nothing happens with no stone selected: the status bar says “Select at least one gem”.
It worked whenThe words at the top left of the 3D view end CJ_Gem_Round_5.00x5.00.
Step 3. Open the Claws panel and read its numbers
WhereThe sidebar. If it is shut, press N with the pointer over the 3D view. In the section bar, click Setting. A list at the top of the section names every panel in words: it is not a button. Under the list stands the open panel Stone Settings: click its title once to fold it, so that the panel titles stand close together (scroll with the wheel, or slide two fingers on a laptop’s touchpad, if you need to). Then click the title of the panel Claws, the line with a small arrow beside it.
DoClick Setting in the section bar, open the panel Claws, and read the numbers at its top.
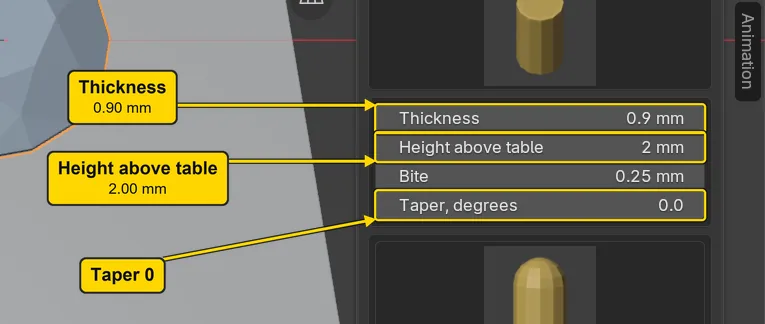
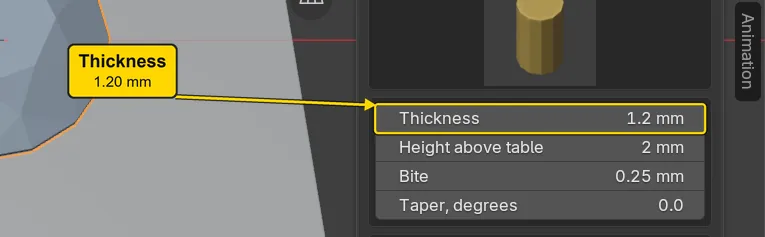
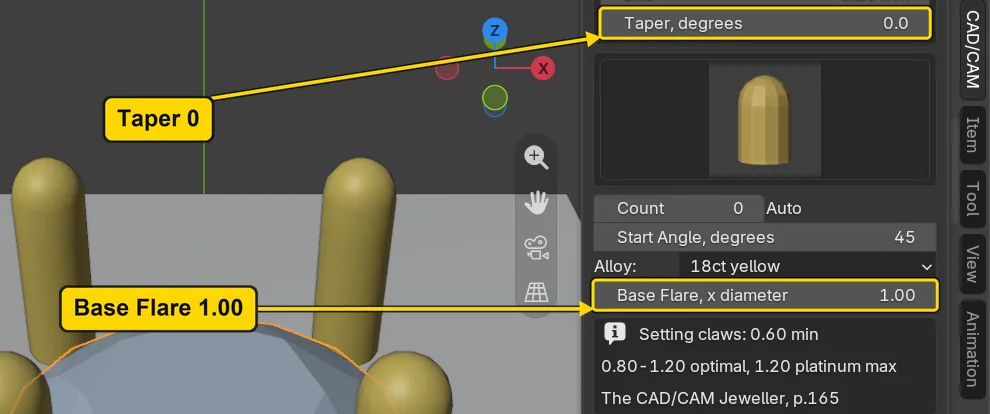
You should seeThickness reads 0.90 mm, how thick each claw is. Height above table reads 2.00 mm, how far the claw stands above the stone’s table. Bite reads 0.25 mm, how far each claw laps over the stone’s girdle: leave it as it is. Taper, degrees reads 0.0, so a claw does not narrow. These are the add-on’s starting numbers, and they are the bench’s numbers for a stone’s own claws: 2.00 above the table and one thickness from foot to tip. The picture at the top of the panel shows the claw’s shape, a round post, and the one lower down shows its tip, a rounded top: leave both. The panel drops a last zero, so it shows 0.9 mm for 0.90 and 2 mm for 2.00.
It worked whenThe panel reads Thickness 0.90 and Height above table 2.00.
Step 4. Make a first trial at Thickness 1.20
WhereThe Claws panel, the field Thickness.
DoClick the middle of Thickness once, type the number, and press Enter.
Type1.20
You should seeThickness reads 1.20 mm. This first set of claws is a trial: the step after next throws it away. A thickness is a number you choose before you press Make Claws, and it is the claws’ diameter at the foot. Nothing is made yet.
It worked whenThickness reads 1.20 mm.
Step 5. Press Make Claws
WhereThe Claws panel, the button Make Claws. Scroll the sidebar down to it.
DoPress Make Claws with the stone still selected.
You should seeFour claws round the stone. The status bar says “4 claws on 1 gem” for a moment, then the message fades. A claw is made on the stone’s girdle and stands 2.00 mm above its table. These claws are 1.20 thick: heavy for a Round 5.00, and they hide more of the stone.
It worked whenFour claws stand round the stone.
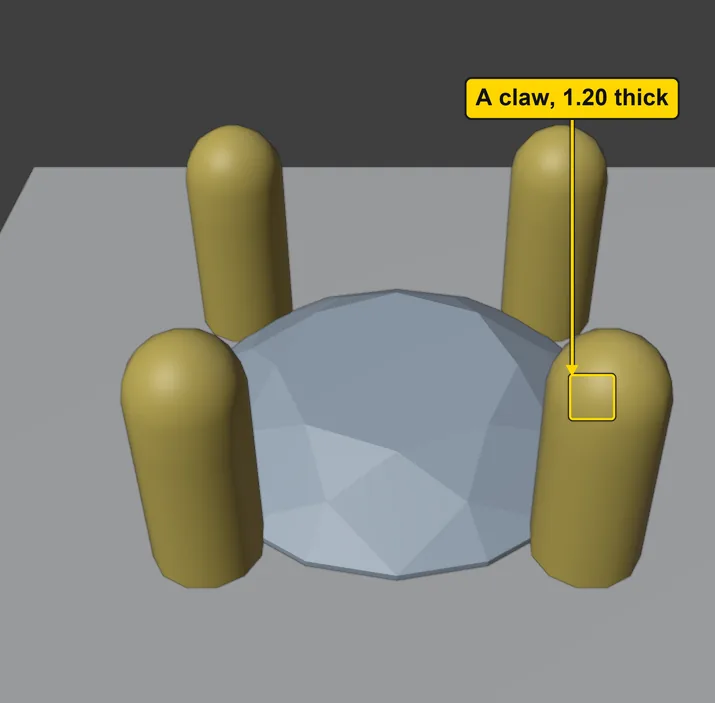
If it goes wrongThe status bar says “Select at least one gem” and nothing is made: no stone is selected. Click the stone in the 3D view, then press Make Claws again.
Step 6. Select the claws
WhereThe Claws panel, the button Select Claws, in the row of two buttons under Make Claws.
DoPress Select Claws.
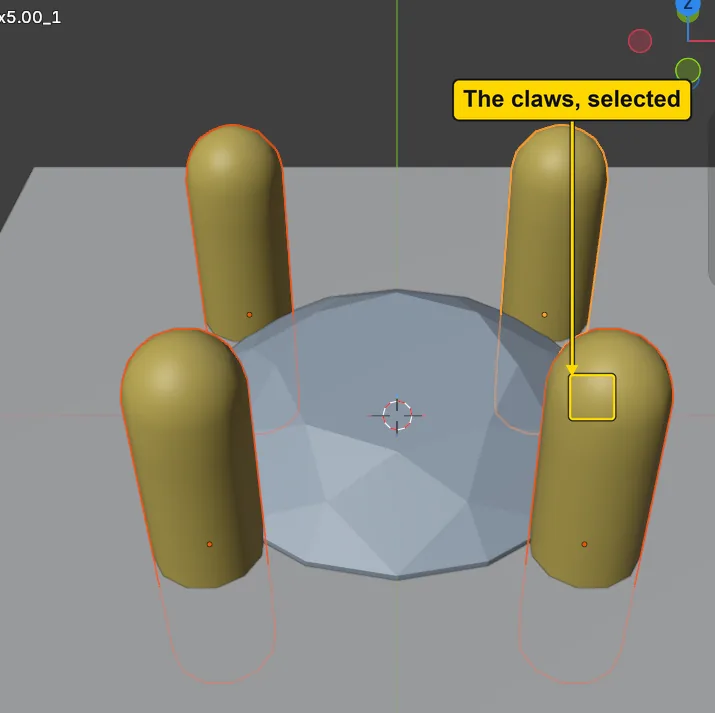
You should seeThe four claws have an orange outline, and the stone does not. Select Claws picks the claws of the selected stone. The status bar says “4 claws selected”, but the message fades. With no stone selected it picks every claw in the file.
It worked whenThe four claws have an orange outline.
Step 7. Delete the claws
WhereThe Claws panel, the button Delete Claws, beside Select Claws.
DoPress Delete Claws.
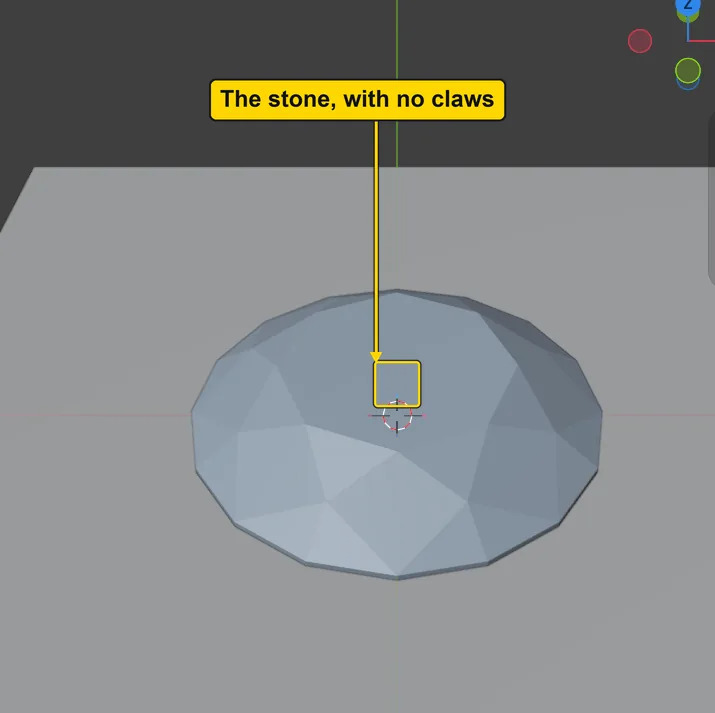
You should seeThe claws go and the stone stands bare in the plate. The status bar says “4 claws removed”. Only the claws are deleted: the stone stays. The trial is thrown away.
It worked whenThe stone stands in the plate with no claws.
Step 8. Make them again at Thickness 0.90
WhereThe Claws panel: Thickness, then Make Claws. Click the stone first, because the stone is no longer selected.
DoClick the stone, click the middle of Thickness, type the number and press Enter, then press Make Claws.
Type0.90
You should seeFour claws again, thinner. The status bar says “4 claws on 1 gem”. They stand 2.00 mm above the table and keep one thickness from foot to tip, because Taper, degrees is 0.0 and Base Flare, x diameter is 1.00.
It worked whenTaper, degrees reads 0.0 and Base Flare, x diameter reads 1.00, and four thinner claws stand round the stone.
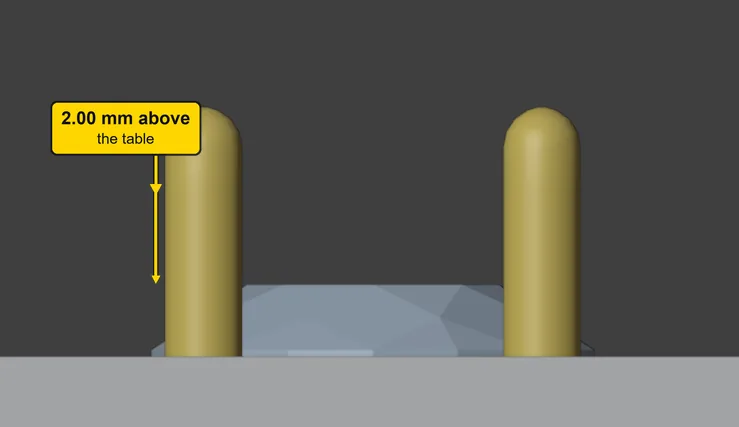
Step 9. Look at the claws from the side
WhereThe 3D view. To look from the front, choose View > Viewpoint > Front, then View > Frame Selected.
DoLook at the picture, which looks at the stone straight from the front.
You should seeFrom the front you see two claws: the other two stand behind them. Each claw stands up past the stone’s table by 2.00 mm and keeps one thickness all the way up to a rounded tip. Nothing narrows and nothing swells at the foot. The claws are separate objects: the stone and the plate are not joined to them.
It worked whenYou see two claws of one thickness, with two more behind them, standing 2.00 mm above the table.
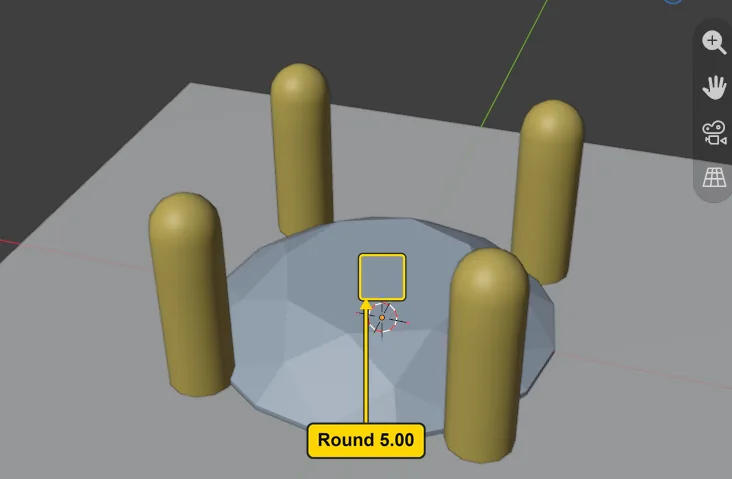
Step 10. Look at the finished stone
WhereThe 3D view.
DoLook at the picture. To see your stone like this, choose View > Frame Selected, then orbit a little, turning the view round the stone.
You should seeA round stone held by four claws, one at each diagonal, with a clear gap between each pair. The stone is the pale one.
It worked whenYou see four claws round the stone.
Step 11. Save your work
WhereThe 3D view: move the pointer over it.
DoPress Ctrl+S.
You should seeBlender writes your copy at once, with no question, because the file already has a name. An asterisk, *, in the title bar marks changes that are not saved, and it goes now. Save your work and get it back (P0-12) says more about saving.
It worked whenThe title bar begins my-claws and carries no asterisk.
No picture: the only change is a message on the status bar, and it fades.
Check your result
| What to read | Where | What it should say |
|---|---|---|
| The claw’s thickness | The CAD/CAM tab, Setting section, Claws panel, the field Thickness | It reads 0.90 mm |
| How high the claws stand | The same panel, the field Height above table | It reads 2.00 mm: the claws stand 2.00 mm above the stone’s table |
| One thickness | The same panel, the fields Taper, degrees and Base Flare, x diameter (scroll the sidebar down four lines from Taper, degrees) | Taper, degrees reads 0.0 and Base Flare, x diameter reads 1.00: the claw keeps one thickness from foot to tip |
| Four claws on the stone | The Outliner, the list at the top right of the window: scroll it down with the wheel (on a laptop’s touchpad, slide two fingers) to the row CJ Settings | Four rows under it, each beginning CJ_Claw |
Try it yourself
Open your copy again and click the stone. In the Claws panel click the middle of Count, type 6 and press Enter, then press Make Claws: six claws replace the four. Type 0 in Count to go back to the add-on’s own choice, four on a round stone.
What you learned
- Make Claws sets every selected stone in claws at the numbers on the Claws panel. Change Thickness first, then press it.
- The add-on’s starting numbers are the bench’s: Height above table 2.00, Taper, degrees 0.0 and Base Flare, x diameter 1.00 give a claw 2.00 above the table and one thickness from foot to tip.
- Select Claws picks the claws of the selected stone, and Delete Claws takes them away. Making them again replaces them too.